DIY Faux Marble Table Makeover WK 5 Spring ORC
Today is all about using what you have. Week 5 is here and I’ve got an easy DIY faux marble table project to share with you!
Hello! Here we are it’s week 5 and the countdown is on. We’ve made progress including this easy DIY faux marble table makeover.

This media room is looking so good! We have come a long ways from the blank slate. The Benjamin Moore Chelsea Gray was the perfect color choice for the room.
The mural really stands out now. I took a small risk (because it’s just paint) and added the gorgeous Sherwin Williams color, Waterloo.
It turned out so well that I decided to forgo the extra ceiling detail I had planned. It was also the right call due to the size of the ceiling and all the holes created for speakers, vents and video equipment.
Paint transformations are how we keep this a little more cost effective because these type of spaces get expensive real quick.
This little tutorial can even apply to doing a faux marble coffee table DIY!
Have a look at this great little side table turned Art Deco chic.
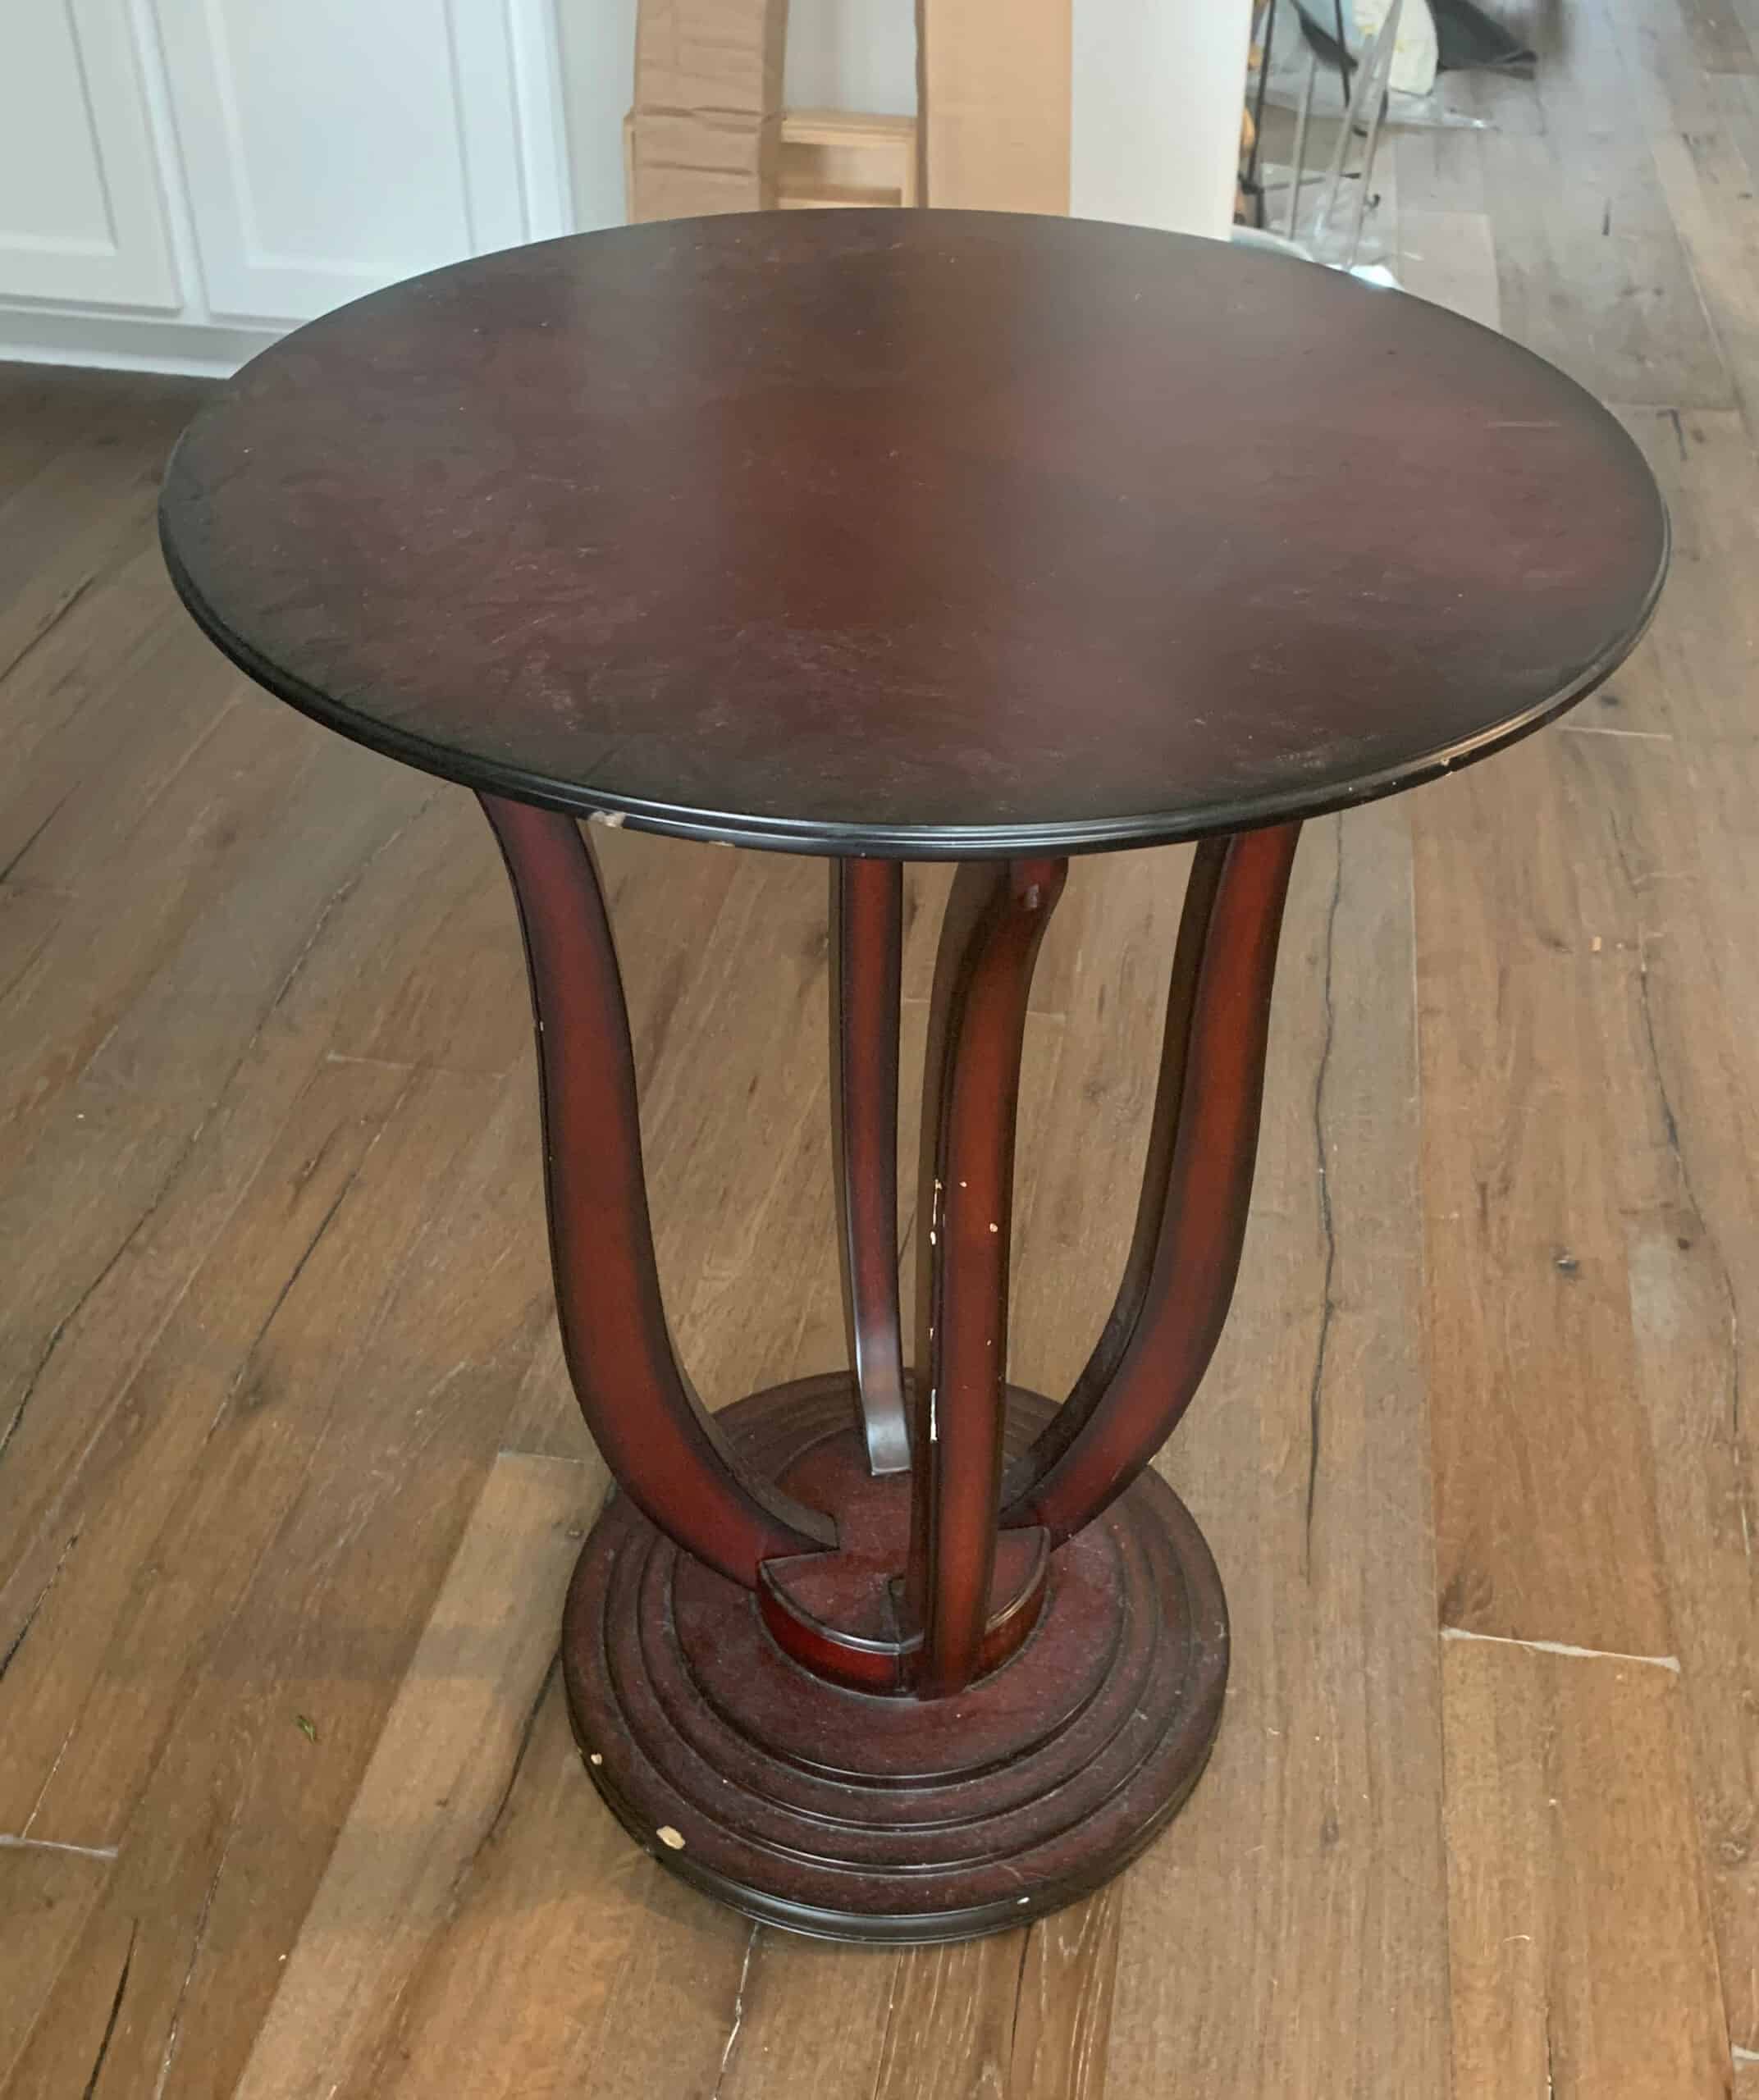
I bought this little side table from the Bombay Company many years ago. I loved its curves and stacked base. Over time the table received normal wear and tear you would expect from a couple of moves.
I could have thrown it out but if you have spent time around here, you know I don’t do that often. I try to reuse what I have and if I can’t , I buy something.
By using acrylic paints I was able to transform this tired piece into a faux marble table beauty!

I love all her glimmering glamour! The technique I used for the faux marble top is so easy and I like that it feels like an old piece of marble, aged and soften over the years.
Step 1 – Paint the entire table
I used titanium white to paint the table.
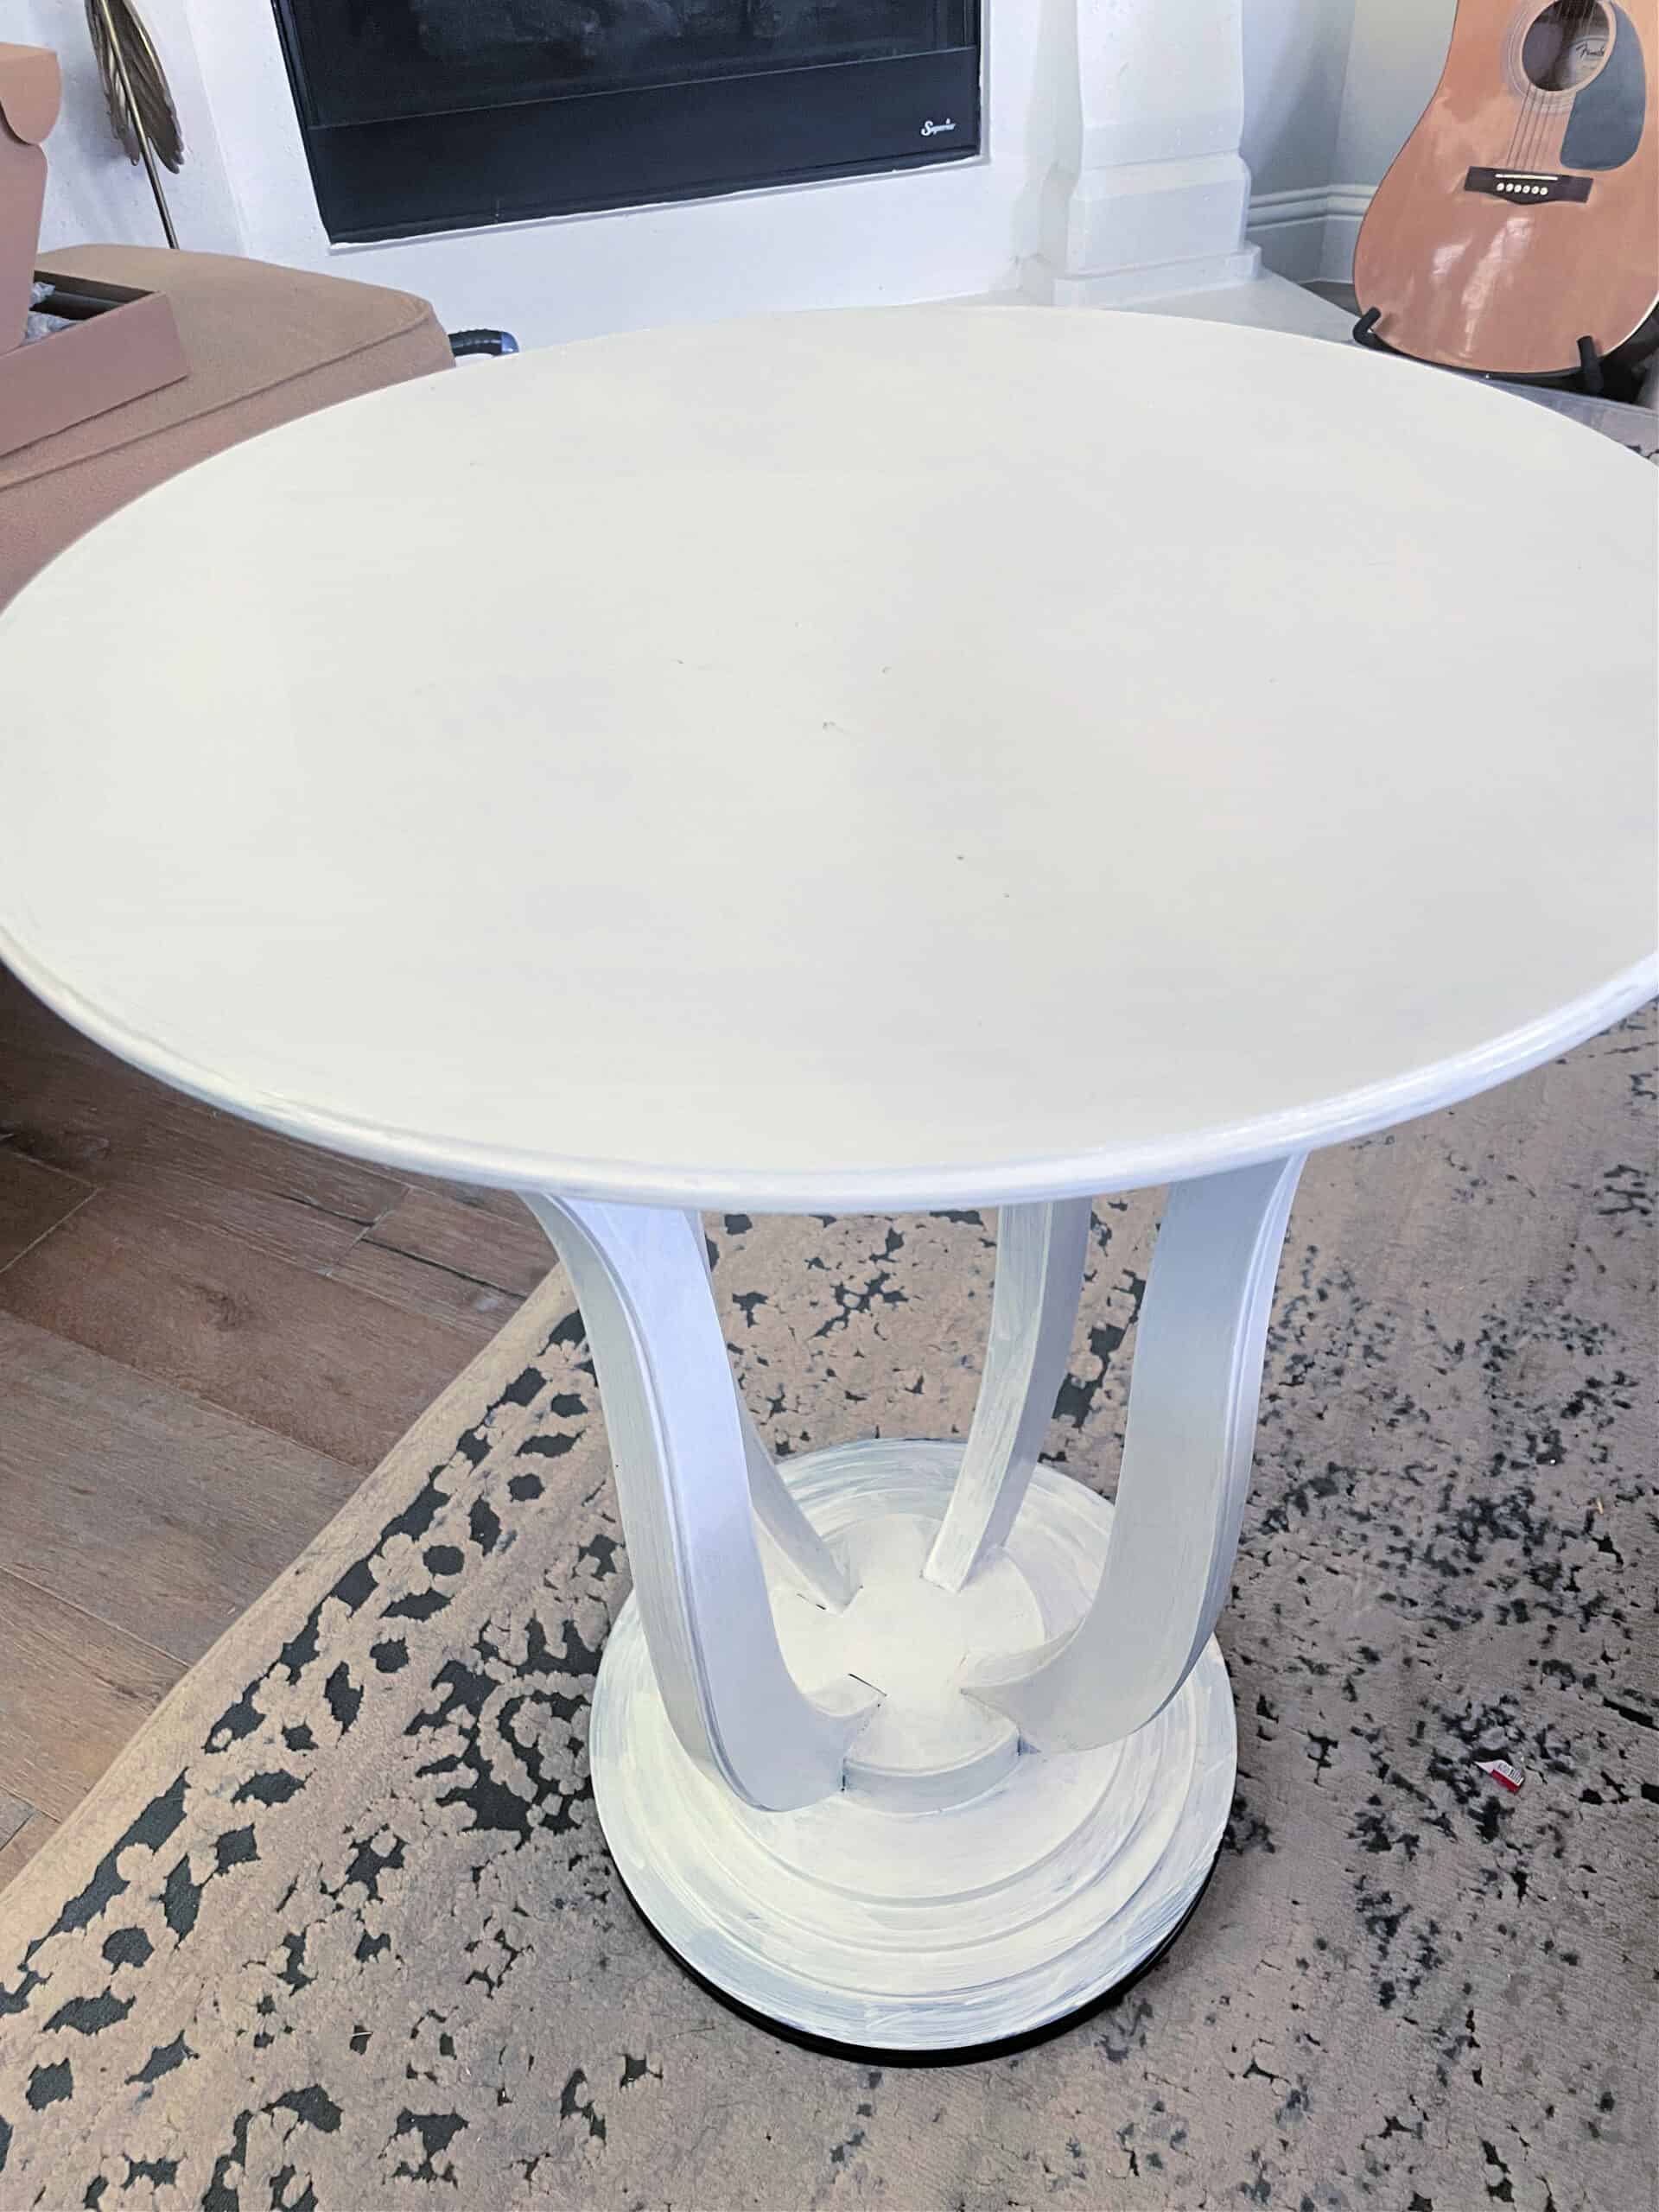
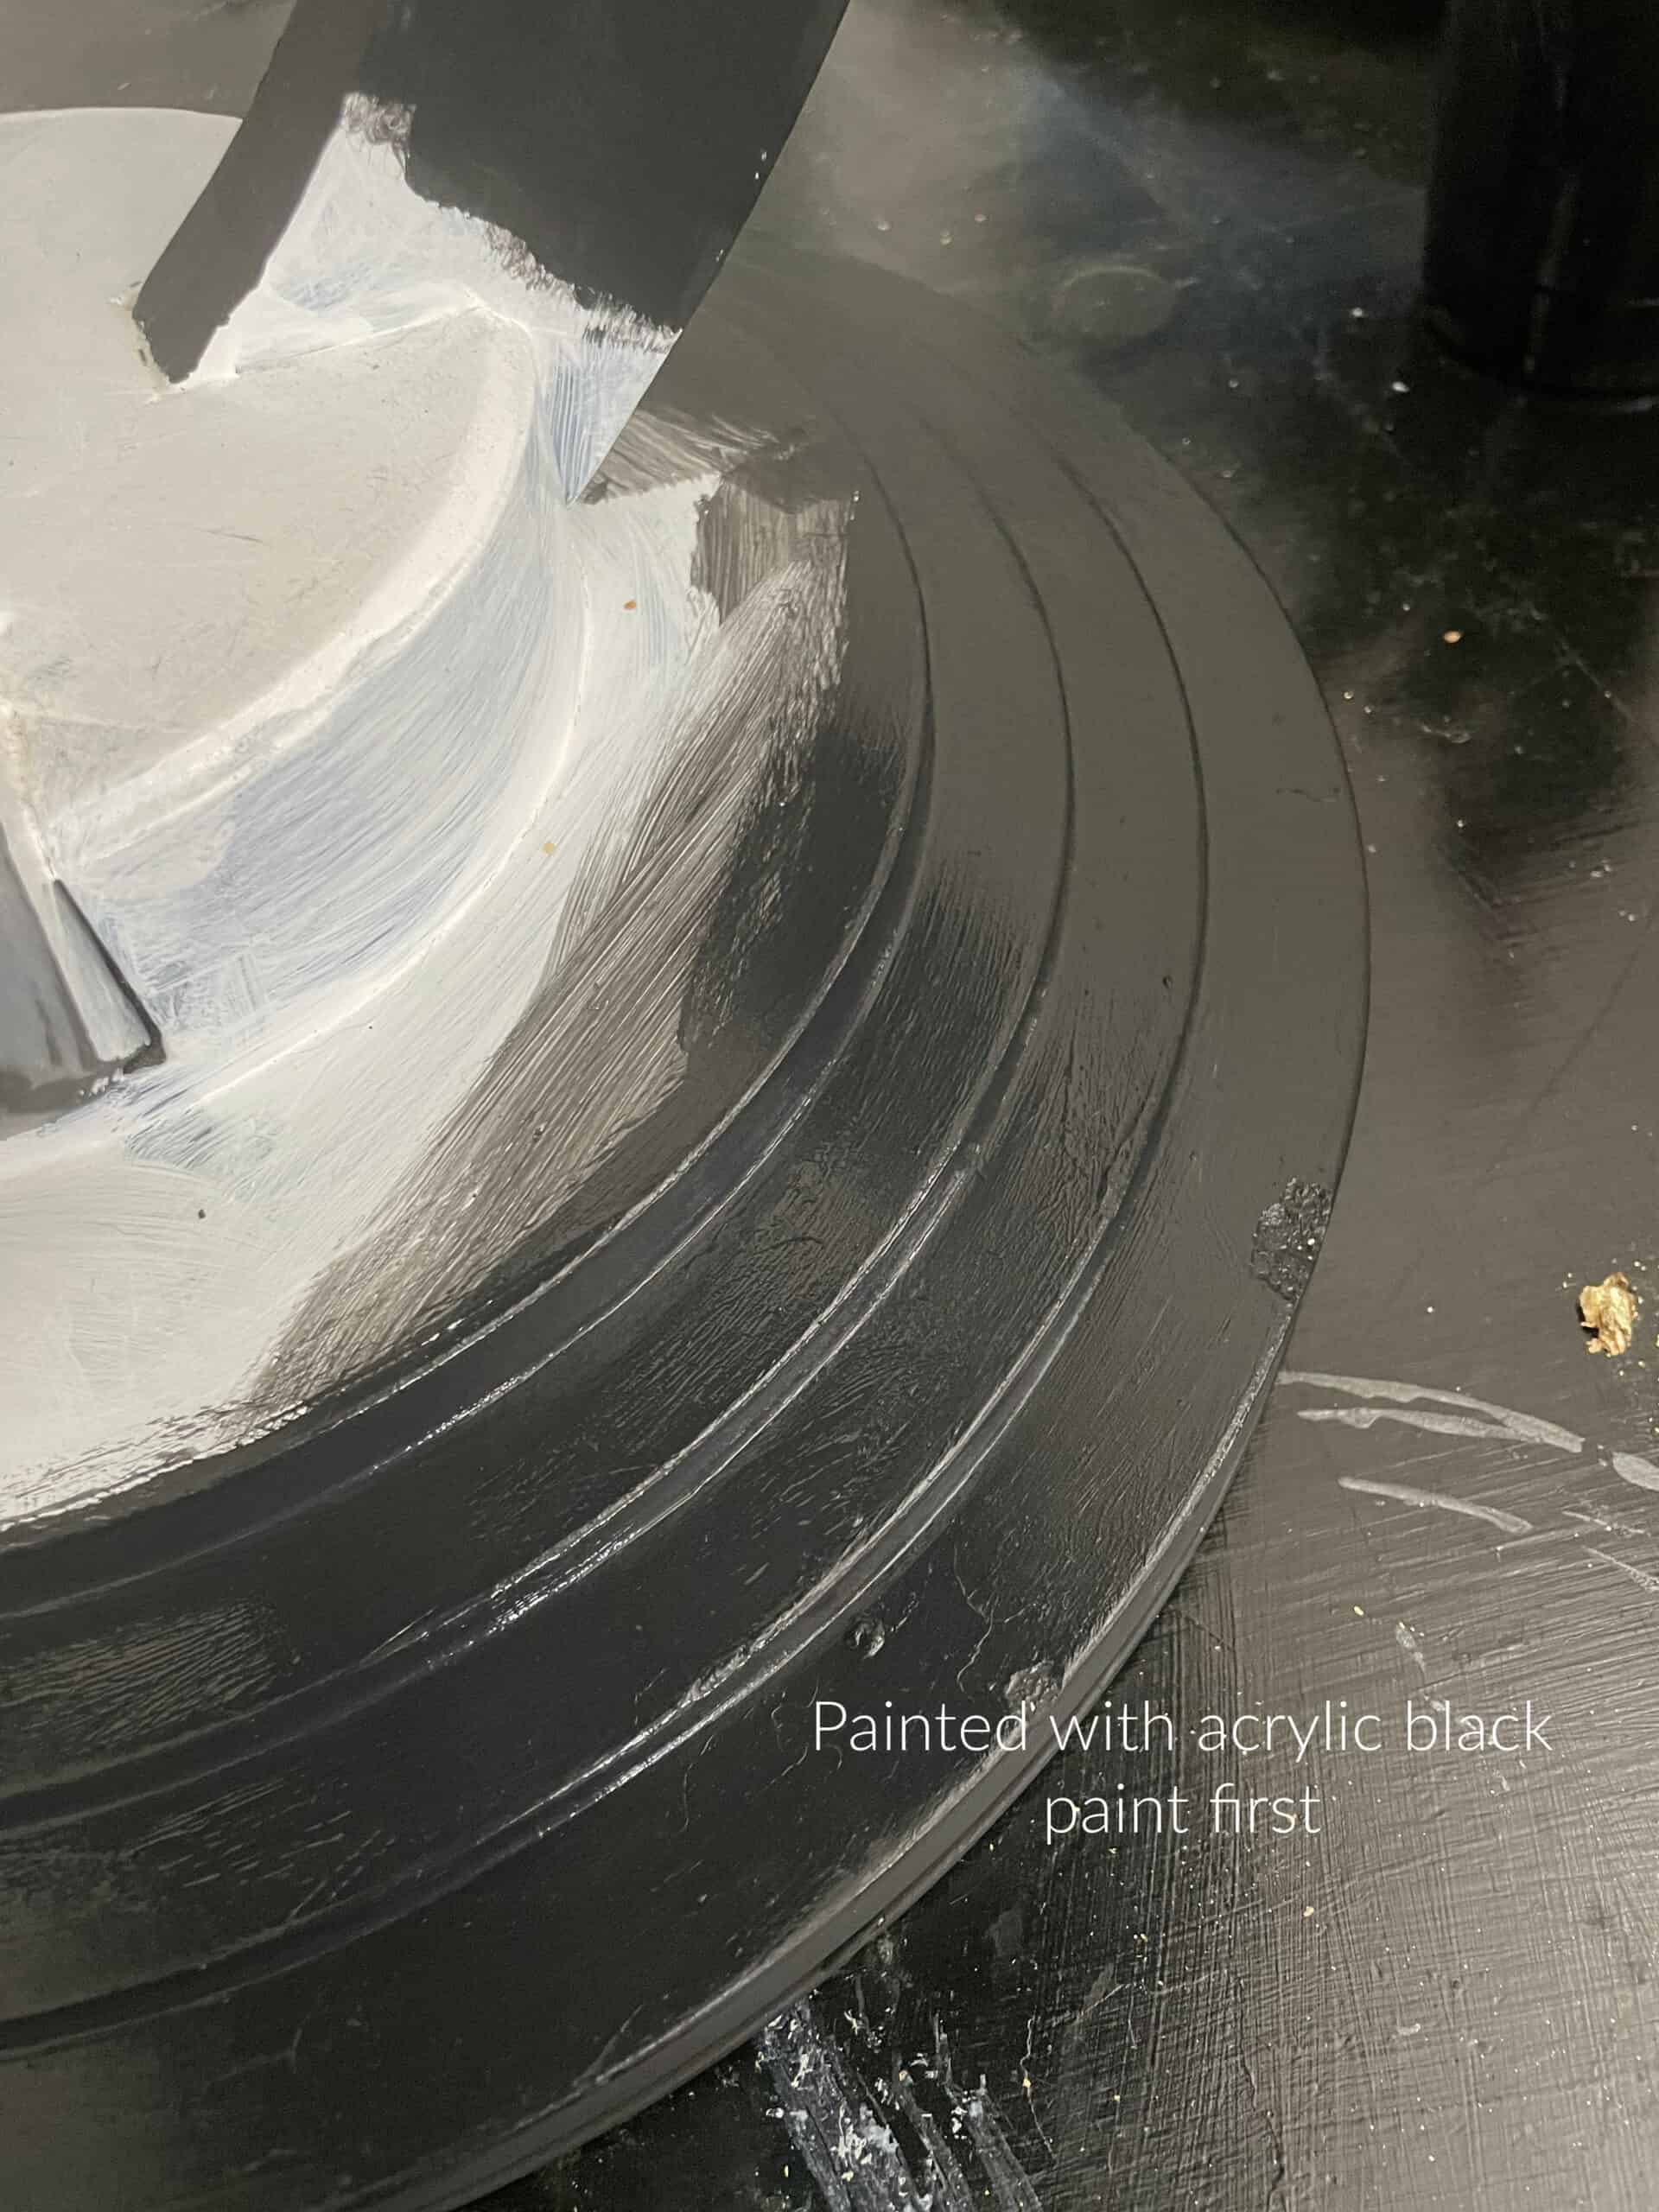
Step 2 – Paint table base
Paint table base in Lamp Black acrylic paint. This step adds depth to the charcoal paint that comes next.
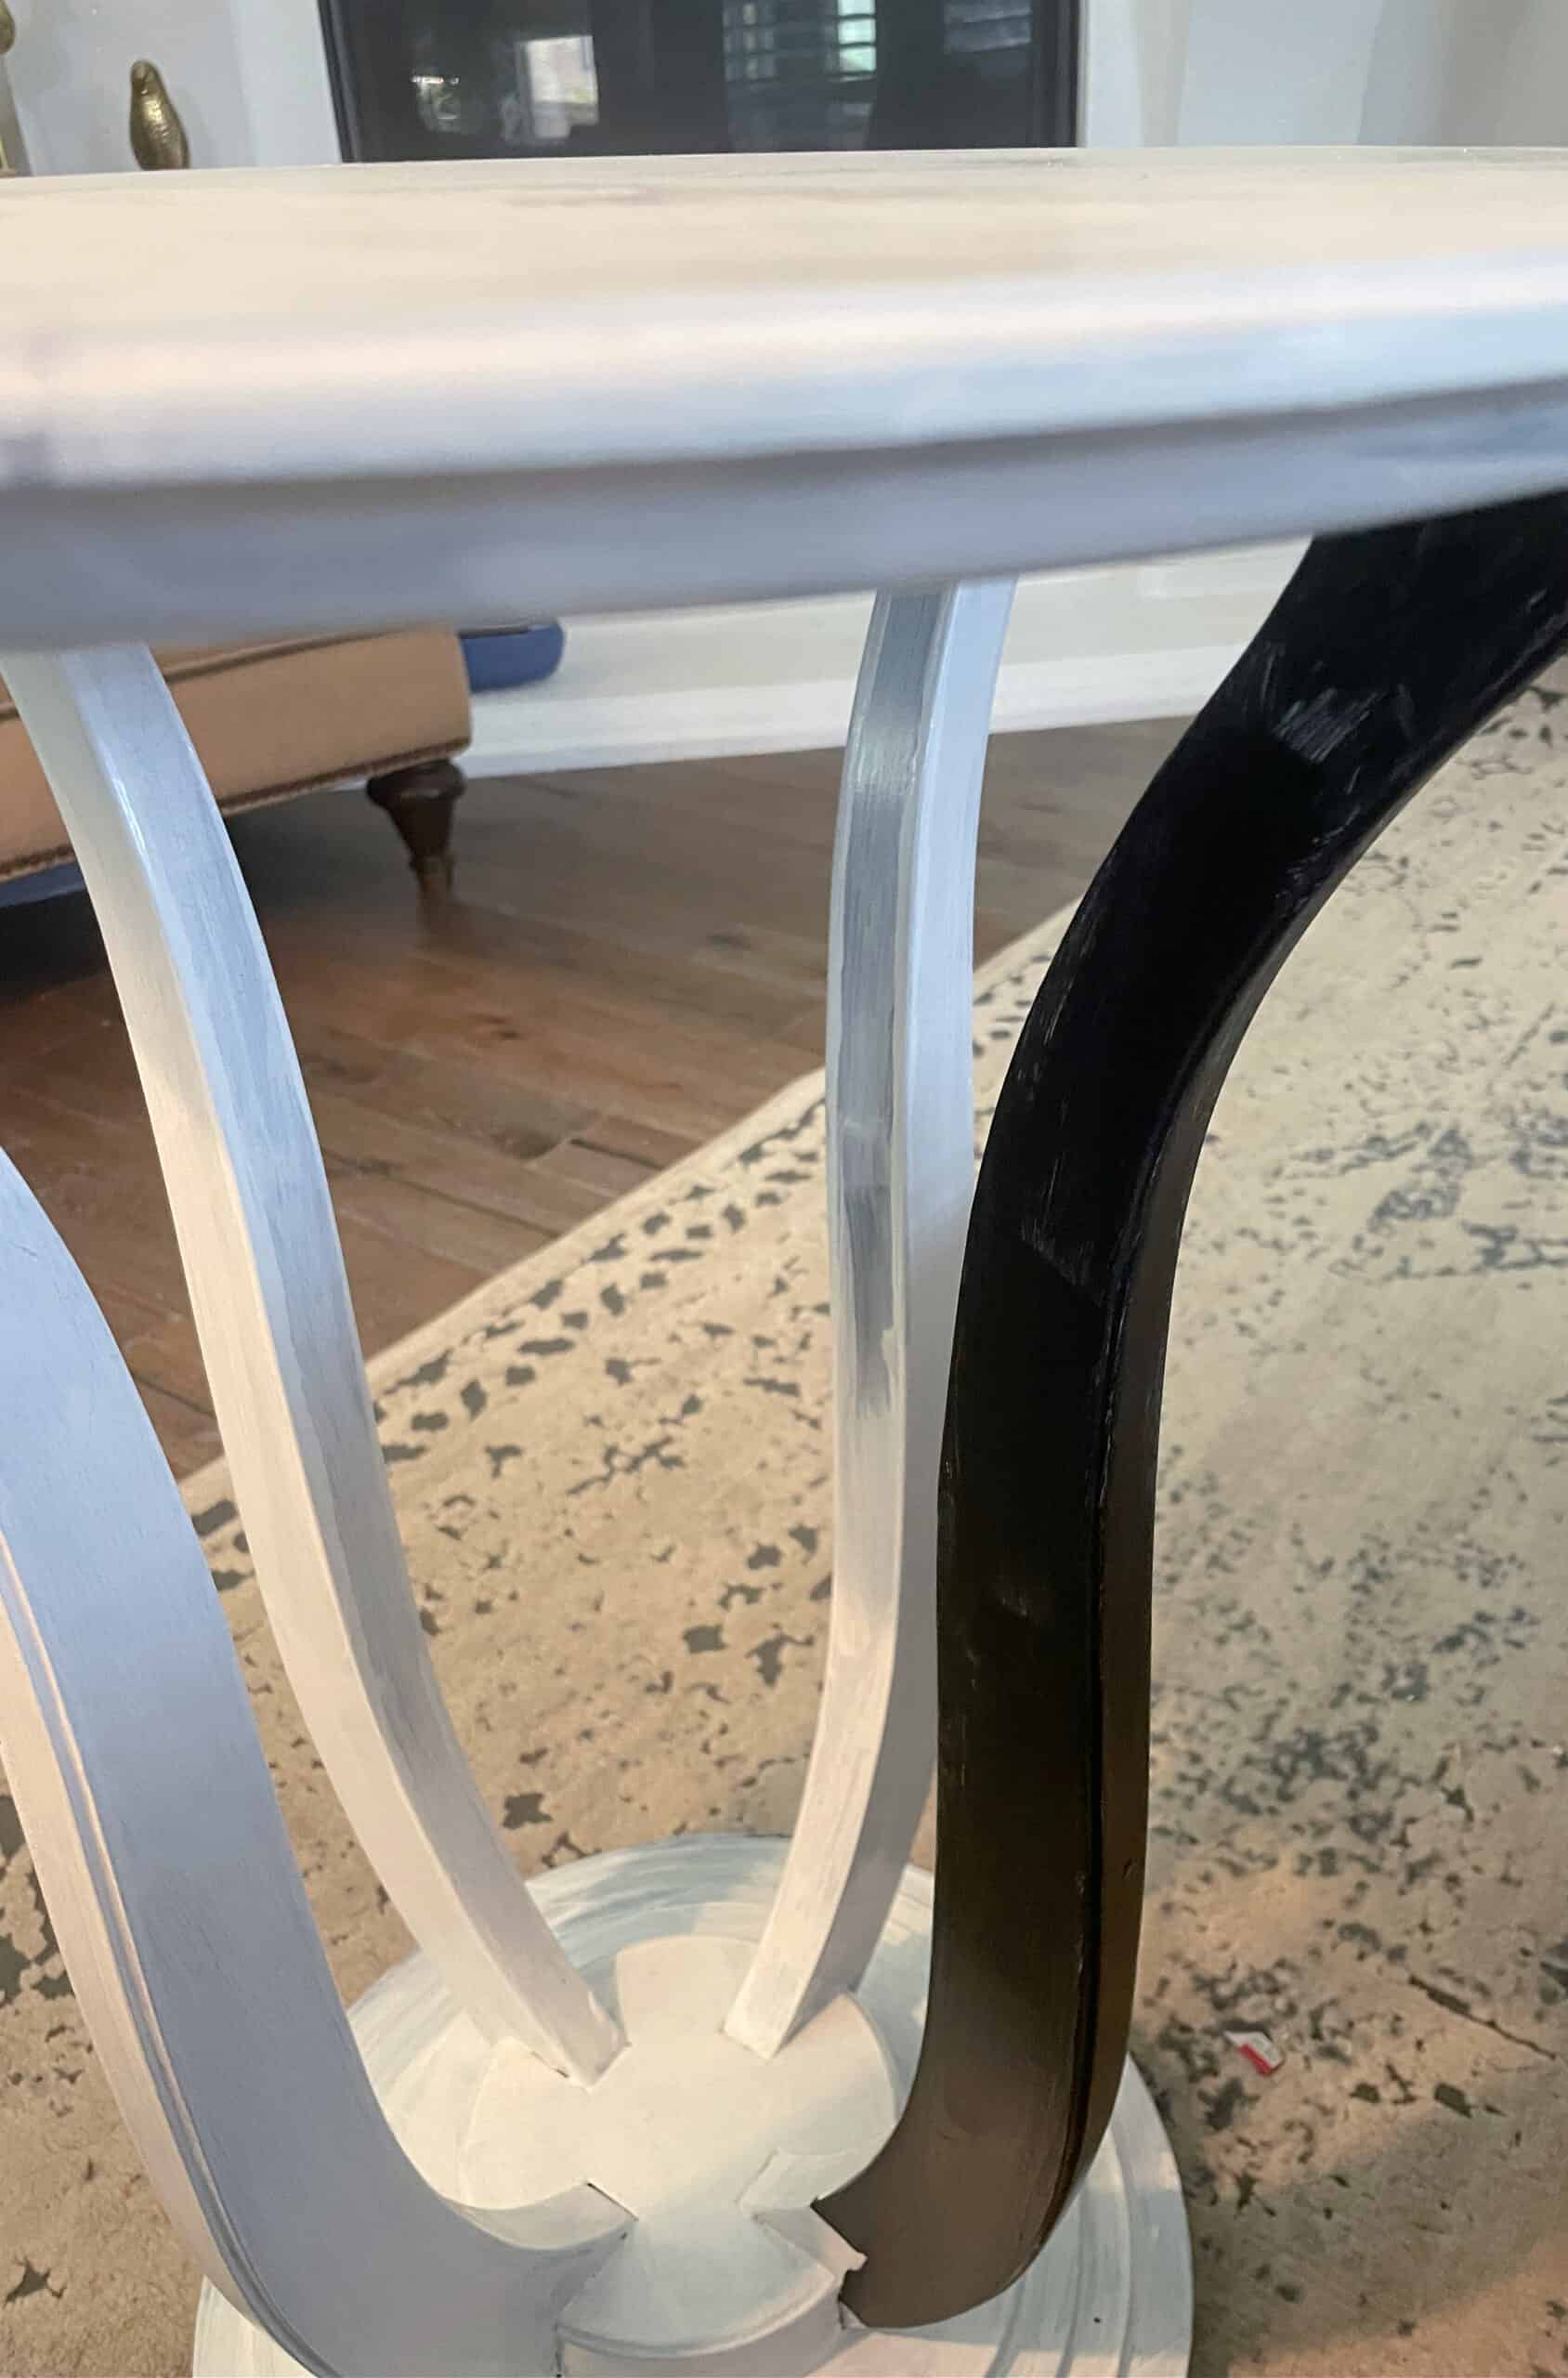
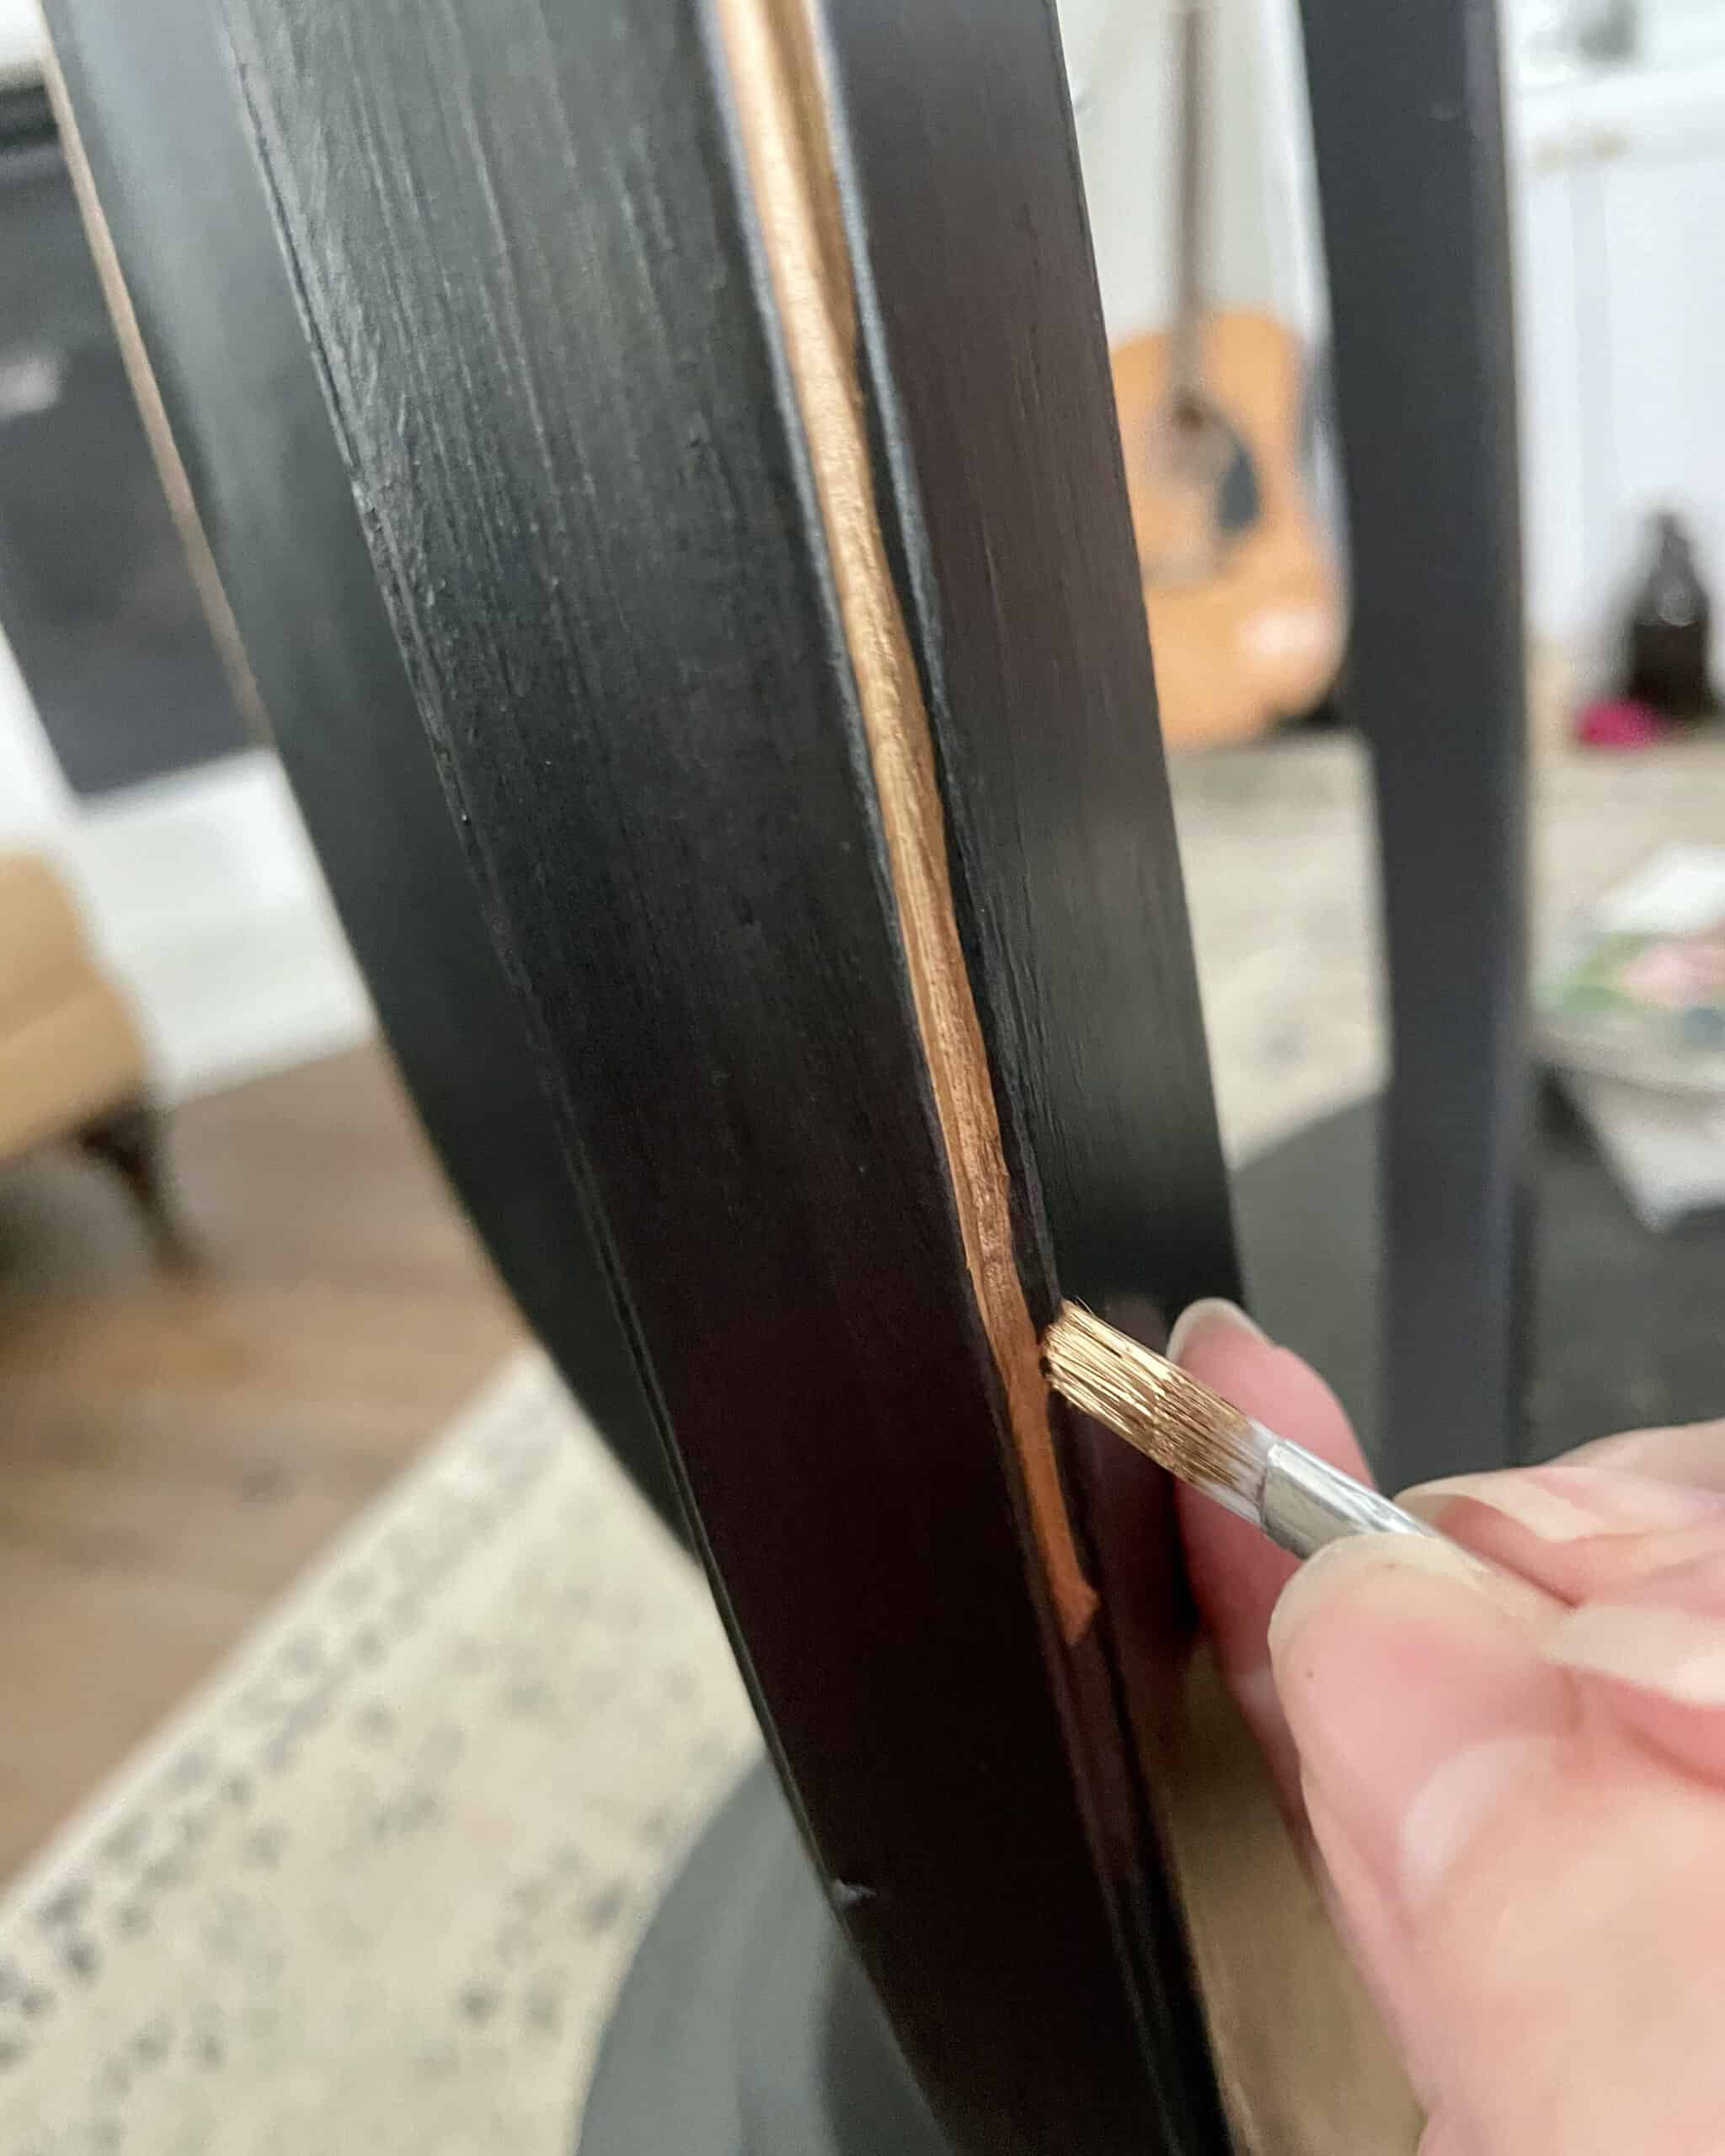
Step 3 – Add gold leaf accent to table legs and base
I used liquid gold leaf to accent areas of the table. The little raised part of the base that you see in the previous picture and I pinstriped the curvy legs.
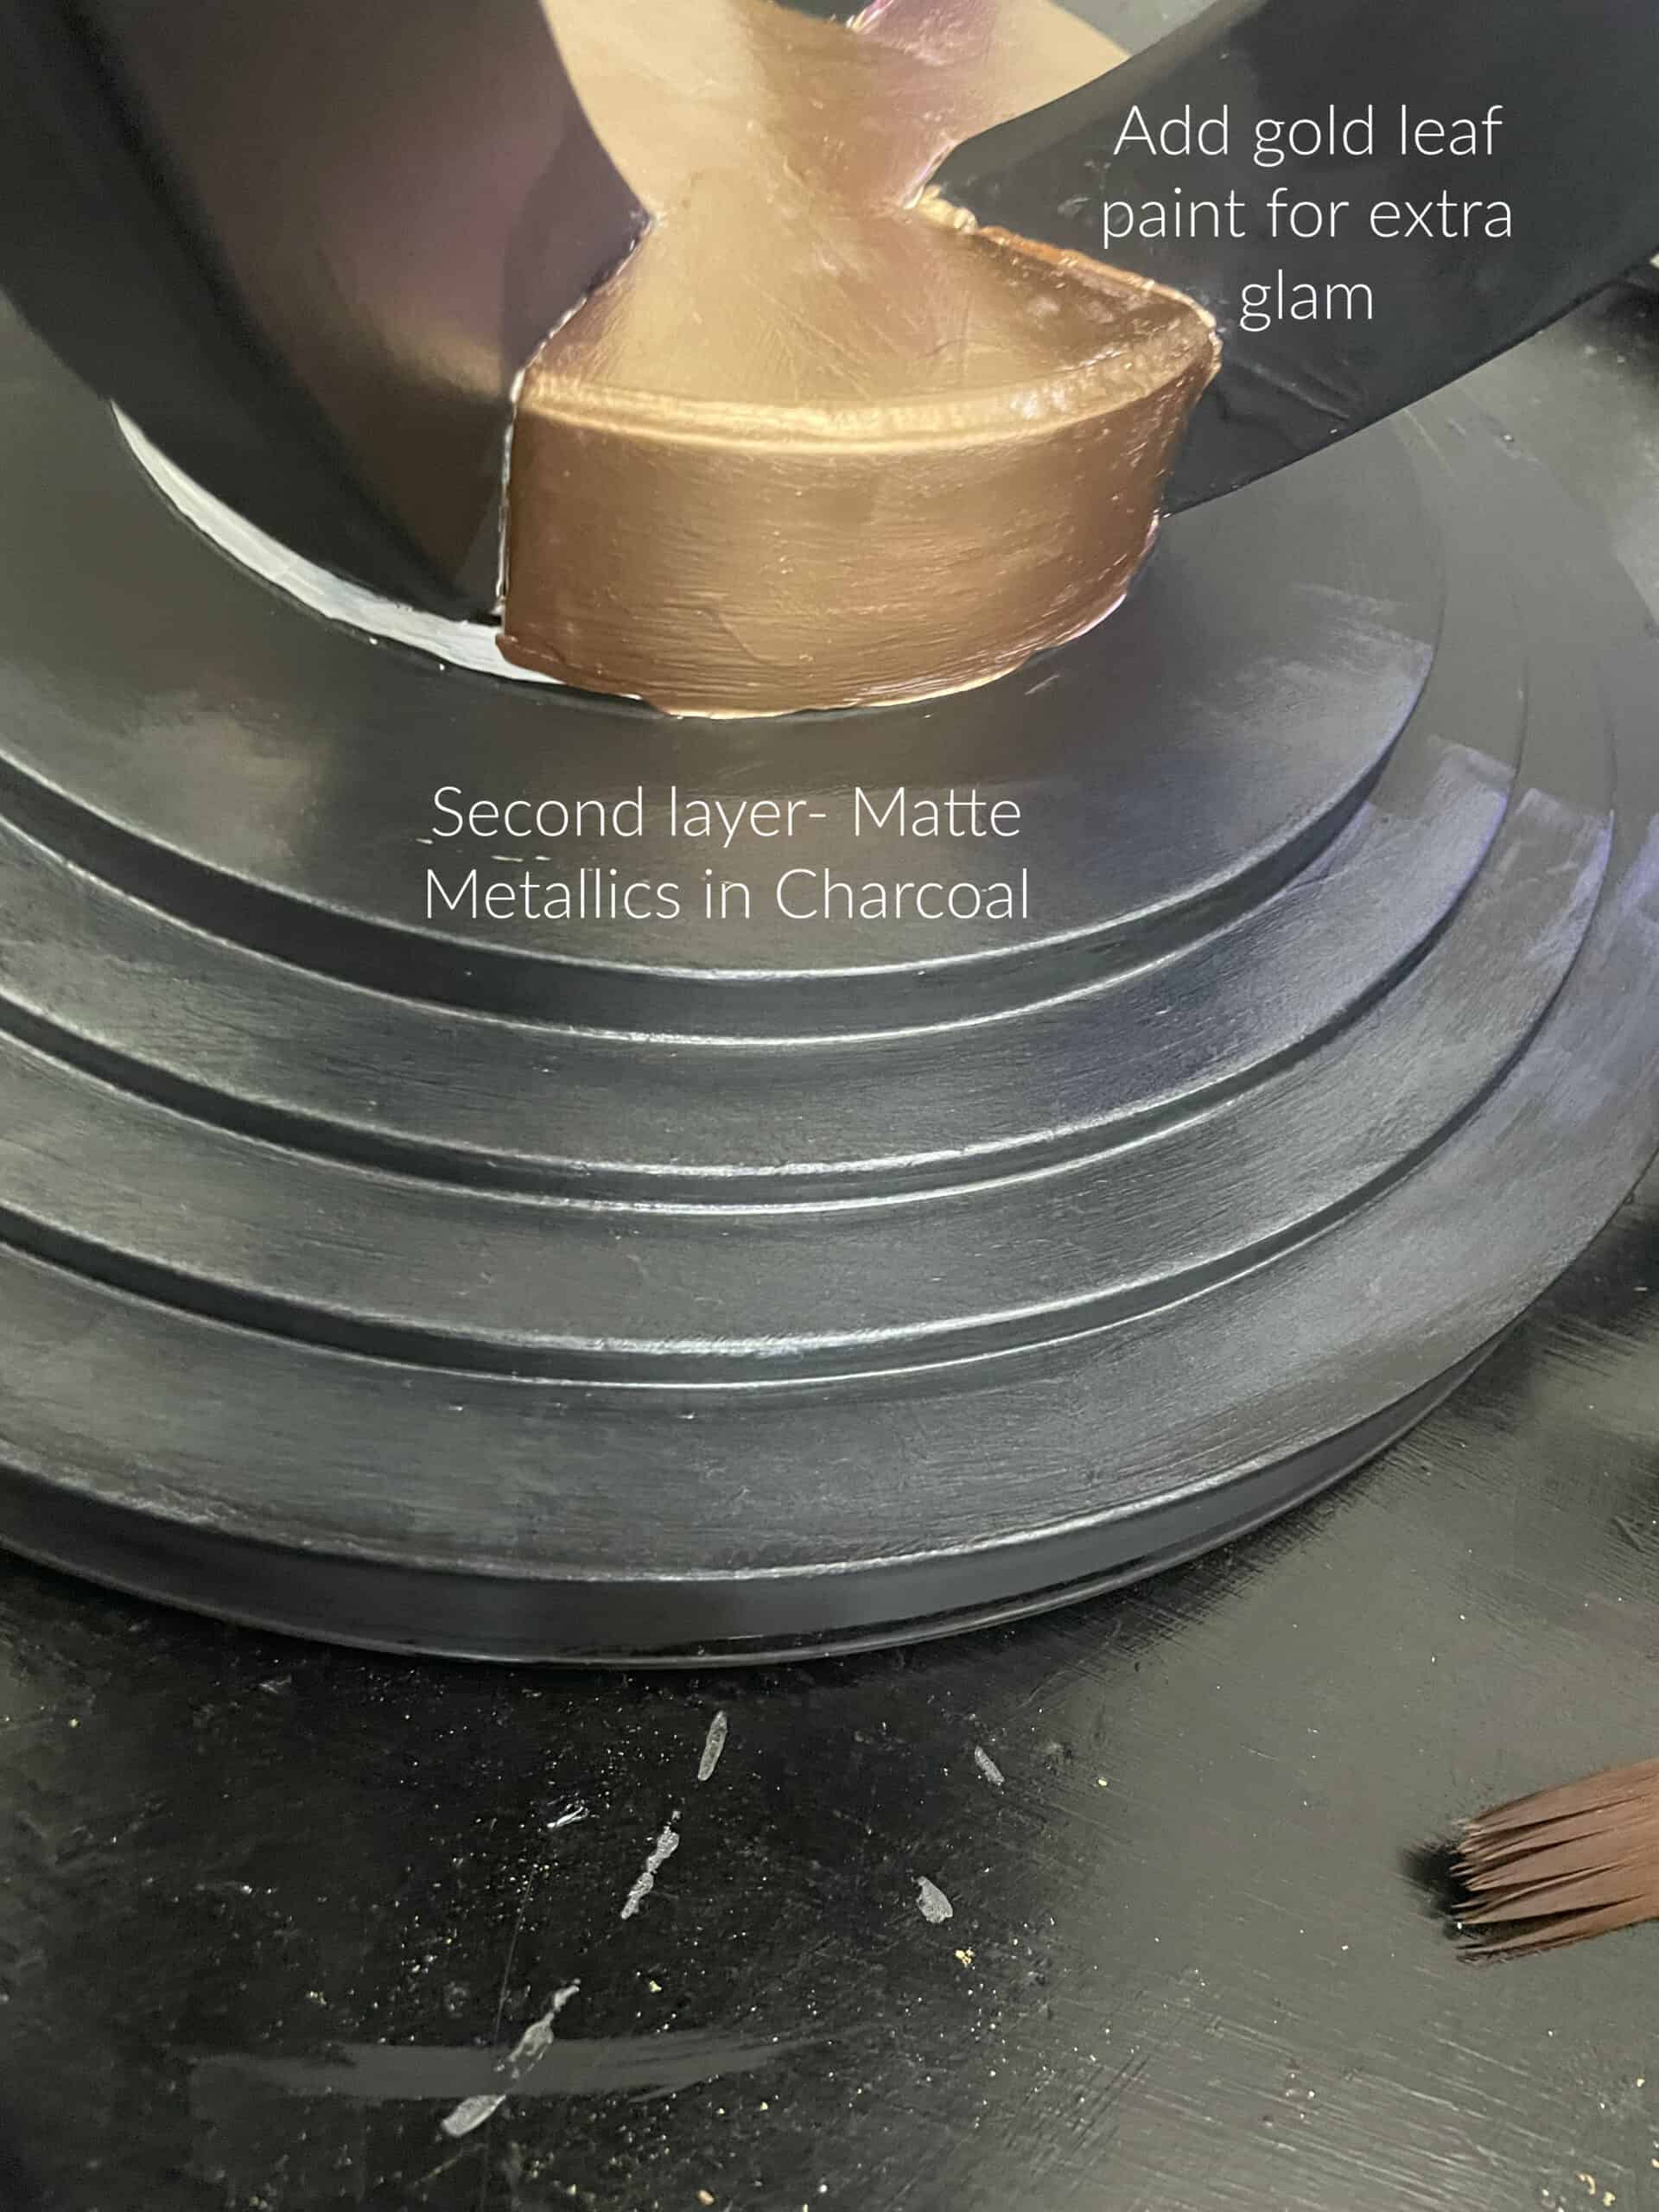
Make sure to use a small brush for pin striping and keep a steady hand. You can go back and add lamp black and metallic charcoal to clean up any funky edges.
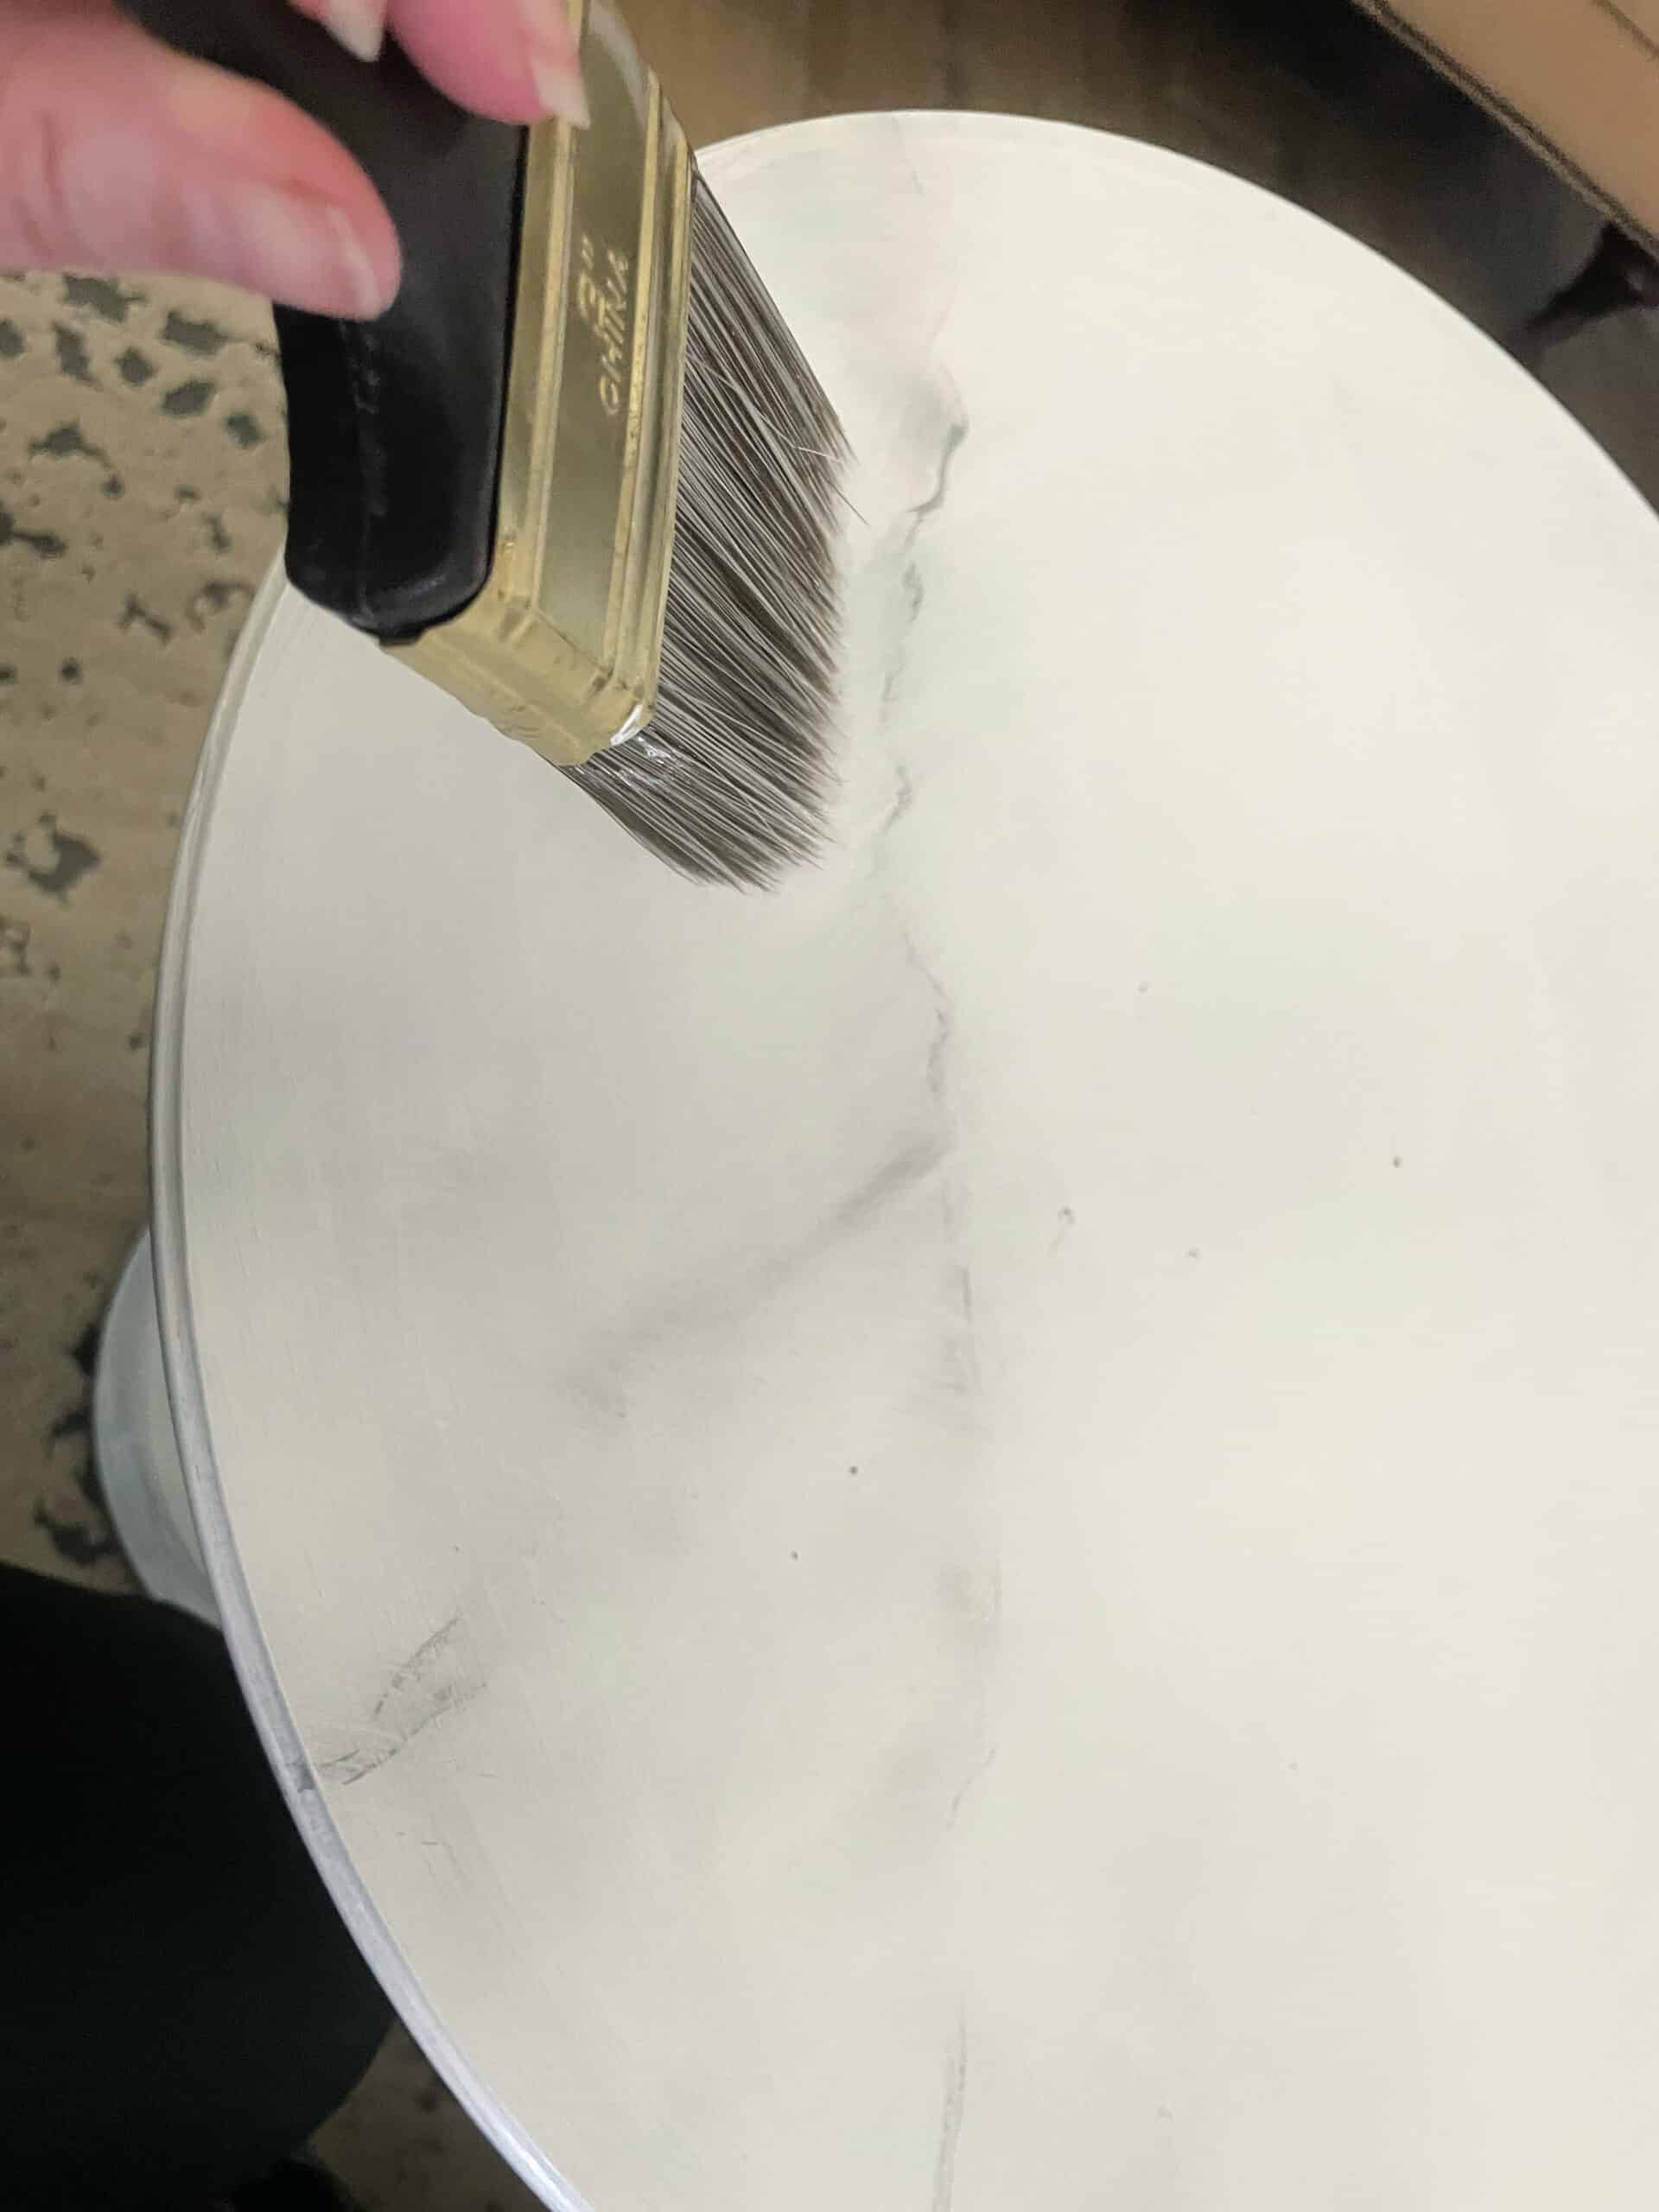
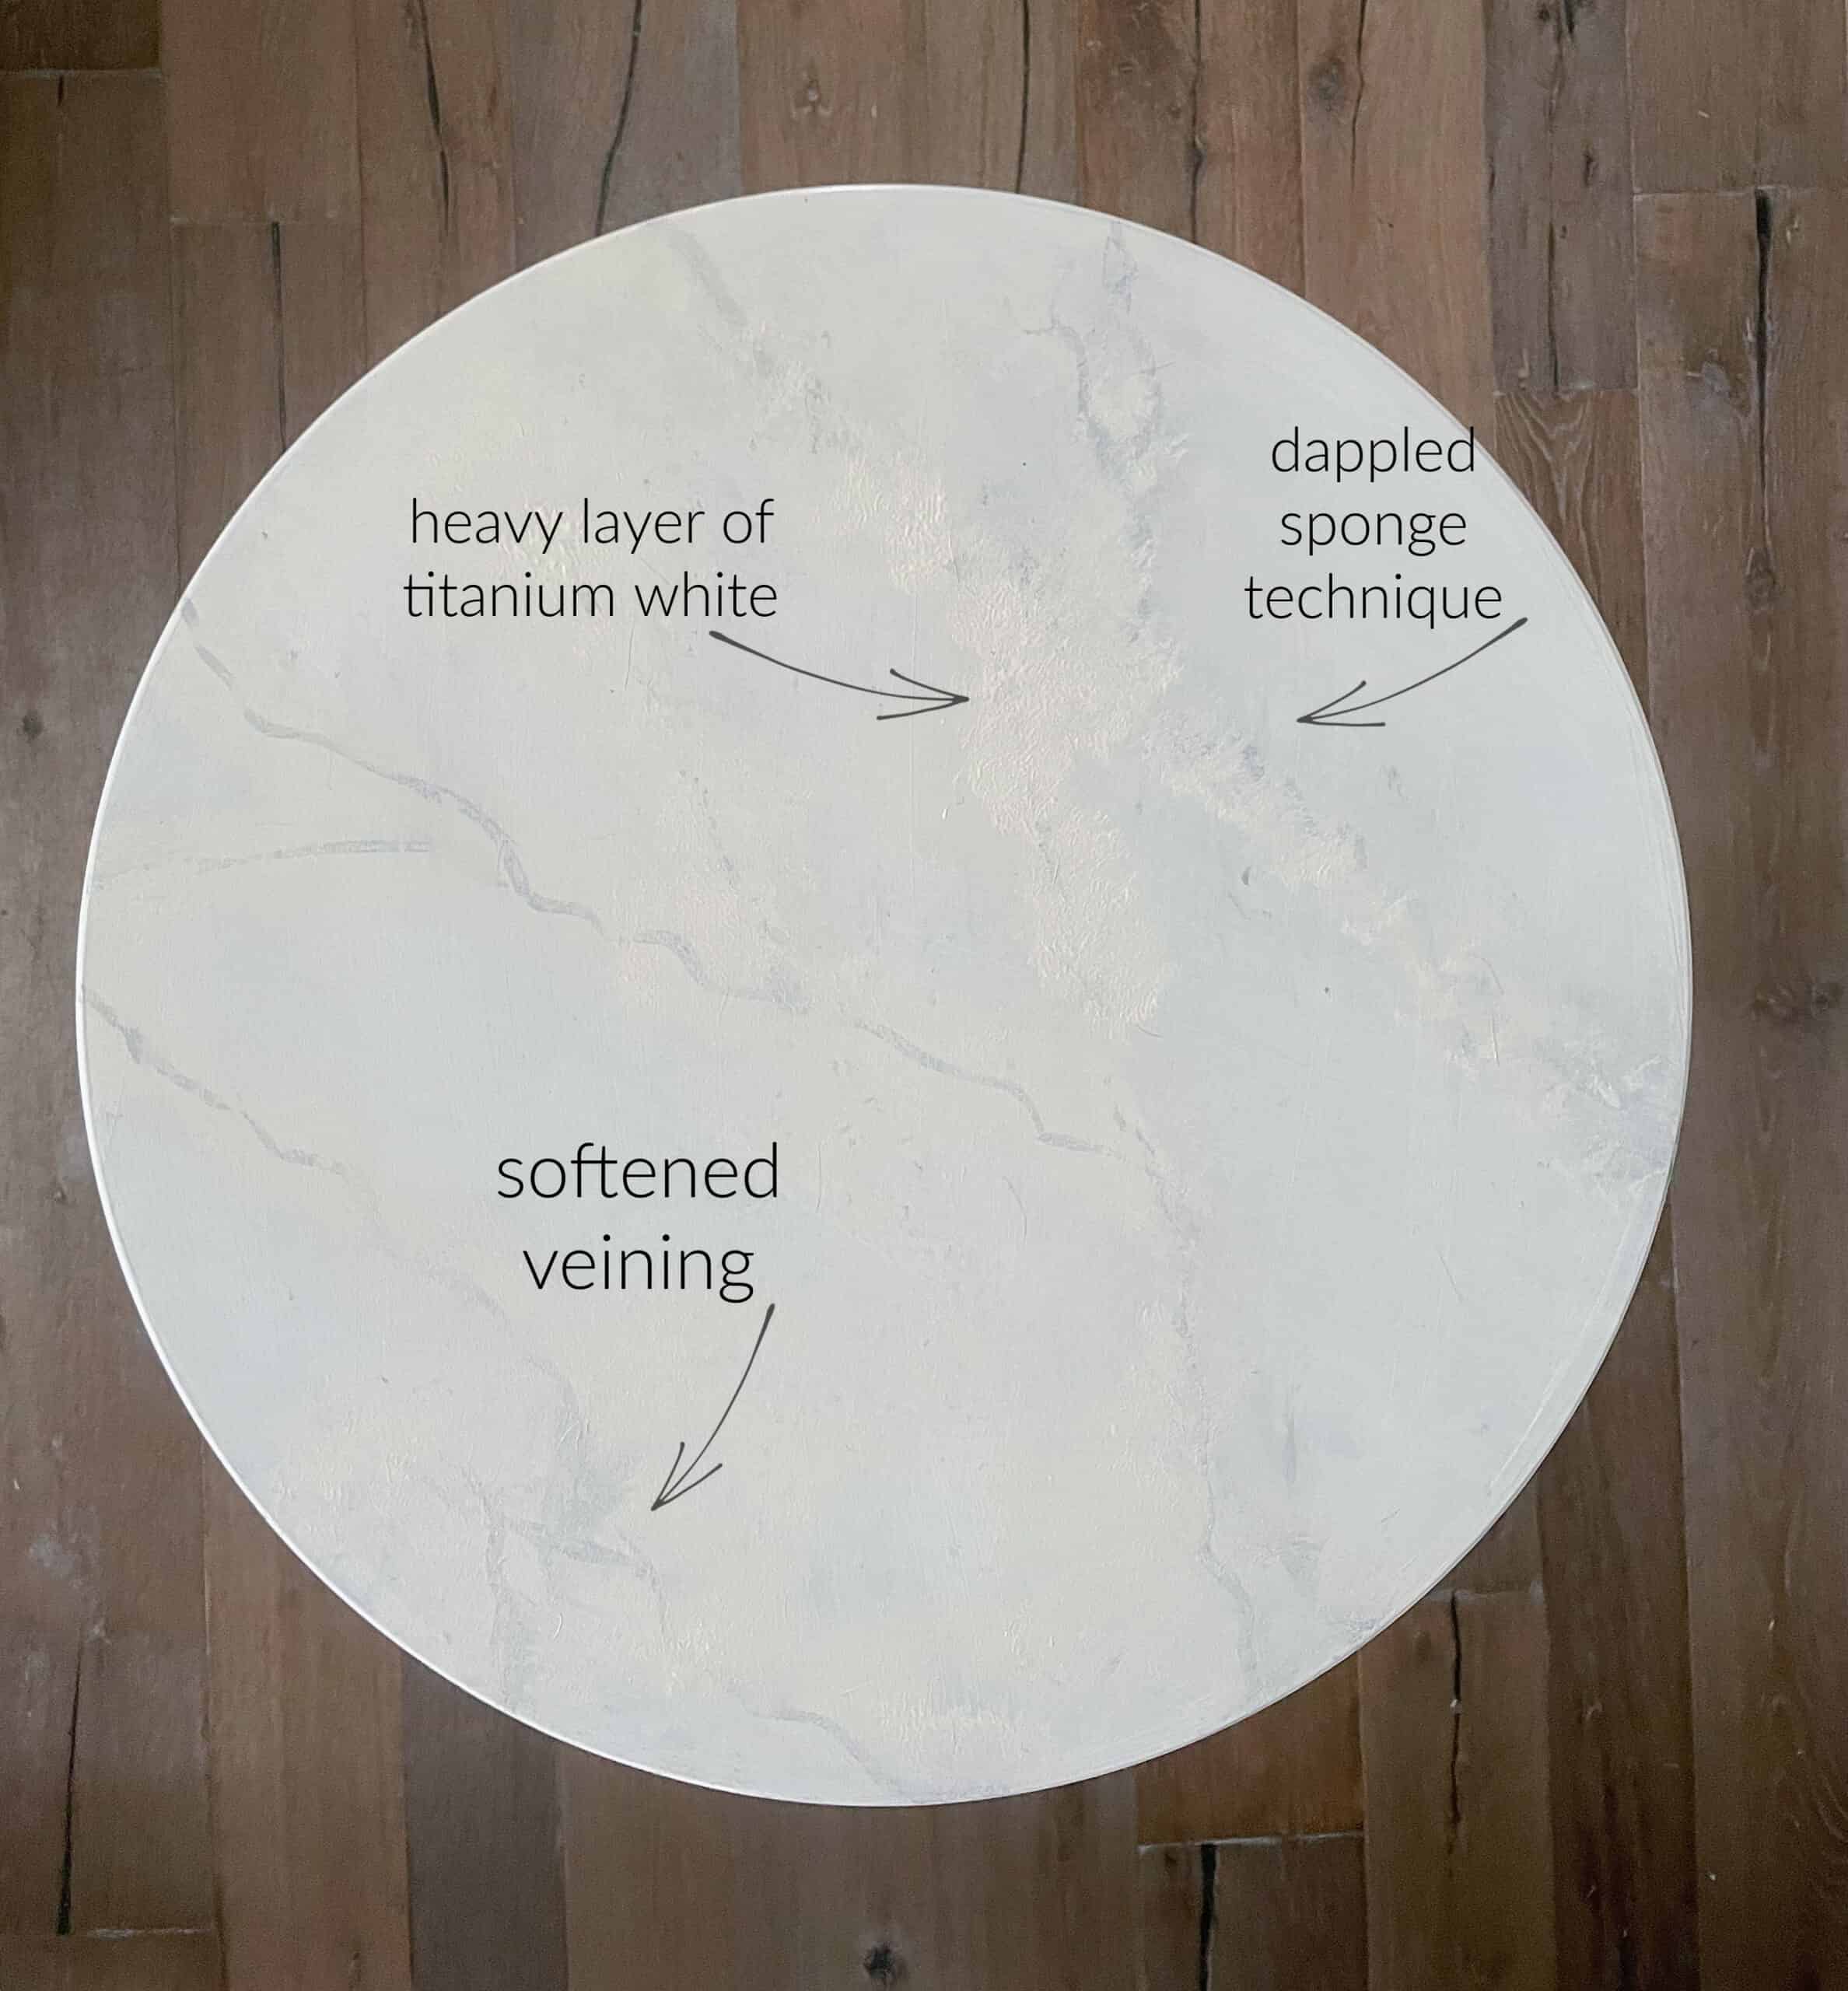
Step 4 – Create the faux marble stone table top
This is the method I use and it seems to work pretty well. I love the aged stone feel it gives to my little table.
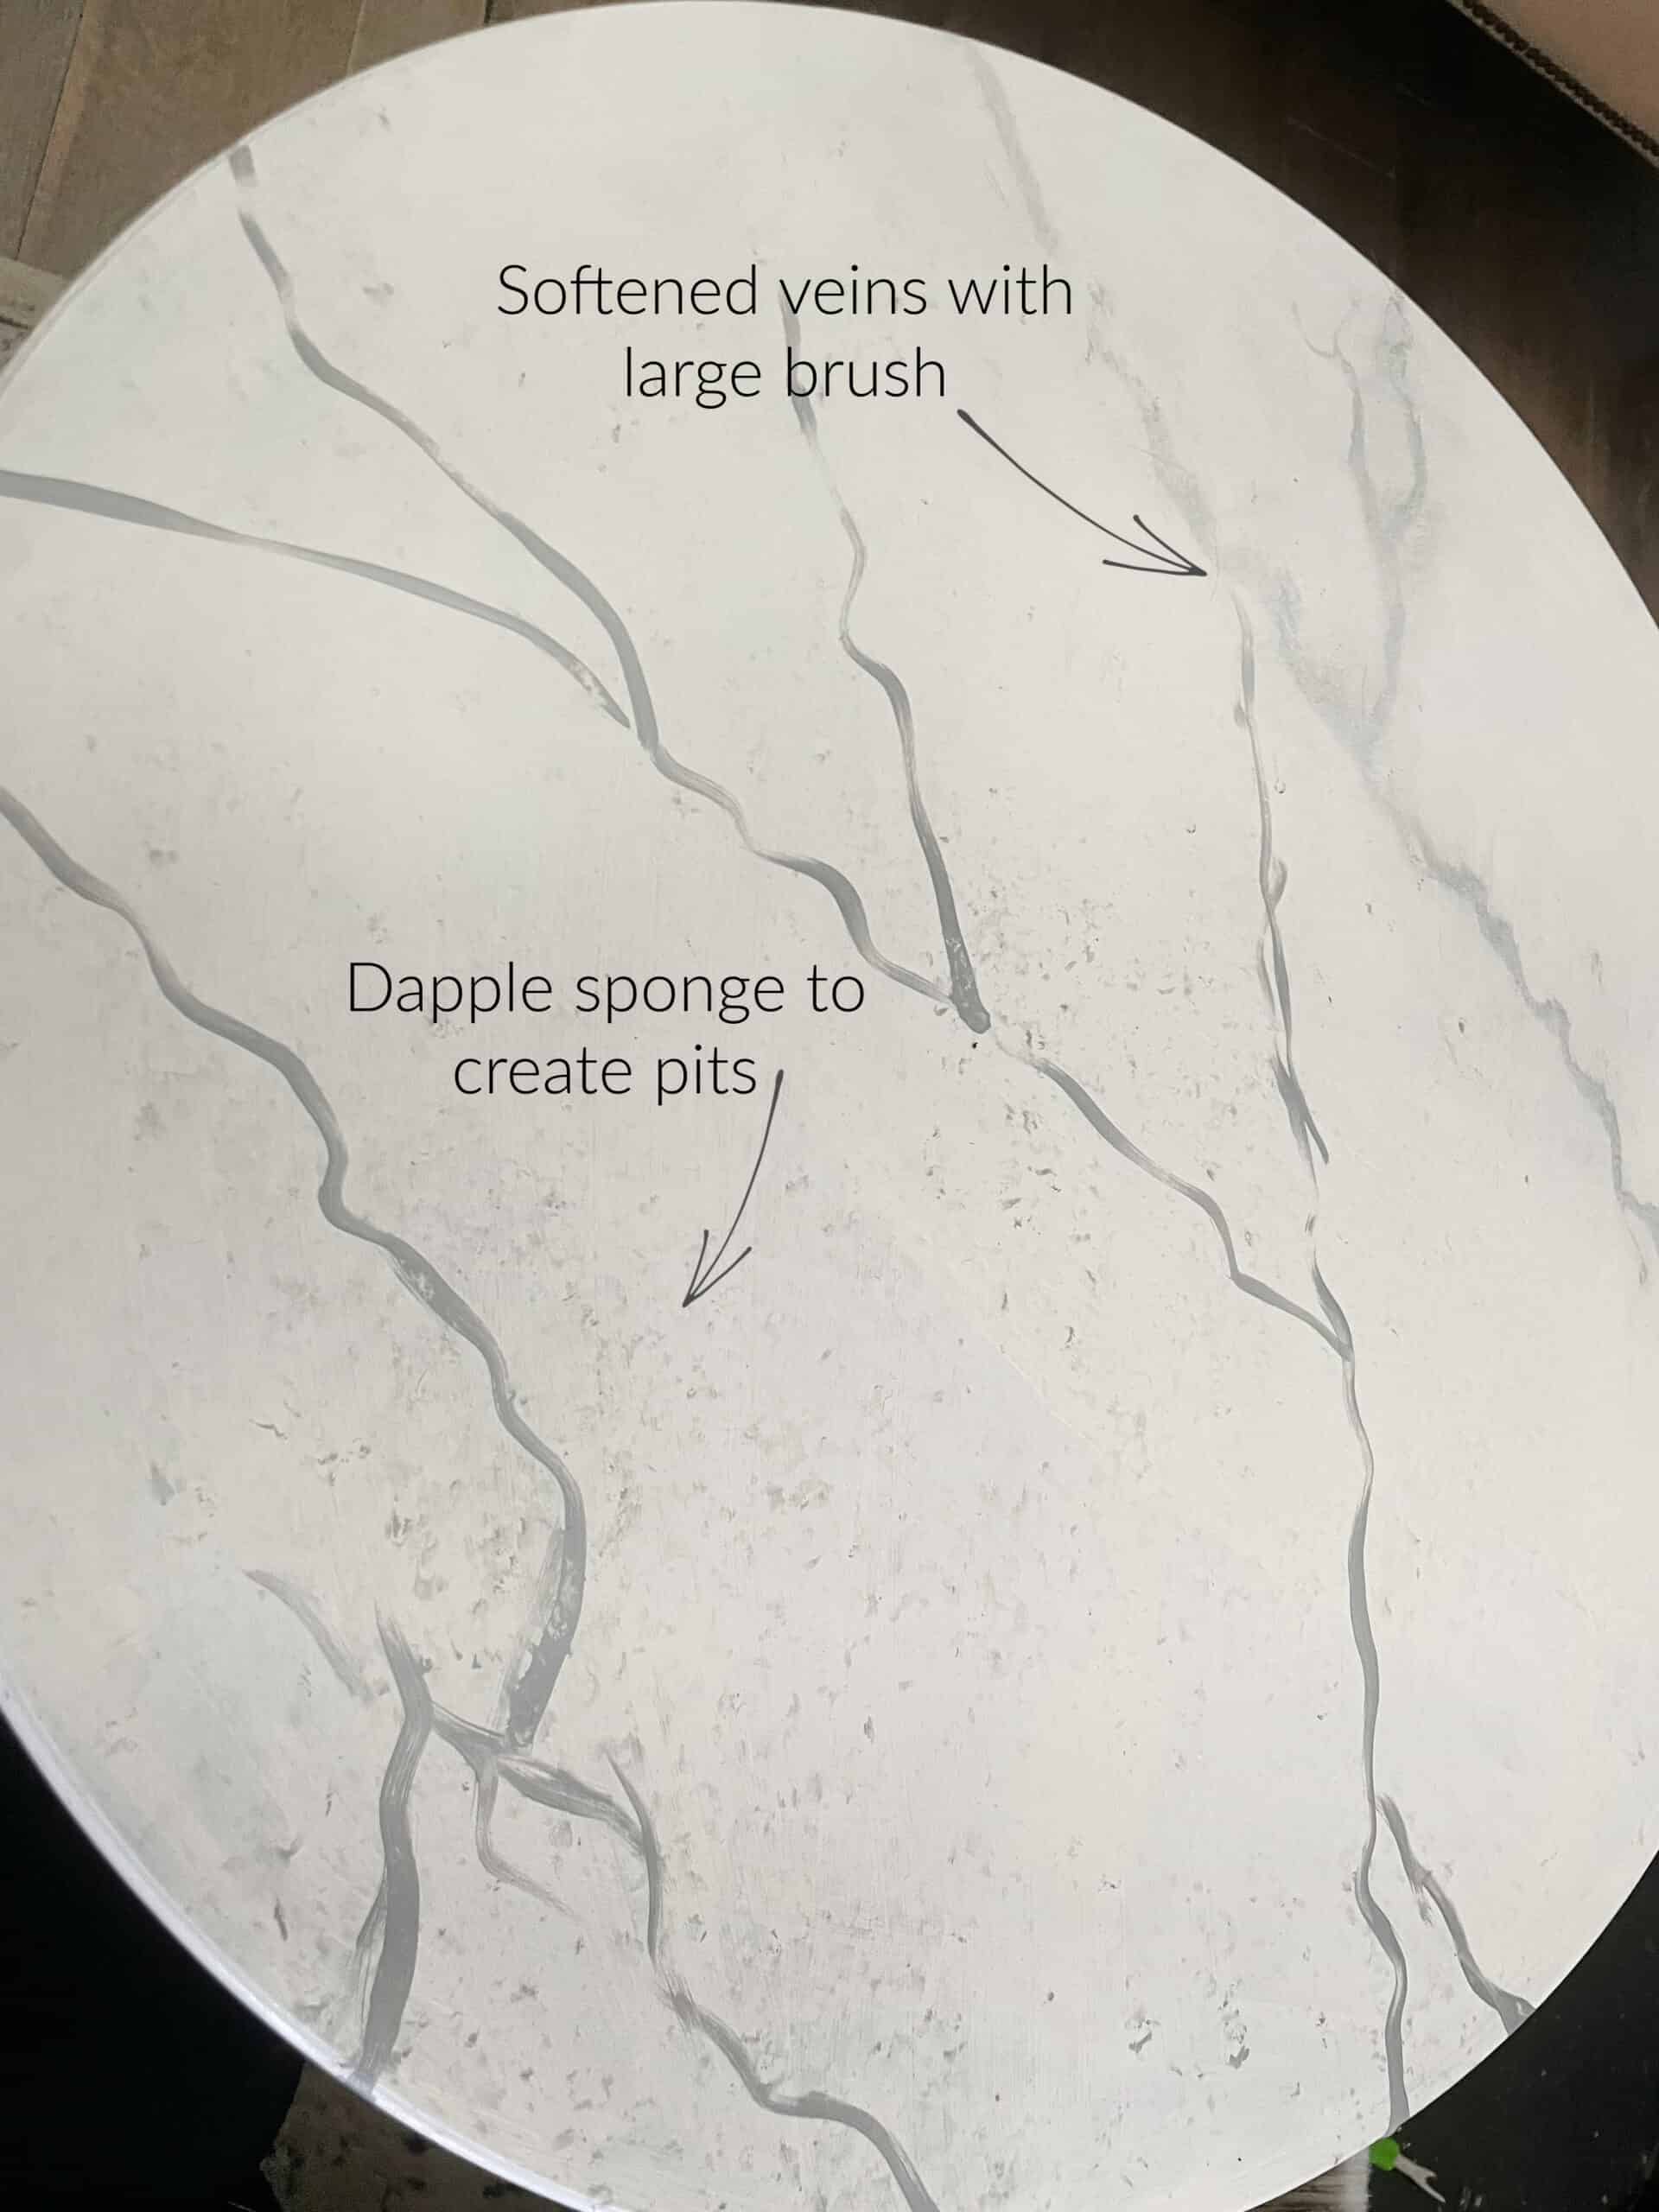
Add veins by gently holding a small to medium sized brush in hand and just let it drift. I mixed the titanium white and lamp black to get a deep gray color.
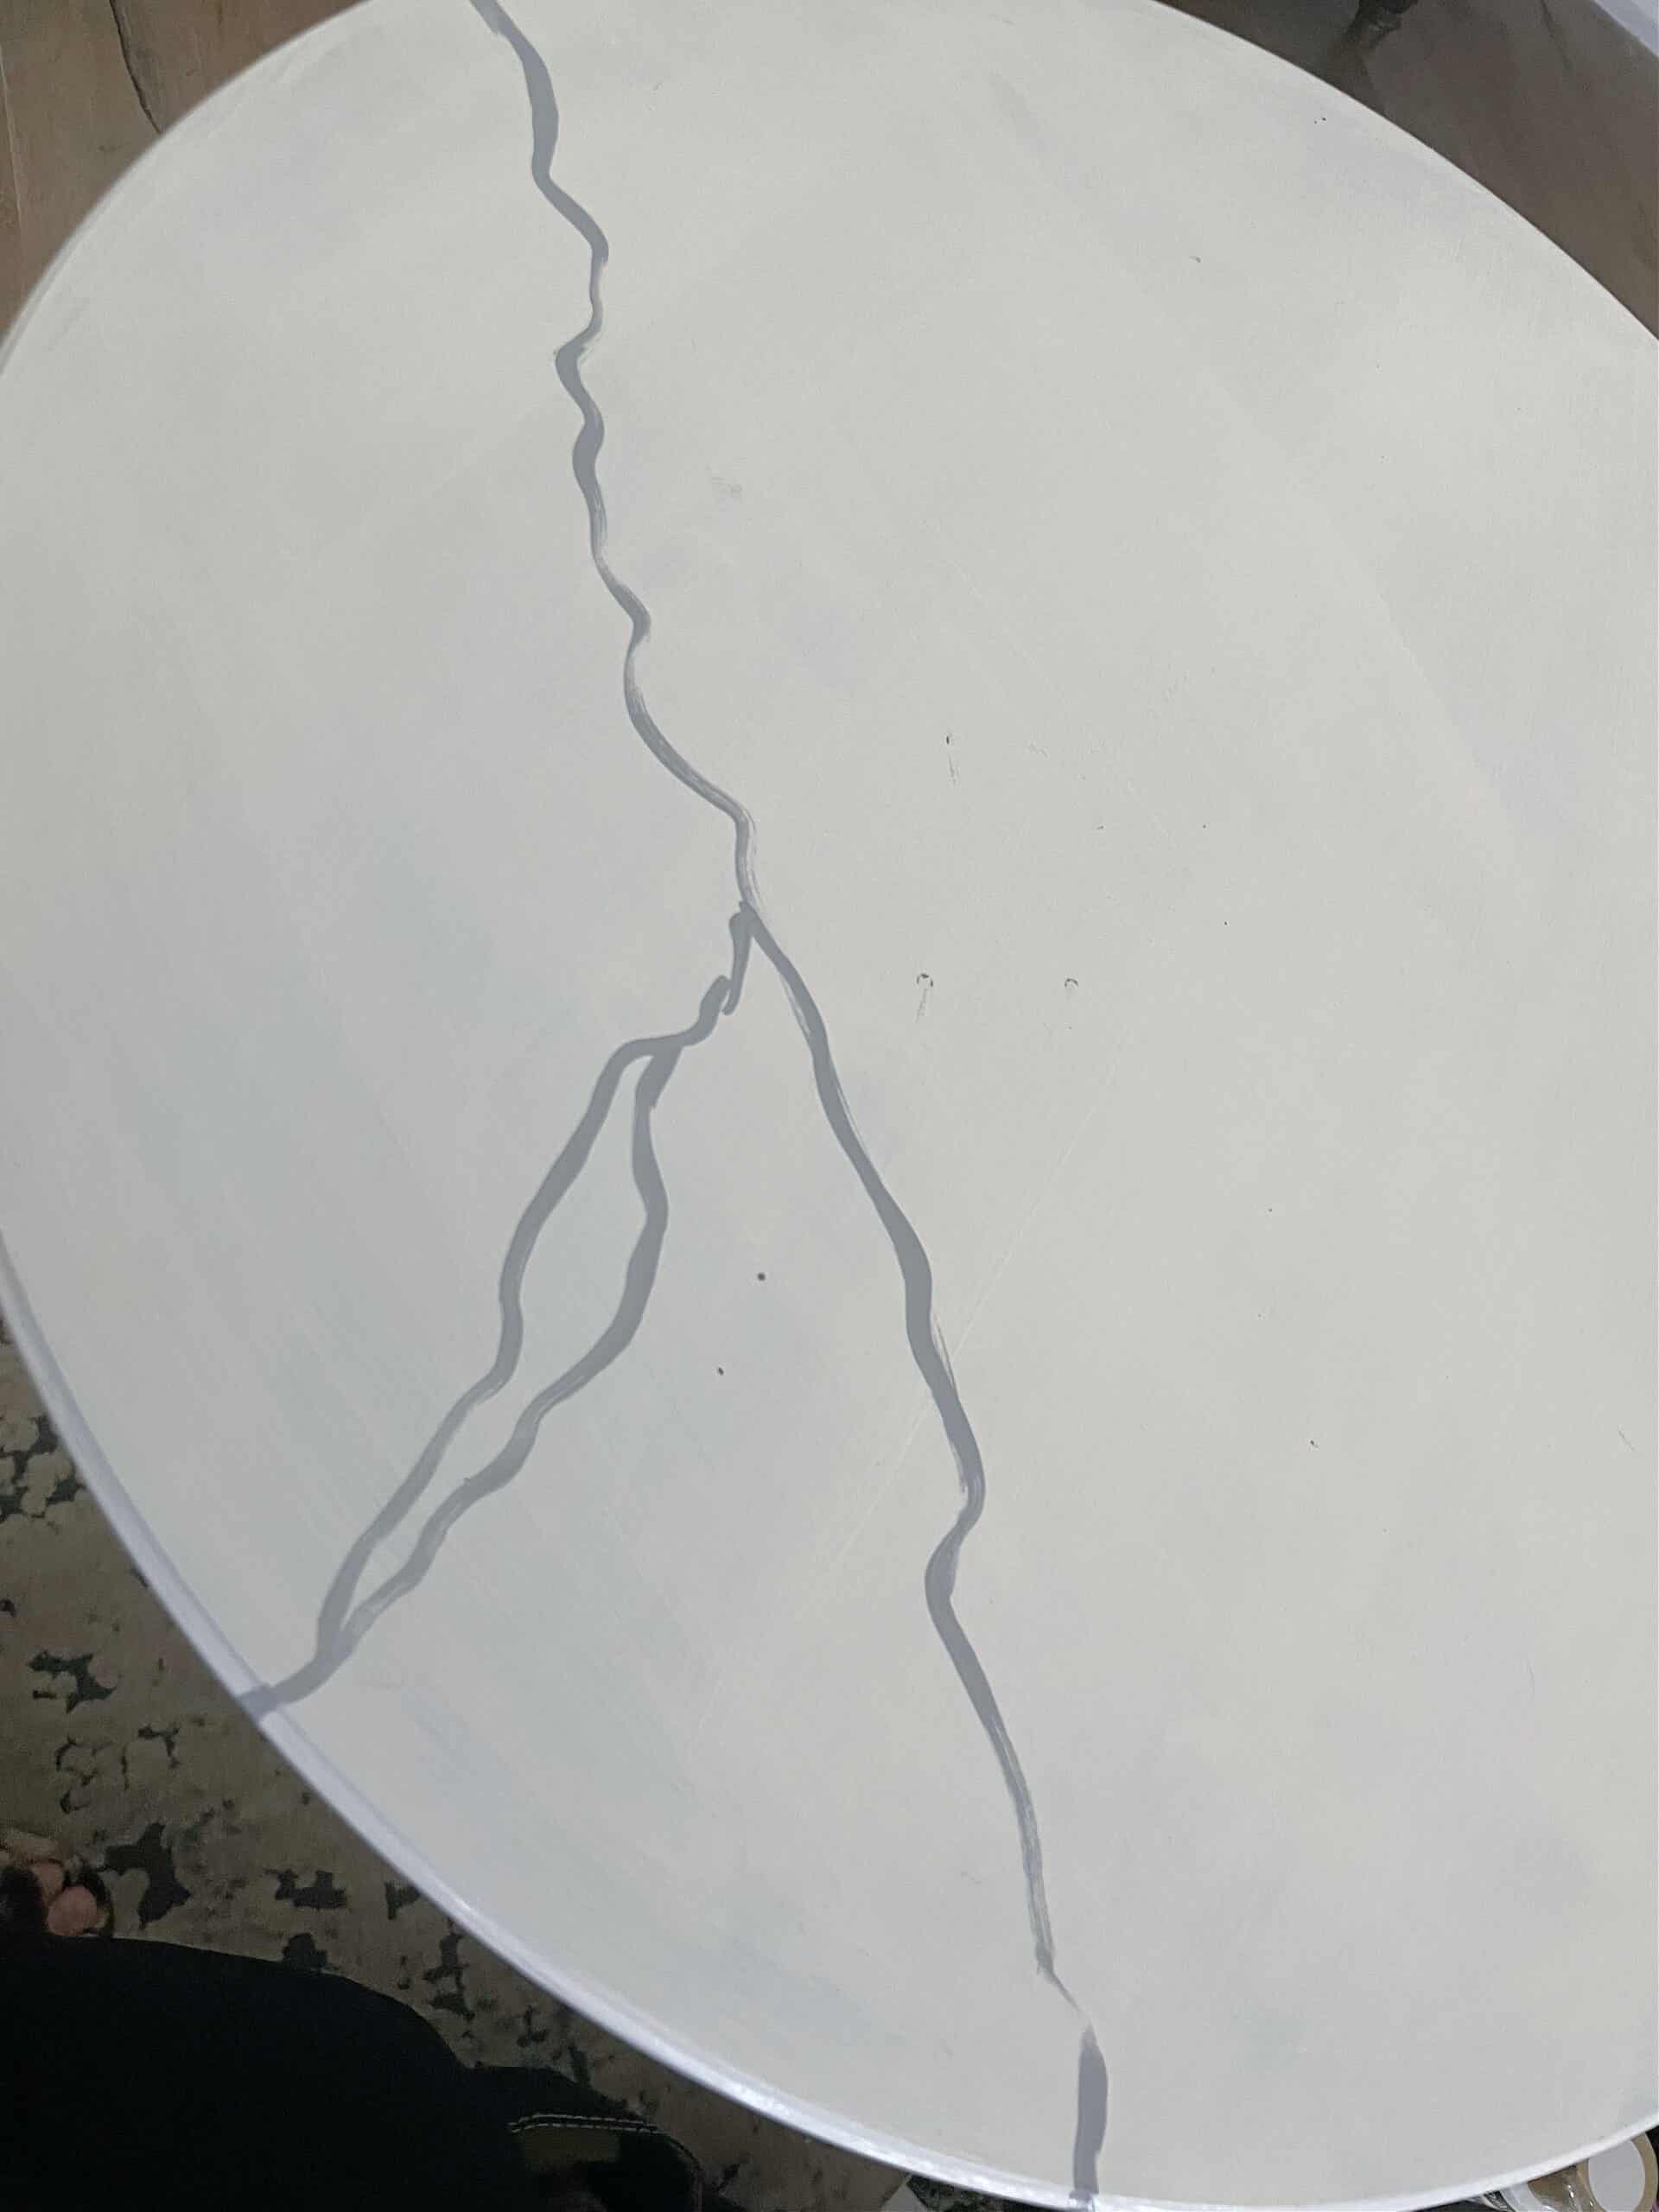
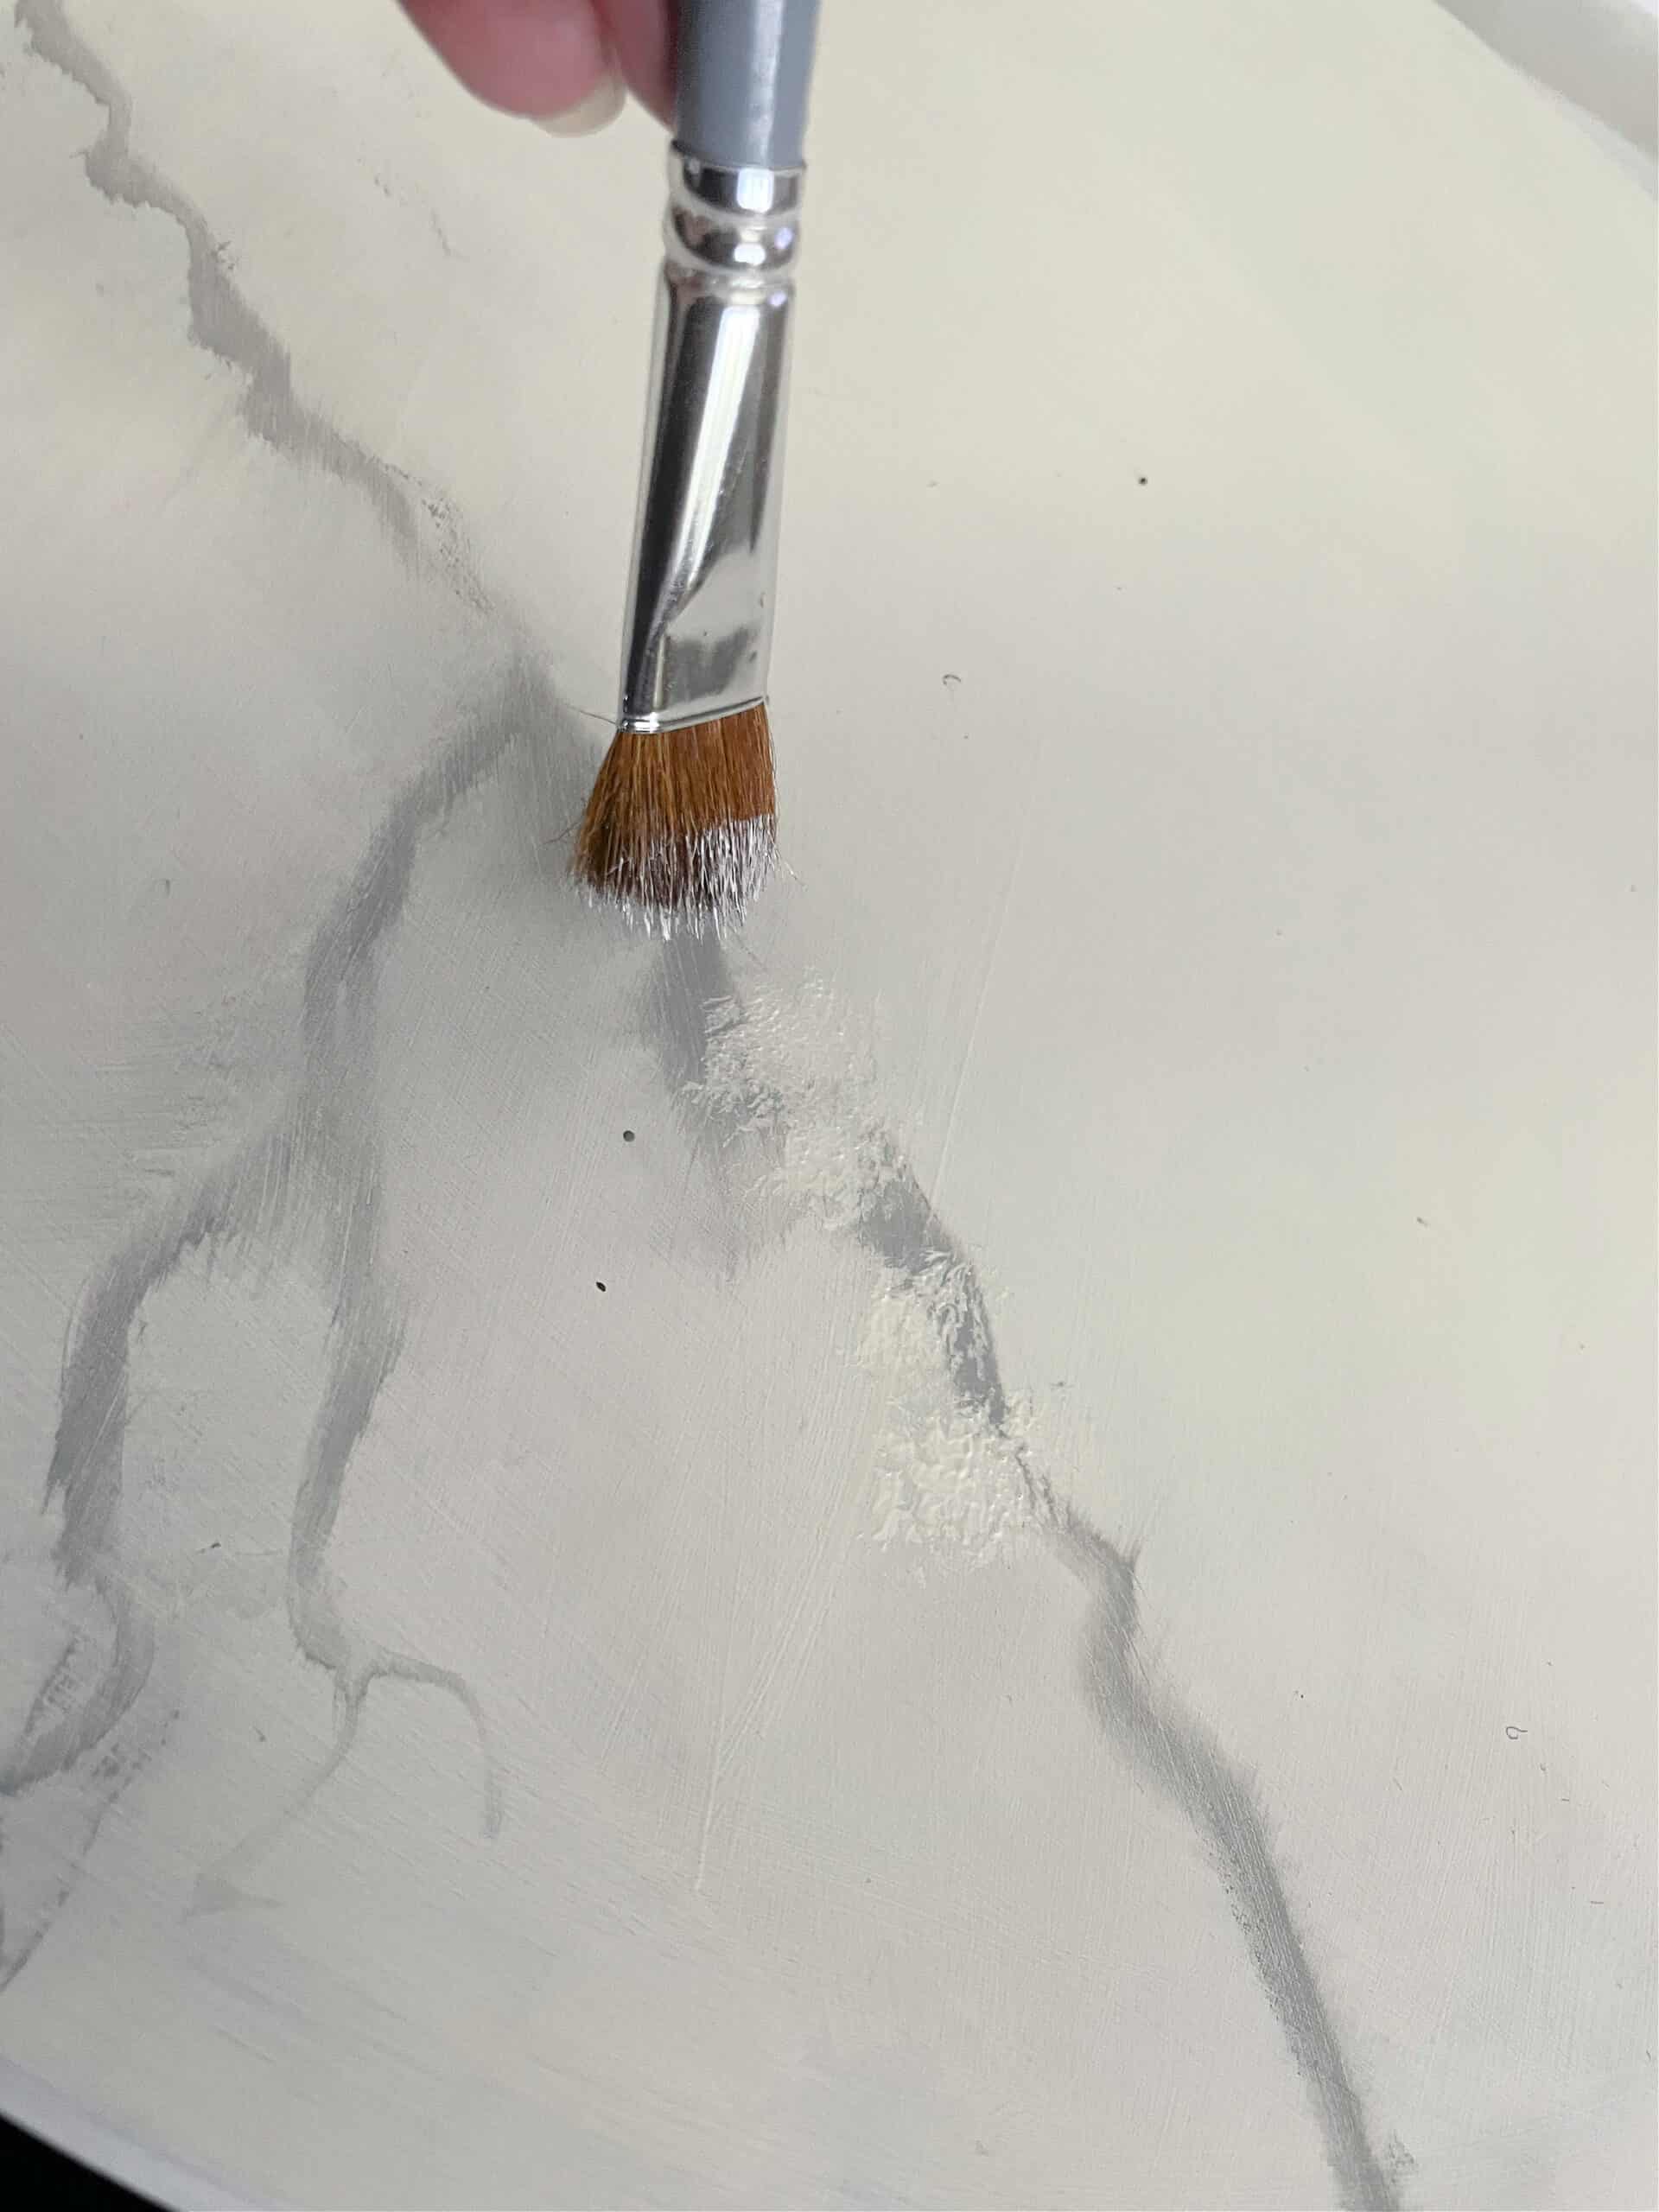
With a sea sponge, lightly pounce the veins twisting the direction of the sponge as you move down the vein. With the left over gray that accumulates on the sponge, dab the solid white areas. This will give us a soft pitted look.
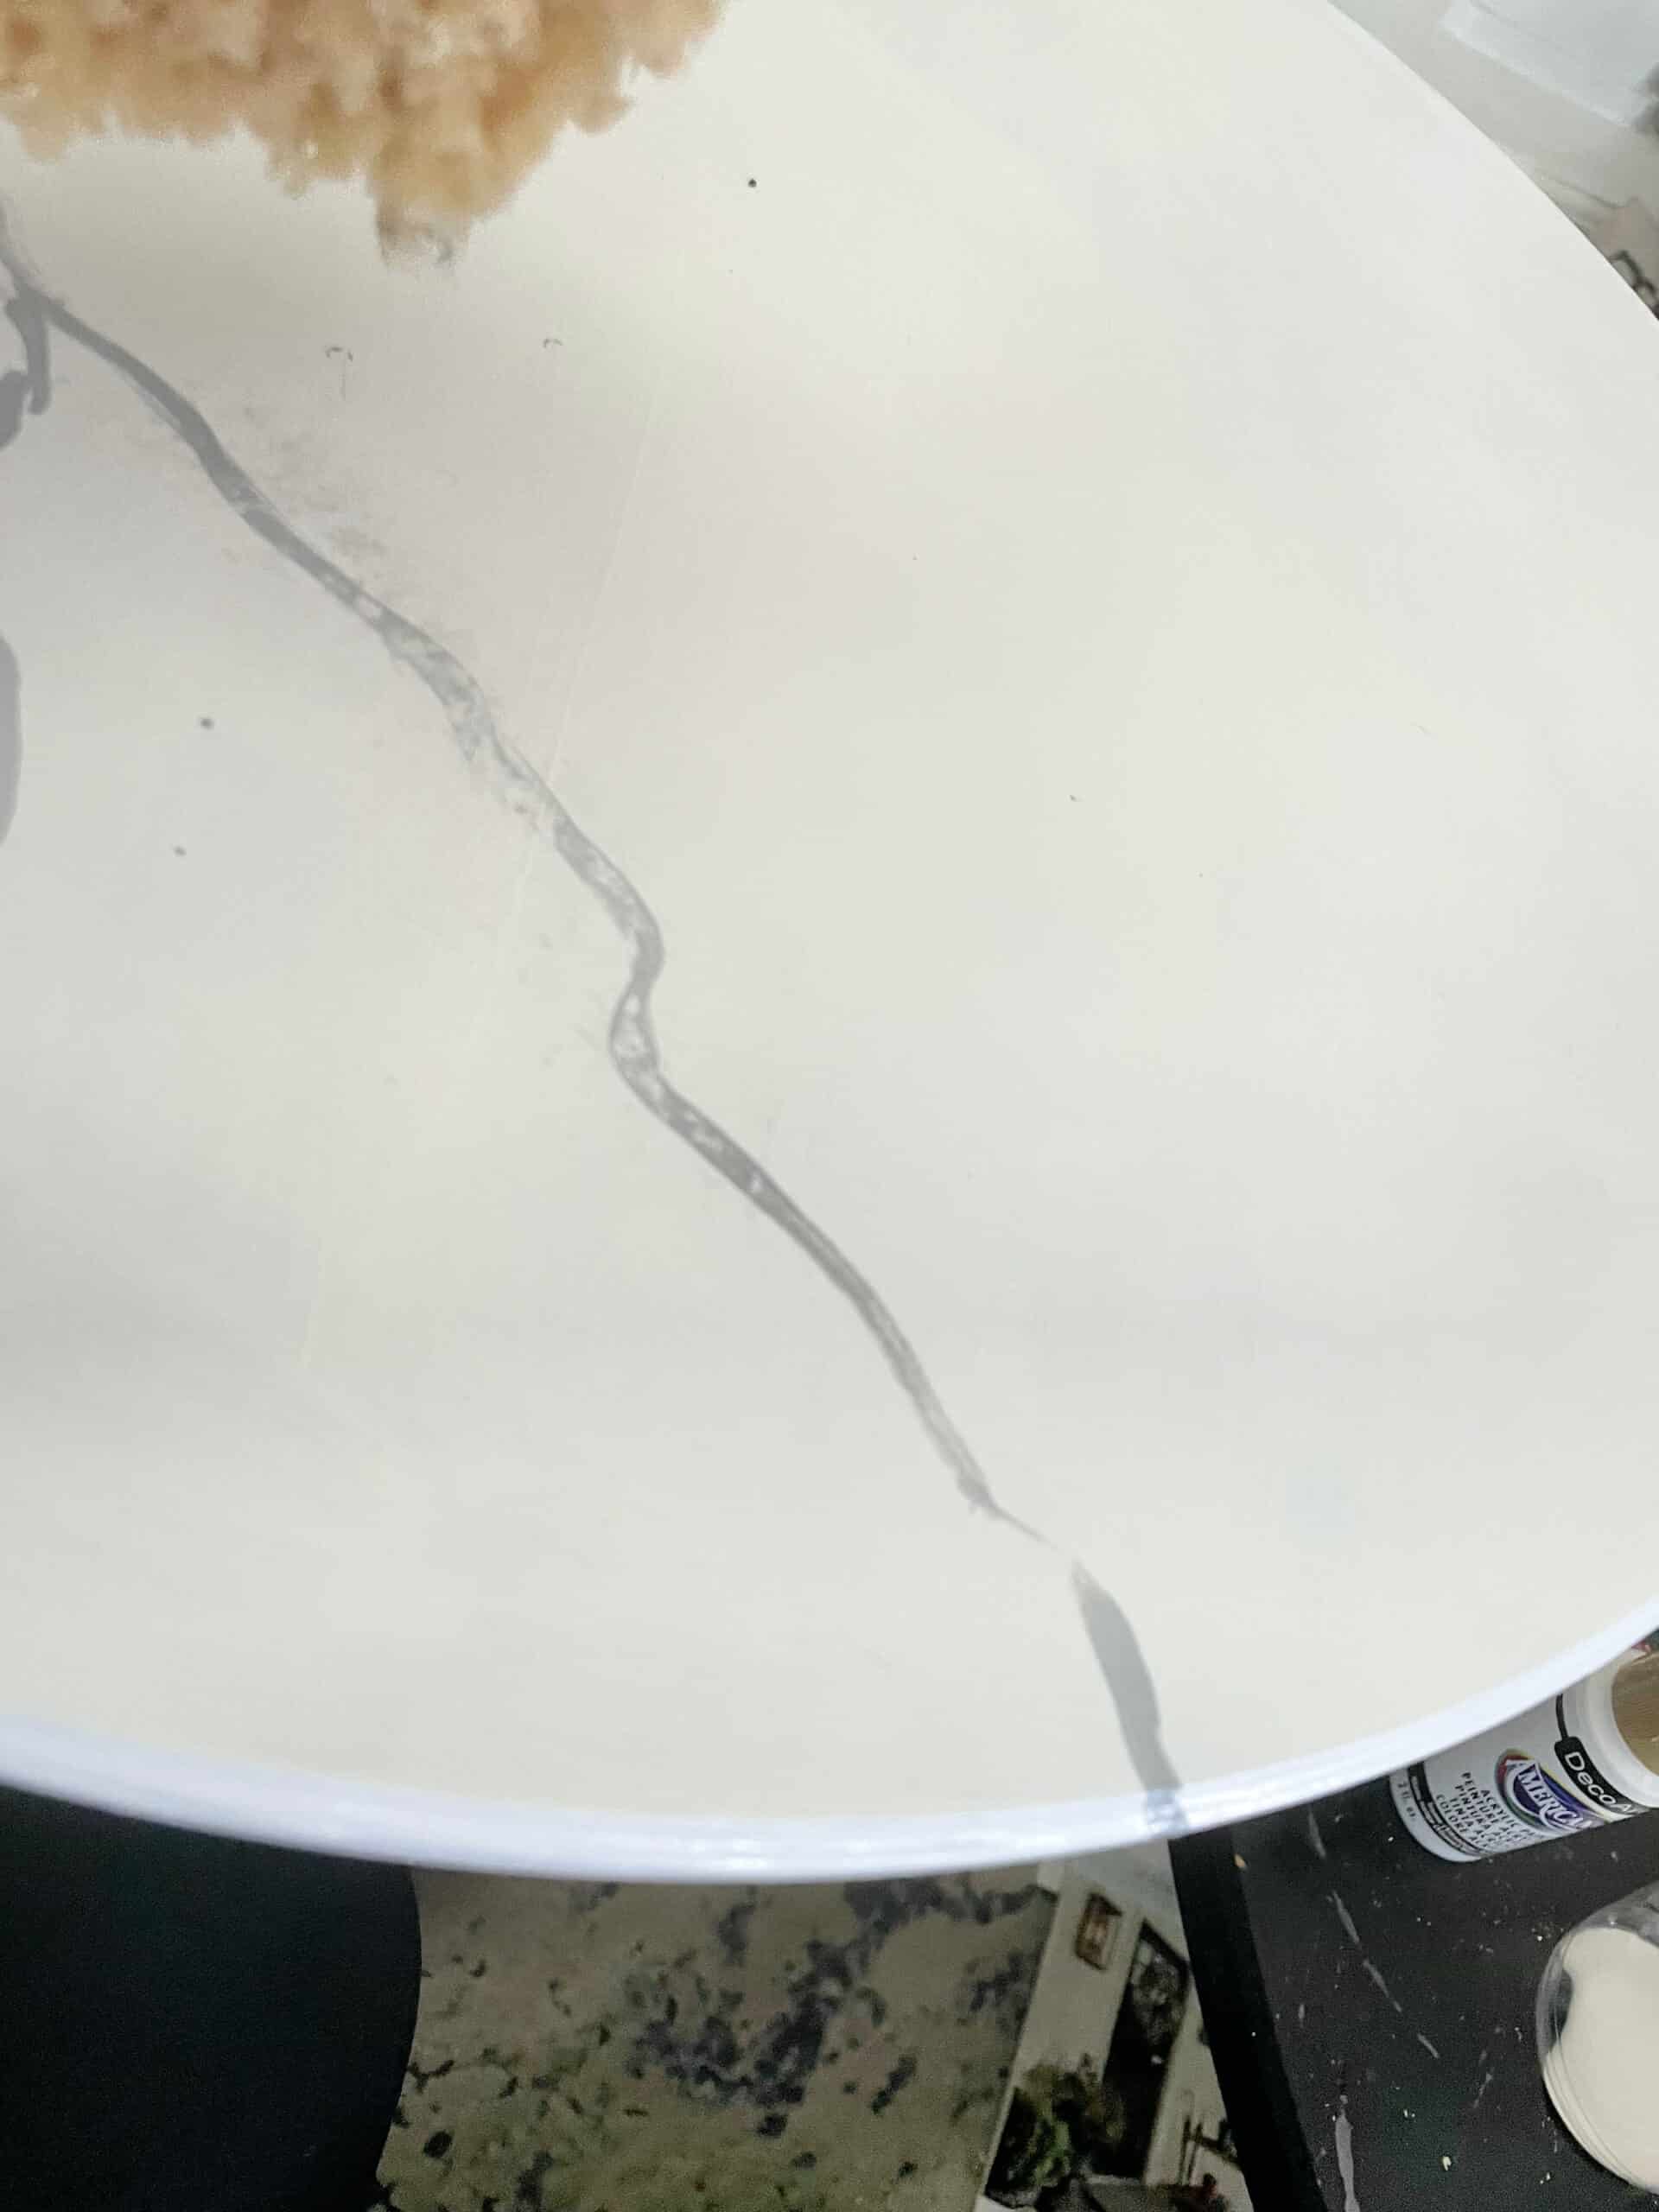
Next follow the same veins with more gray paint. Then with a large paint brush, lightly brush the veins in one direction creating a blurred effect.
Add titanium white over the veins. A little goes a long way here. We want to “push the veins back” but not completely cover.
You will add several layers and in between, take your sea sponge and blot the white paint while it is still wet.
Repeat this method over the whole table.
Add one last layer of veining by following the same veins you’ve already created but this time mix a darker gray.
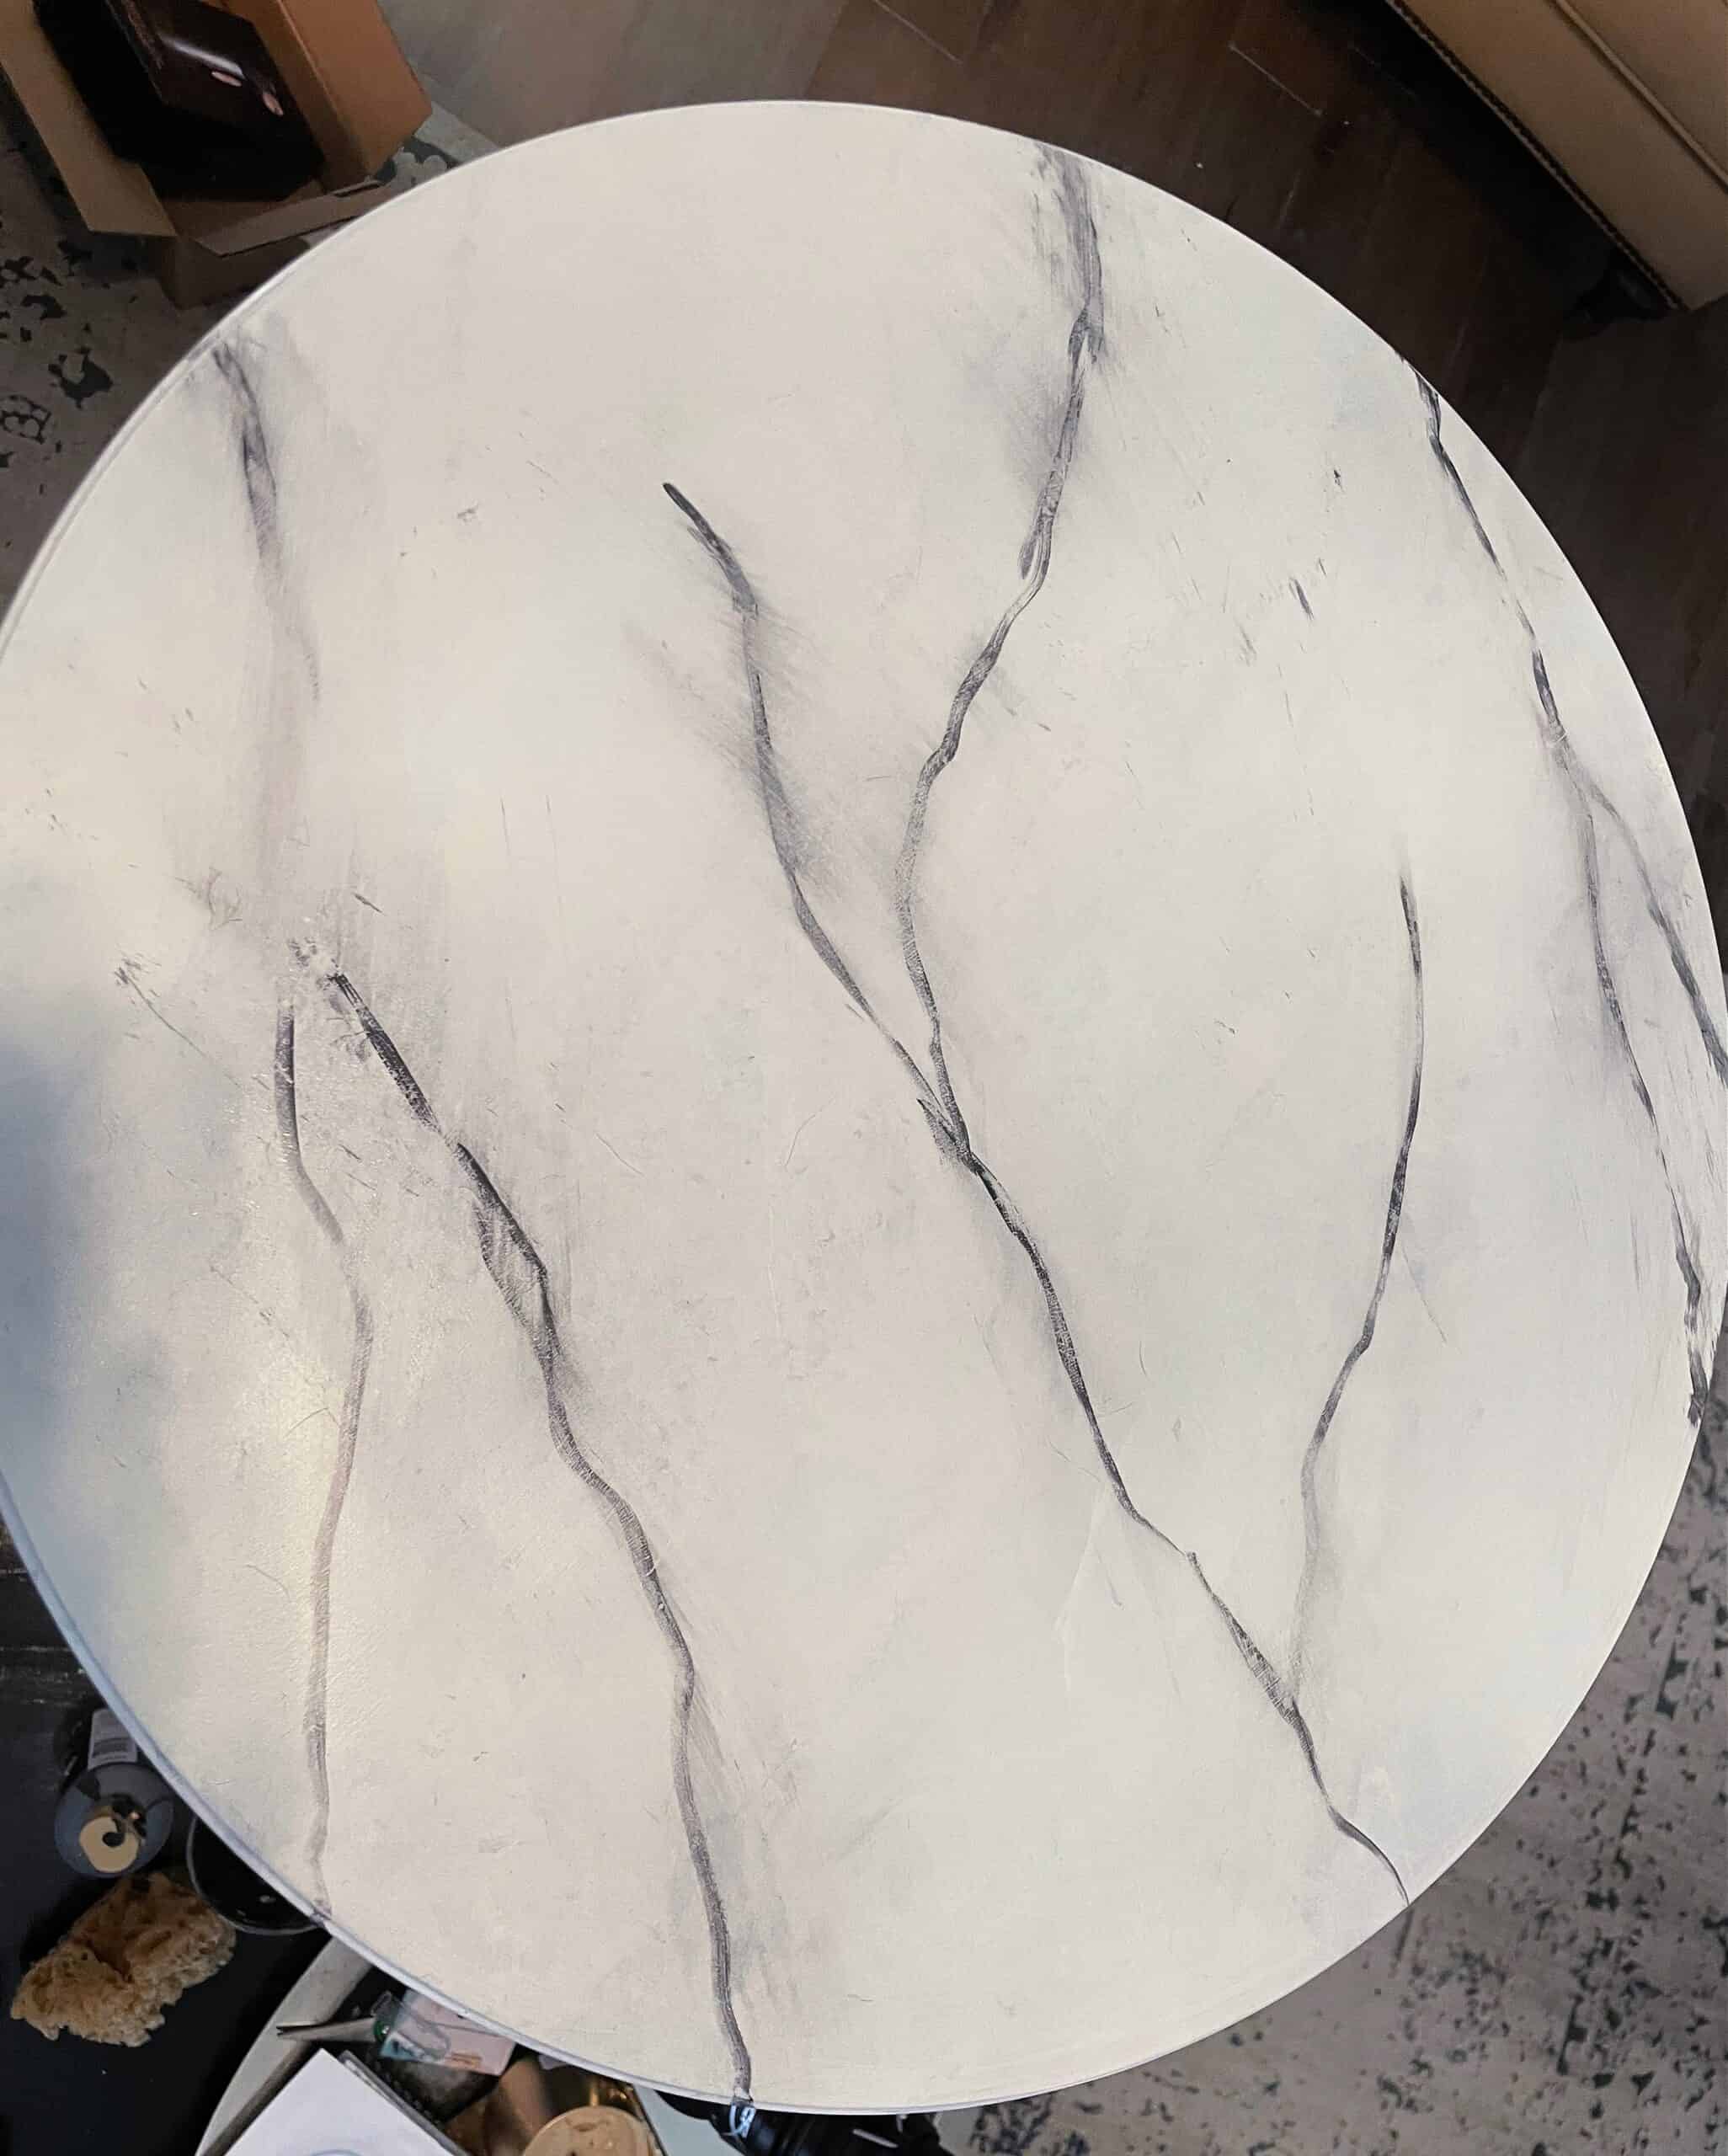
Start the process all over with brushing the veins and building up the white paint over the veins. As you look over your piece add more white paint to any area you feel is too dark.
If the paint becomes too thick in an area you can blot with a paper towel and that will create even more depth.
Add a coat of satin or glossy clear sealer to protect your masterpiece. That’s it! So easy, right?
What’s left on the media room project before the big reveal?
Oh so many things… here’s the list –
- Build storage console
- Sew accent pillows and floor pillows
- Paint frame of current movie posters
- Build movie reel coffee tables and bar high sofa console
- Accessorize for the perfect movie night
We are inching closer and so it the reveal date! YIKES! In the meantime lets go the One Room Challenge website and check out where everyone else is in their epic room makeovers.
See you next week!

Joy Maier is the founder and principal designer of The Aspiring Home Interiors, an award-winning studio serving the greater Dallas area and beyond. Blending gracious living with elevated design expertise, Joy creates interiors that feel deeply personal, beautifully refined, and effortlessly livable — from full-home renovations to boutique vacation rentals. Her professional affiliations include ASID (Associate), ART, the Interior Design Society (Professional), NKBA, VRD Collective, and she is a founding member of Designers for Dogs. Since 2012, she has shared design tips and heartfelt stories on The Aspiring Home Blog. Her philosophy is simple: “Design should feel like a deep breath. When we get it right, your home greets you with that exhale every single day.”
