How To Make This Square Boxwood Wreath
Boxwood wreath can be expensive. See how to make this square boxwood wreath with just a few items.
This boxwood wreath is perfect for the front door. I love a good welcoming front porch or stoop. I have tried to make the most of ours over the years in different houses. Hanging a beautiful wreath on the door is one way of creating an inviting entrance and this particular one is so lux feeling. Today I am excited to share how to make this square boxwood wreath
One of the best ways to create a welcoming front porch is to start with a boxwood wreath. Add instant charm and the bonus? This type of evergreen wreath can be used to decorate for any season.

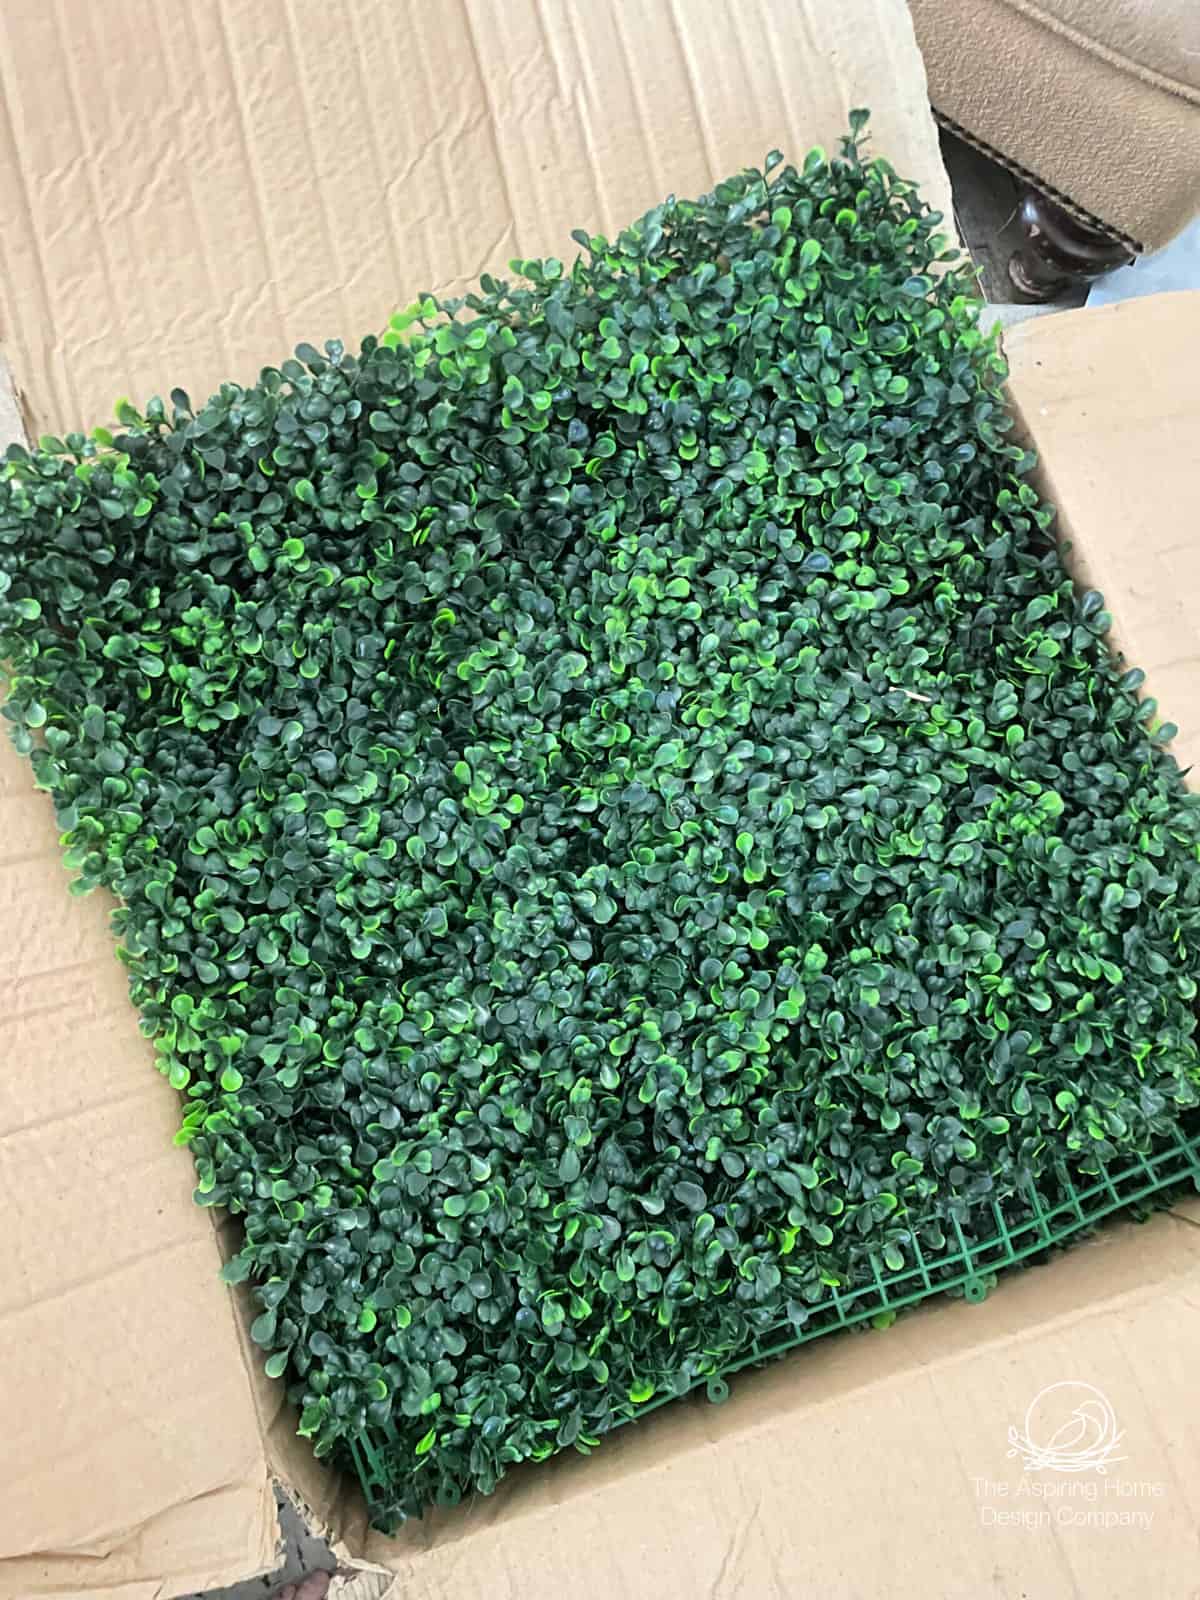
This idea came about because I had an extra box of faux boxwood greenery for screening. Say that three times fast, HA! I found it on Amazon and it was perfect when we took our plain jane driveway/patio to a little get away complete with herb garden and outdoor movie set up
And like usual, It was packed up and moved to the new house just in case it could be used. Well, it has been waiting for transformation for 2 years but today is the day!
Oh and I have a fun idea for the rest of the pieces, I can’t wait to share with you! So let’s get started making one of these boxwood wreaths!.
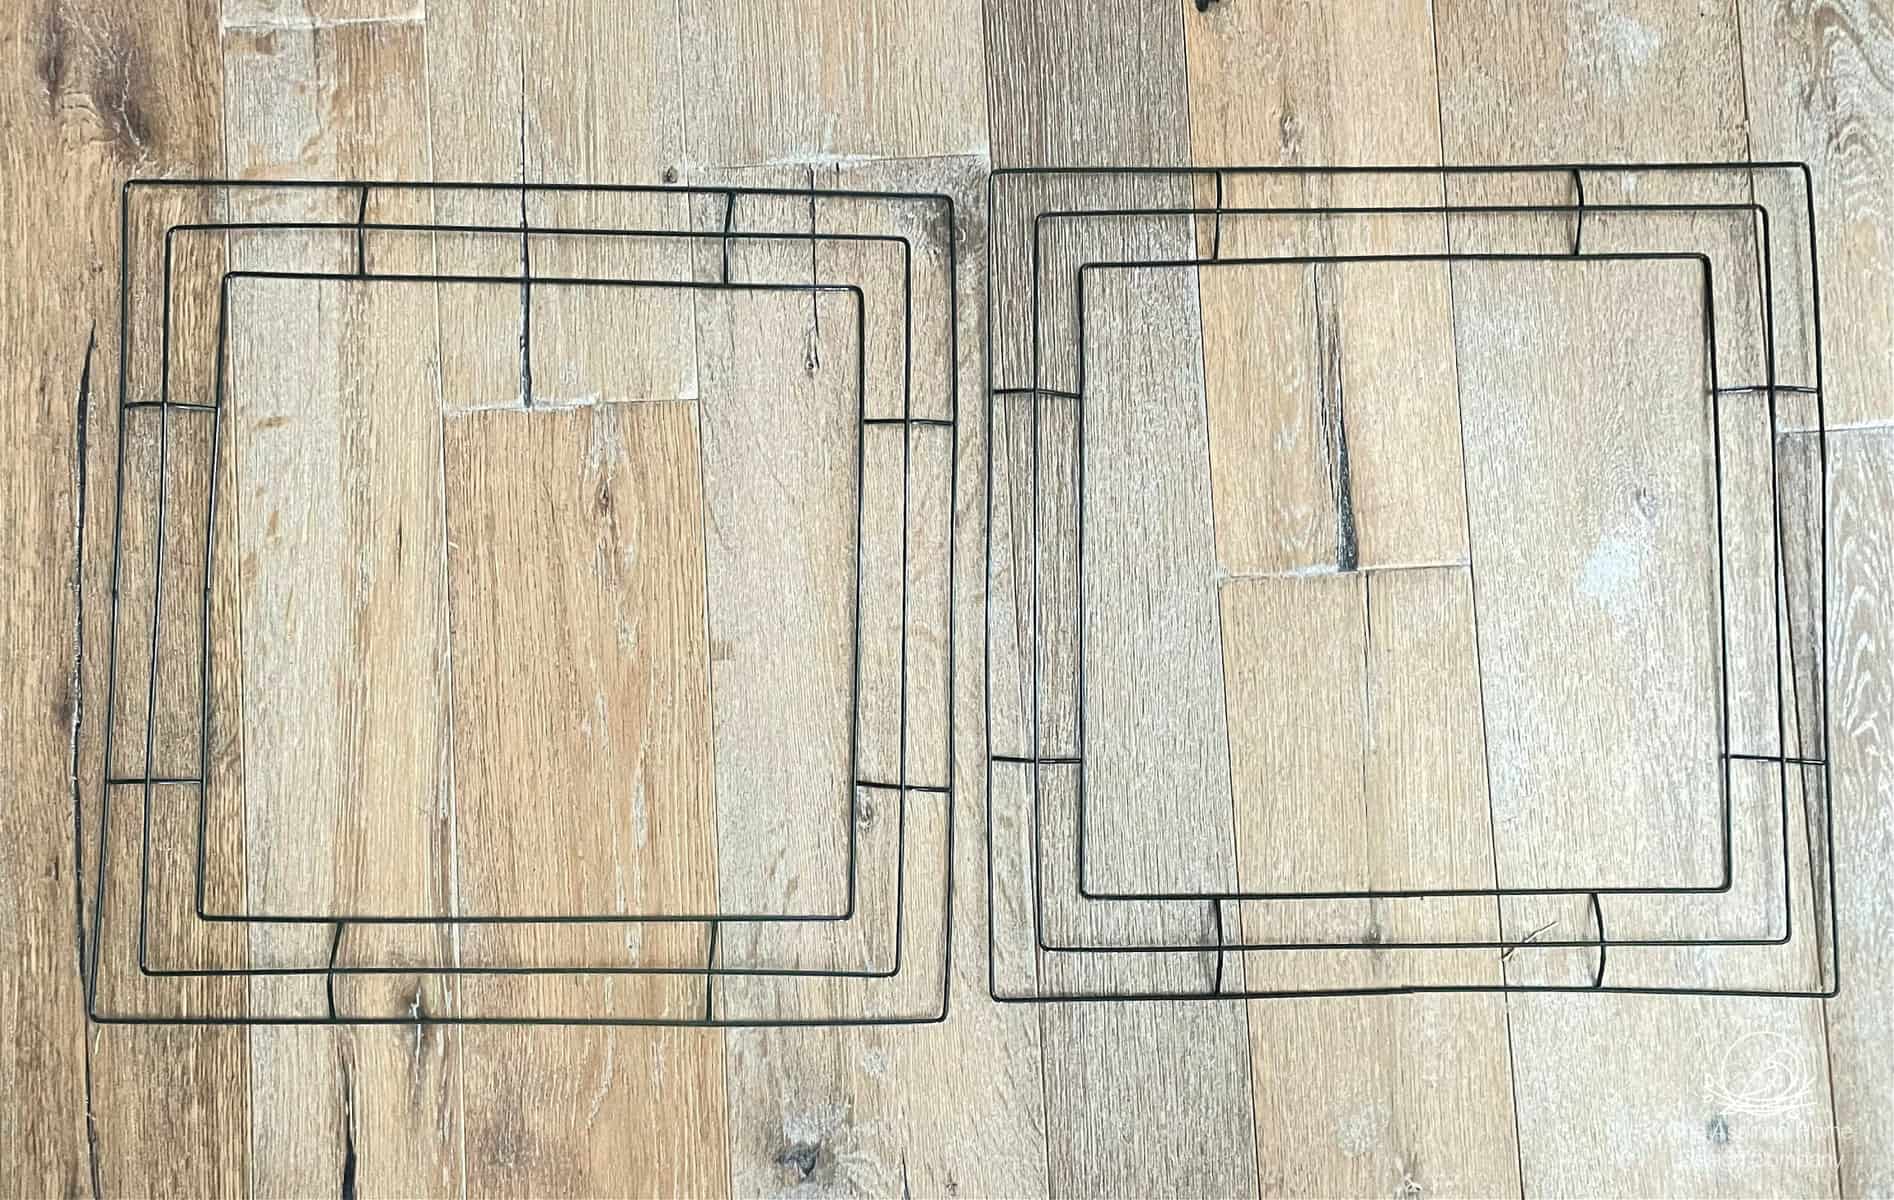
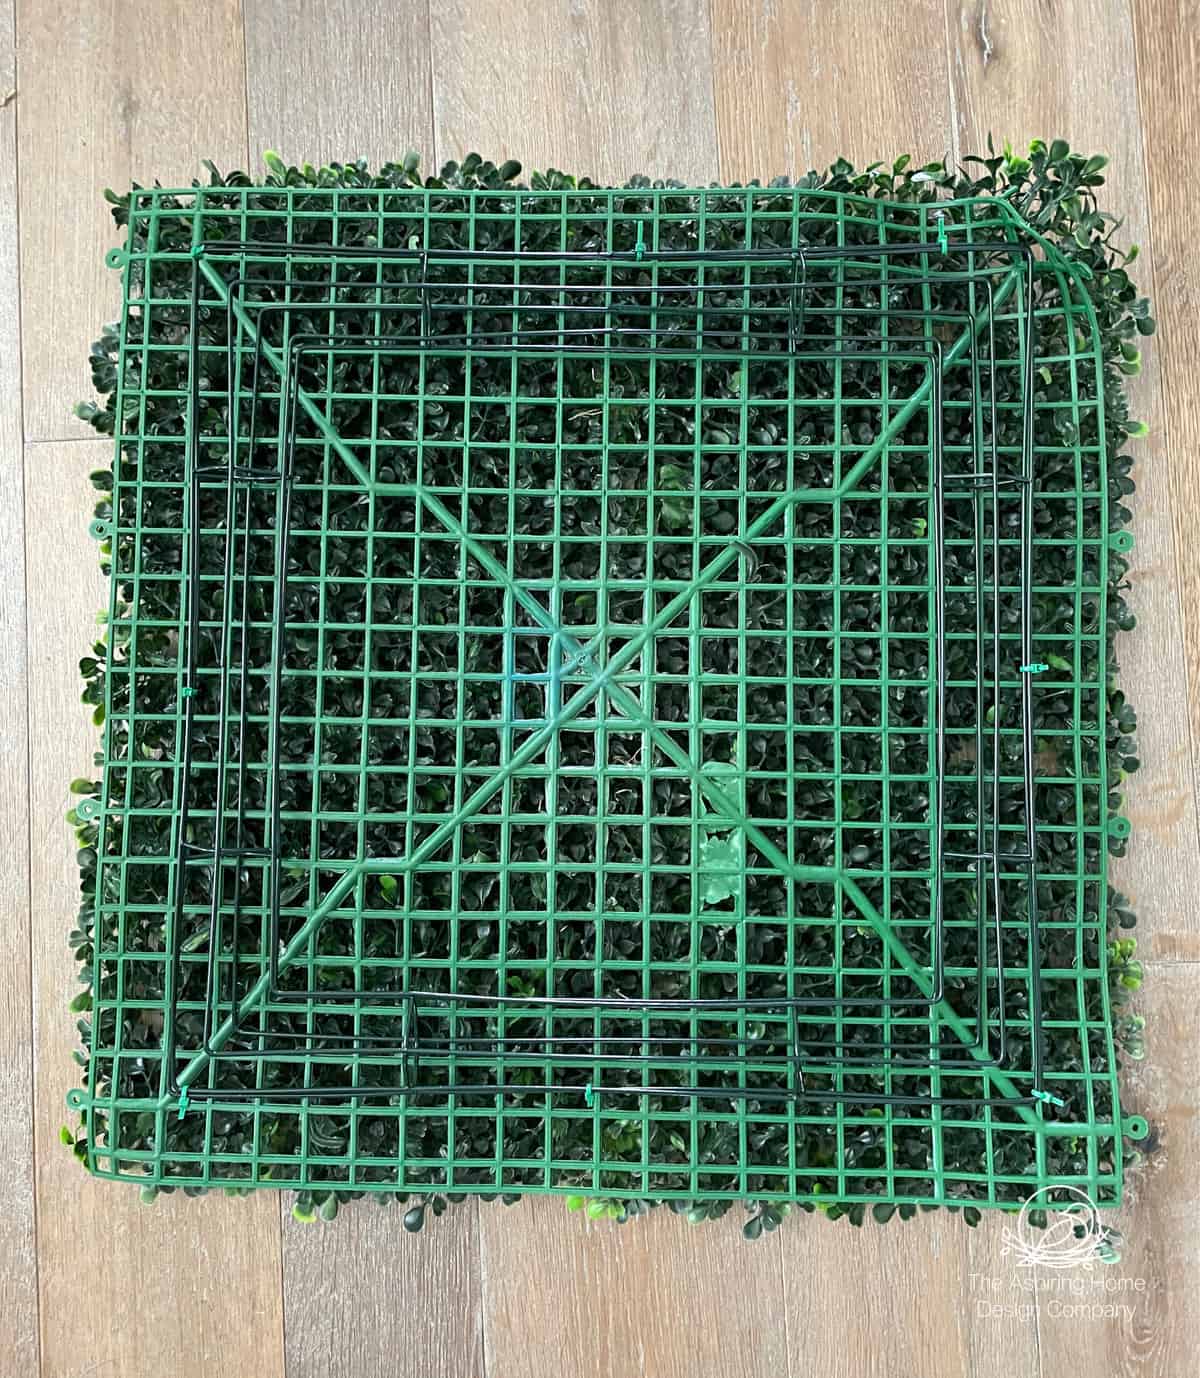
Step 1: Choose your wire wreath frame
These are 16 inch square wire wreath forms – perfect for my front door.
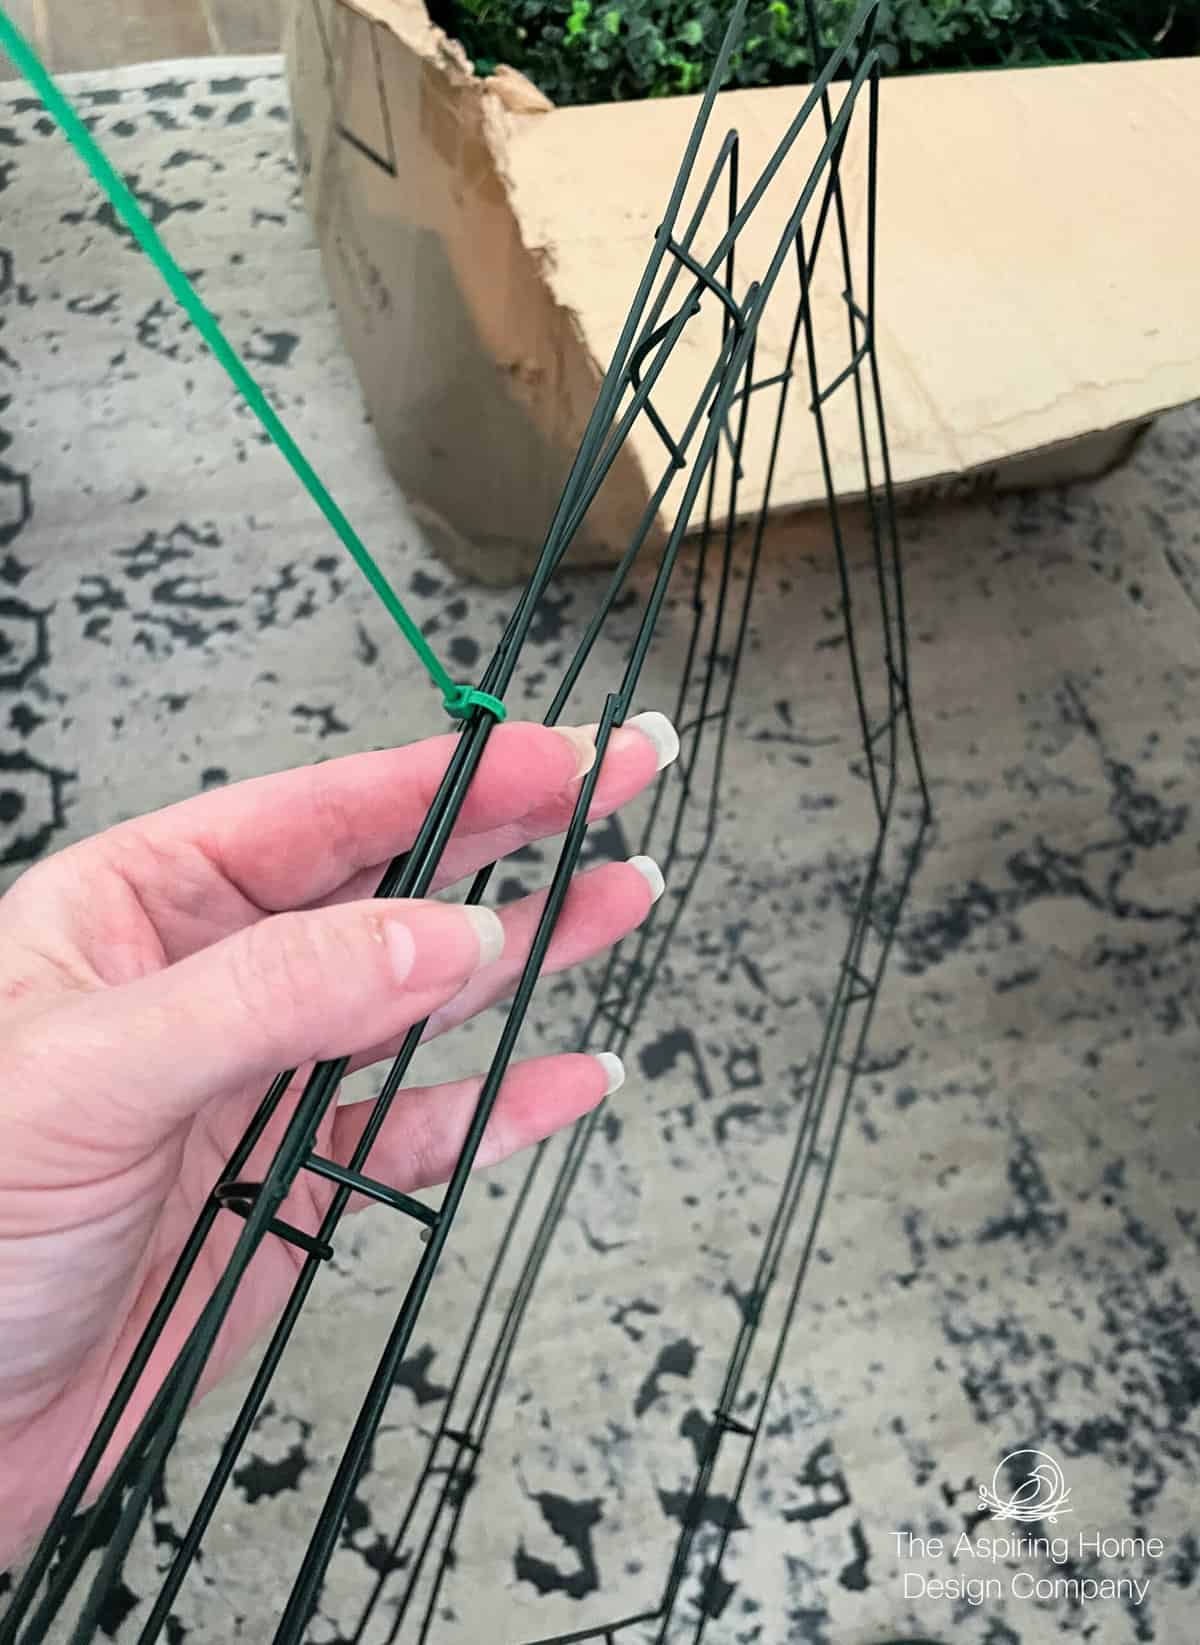
Step 2: Bend the wires
The wire forms seemed a little flat to me and putting two together to create thickness, just seemed redundant. However, if I bend the wires slightly out – I get a more 3D look and just that little bit of movement made all the difference.

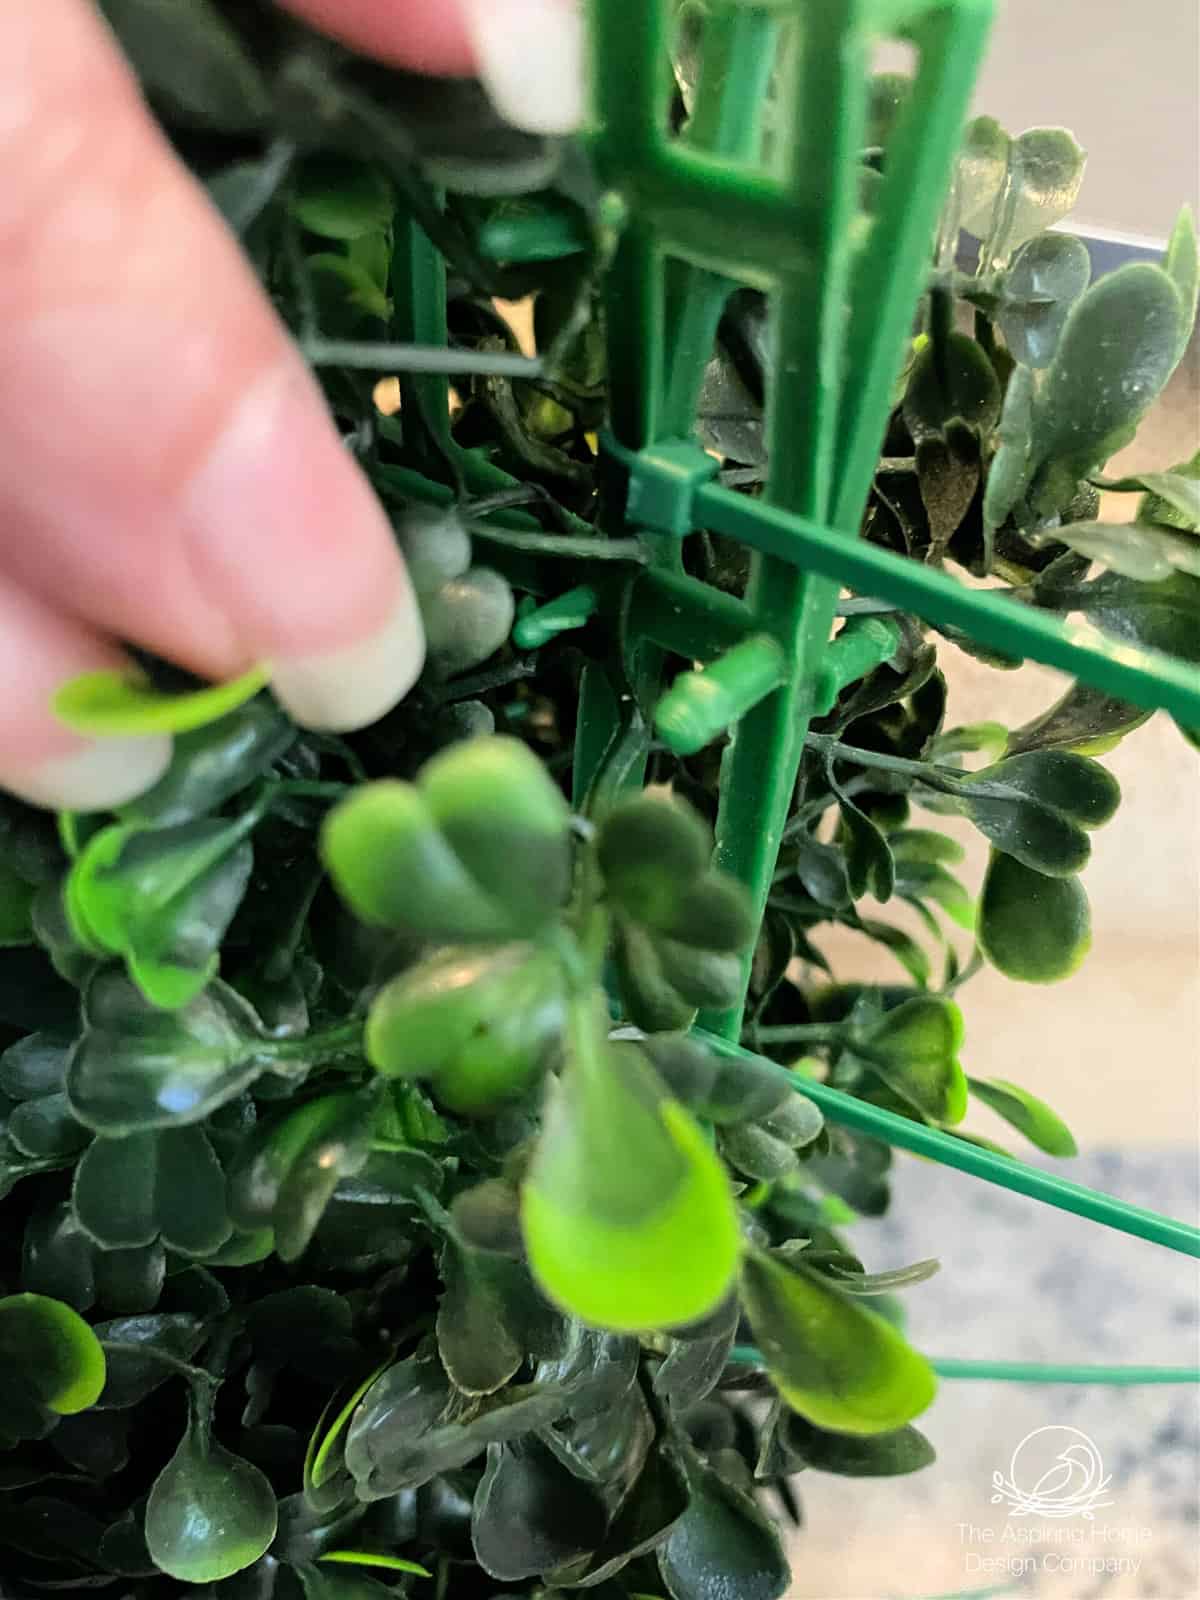
Step 3: Zip-tie
I used narrow green zip-ties to connect the wire wreaths. This was super simple and the extra firmness helped the wreath structure.
Step 4: Lay out and attach
Lay out the wire form to allow about an inch and 1/2 overhang. This is allow for a little bit larger wreath and make it easer to zip tie the two boxwood sides together for the finished wreath.
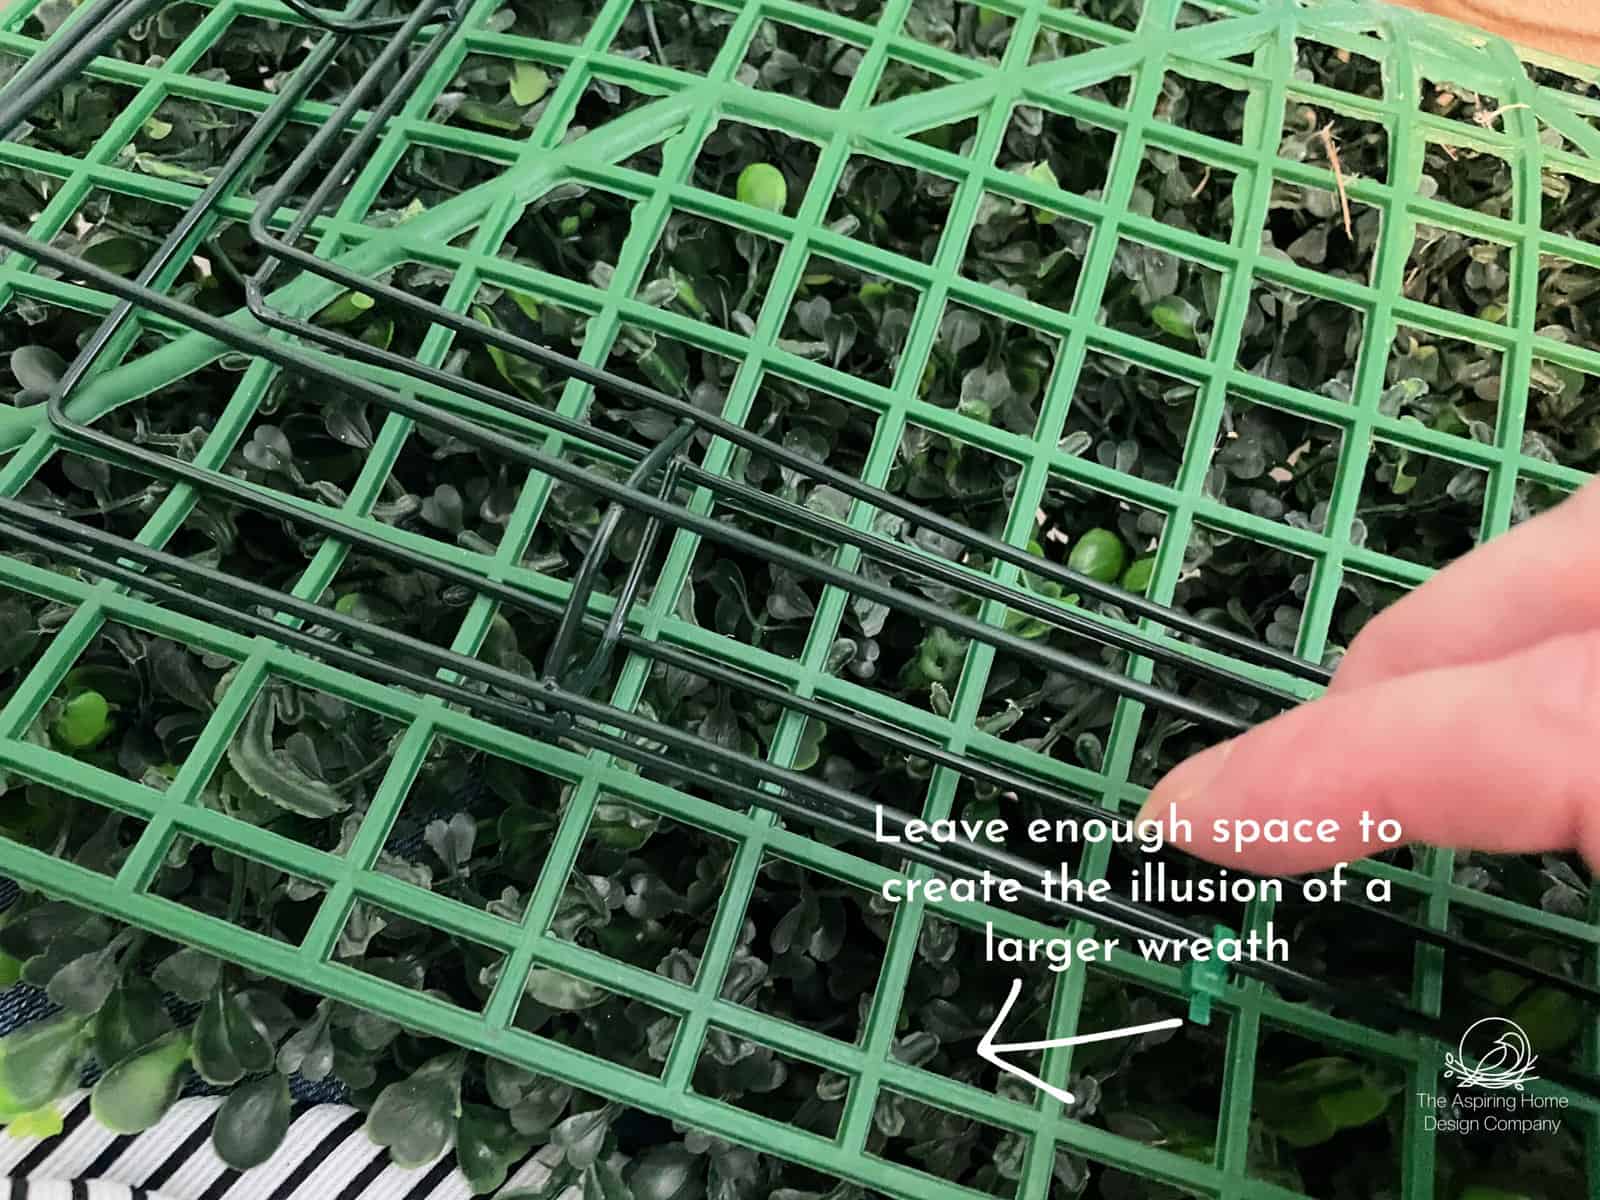

Step 5: Trim the boxwood
Time to cut out the center! I counted out two squares away from the wire form and began cutting. Super easy and allowing the extra space will allow for the illusion of a thicker wreath.
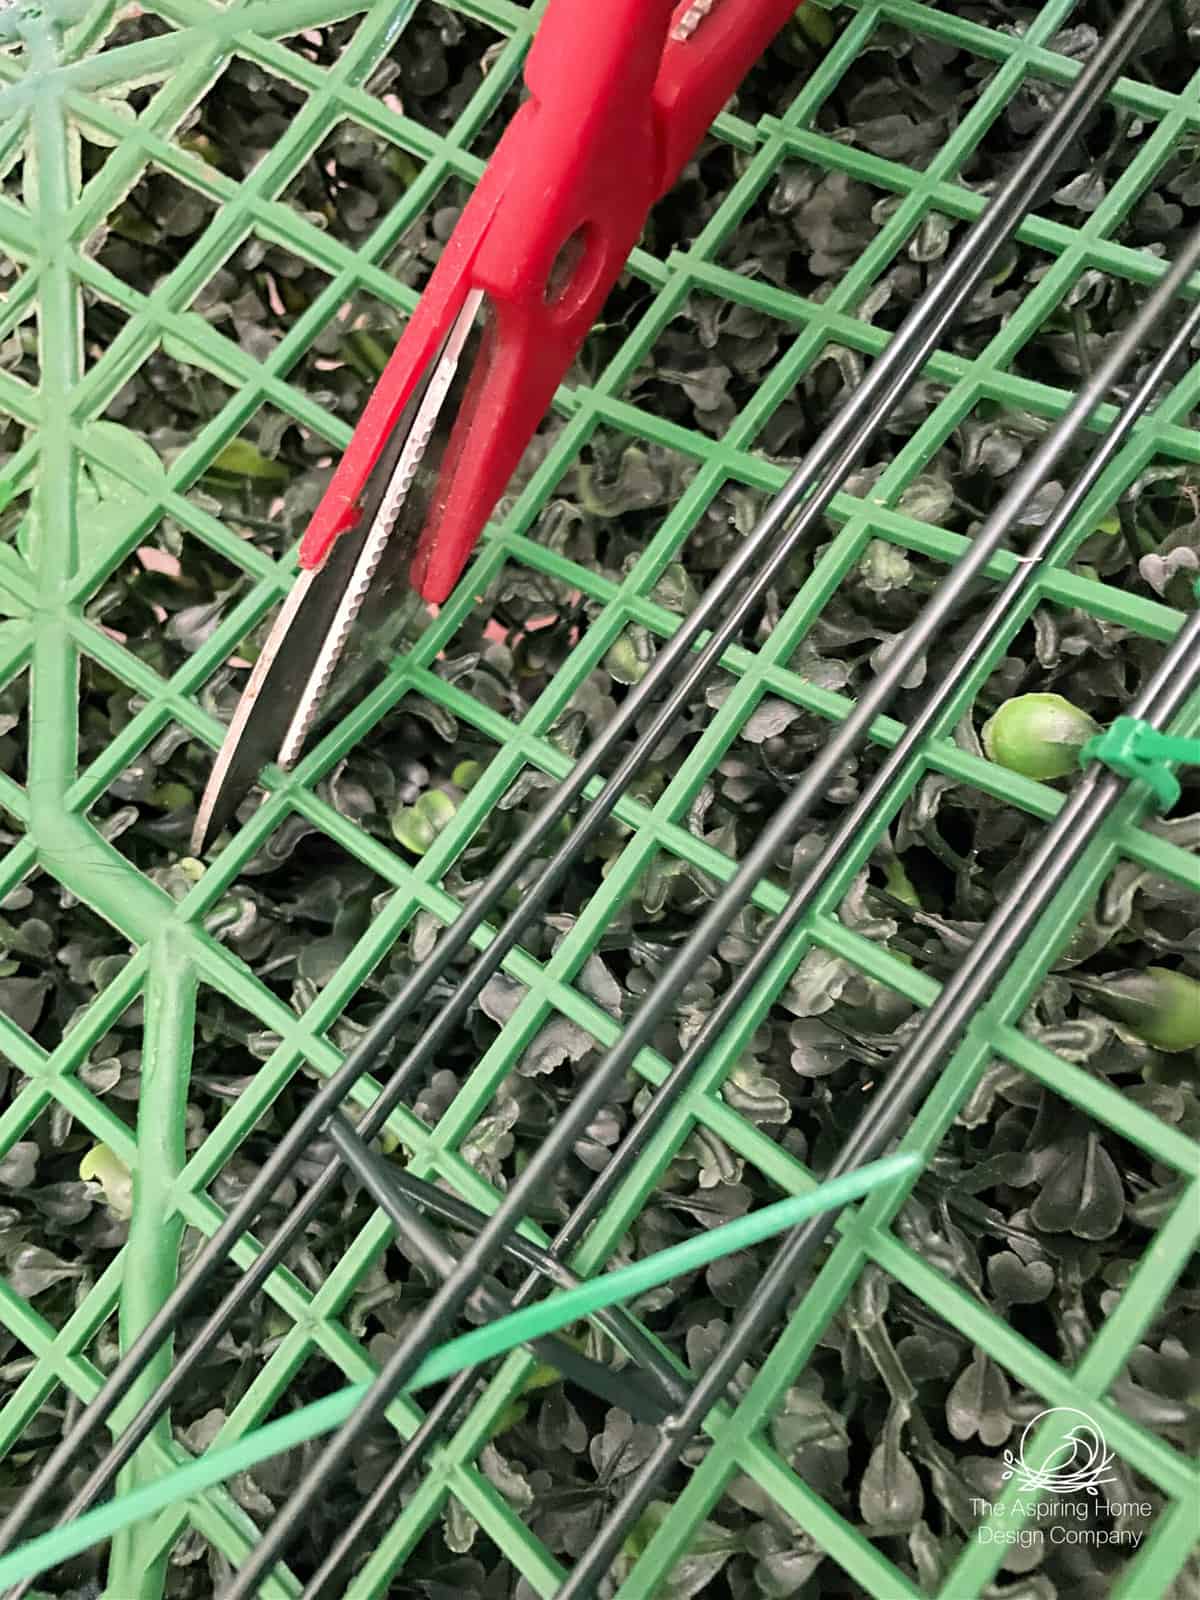
After the first side is attached. Mark and count out the center area to be cut on the second piece – doing this step before attaching will make putting the wreath together so much easier.
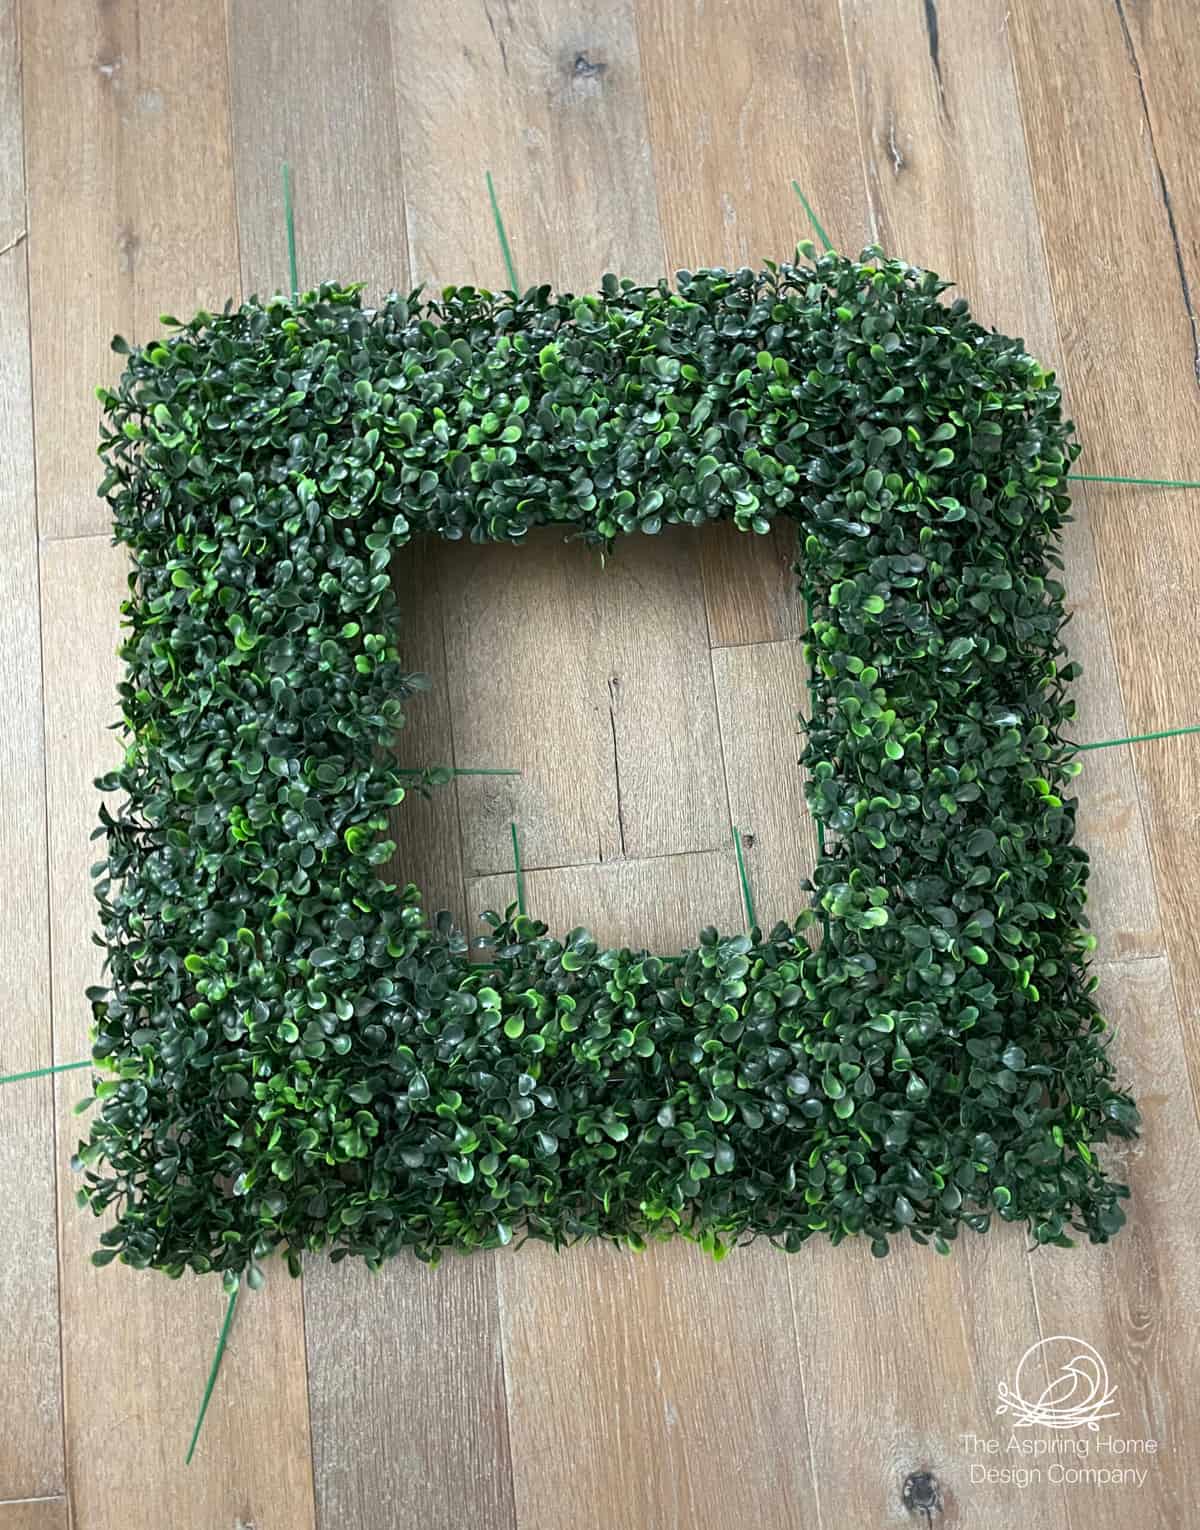
Step 6: Close the sides
Finally, use a zip tie to connect the front and back boxwood pieces together around the edges. Start with the corners first to assure the wreath’s alignment. Add zip ties as needed to secure.
That’s it, carefully snip the zip tie tails and gently fluff the faux boxwood to cover the edges. All that’s left to do is hang your lush wreath!
If you want to create a truly inviting space, consider adding a few boxwood wreaths to your décor. You can find boxwood wreaths in a variety of sizes and styles, so it’s easy to find one that fits your porch perfectly. That is if you do not want to create one.
Hang one on your front door and another on a nearby window to add a touch of Christmas cheer. Or, try creating a spring-inspired wreath by adding some fresh flowers to your boxwood wreath.
Whatever style you choose, boxwood wreaths are an easy way to create a warm and inviting front porch and now you have a more affordable way to make one!
I put together a little shopping list to make it easier for you. Please note, that these are affiliate links and i may receive a small commission if you choose to purchase at no additional charge to you. Just click the link and it will take you to the store front page.

Next up – I will be making the prettiest wreath sash -find it here!
Until then, keep creating home my friends,

Joy Maier is the founder and principal designer of The Aspiring Home Interiors, an award-winning studio serving the greater Dallas area and beyond. Blending gracious living with elevated design expertise, Joy creates interiors that feel deeply personal, beautifully refined, and effortlessly livable — from full-home renovations to boutique vacation rentals. Her professional affiliations include ASID (Associate), ART, the Interior Design Society (Professional), NKBA, VRD Collective, and she is a founding member of Designers for Dogs. Since 2012, she has shared design tips and heartfelt stories on The Aspiring Home Blog. Her philosophy is simple: “Design should feel like a deep breath. When we get it right, your home greets you with that exhale every single day.”
