Make This Wreath Sash From Painter’s Canvas Drop Cloth
Here’s a fun idea that uses leftover painter’s canvas drop cloth material. Make this wreath sash easily by following these steps.
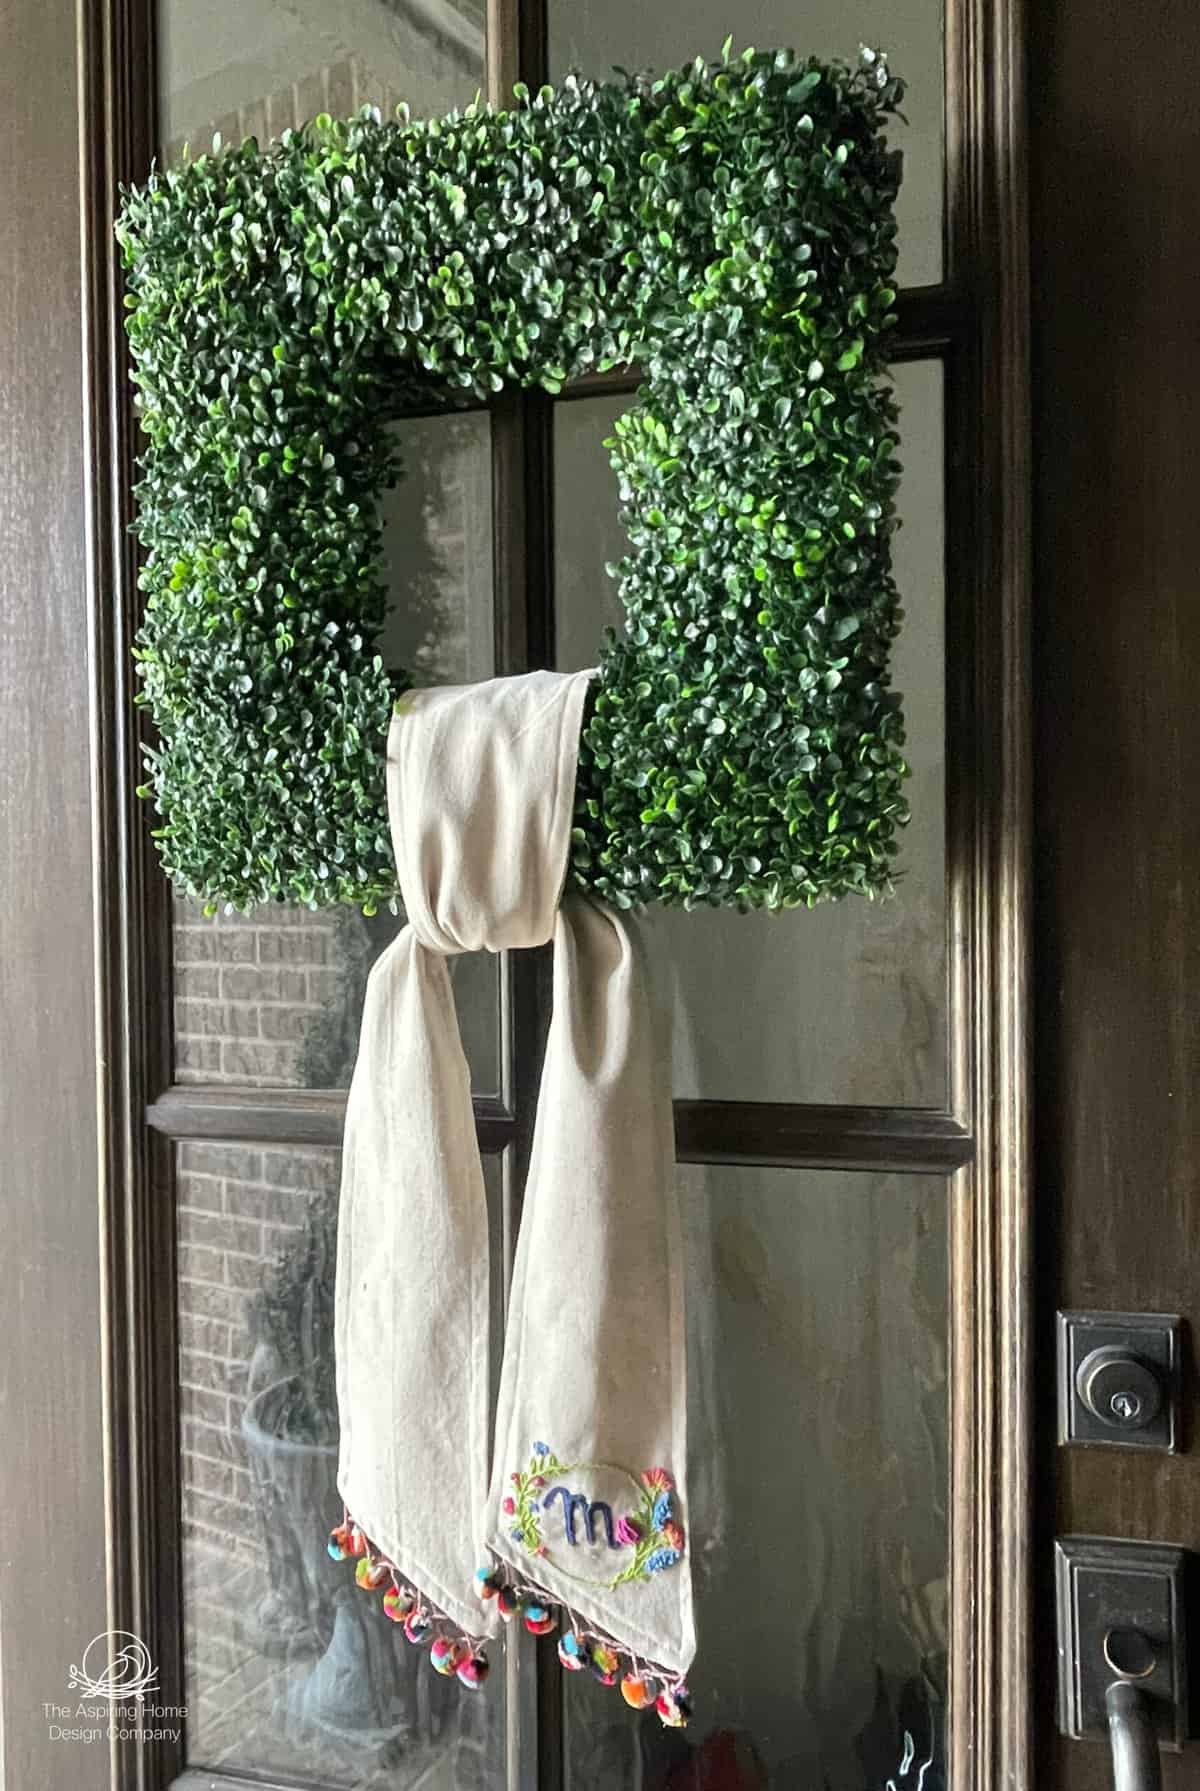
I’m back with another easy project made out of painter’s drop cloth material! This time it’s for the front door. I put my own spin on the growing in popularity, monogrammed wreath sash. Who doesn’t need a wreath sash from drop cloth?
I am such a fan of this modest material, I keep finding so many ways to make more than just a protective barrier during the painting process. Find my favorite painter’s drop cloth material from Harbor Freight.
Painter’s drop cloth material is such a versatile tool in creating projects for the home including this monogrammed wreath sash DIY. Ready to make your own? Let’s get started!
Monogrammed wreath sash from drop cloth tutorial:
Supplies –
- Drop cloth
- Sewing Machine & thread
- Embroidery thread & needle
- Trim (optional)
- Mat and rotary cutter
- Scissors
- Ruler or tape measure ( I used a quilter’s ruler)
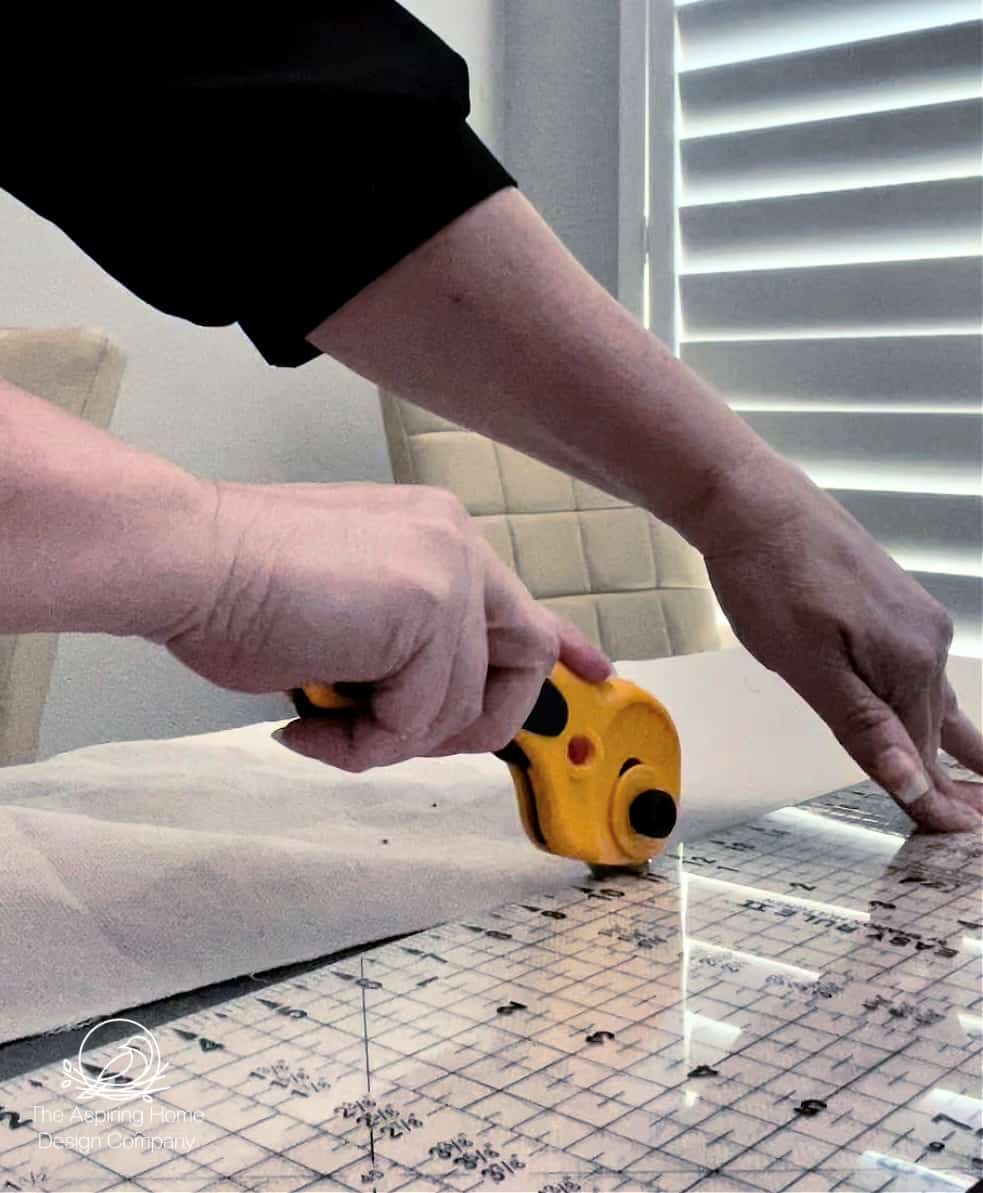
Step 1 :Cut
Begin this project by cutting out the sash pattern. I used a 6 inch wide quilter’s ruler to make this as easy as possible. 6 inch width allows me a 1/2 inch seam.
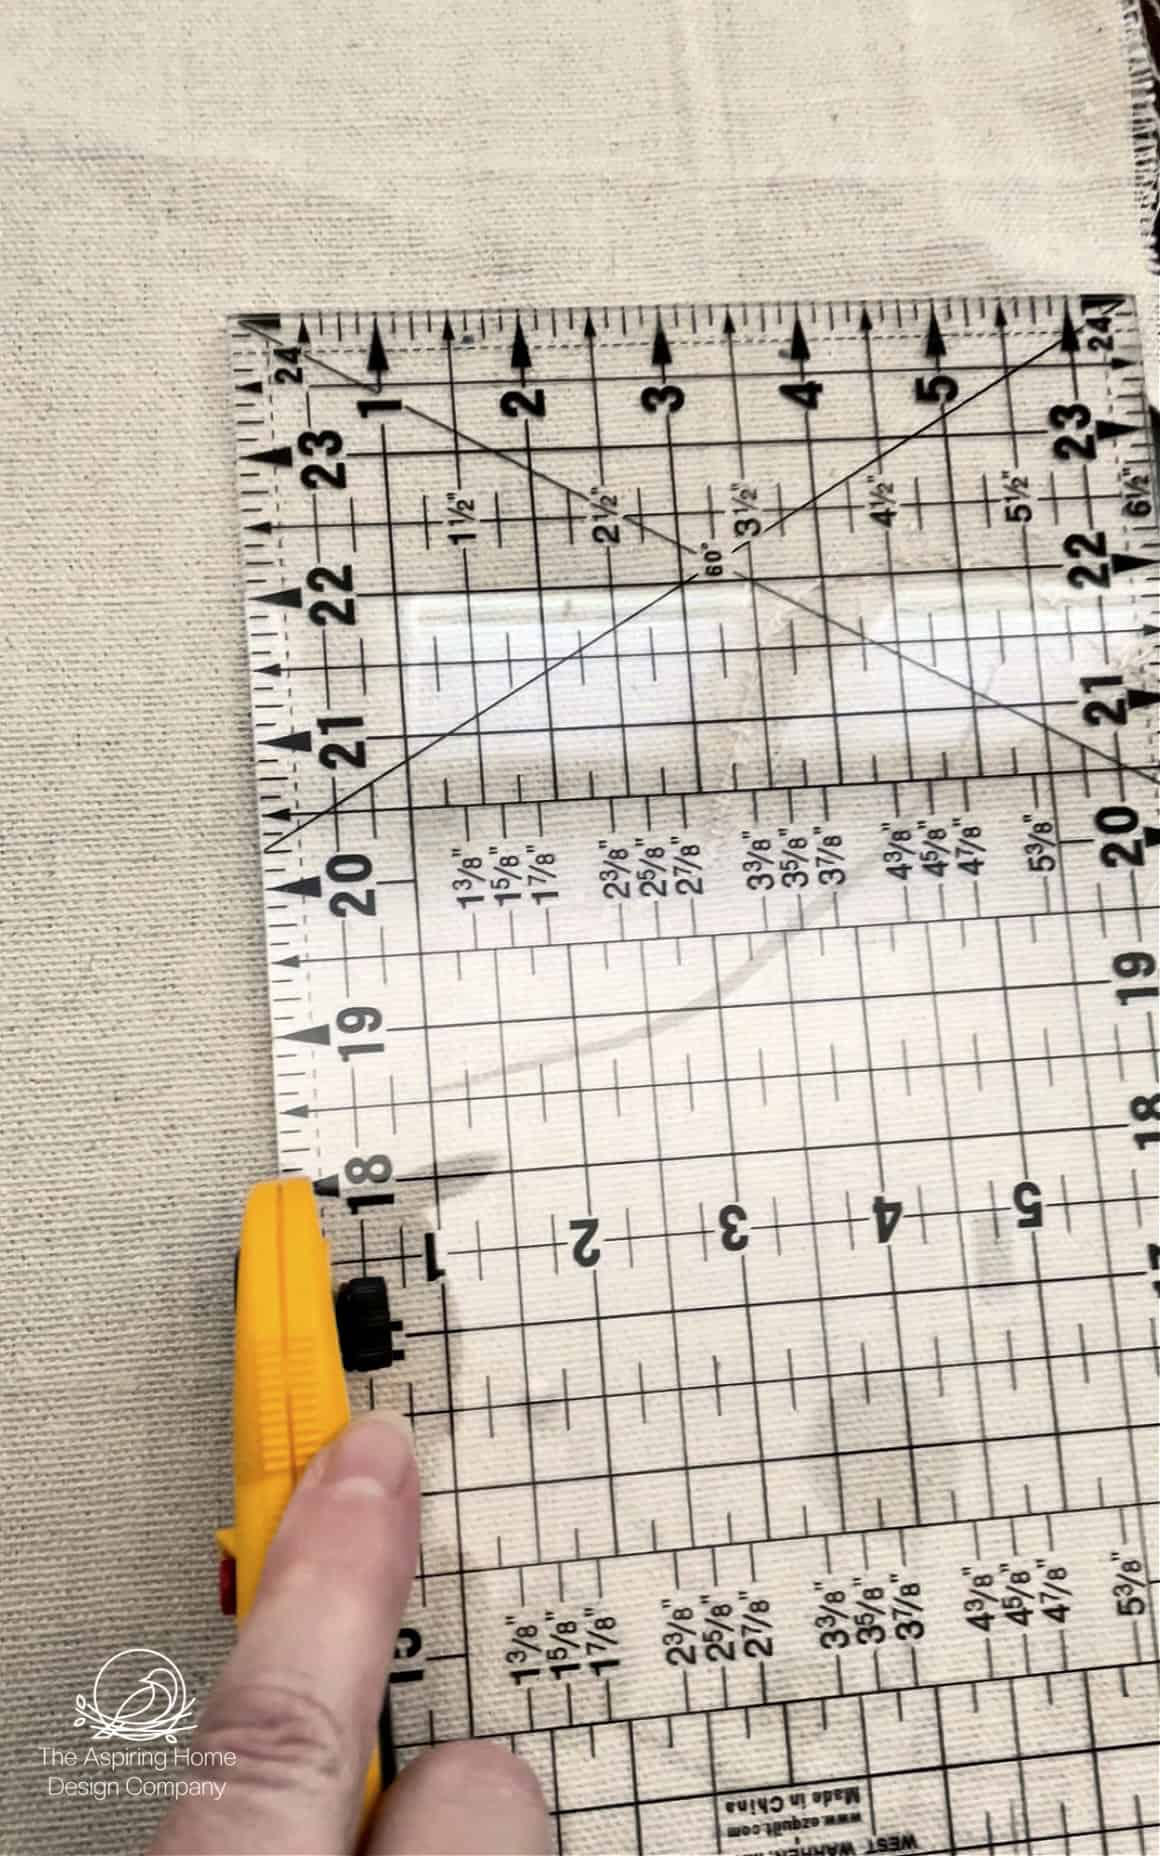
Using a rotary cutter I quickly cut two pieces of fabric 6 in x 60 in.
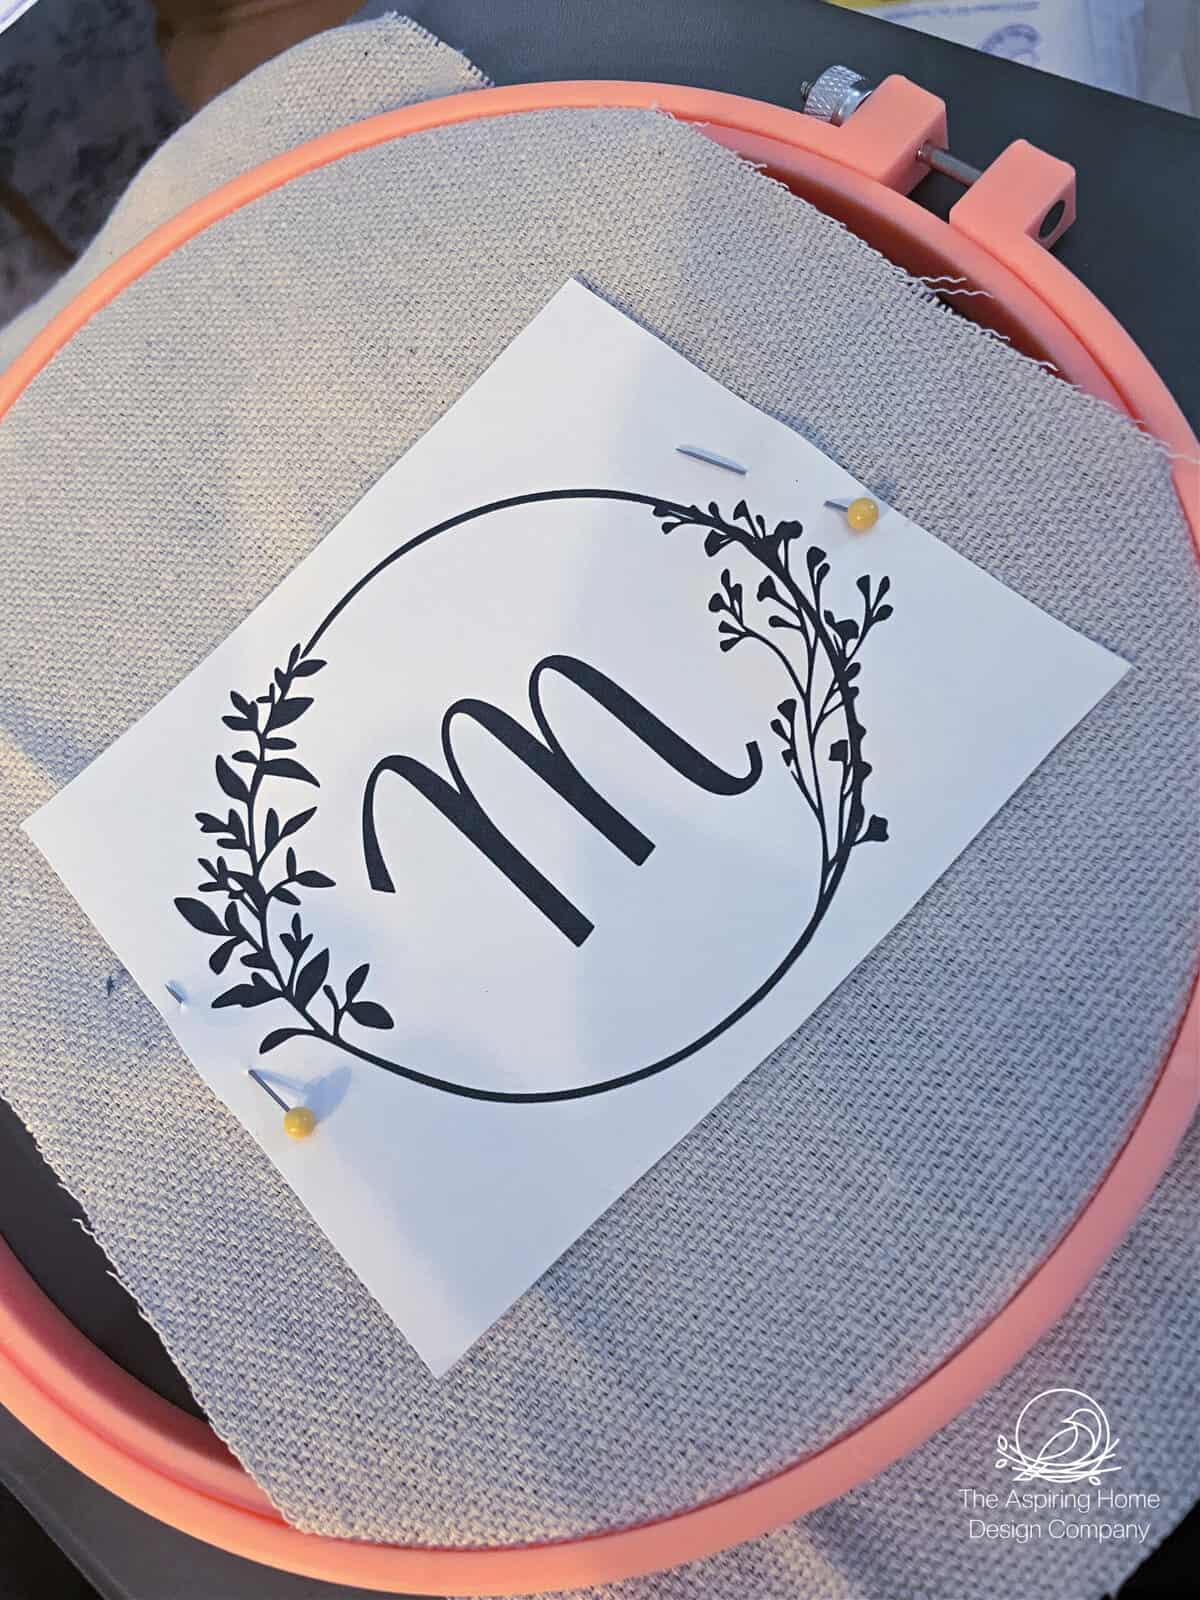
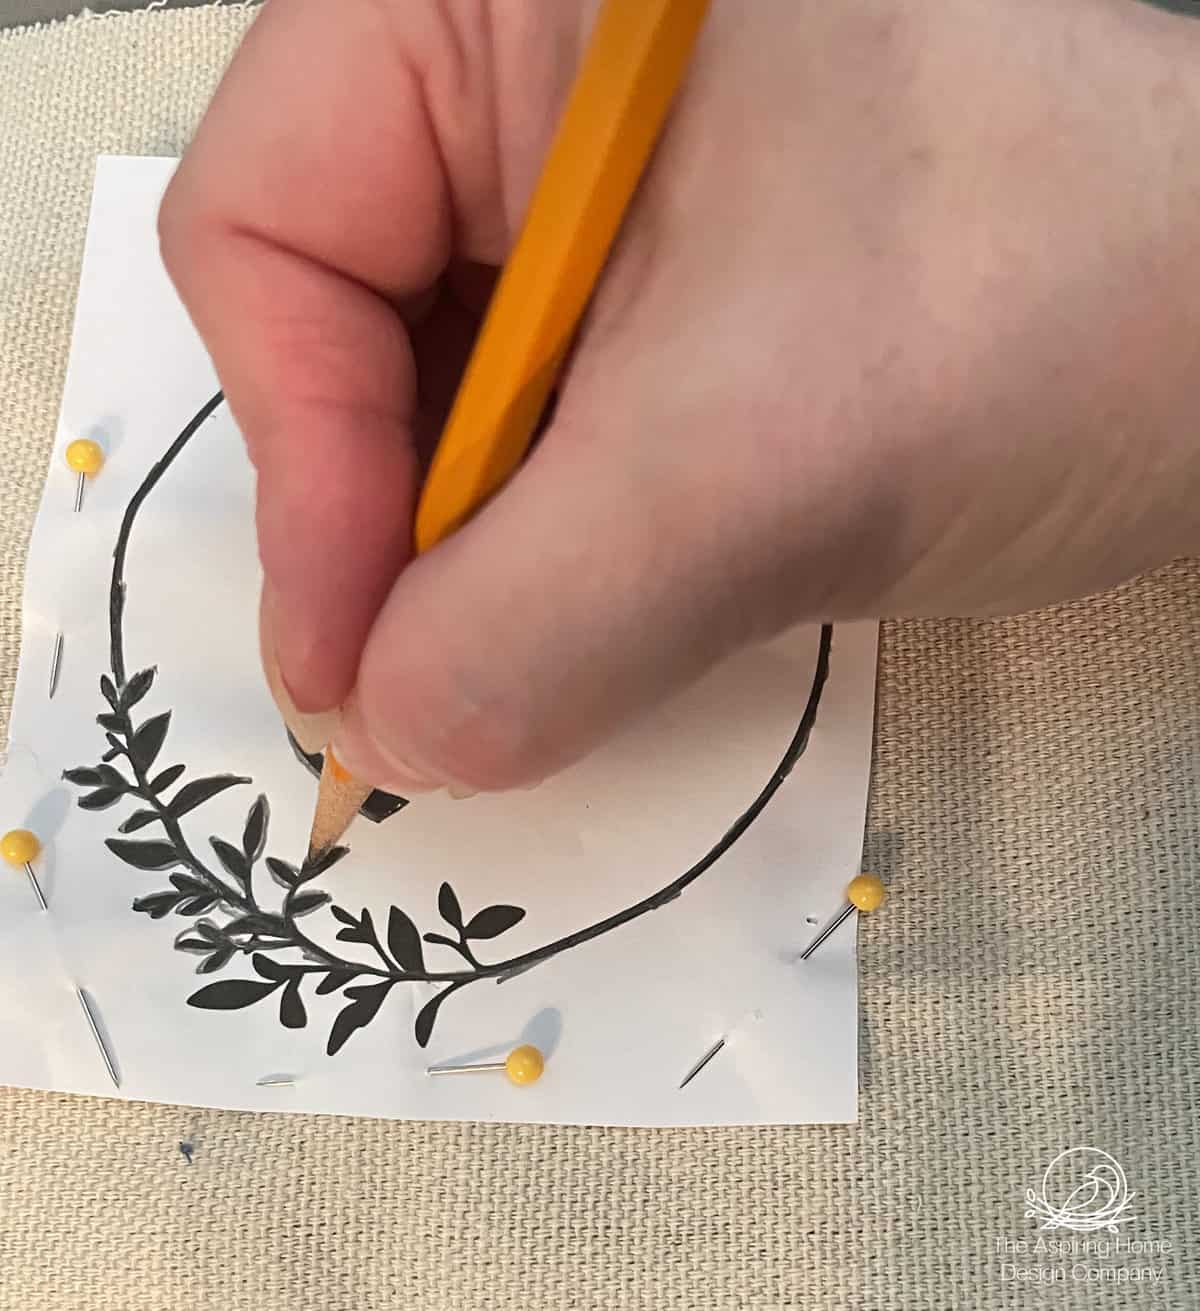
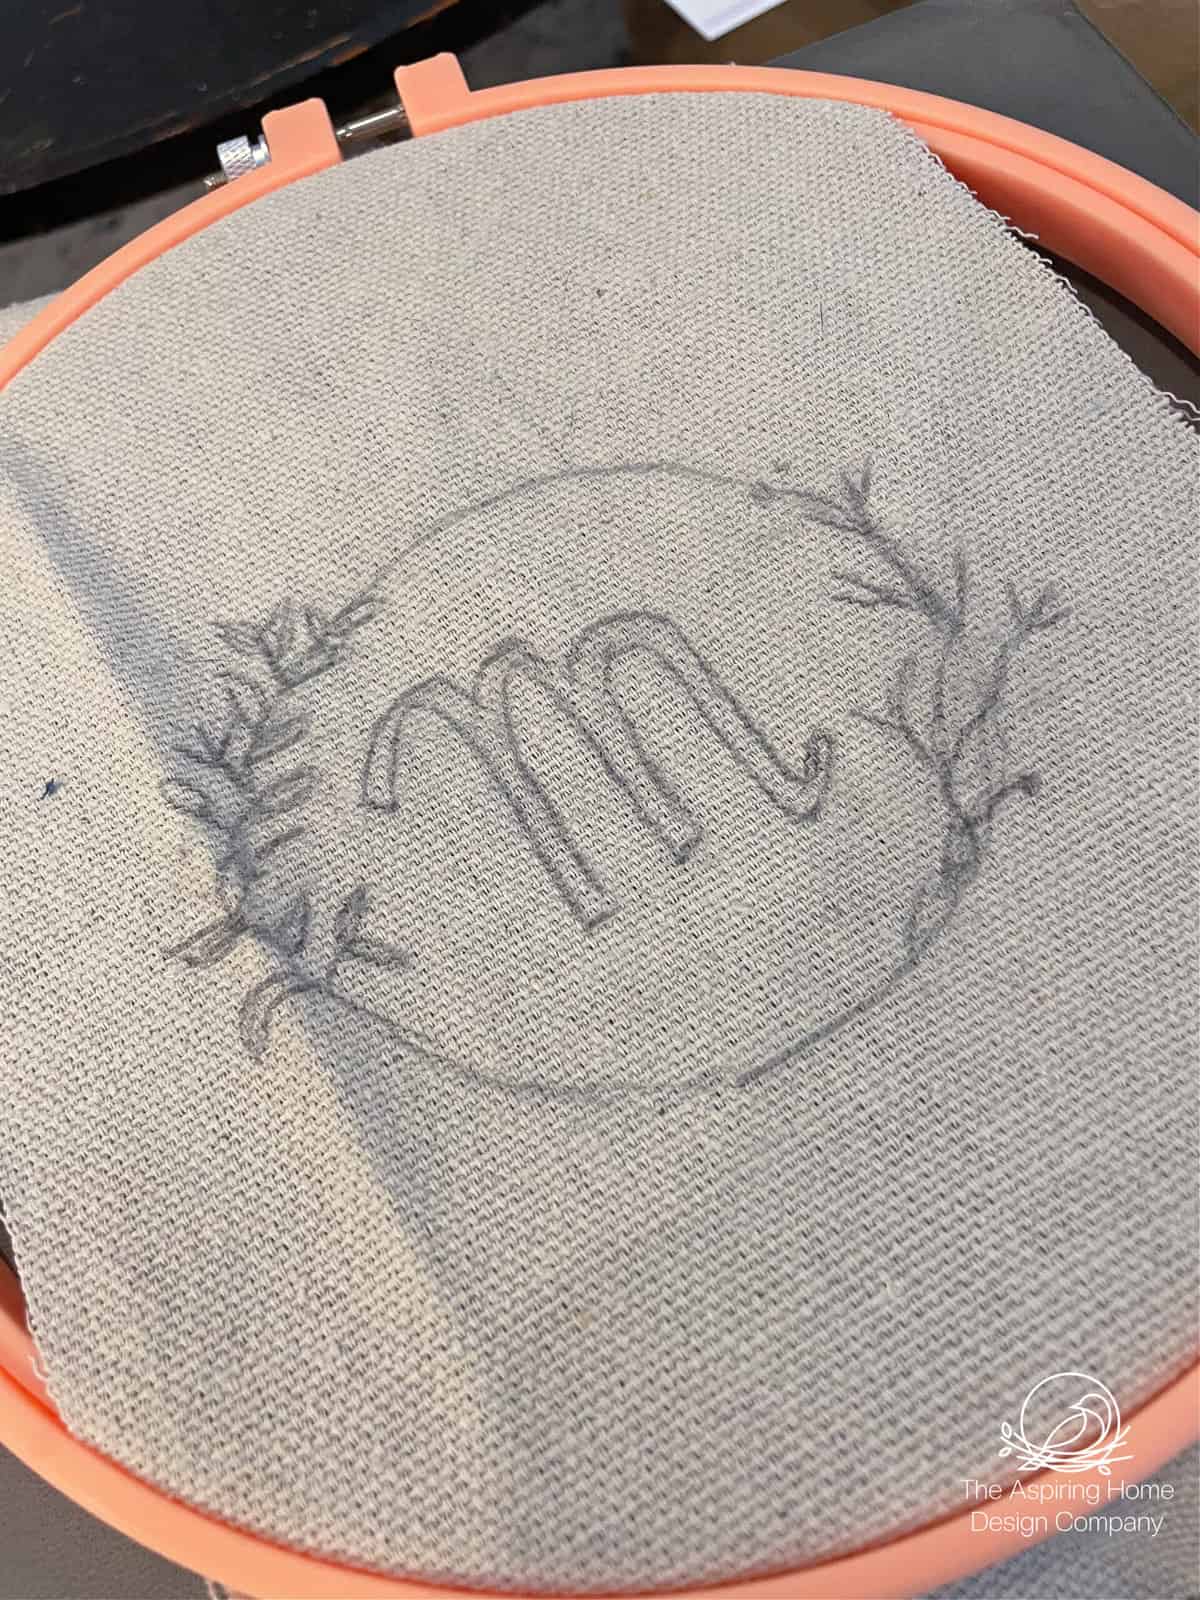
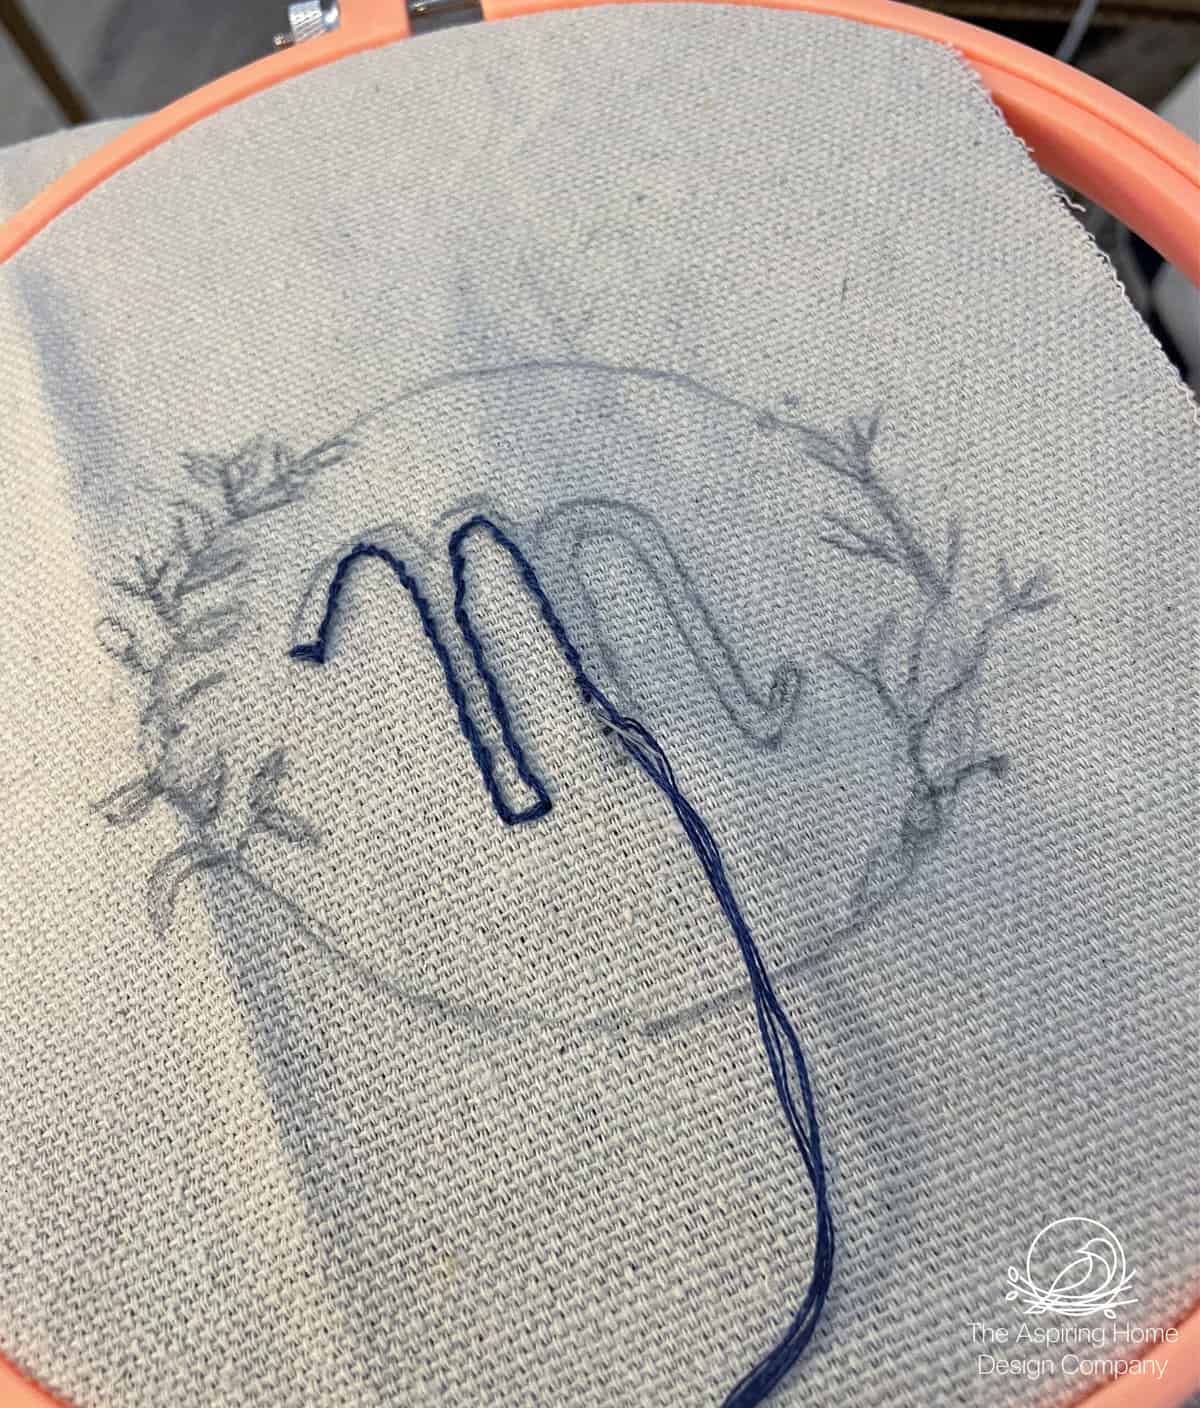
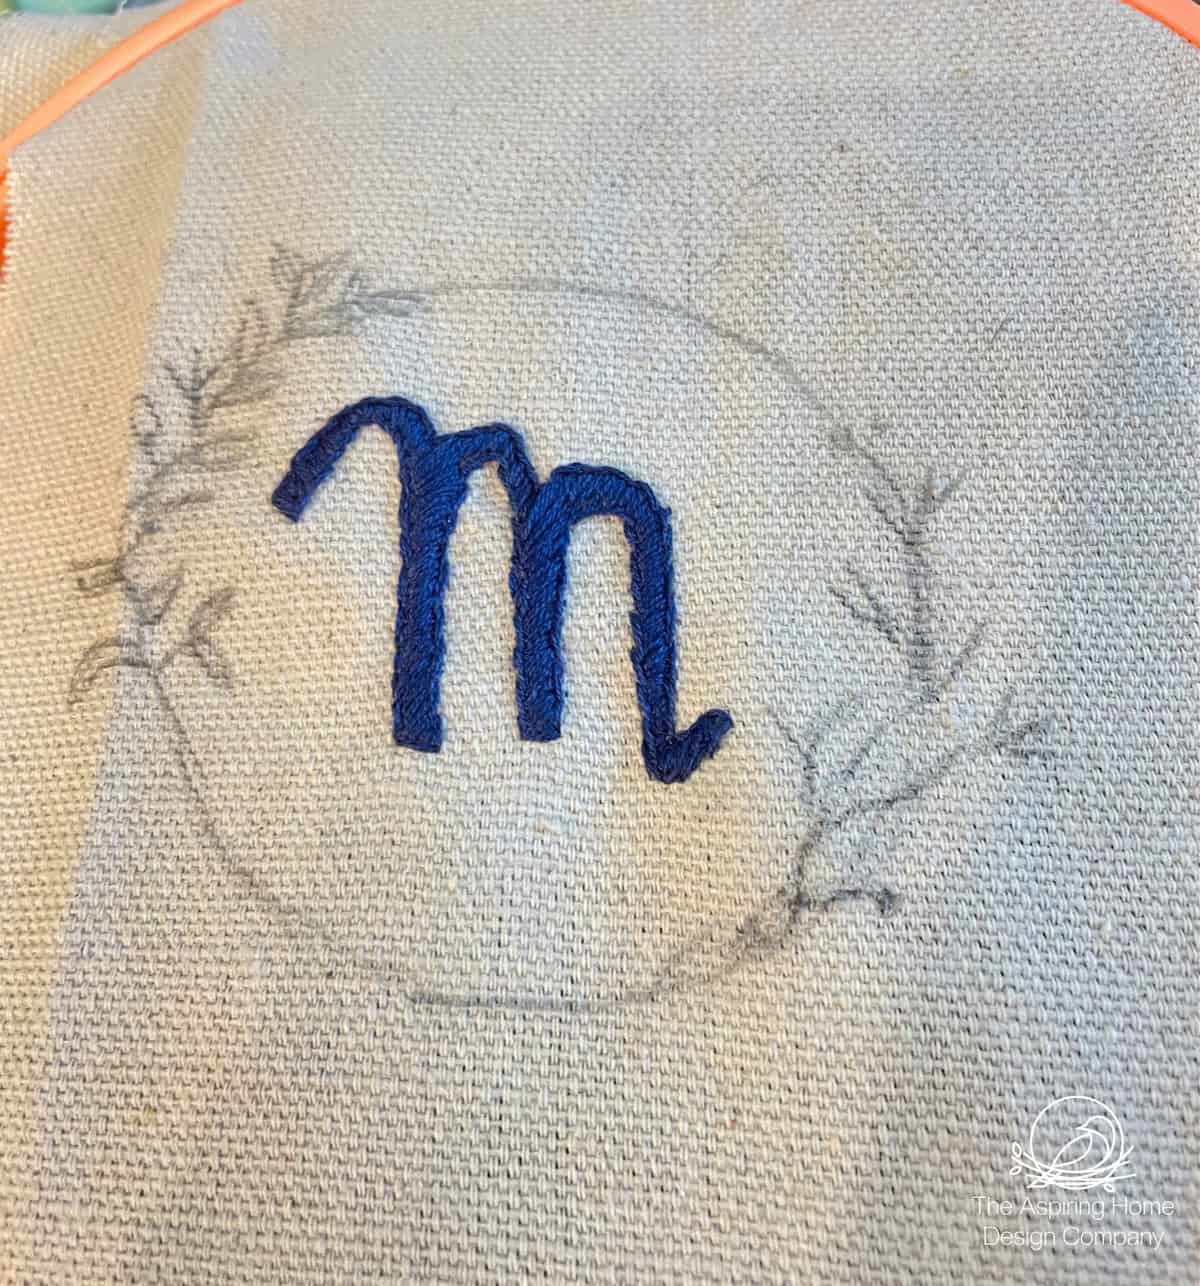
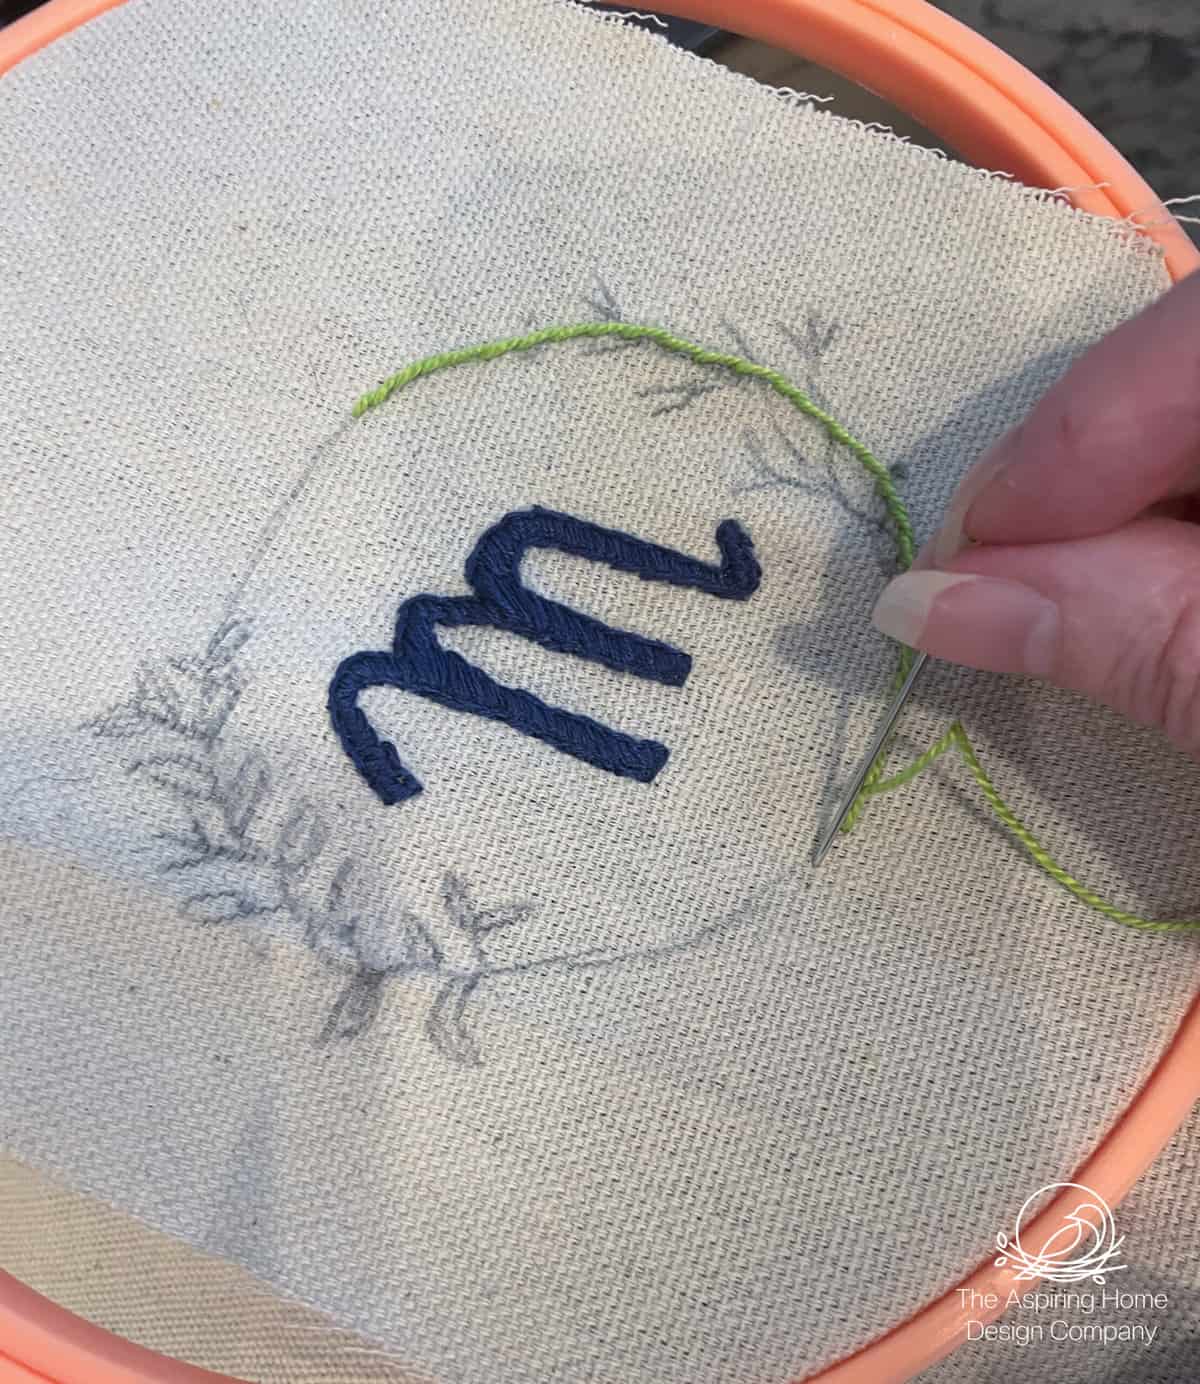
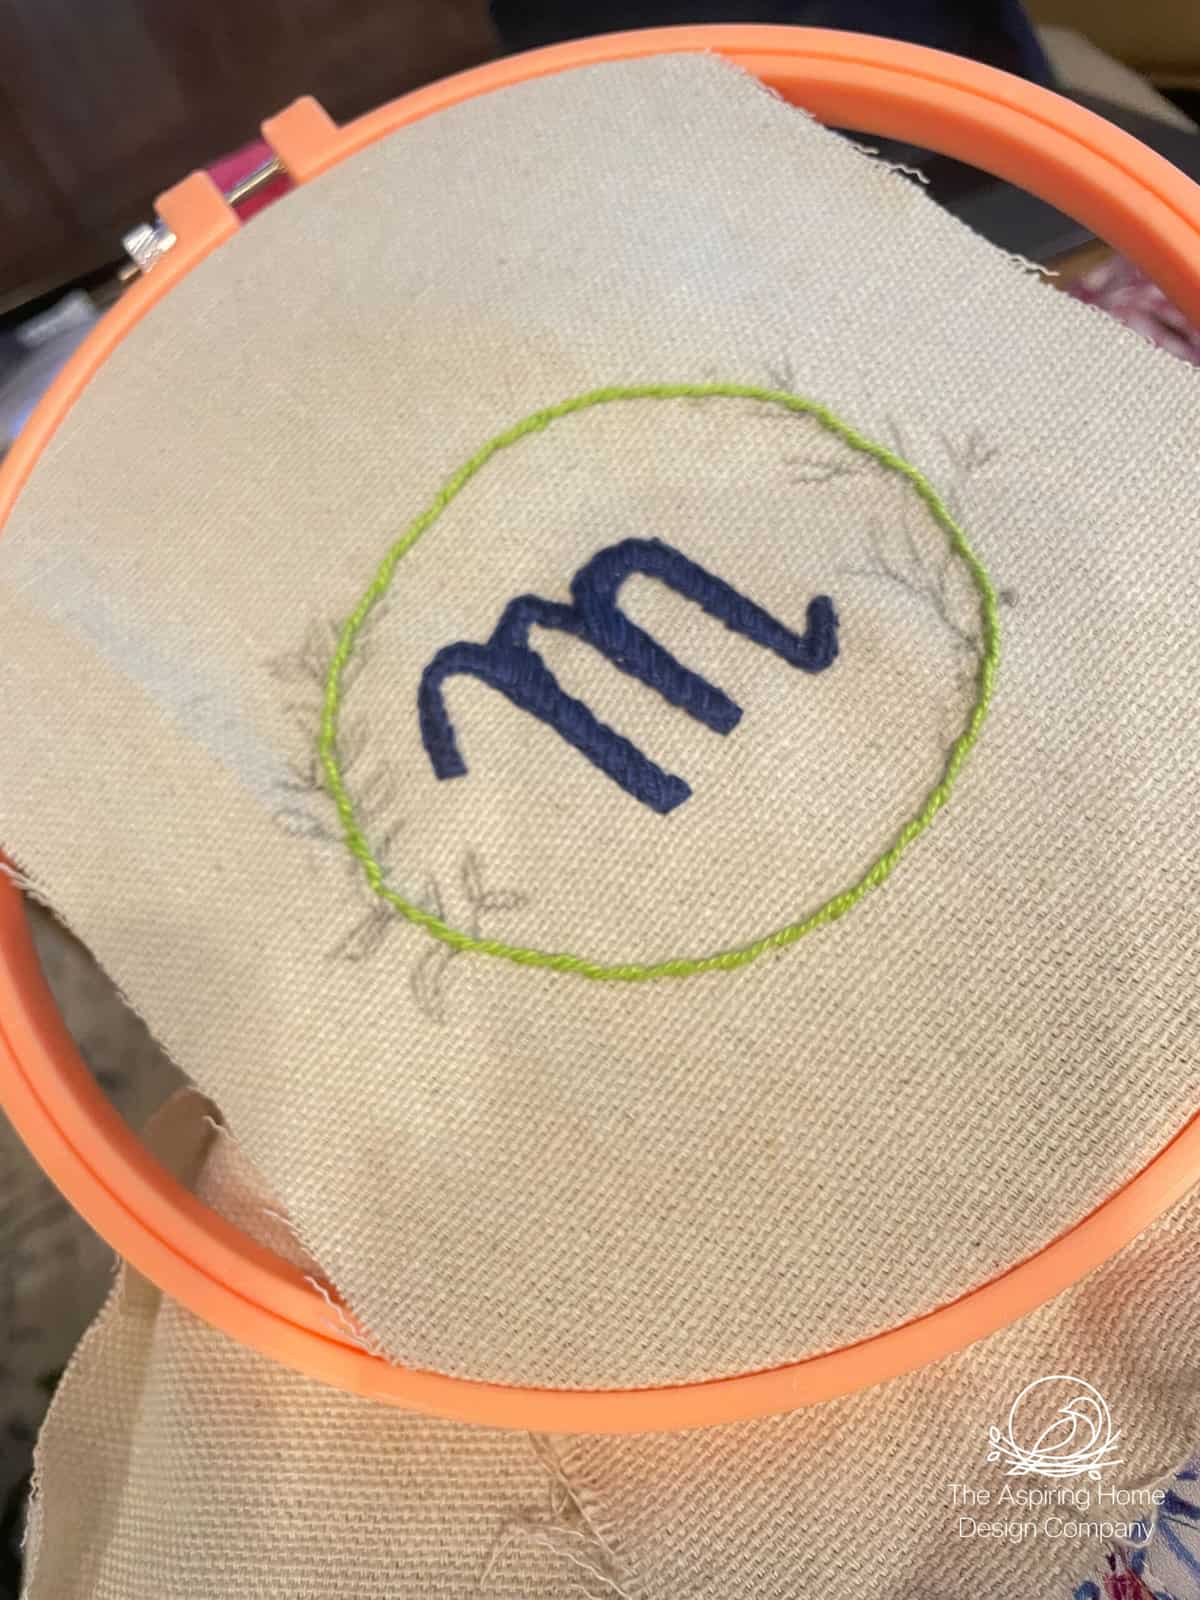
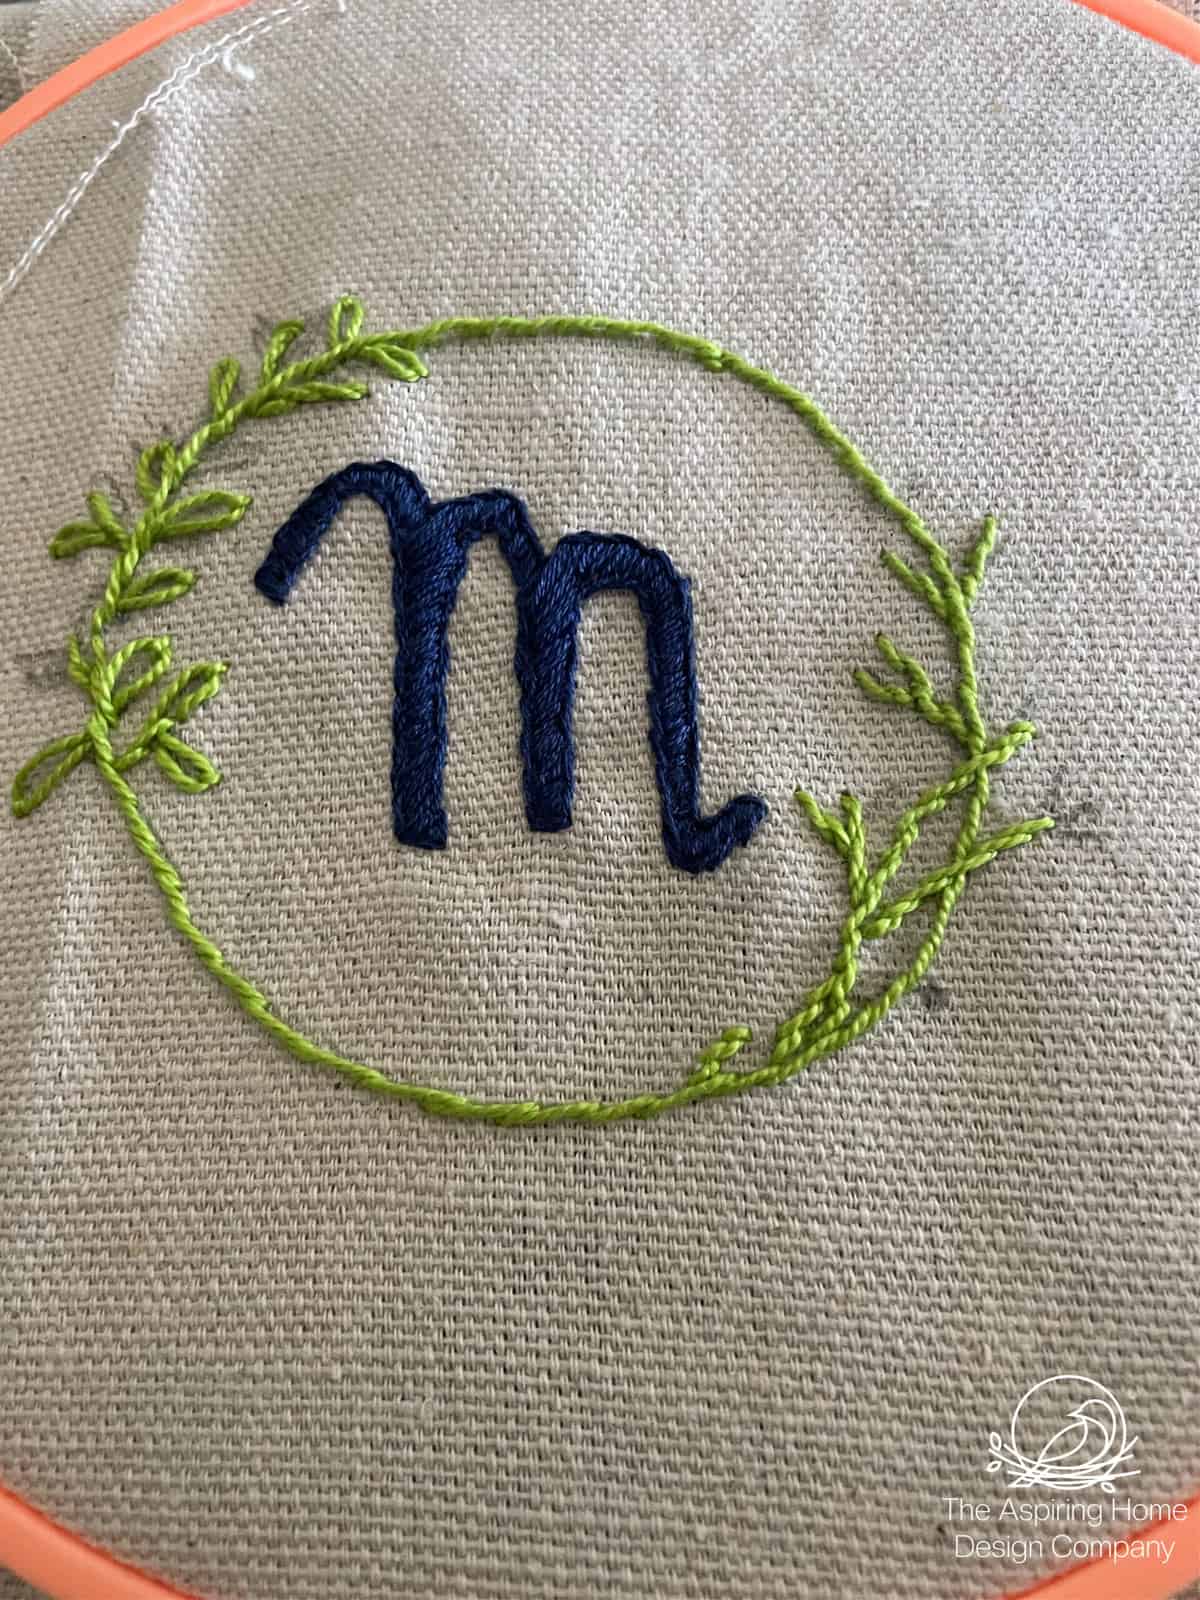
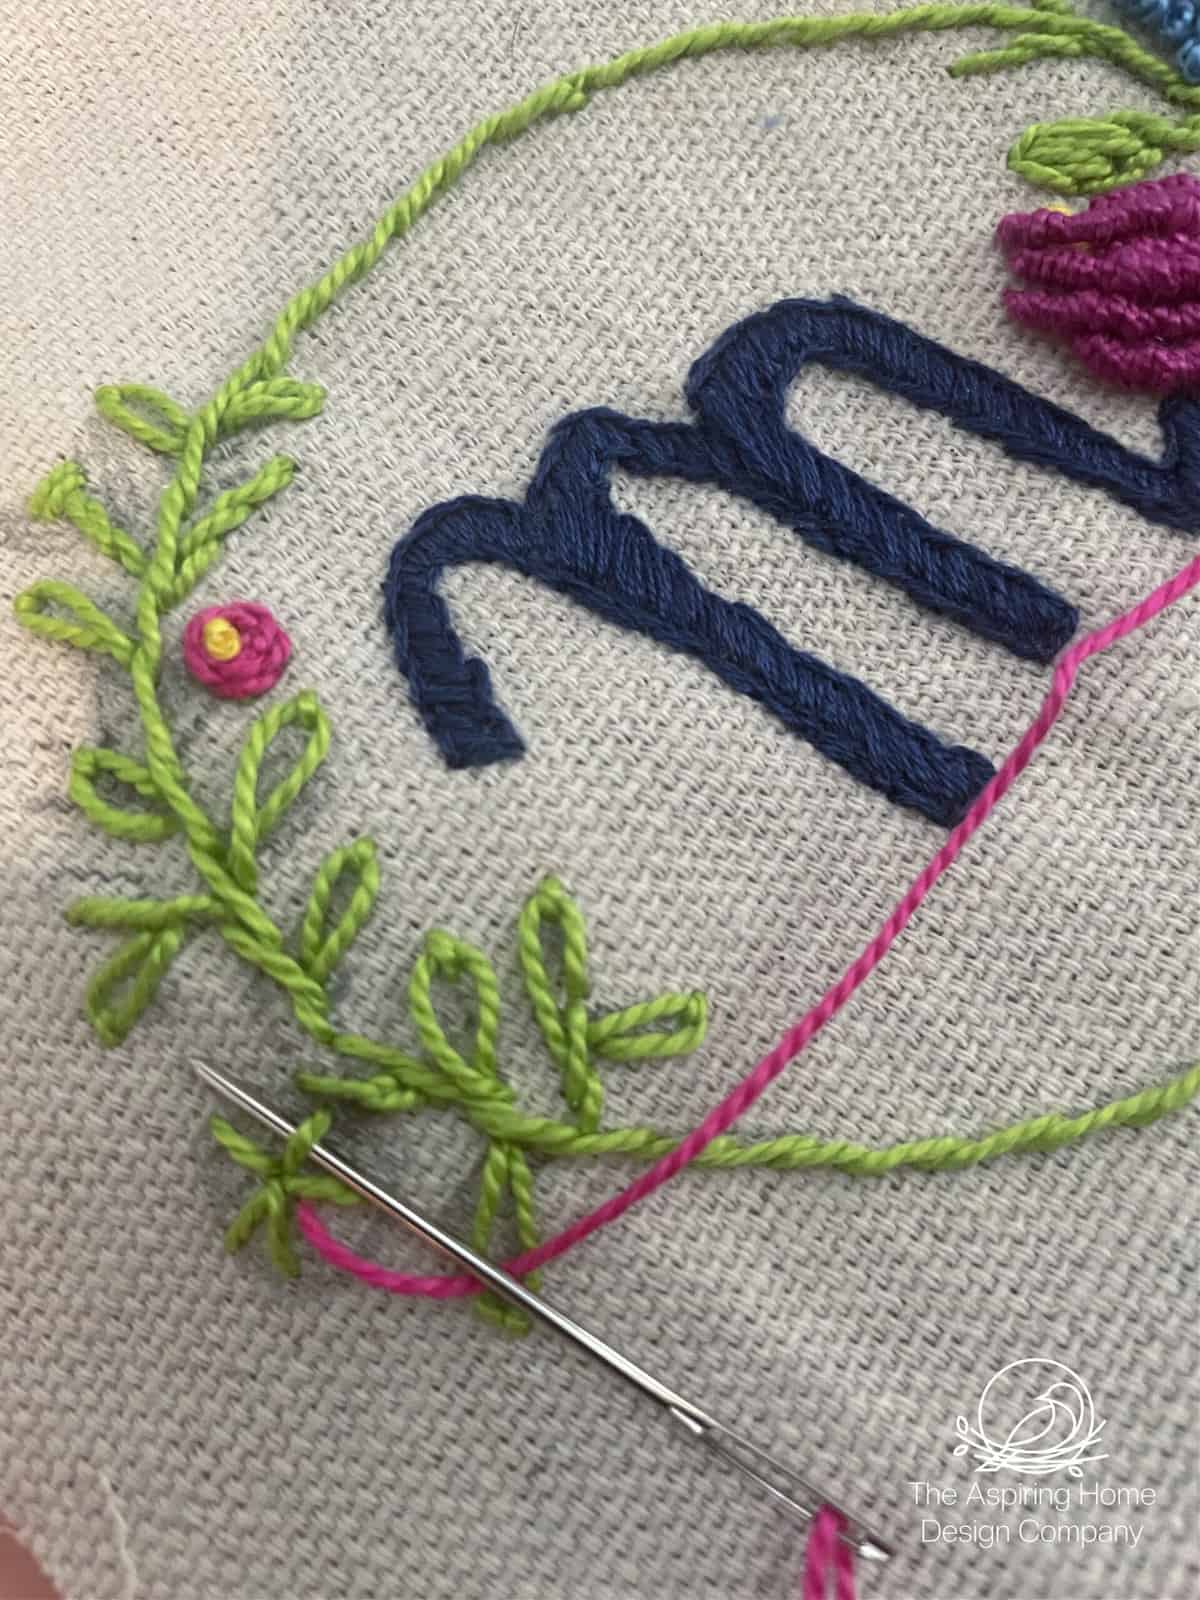
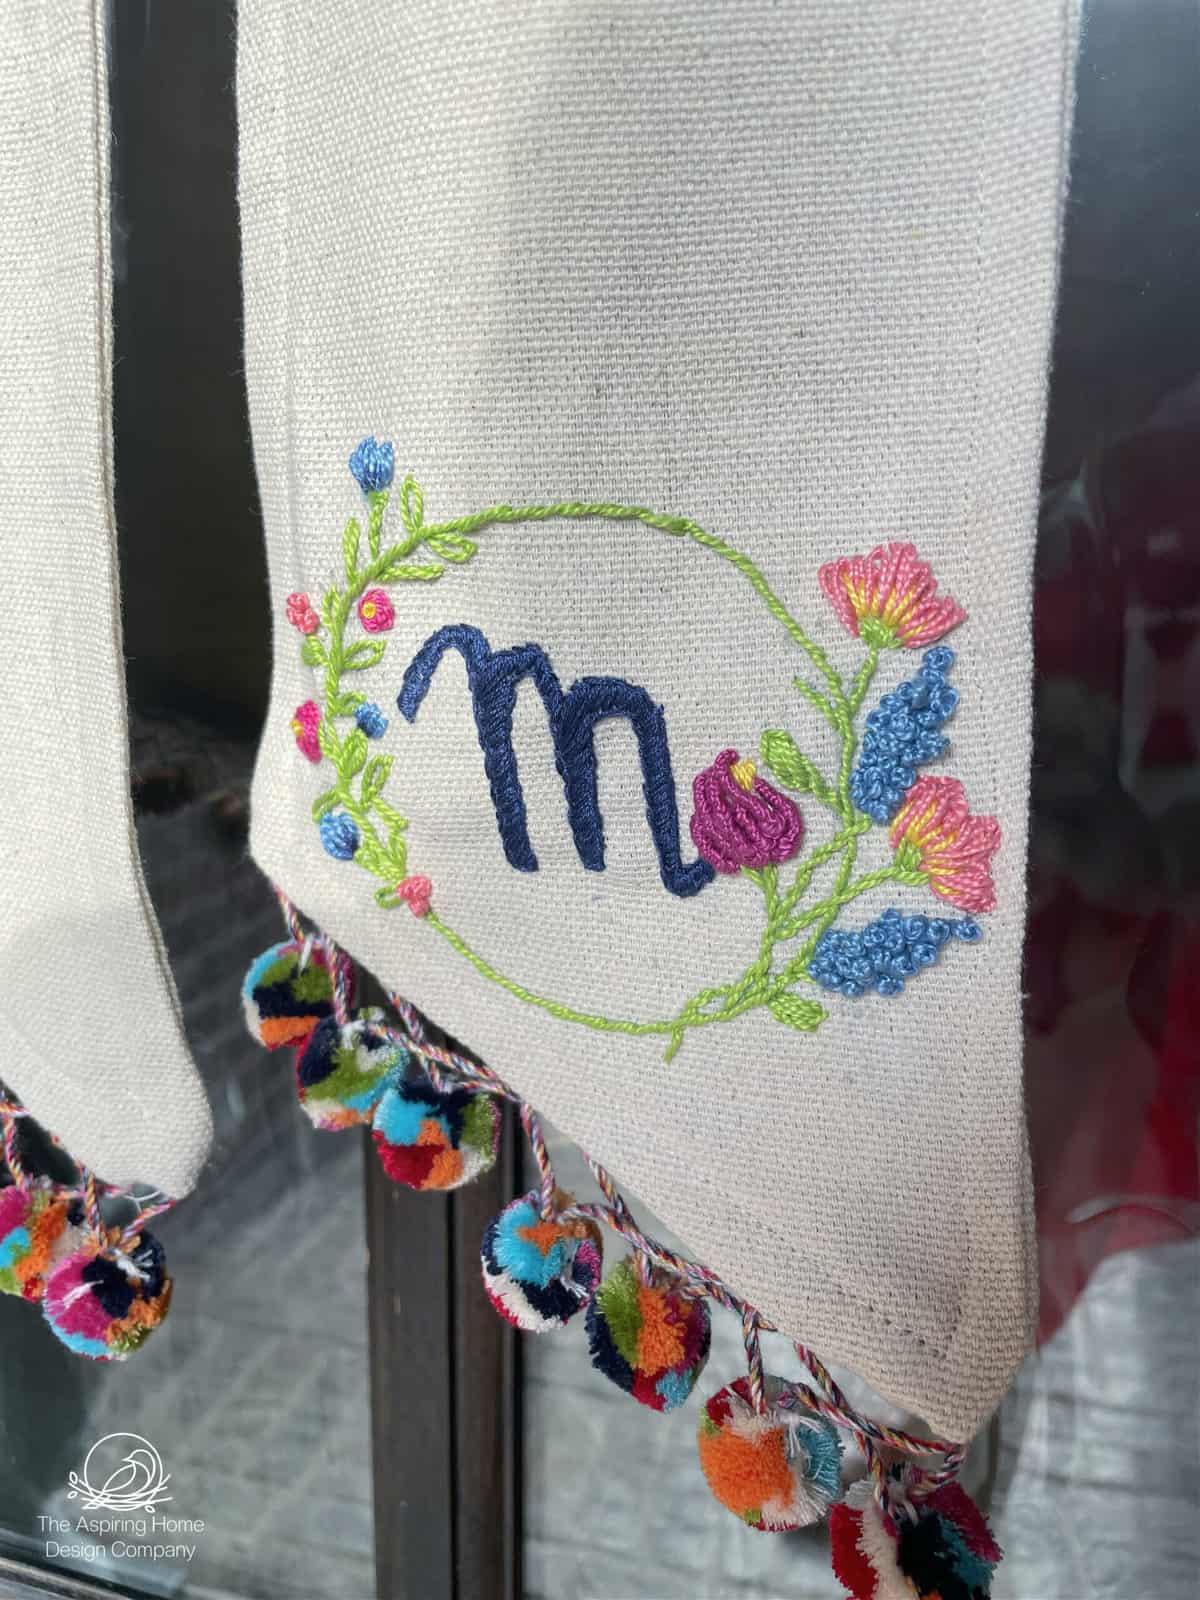
Step 2: Embroider
Step two is a little lengthy. This addition to your wreath sash can be done one of two ways. 1) with an embroidery machine or 2) by hand.
I chose to do this one by hand, I love the look and feel of hand-embroidery and it’s making a real comeback on the gram and youtube.
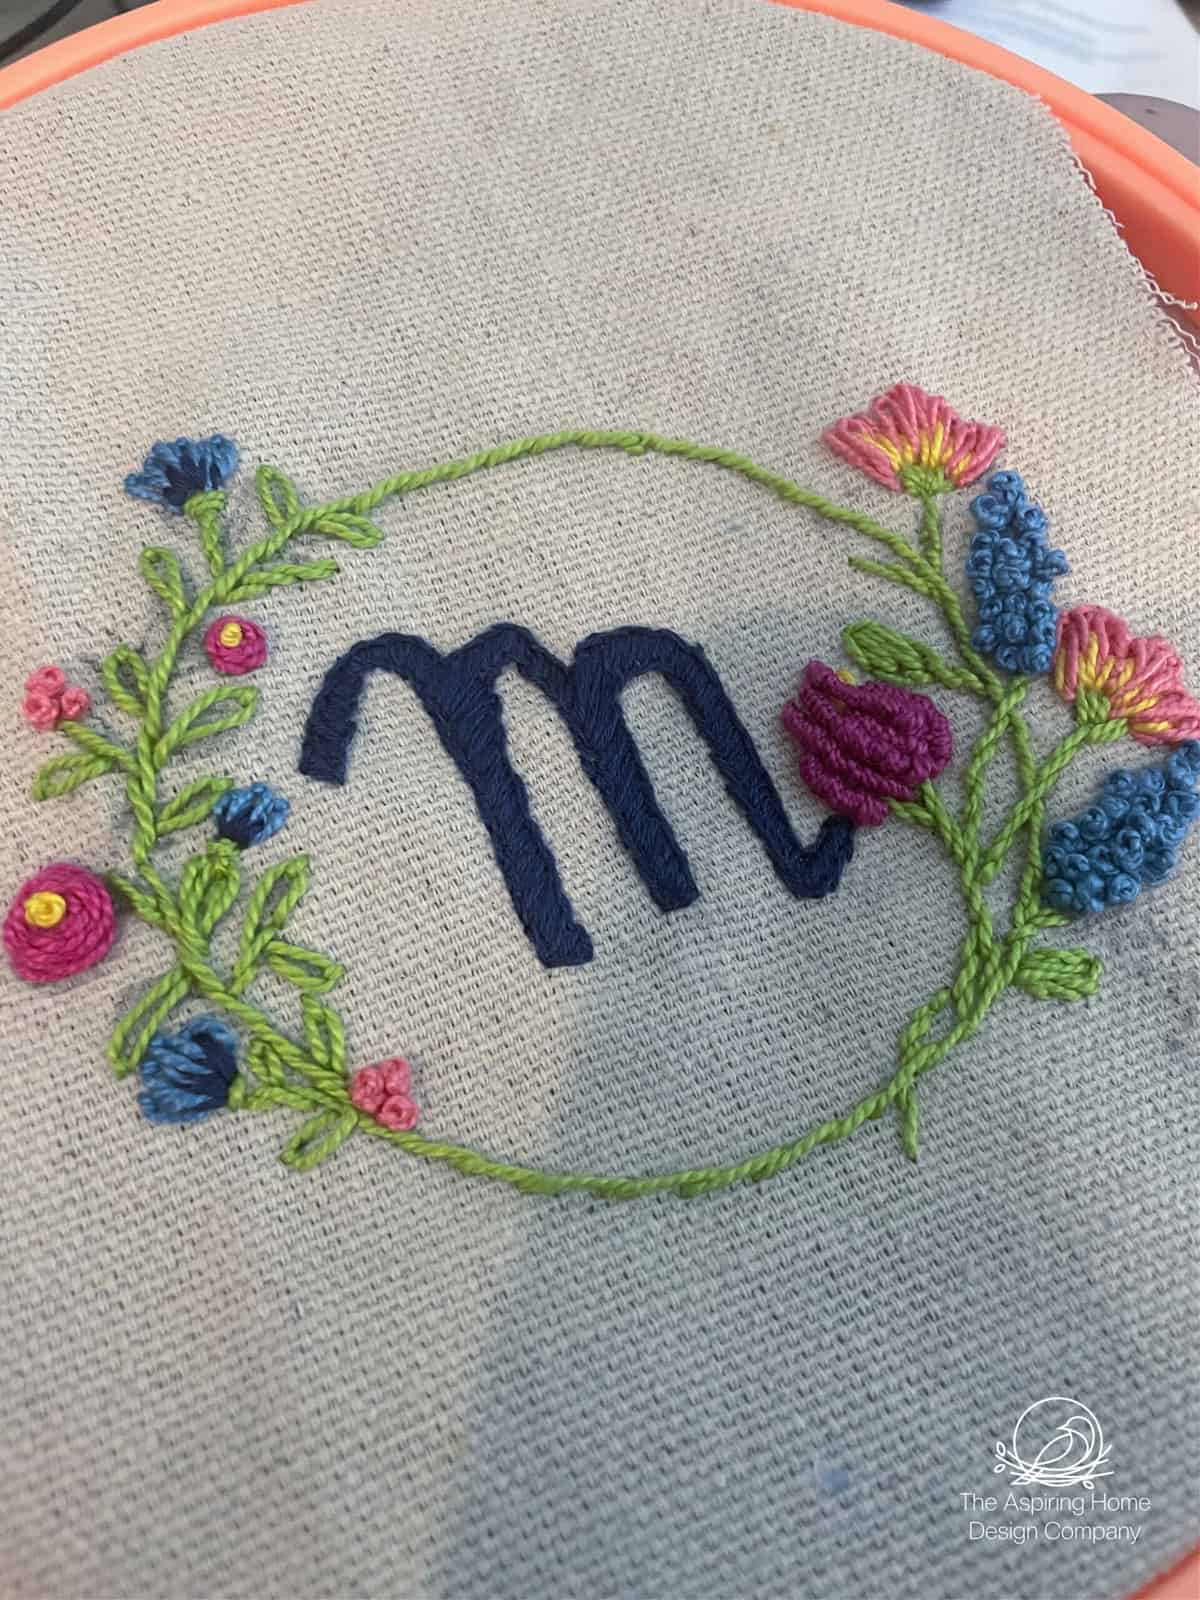
Begin by finding a monogram that you like and can be easily transferable as a template.
Next,I made it my own by incorporating different stitches.

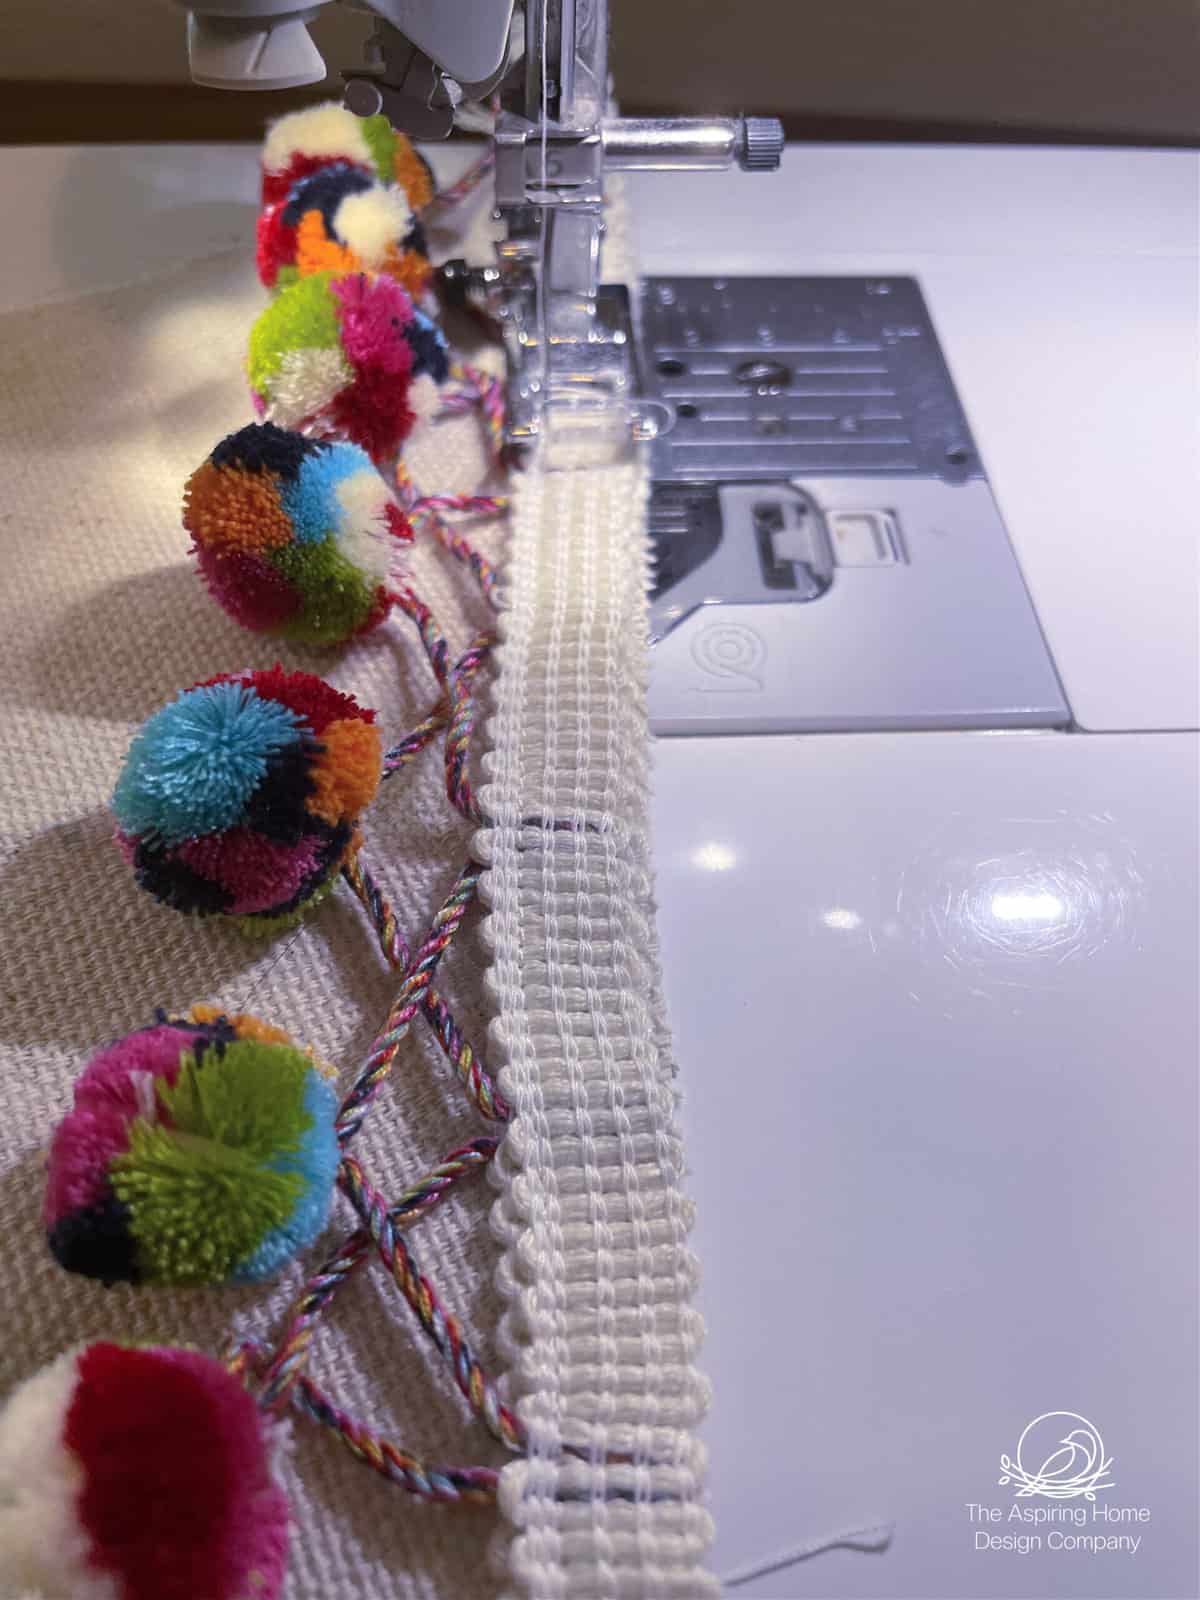
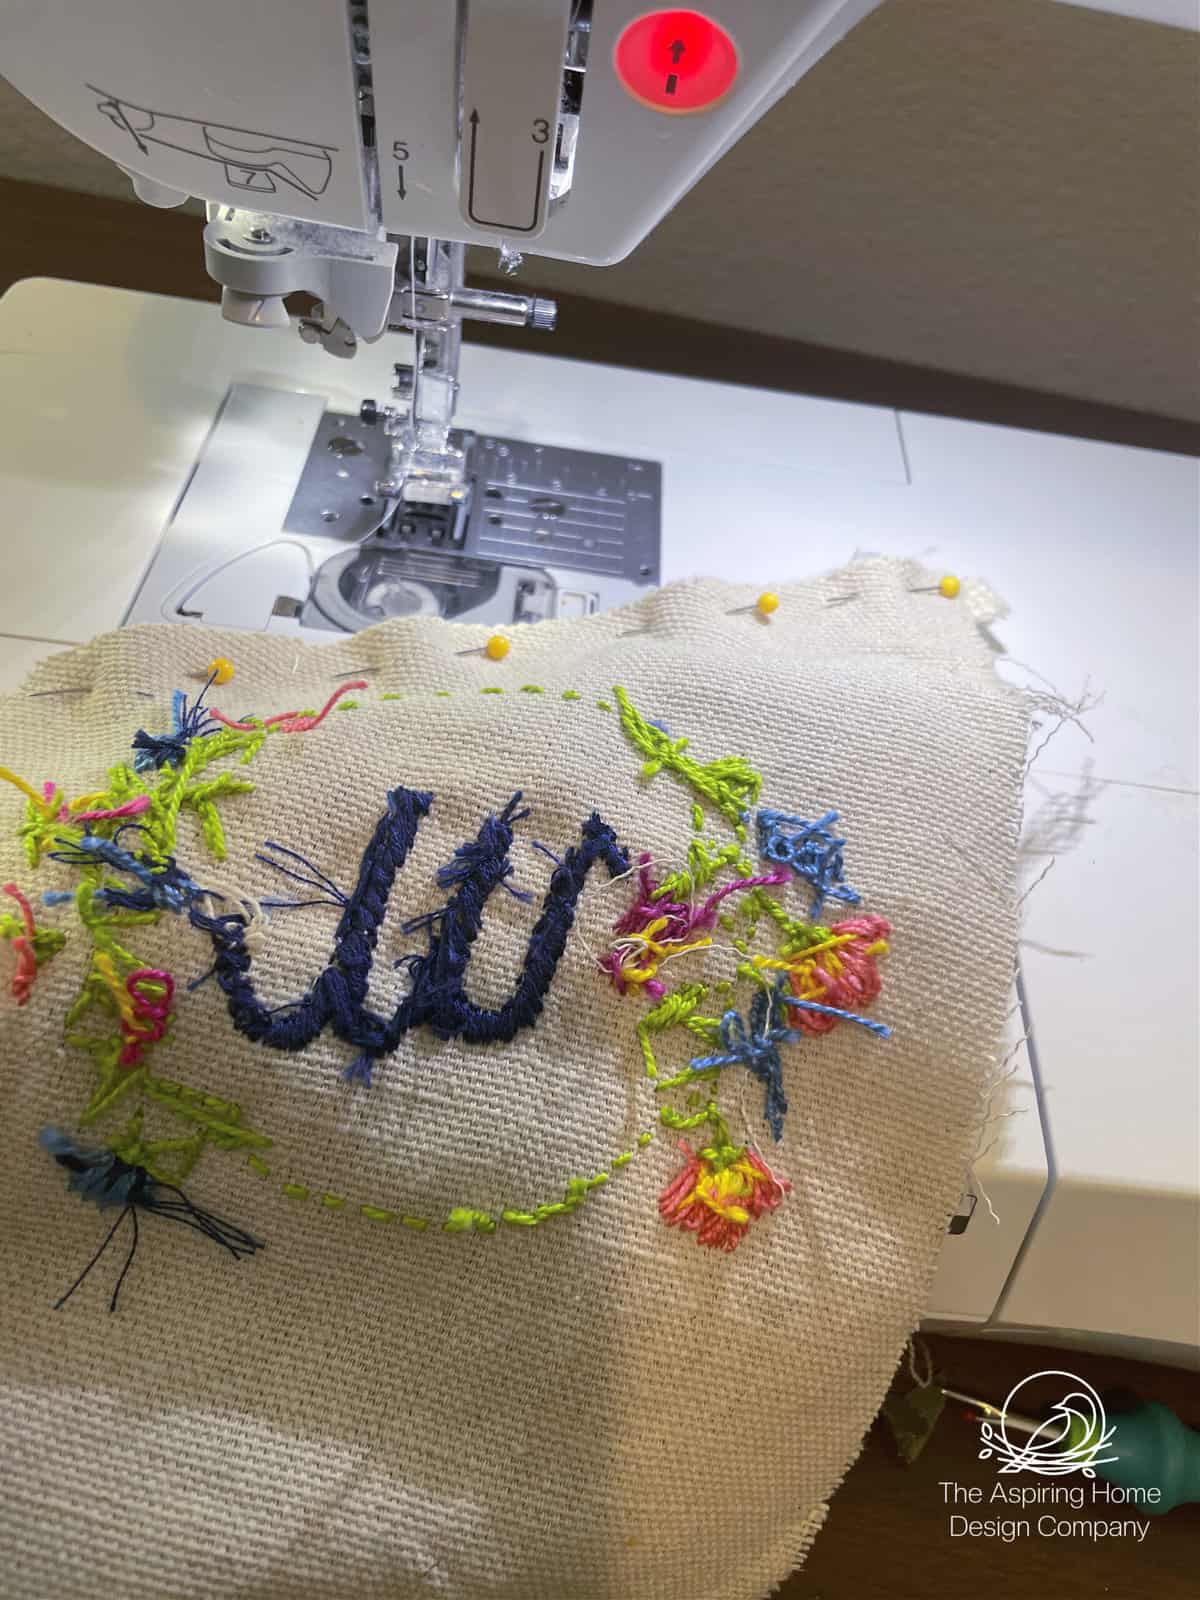
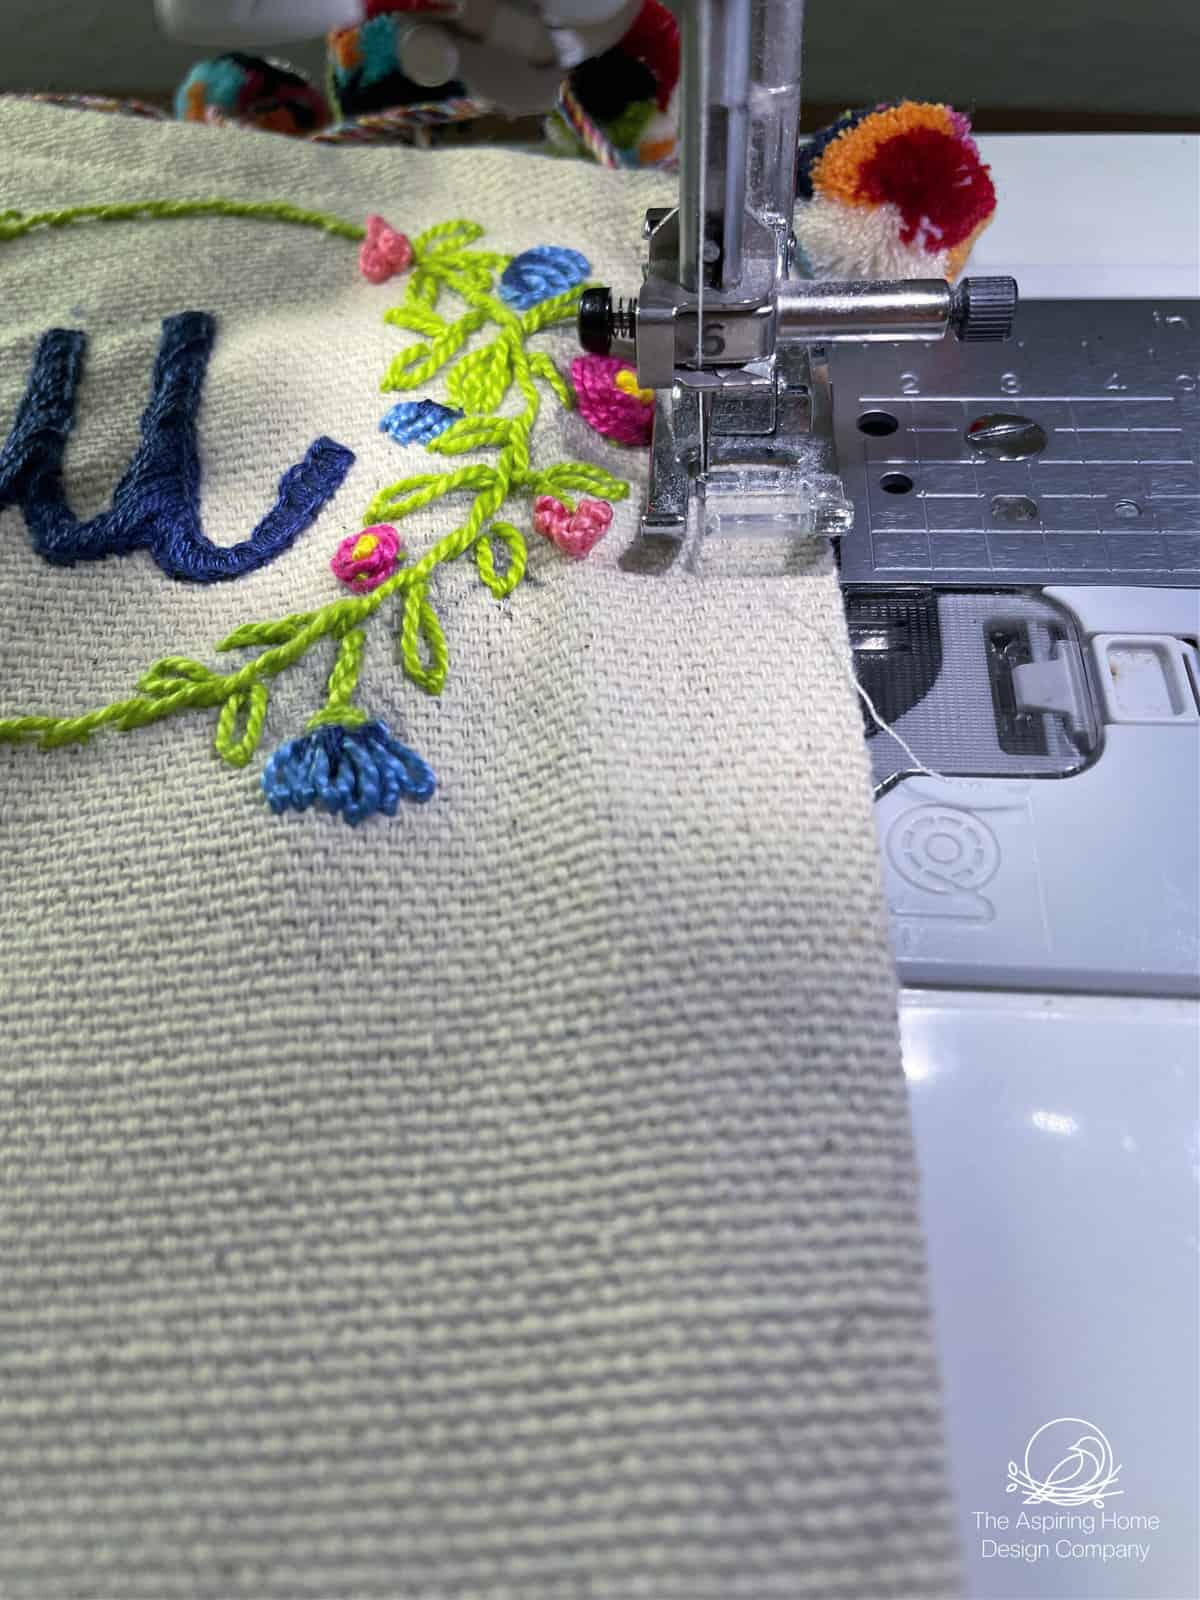
Step 3: Sew
With our monogram completed, it’s time to add a few more details and sew the front and back of the wreath sash together. Once sewn together, iron sash carefully.
Avoid the embroidered area.
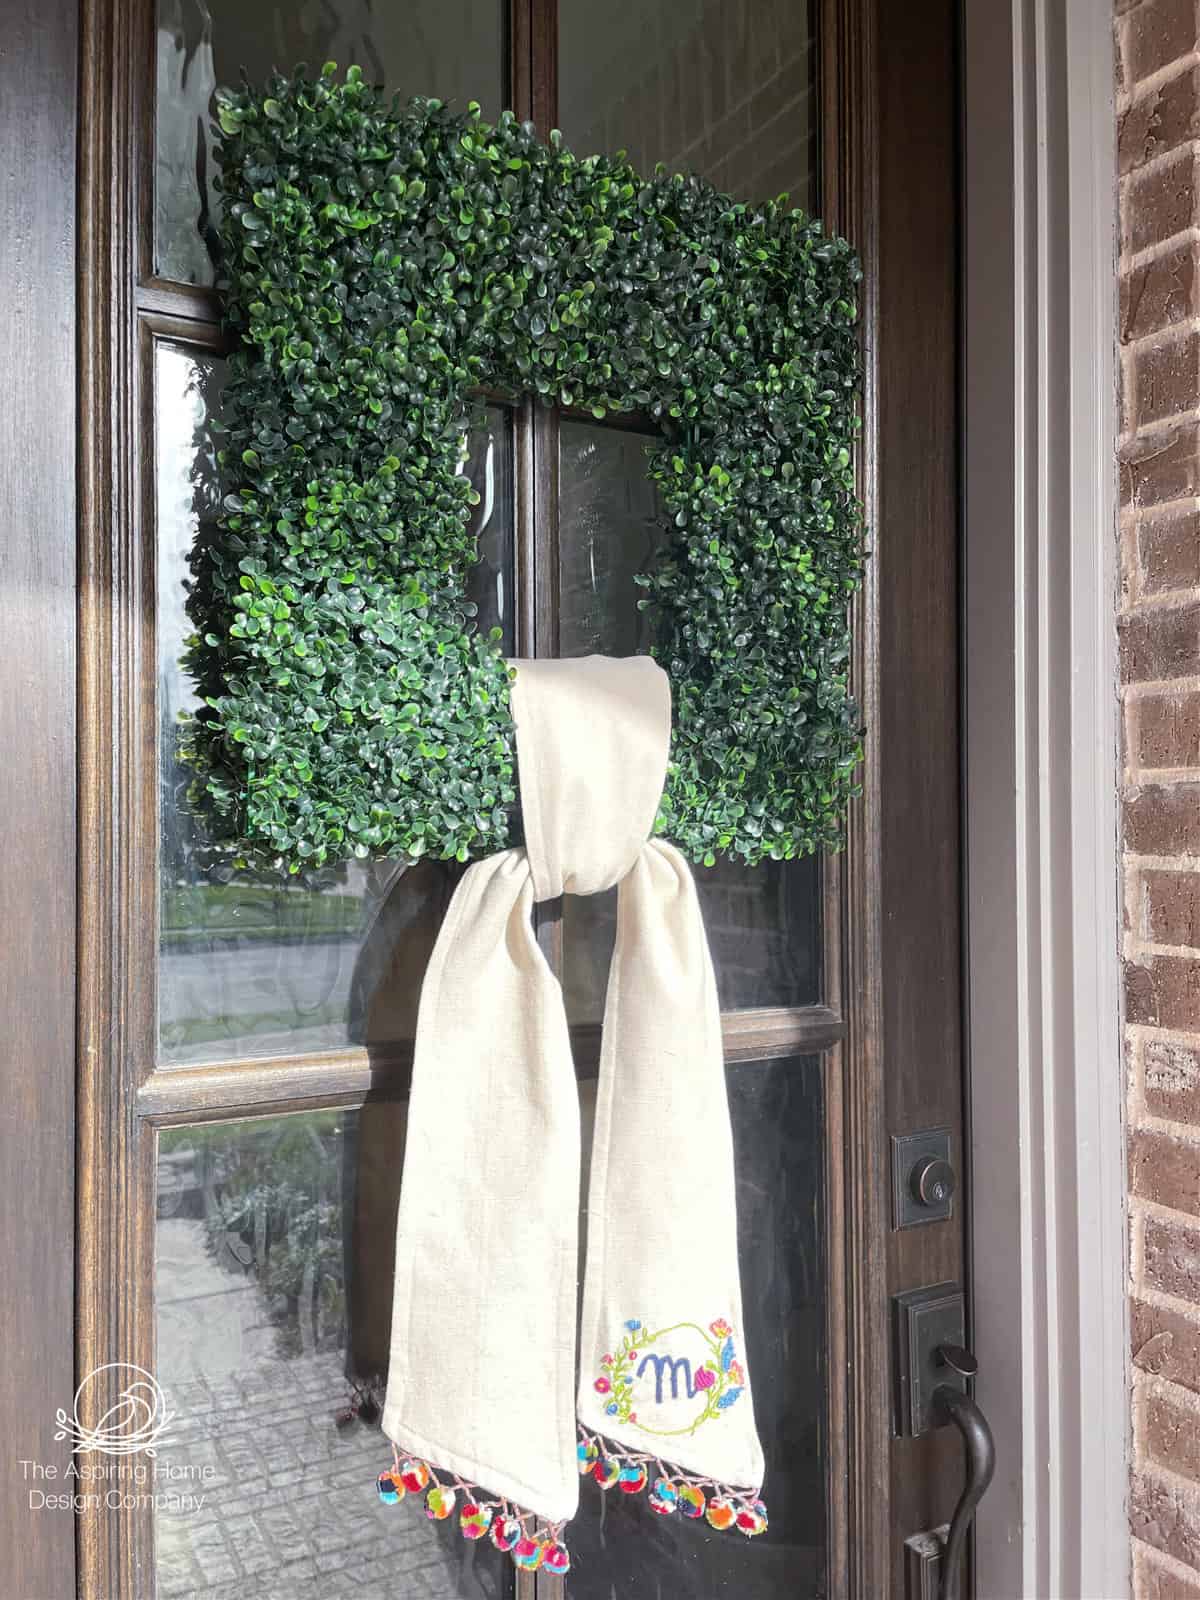
Step 4: Attach
All that’s left now it to tie your beautiful wreath sash to your wreath! Next, I added mine to my DIY square boxwood wreath that I made earlier.
I love this simple idea, can you imagine all the fun sashes you could make? Everything from the most sophisticated year-round version to having one for every month of the year!
The possibilities are endless, why stop at plain fabric? Why not create patterned versions?
If you are new to hand embroidery, check out this embroidery youtube channel I found. I learned the clover flower stitch from here. She is very good at teaching basics and more complicated stitches.
Please, join me next time when I share the entire late summer porch makeover! The temps are brutal here and I have great ideas that will help you keep your porch looking visitor friendly!
Feel free to visit my Amazon Storefront if you would like to purchase any of the supplies. *These will be affiliate links and I may receive a small commission at no additional charge to you.
Keep creating home my friends!

Joy Maier is the founder and principal designer of The Aspiring Home Interiors, an award-winning studio serving the greater Dallas area and beyond. Blending gracious living with elevated design expertise, Joy creates interiors that feel deeply personal, beautifully refined, and effortlessly livable — from full-home renovations to boutique vacation rentals. Her professional affiliations include ASID (Associate), ART, the Interior Design Society (Professional), NKBA, VRD Collective, and she is a founding member of Designers for Dogs. Since 2012, she has shared design tips and heartfelt stories on The Aspiring Home Blog. Her philosophy is simple: “Design should feel like a deep breath. When we get it right, your home greets you with that exhale every single day.”

Love this. Can’t wait to make one, or 100. 😜
I love the addition of the trim. I would have not thought of that. I’m excited to make one. Thanks for sharing..