One Room Challenge- Pantry Makeover Details & Sources
Well, the pantry is complete and I am loving it! Here are my One Room Challenge Pantry makeover details. Come see how I created a pretty pantry.
Hello Friends! I’ve got to tell you, THANK YOU for all the kind comments you sent my way concerning the One Room Challenge pantry makeover. I was in such a state of exhaustion by the time I posted yesterday that I honestly couldn’t count on the brain cells that would be needed to break down all the details of the redo and it’s fun seeing lots of pictures anyway. 🙂
Today is a new day and I am excited to share with you all the details of this hard-working room. Let’s break the pantry makeover details down…
When I wrote the first post declaring my desire to throw my hat in the ring with over 100 designers/bloggers for the Thursday linking party of The One Room Challenge – I was a bit, ok very starry-eyed.
Pulling together a look that I felt would jive with my kitchen update (yes I have hinted at sharing it for far too long-I am wrapping up a few extra details and will show you next week).
Something that would wink at my favorite eras. I love mixing decades.
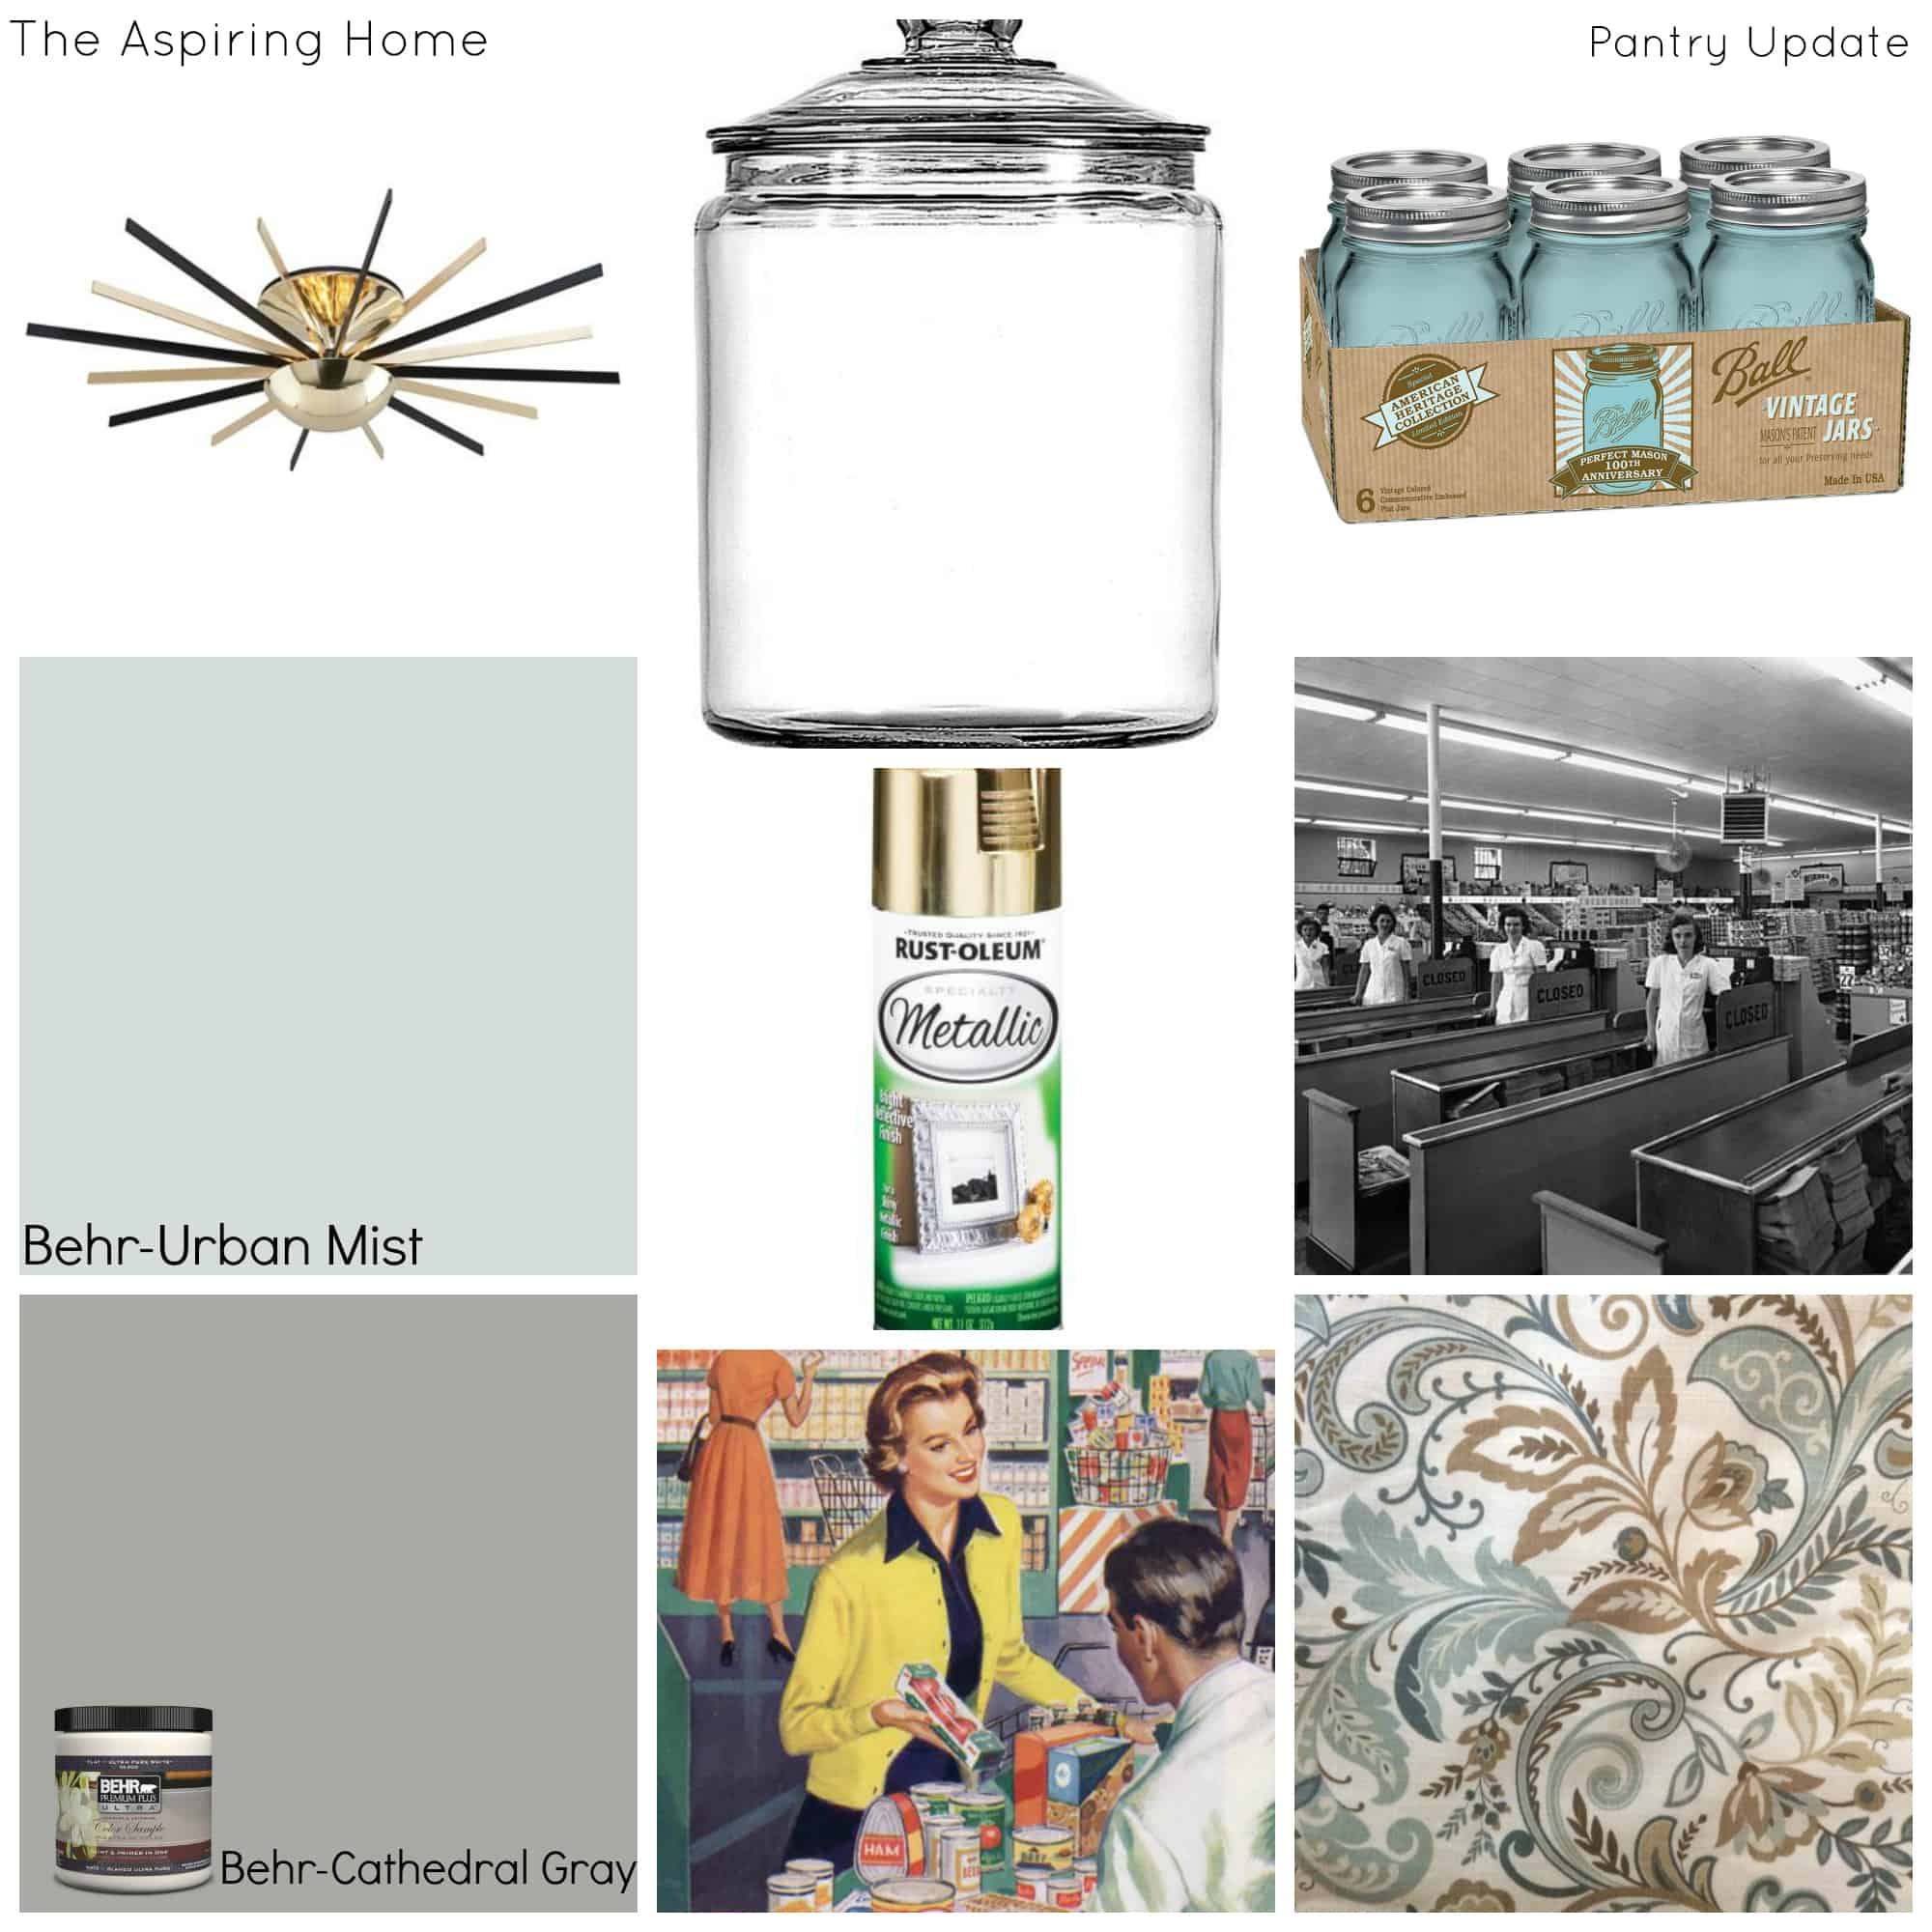
Of course, inspiration boards are meant to be tweaked – at least in my world.
We did go with the original color for the room and with the help of Purdy Paint Brushes- the room was finished quickly. If you are like me, the budget is super important and you can’t always justify hiring a painter.
If you are painting the room yourself- I can’t express to you enough the importance of really good paint tools. I learned from my husband who learned from his stepdad (who is a professional painter- one of the best in the business) the power of the right brushes.
Purdy brushes to be exact. Some of my Purdy brushes are 20 years old and they are still able to crank out beautiful rooms.
Back to the Pantry Makeover Details Breakdown:
We started out with a space that looked like this…

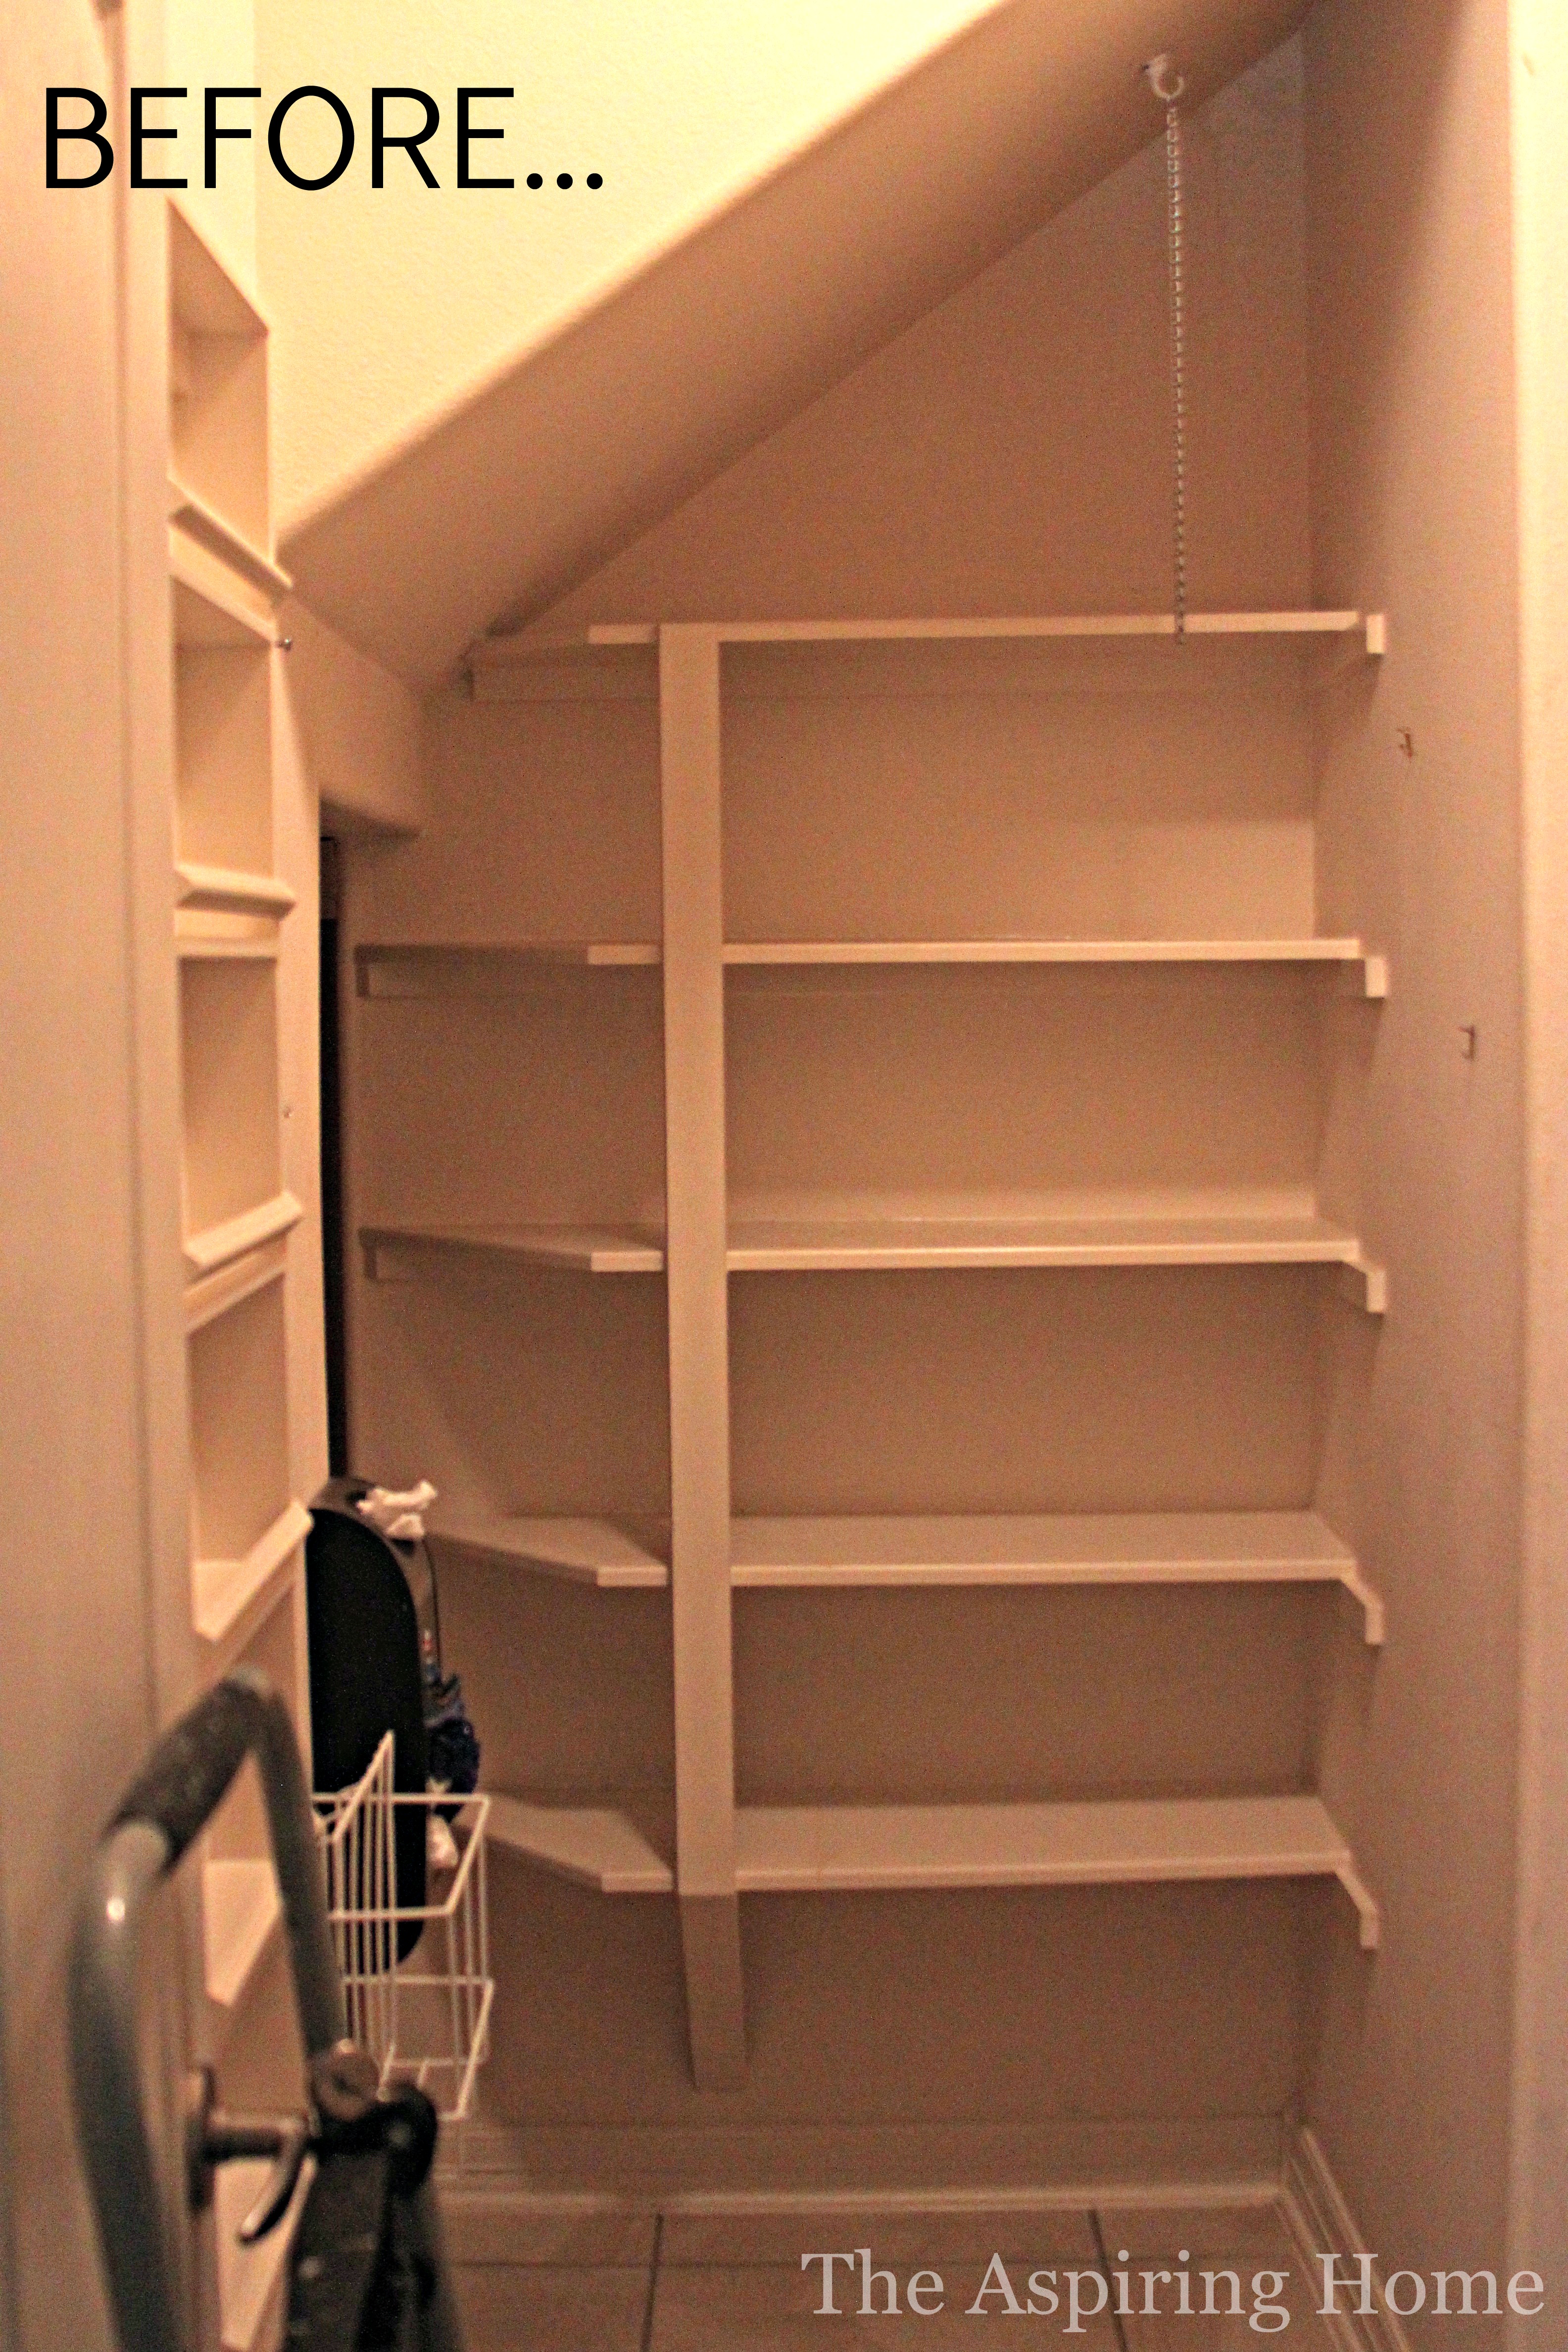
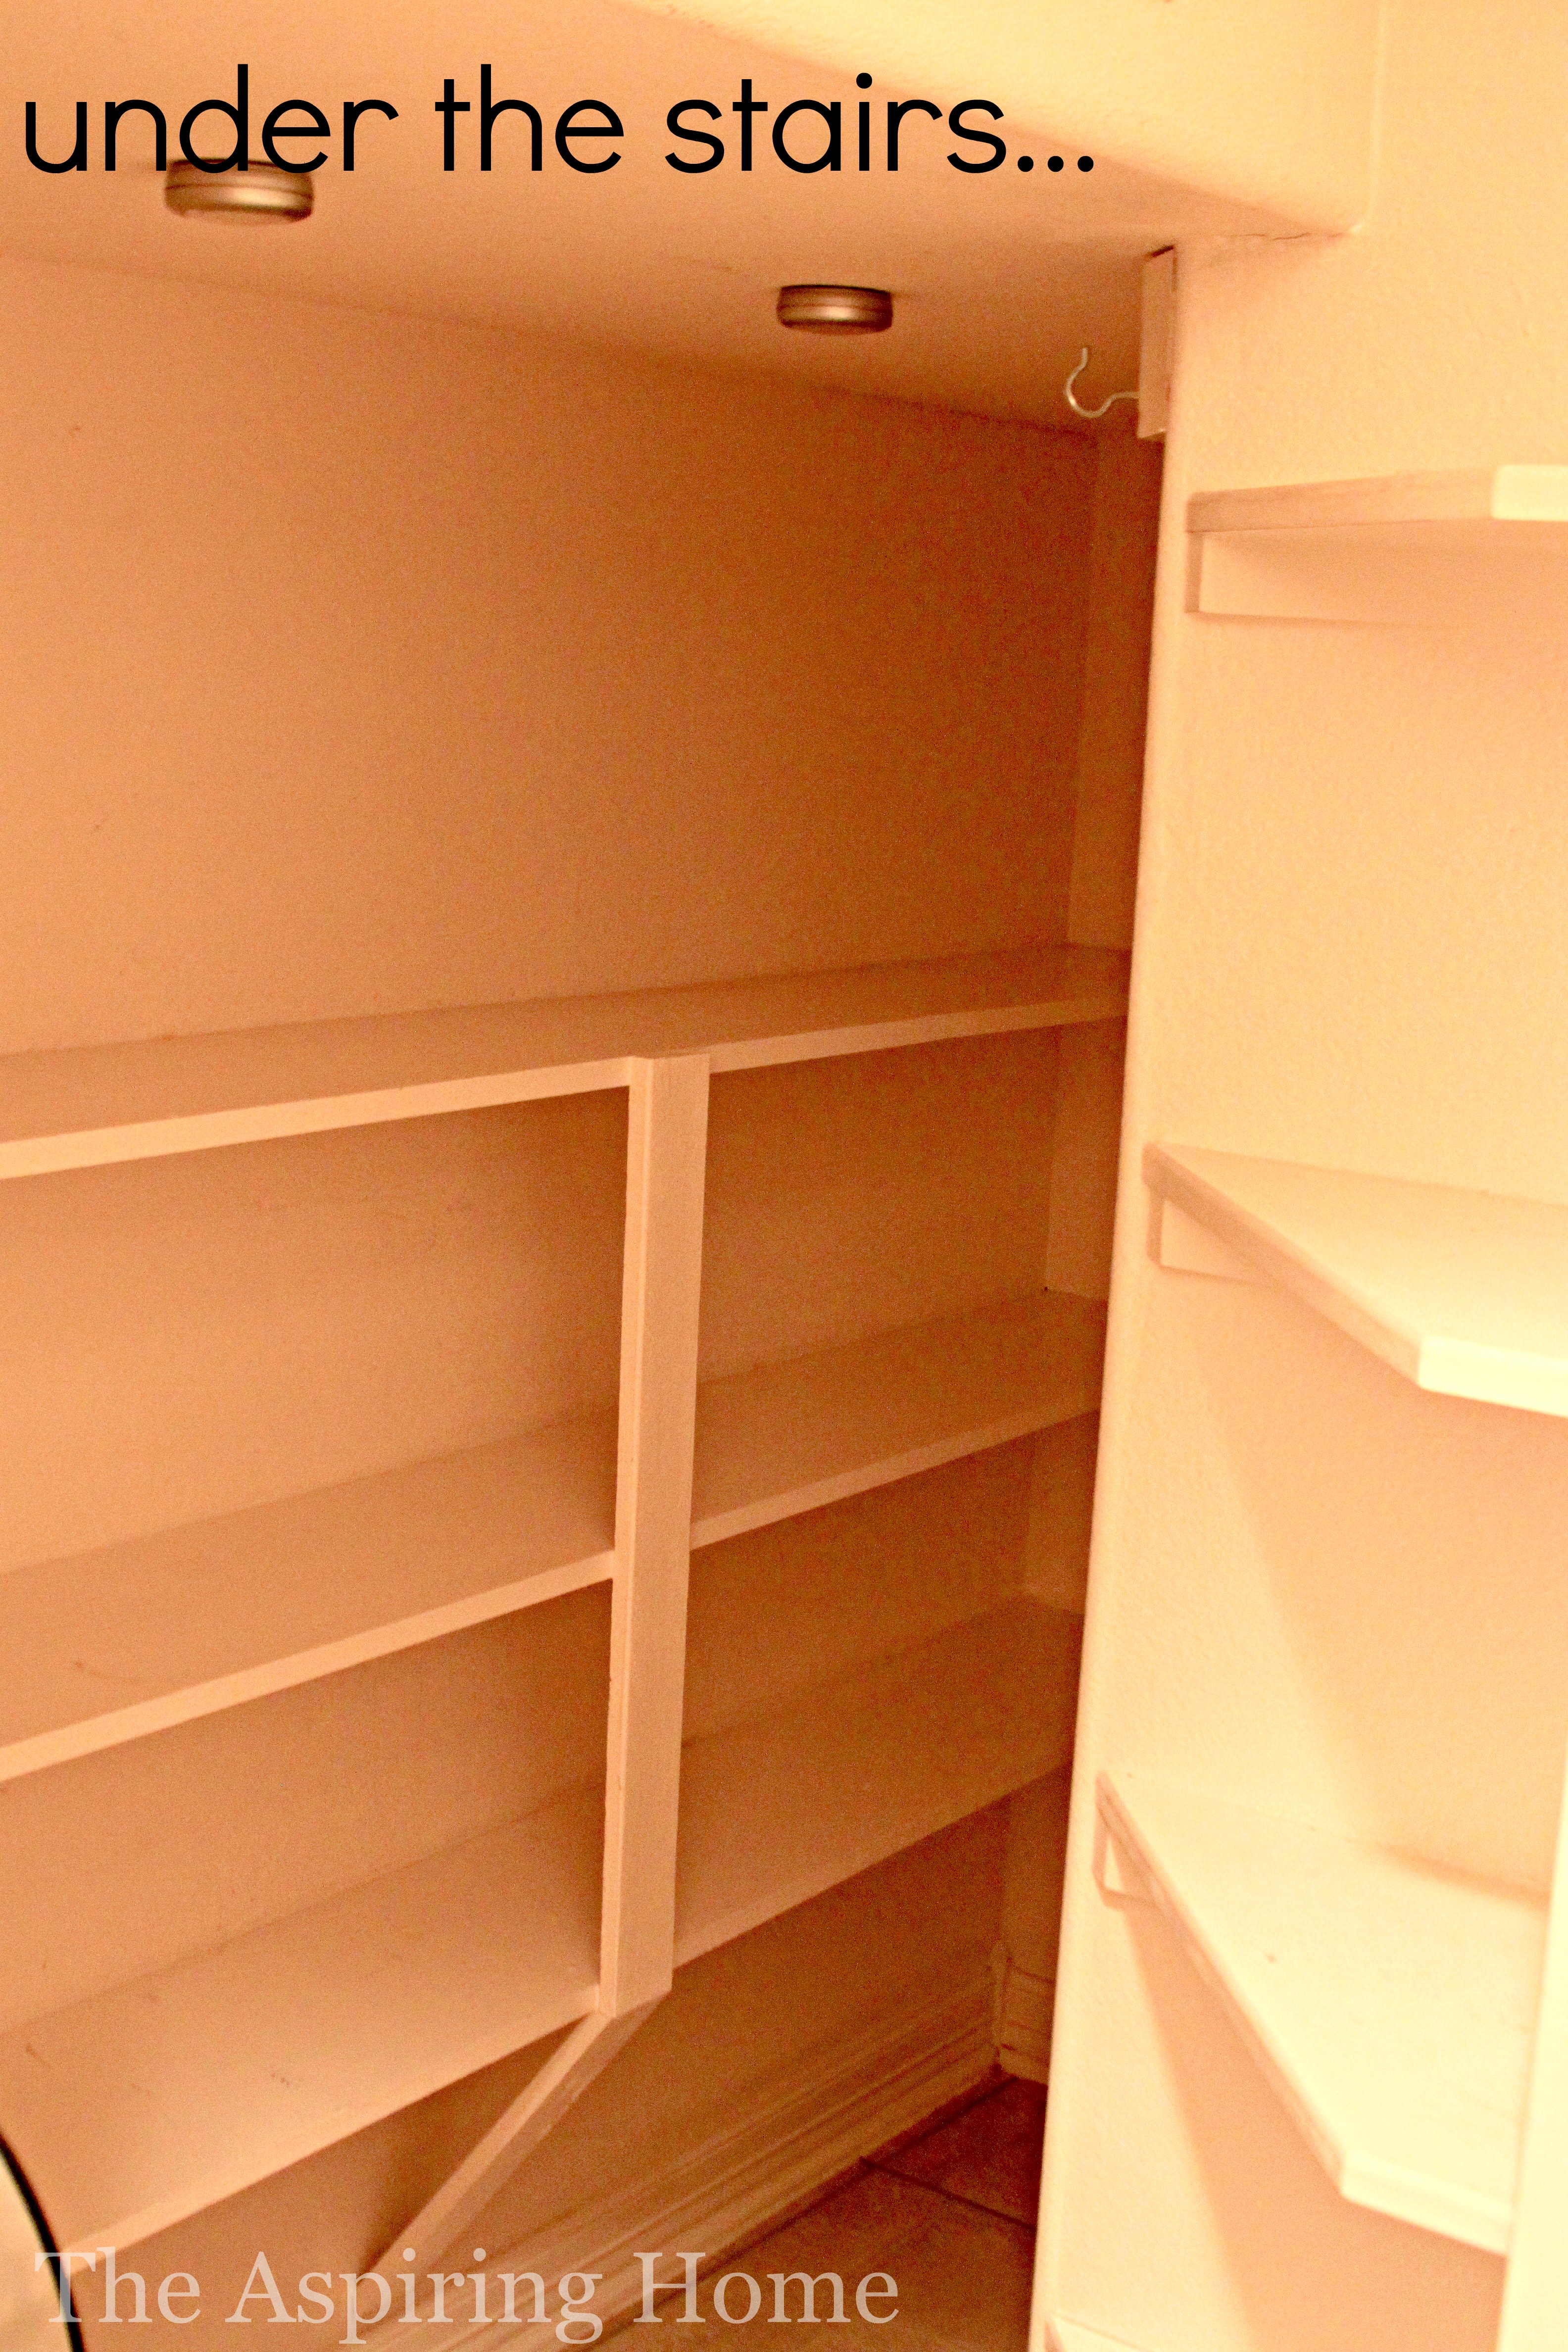
Now, these pictures were taken AFTER I (ok, it took the whole family) cleaned it out. I honestly took REAL before pics and was prepared to show you but now I cannot for the life of me find the little buggers. Trust me, it was seriously bad.
Blank slates are always a good place to start and as I stood in this room – I had to get honest with myself. I wanted a pretty space but I knew storage and organization had to trump pretty if it came down to an “either-or” situation.
Pantry Makeover Details –
Organization:
While staring at the space the idea of bins came to me. I have a ton of reusable bags that tend to need a weekly tidying up. Well, you know that school of thought that says one item out of place leads to unlimited clutter?
That was the weekly story in the pantry until I created these under shelf rolling storage bins! A perfect example of pantry makeover details that are not only functional but pretty!


I knew my tiered shelving system was not cutting it and so I took away a few of the tiered shelves and added baskets instead. Much better.

I tried to keep all the snacks and lunch making items together. Items that could be breakfast related were gathered into one spot. Baking items and oil were pulled together and I put them on the shelves directly across from the pantry door- we do not bake often so I am hoping this area will stay uncluttered and give the sense of organization even when it is struggling with a tad of chaos (we know it is going to happen).
The large jars were perfect for holding the traditional pantry items. I pulled out my Cricut Expressions 2 and made vinyl letters to create the label.

The chalkboard labels were a last-minute decision when I couldn’t get the Cricut to “talk” to my computer. I have another idea for labeling the baskets – hoping that will come about next week sometime.
The crate storage was a happenstance. I bought four crates in hope that I could slap on some wheels and “create” my bins that way. It didn’t take long to see that they were not going to give me the sleek clean look I was desperate for. Instead of returning them (bought on sale!) I used them. After lightly sanding and staining, they were perfect to control all the cute paper plates and party napkins.


The blue mason jars were a bust at first thought. When they arrived – I thought they would be bigger. I know I know… I still thought about it. Anyway, they turned out to be a perfect size for energy drink powders, corn starch, and baking powder.
The hanging potato and onion basket got the boot in favor of 2 small wall baskets. I have learned that you should separate the onions and potatoes. So, potato baskets are hanging on the wall and I have a wire basket for my onions on the back shelf of the under stairs storage.

The old spice rack became the go-to spot for storage bags, foil, and plastic wrap. All my spices are now stored beautifully above the stove.
The Chalkboard was a find at Hobby Lobby. I added the words “The List” to it with my handy dandy Cricut.

Ceiling/Lighting:
I fell in love with the light I found but not with the price… for a pantry.
I then began to think of how I could recreate the light at the same time I also had the idea of doing something fun to the ceiling. Thus the MDF ceiling “tiles” were born. Once the “tiles” were installed, it became clear that the contractor-grade light fixture would not play well in the little space. The “tiles” stand-alone and bring in the 50’s vibe I was going for on the 5th wall.
With the awesome tiles up, it was back to the drawing board for lighting.
I came across the drum shade light and the price sold me. Imagine my surprise when I unwrapped my little treasure to find not only was it shiny chrome BUT it was made up of little circles! You can’t tell from the website pic, but it was a nice little surprise in making thw pantry makeover details a reality.

Artwork:
Yep, artwork in the pantry… why not? I found a fun picture of cashiers all lined up in really snazzy uniforms and just had to have it for the pantry. It reminds me of my cashier days at Winn – Dixie…I would have loved to have a cute dress and apron instead of a smock and black pants. 🙂

I am working on adding the fun colorful piece from my inspiration board and a few more kitschy fun pieces.
The artwork on the stair wall came about when I was hunting for letters to spell out a word. I wasn’t sure what I wanted to spell. “YUM” or “EAT” came to mind but they just were eh to me. While perusing Hobby Lobby I saw this framed photo and it hit me.
“LOVE” is what brings me in the pantry daily and it is why I go to the grocery store excessively. I love my family and friends and I love to cook. The little “starburst” wall sculptures were a fun find and bring in the atomic element I was digging from the original light fixture.

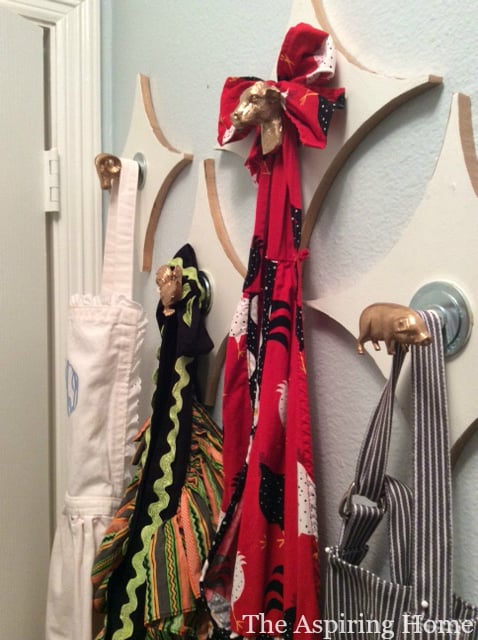
Another detail of the room that has me super thrilled is the apron hooks. I decided to put them under the artwork category of this post because they are so darn cute.
I love wearing an apron for a couple of reasons:
1) I tend to be a messy involved cook
2) Donna Reed wore one
Before I had all my aprons shoved onto one little hook. Now I have them displayed proudly. The backboard came from the scrap leftover of the MDF circle tiles. The animal hooks are cabinet knobs from Hobby Lobby that I Gold Leafed.

The Rug:
Oh! Finding the perfect runner gave me real fits. I searched EVERYWHERE and came up empty-handed. Wayfair to the rescue with this Dash and Albert rug, I was a bit hesitant to place the order but this rug received high marks and it had the texture I wanted.
When the rugs arrived – it was a happy day! Not only did they remind me of the old-fashioned rag rugs but the colors were spot on for the room. To save some cash I bought two smaller rugs and bound them with upholstery thread.
Simple project but time-consuming. I wanted to be able to wash these suckers and have them stay together, little tiny stitches were in order.


Well, that will wrap up my very first One Room Challenge!
I really enjoyed redoing this room and sharing all the pantry makeover details with you.
It isn’t as glamorous a choice granted but I think the hardest working rooms deserve to be beautiful too. Don’t you agree?
Thank you for checking in with me during the last 6 weeks. I hope you have found inspiration and a place to visit more often. In fact, if you ever want to know what crazy ideas I may come up with next… feel free to subscribe and I will email you all the fun!
’til Later,

http://amzn.to/1WX29XK
http://amzn.to/1WX29XK
http://amzn.to/1WX29XK
http://amzn.to/1WX29XK
http://amzn.to/1WX29XK
http://amzn.to/1WX29XK
http://amzn.to/1WX29XK
http://amzn.to/1WX29XK
http://amzn.to/1WX29XK
http://amzn.to/1WX29XK
http://amzn.to/1WX29XK
Joy Maier is the founder and principal designer of The Aspiring Home Interiors, an award-winning studio serving the greater Dallas area and beyond. Blending gracious living with elevated design expertise, Joy creates interiors that feel deeply personal, beautifully refined, and effortlessly livable — from full-home renovations to boutique vacation rentals. Her professional affiliations include ASID (Associate), ART, the Interior Design Society (Professional), NKBA, VRD Collective, and she is a founding member of Designers for Dogs. Since 2012, she has shared design tips and heartfelt stories on The Aspiring Home Blog. Her philosophy is simple: “Design should feel like a deep breath. When we get it right, your home greets you with that exhale every single day.”