Wk 4 Fall ORC – Flat Panel Wall DIY
Week 4 is here and it’s all about the flat panel wall DIY we came up with. Traditional Grid style panel walls are a perfect combo with the faux beams.
Hi friends, Week 4 update of the One Room Challenge is here. I am a little late in sharing my update. We have a few things happening behind the scenes in our personal lives but I am happy to share where we are as of today. Let’s talk about this flat panel wall DIY.
Catch Up Here:
Week 1 // Week 2 // Week 3 // Week 4 // Week 5 // Reveal!

For my friends who haven’t heard of the One Room Challenge, it is a bi-annual event hosted by Linda of Calling It Home. This event has grown into quite a sensation over the years. It’s exciting to have Better Homes and Gardens as the media sponsor and this season, High Point Market is involved!
20 featured designers are chosen for each round to share their visions and hard work on Wednesdays. Then Thursdays are open to over 150 guest participants to give their room updates. Every week is filled with highs and lows, design changes, and the unexpected. The One Room Challenge offers incredible encouragement and camaraderie amongst the participants and those who are following along as the “before” photos become a thing of the past and new beautiful spaces emerge.
My timeline is a little off and I really wanted to share with you in detail the gorgeous wall sconces that are going up. That conversation will be up on Thursdays for week 5.
After painting all the walls in deep beautiful indigo, I changed my mind on the wall treatment. Originally, I had planned to do wall panels similar to the office. These would have been great but with the addition of faux beams – a flat panel grid-style wall treatment felt right.
Flat Panel Wall DIY
Why thin plywood?
I didn’t want to rip out the current baseboards. So, I went with something that could be easily applied to the wall and give me the look I was wanting without having to deal with baseboards and carpet.
Supplies:
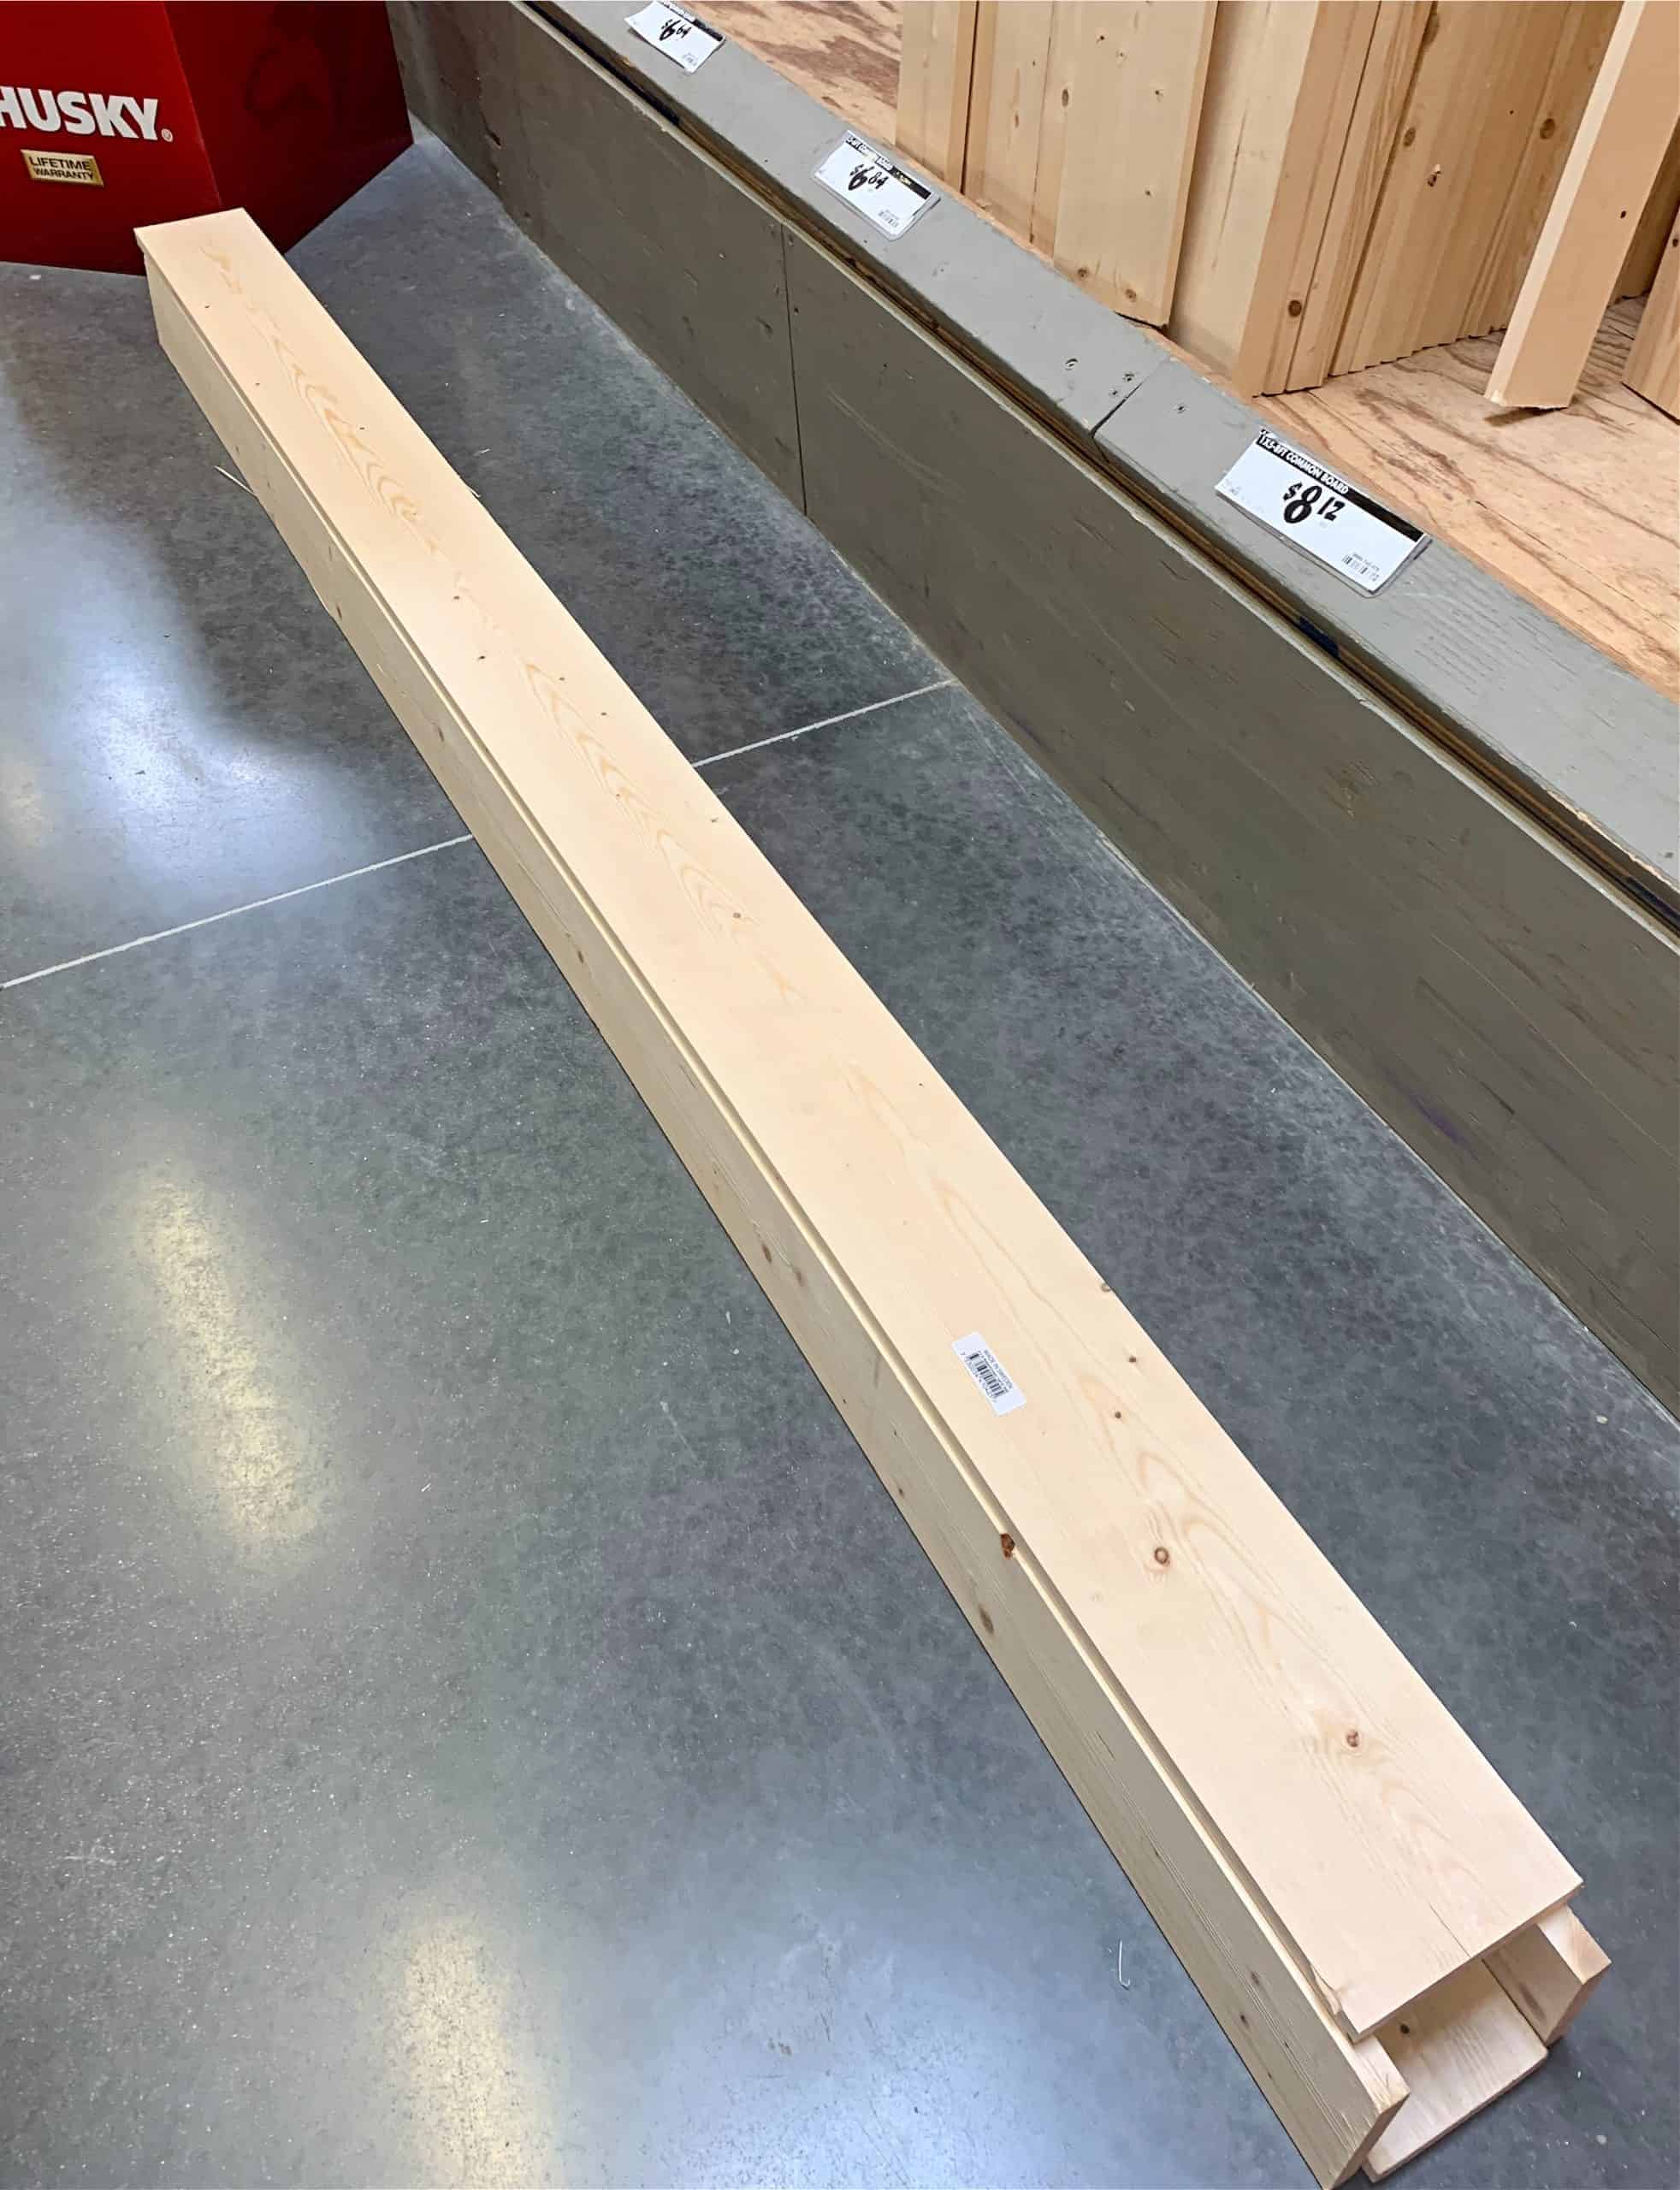
- 1/4 inch paintable plywood.
- Sandpaper
- The paint of your choice
- Table Saw (or talk with your local hardware/lumber store about cutting the strips for you)
- Paintable Caulk
- Brad Nailer
Step 1: Decide how wide to make your strips
I went with 3-inch strips for my panel wall. You can cut the strips at home with a table saw -this is a two-person job, especially if you are going to use thin plywood. The local hardware store made quick work of my strips on their ginormous saw. It was still a two-person job but it went so quickly!

Step 2: Sand the sides smoothly
This step will be a little time-consuming – knock off all the little burrs and splinters.
Step 3: Paint
This step is optional. You can paint before or after the strips are installed on your wall. It’s all preference.

Step 4: Install the strips
Start with outlining the wall with your strips, creating a large frame.

Measure the distance inside the frame. Determine how large you want the grid pattern to be. I wanted my grid to be three rows horizontally. So, after measuring – I was able to get 5 vertical strips across and my idea of three rows horizontally looks pleasing to the eye

Step 5: Putty
Lots of nail holes to fill!
Step 6: Touch – Up paint
Now that all the holes are filled, time to paint!

What’s happening with the rest of the room?
I put together a room layout for this space. This room is going to be full. It just can’t help it so the “Gentleman’s Quarters” feel is going to help this room make sense.
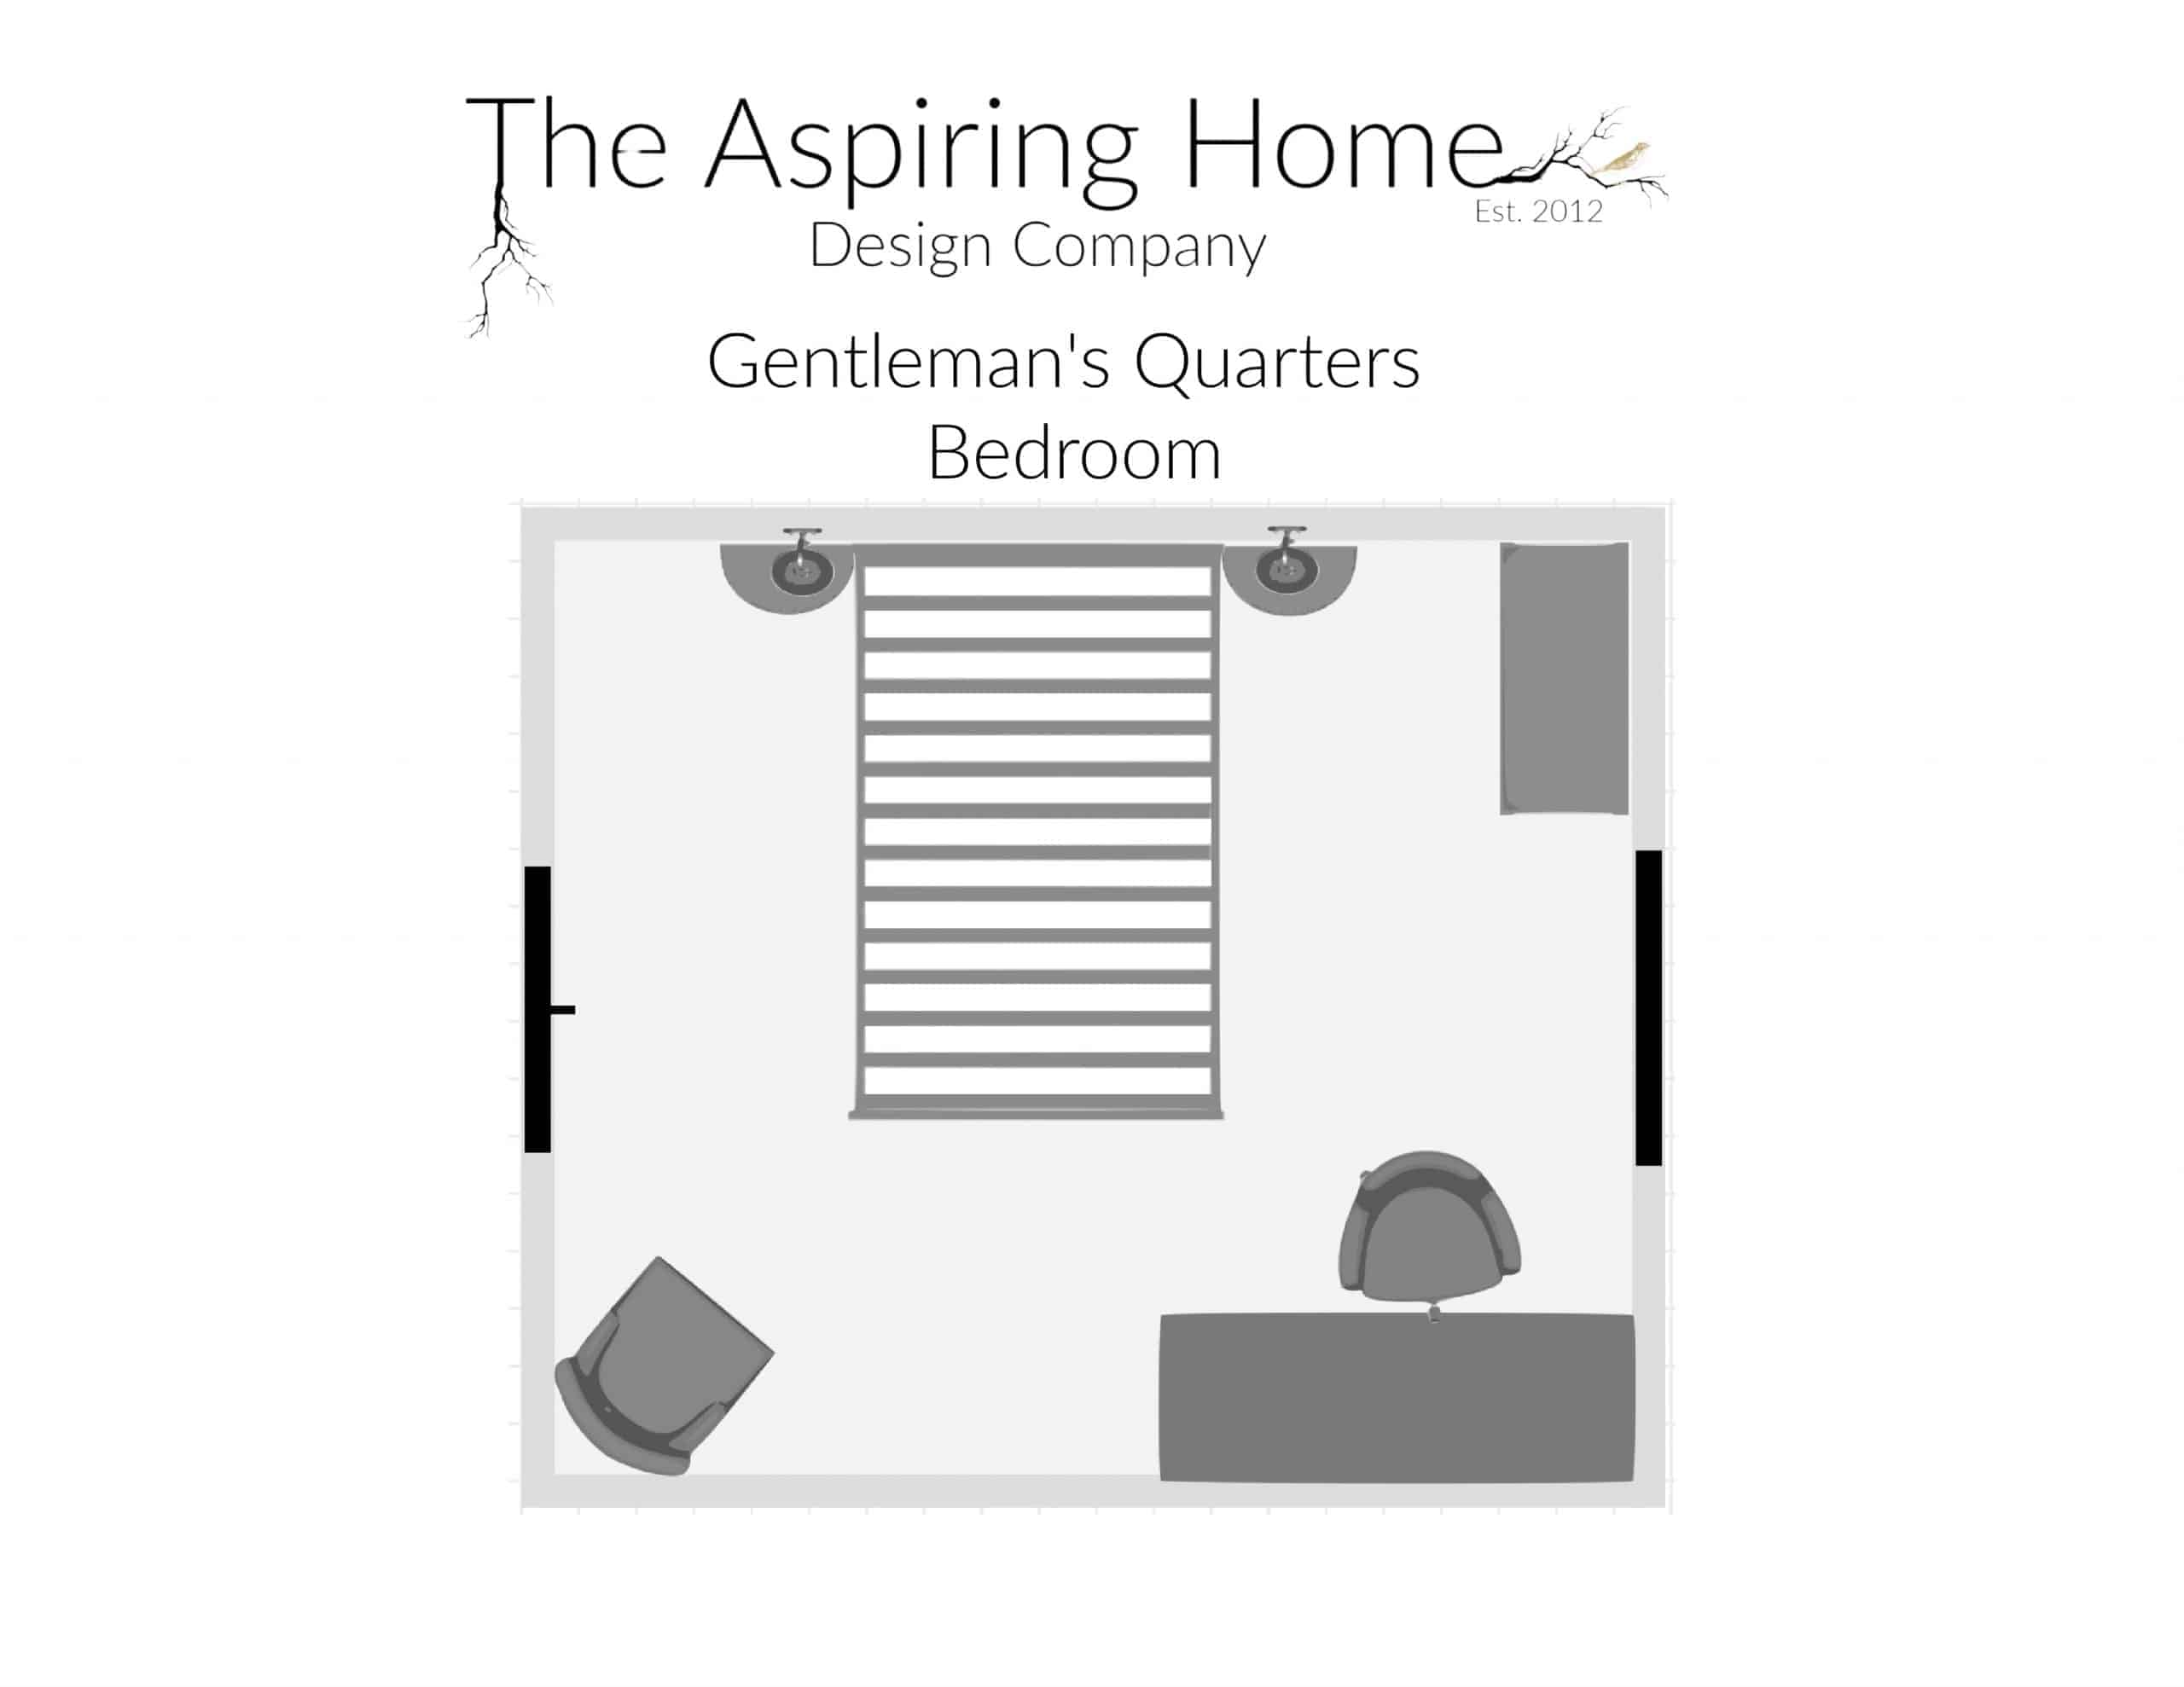
I shared with you that the chesterfield accent chair I had originally pegged for this room, became “out of stock”. The hunt went on and I found myself moving in a slightly different direction. This chair has a mid-century vibe BUT has the tufted element. It is also a bit smaller scale which will tuck into the room a little better.
To add a little flare- I am going to add a swath of gold to the legs – should be fun!

The bed has been sanded and bleached. Next up is a beautiful wood stain and a surprise element!

We purchased the wood to make the beams and have started staining. These are going to be SO GOOD with the new flat panel walls!
Next week, I get to show you the gorgeous sconce lighting coming into this room by Crystorama!
Til Later Friends,

Joy Maier is the founder and principal designer of The Aspiring Home Interiors, an award-winning studio serving the greater Dallas area and beyond. Blending gracious living with elevated design expertise, Joy creates interiors that feel deeply personal, beautifully refined, and effortlessly livable — from full-home renovations to boutique vacation rentals. Her professional affiliations include ASID (Associate), ART, the Interior Design Society (Professional), NKBA, VRD Collective, and she is a founding member of Designers for Dogs. Since 2012, she has shared design tips and heartfelt stories on The Aspiring Home Blog. Her philosophy is simple: “Design should feel like a deep breath. When we get it right, your home greets you with that exhale every single day.”