DIY Outdoor Stone Entry Table
Spring is here and it’s time to tidy the yard! This DIY outdoor stone entry table is so easy and can double as a planter.
Sprucing up for Spring around here! This DIY outdoor stone entry table one took a couple of afternoons and a few years to complete. HA! I say a few years because we originally built it as a fall planter to hid the wall fountain cord. Then our pool’s original limestone coping became weakened by the salt pool and had to be replaced with another type of stone. I ended up keeping the limestone and repurposing it.
Our palette of new stone had one large piece left that I was able to keep on the side of the house for a little while until I came up with an idea on how to use it. One spring day, I was dreaming of ways to update my porch without spending a fortune, I had a light bulb moment.

Supplies for DIY Outdoor Stone Entry Table:
- 2 Knotty Pine boards 1 in x 8 in. x 96 in
- 2 Shelf brackets
- Nails
- Wood Glue
- A large piece of stone (from a stone yard or neighbor leftovers)
- screws for shelf brackets
Step 1: Build the Base
Cut three pieces. 2 pieces for the legs and 1 piece for the bridge.
Legs – 30 inches each
bridge – 34 inches

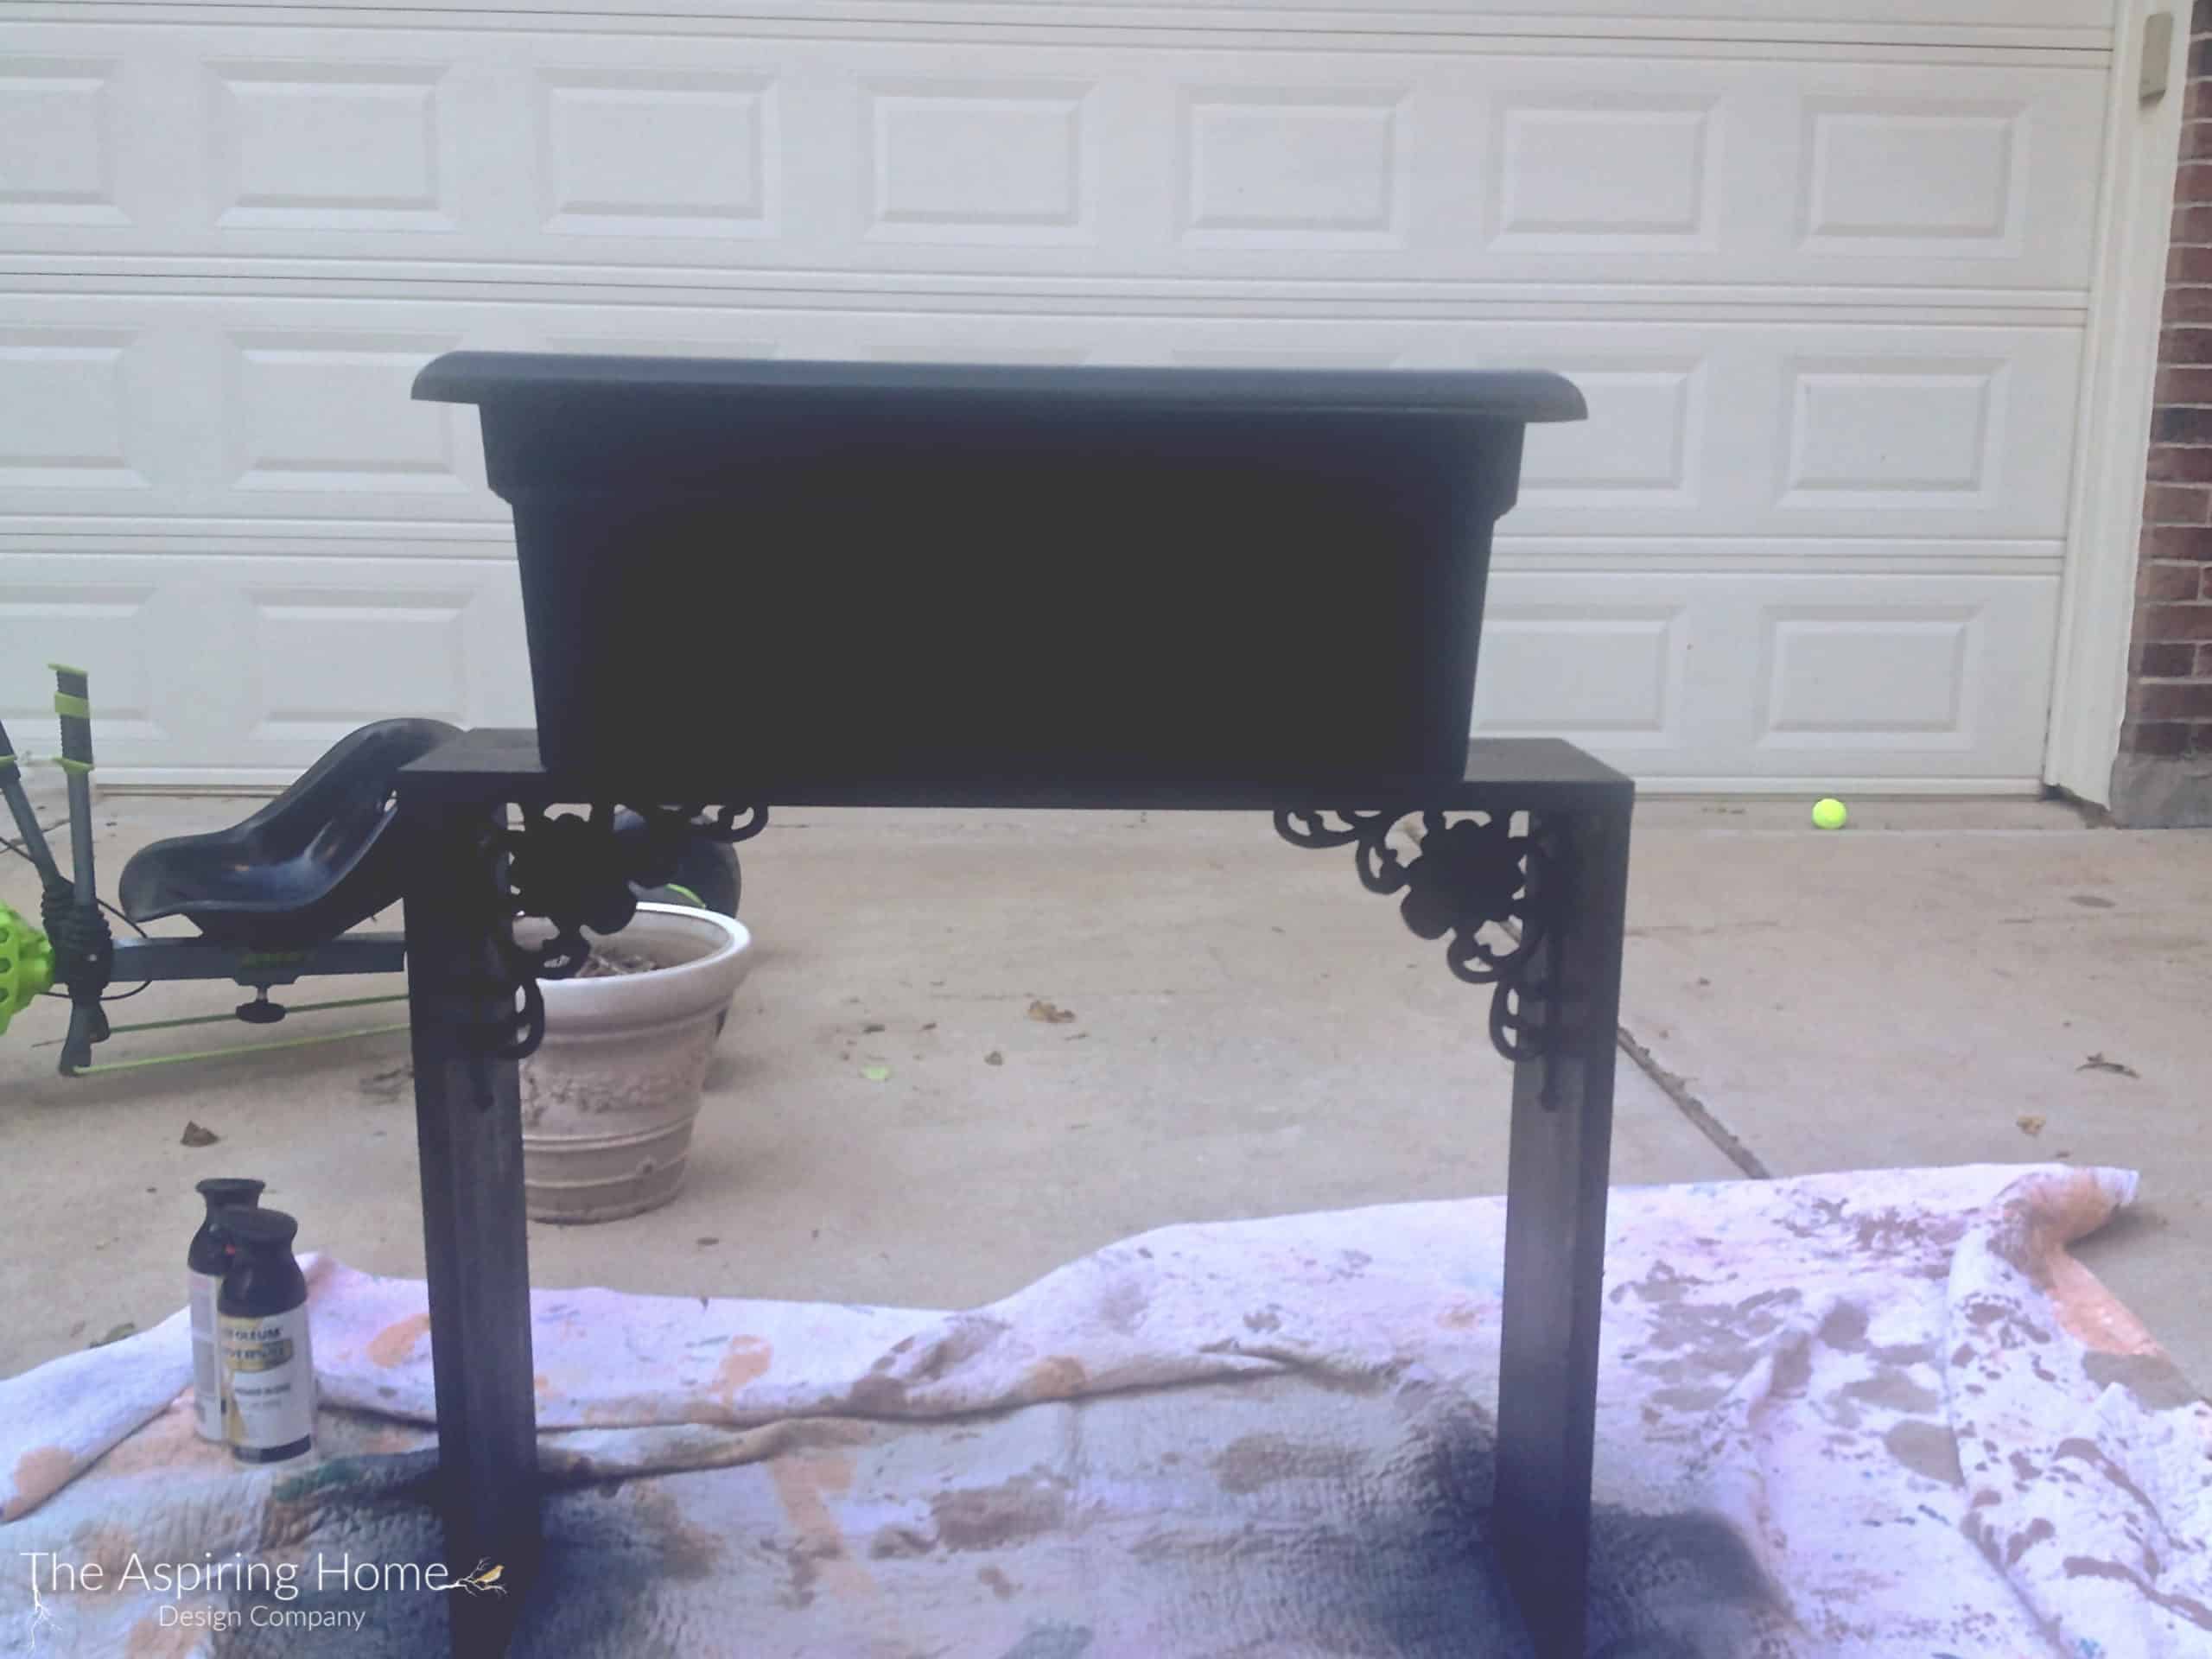
Wood glue and nail the legs to the bridge piece. Flip the base upside down and add the shelf brackets. Pre-drill for your screws in order to avoid splitting the wood.
The brackets add stability and a little decorative element (I had them on hand or I would have probably chosen something a little cleaner in design).


- attach buttons to the bottom to raise the wood slightly off the ground. It will help with those rainy days.

Step 2: Paint the Base
Originally I painted the base black when I was using the base for a flower planter box. I chose the easy route- spray paint.

Makes a handy dandy planter, doesn’t it?
When I decided to repurpose the base, I chose a faux finish with a few acrylic outdoor craft paints in light tan and grays. This was also very simple, I chose the colors from dark to lightest and did a dry-brush technique, building color until it felt “right”.


Step 3: Add the Stone Top
Ok, this could not be easier. Our stone piece was large enough and heavy enough that we just sat it squarely on top of the base. We NEVER had an issue with it. If your stone is lighter or you have a safety concern, you can use a 2-part epoxy glue formulated to adhere the stone to wood. Just follow the package directions.
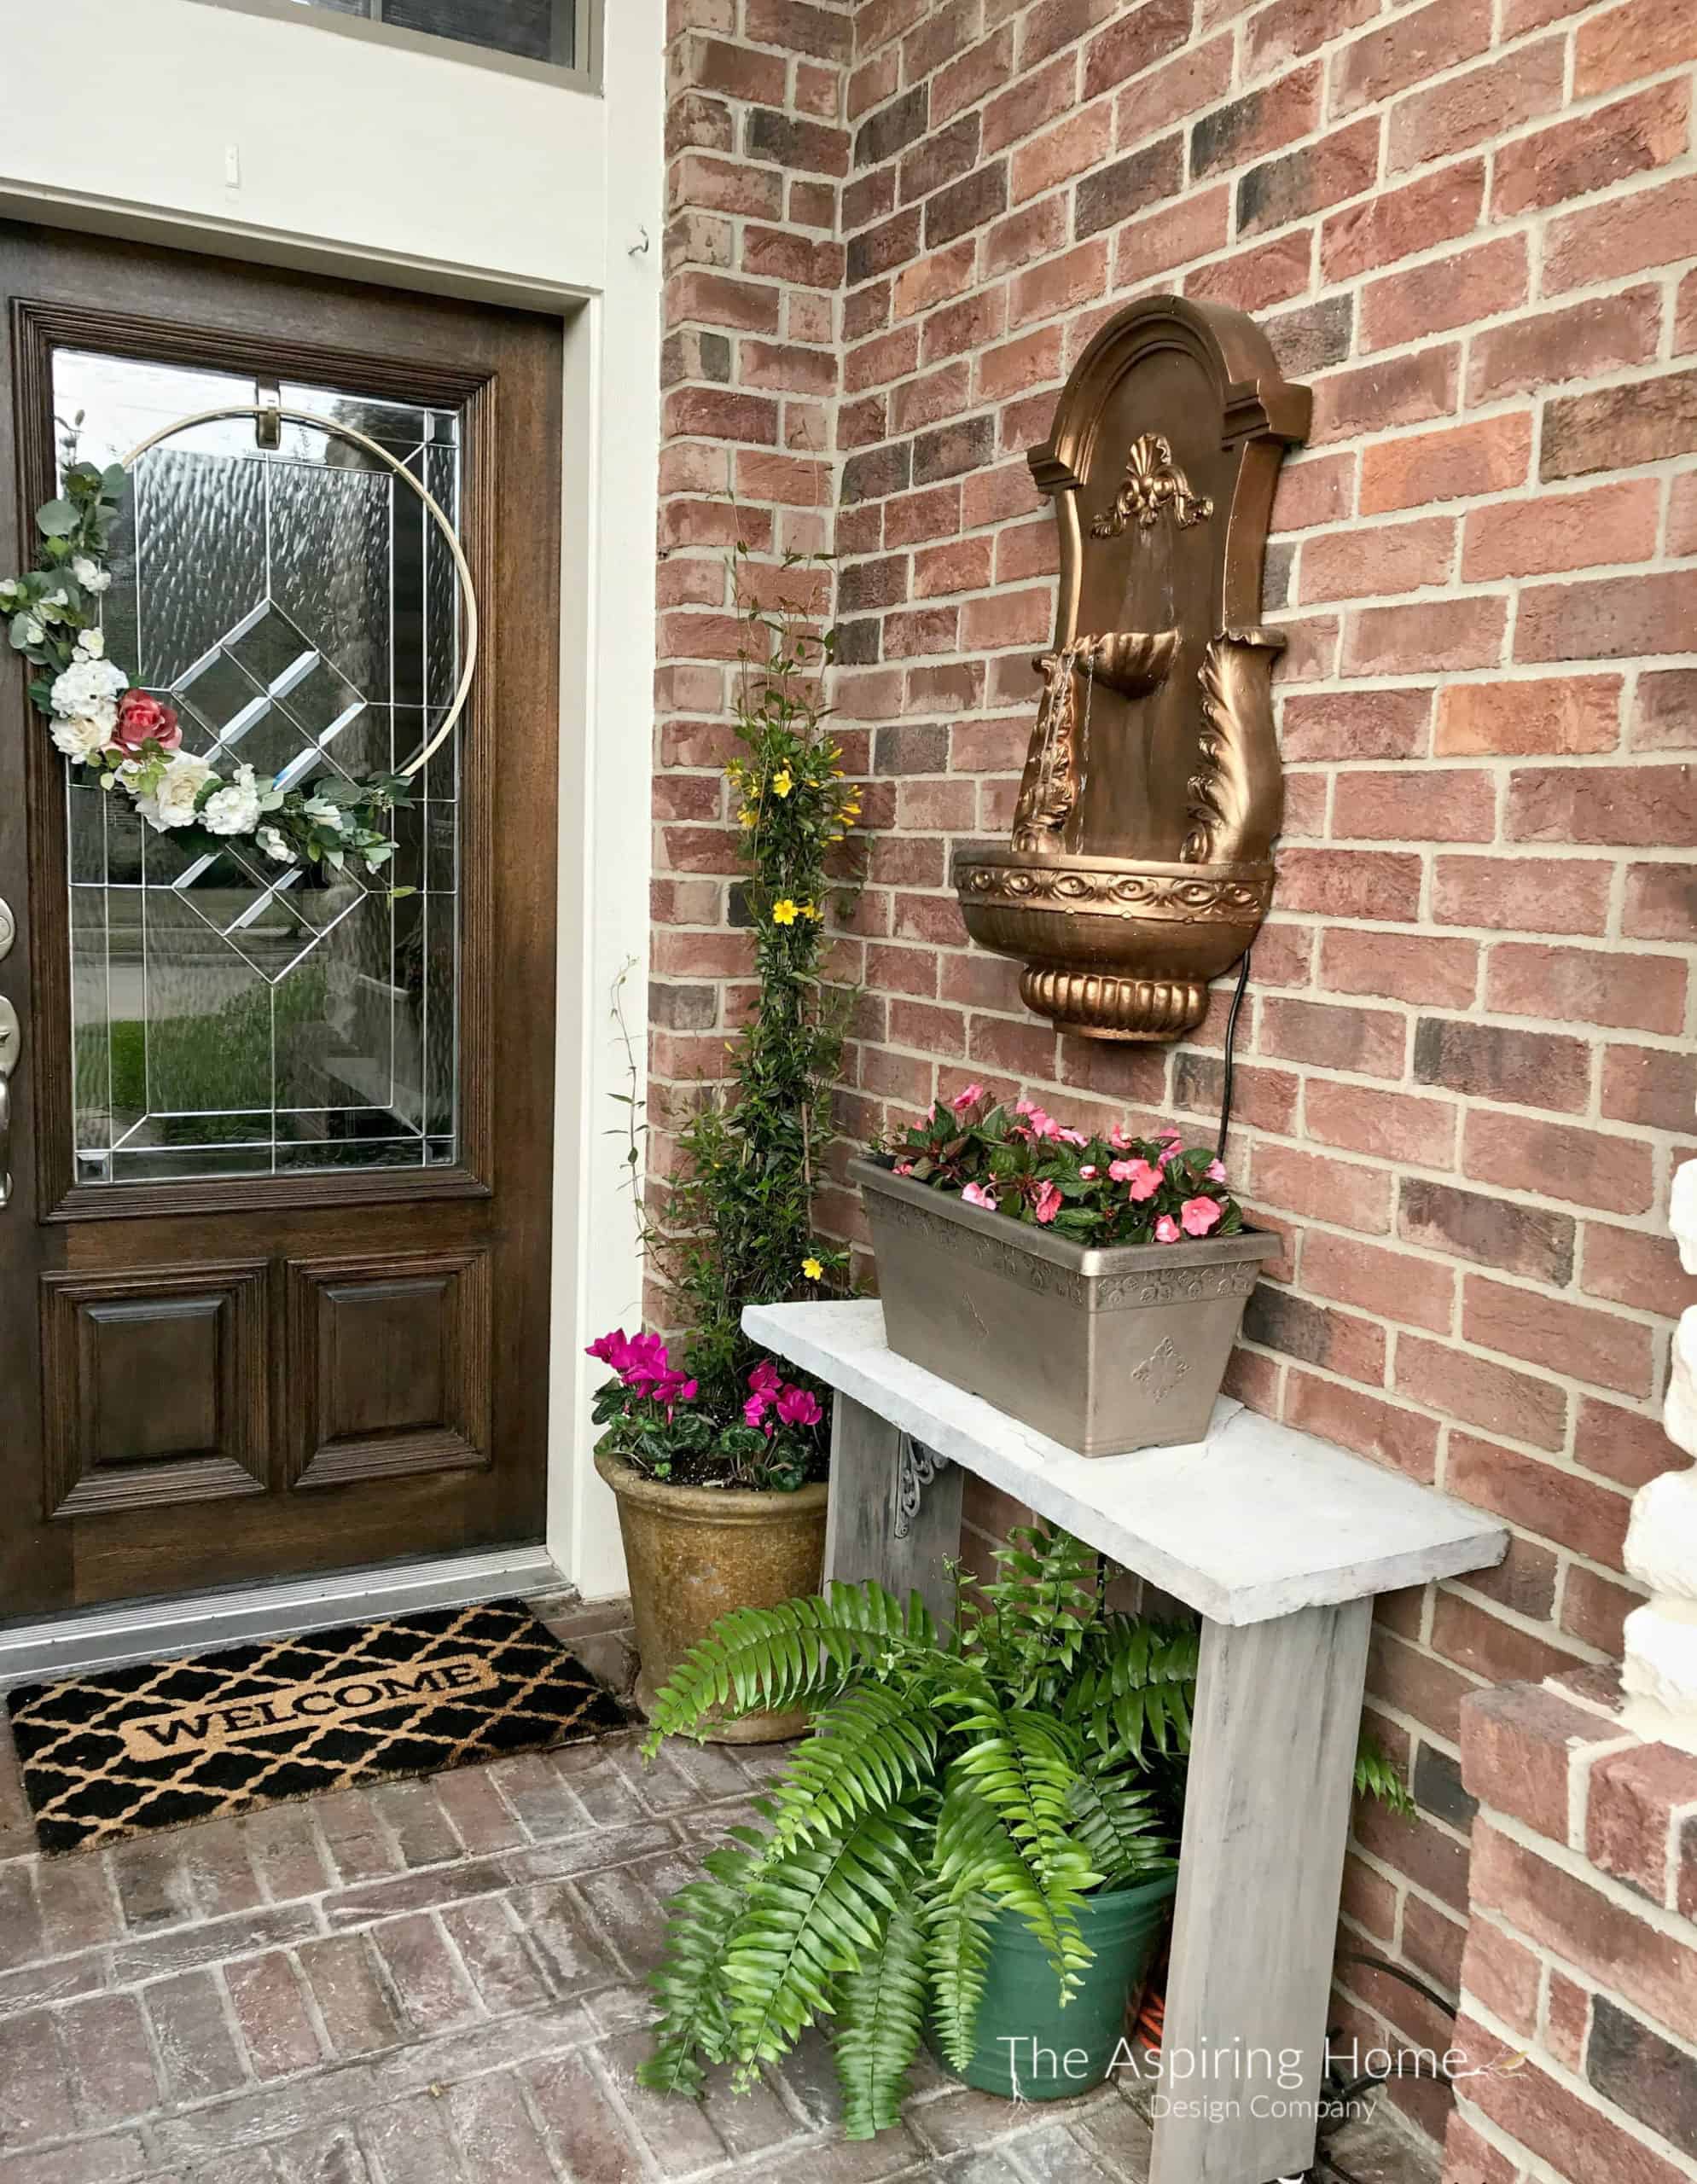
- To blend the stone and the base, I watered down the lightest shade on the base and with a soft brush, I added layers of thin paint until I liked the shade.
So simple and easy! What are you waiting for?
Go spruce up for Spring, my friends and if you need some pretty summer porch shopping inspiration click here.
Till Later,

Joy Maier is the founder and principal designer of The Aspiring Home Interiors, an award-winning studio serving the greater Dallas area and beyond. Blending gracious living with elevated design expertise, Joy creates interiors that feel deeply personal, beautifully refined, and effortlessly livable — from full-home renovations to boutique vacation rentals. Her professional affiliations include ASID (Associate), ART, the Interior Design Society (Professional), NKBA, VRD Collective, and she is a founding member of Designers for Dogs. Since 2012, she has shared design tips and heartfelt stories on The Aspiring Home Blog. Her philosophy is simple: “Design should feel like a deep breath. When we get it right, your home greets you with that exhale every single day.”