Make This DIY Outdoor Curtain Rod
Outdoor curtain rods can get expensive fast! Save your cash for the curtains and make this DIY outdoor curtain rod version.
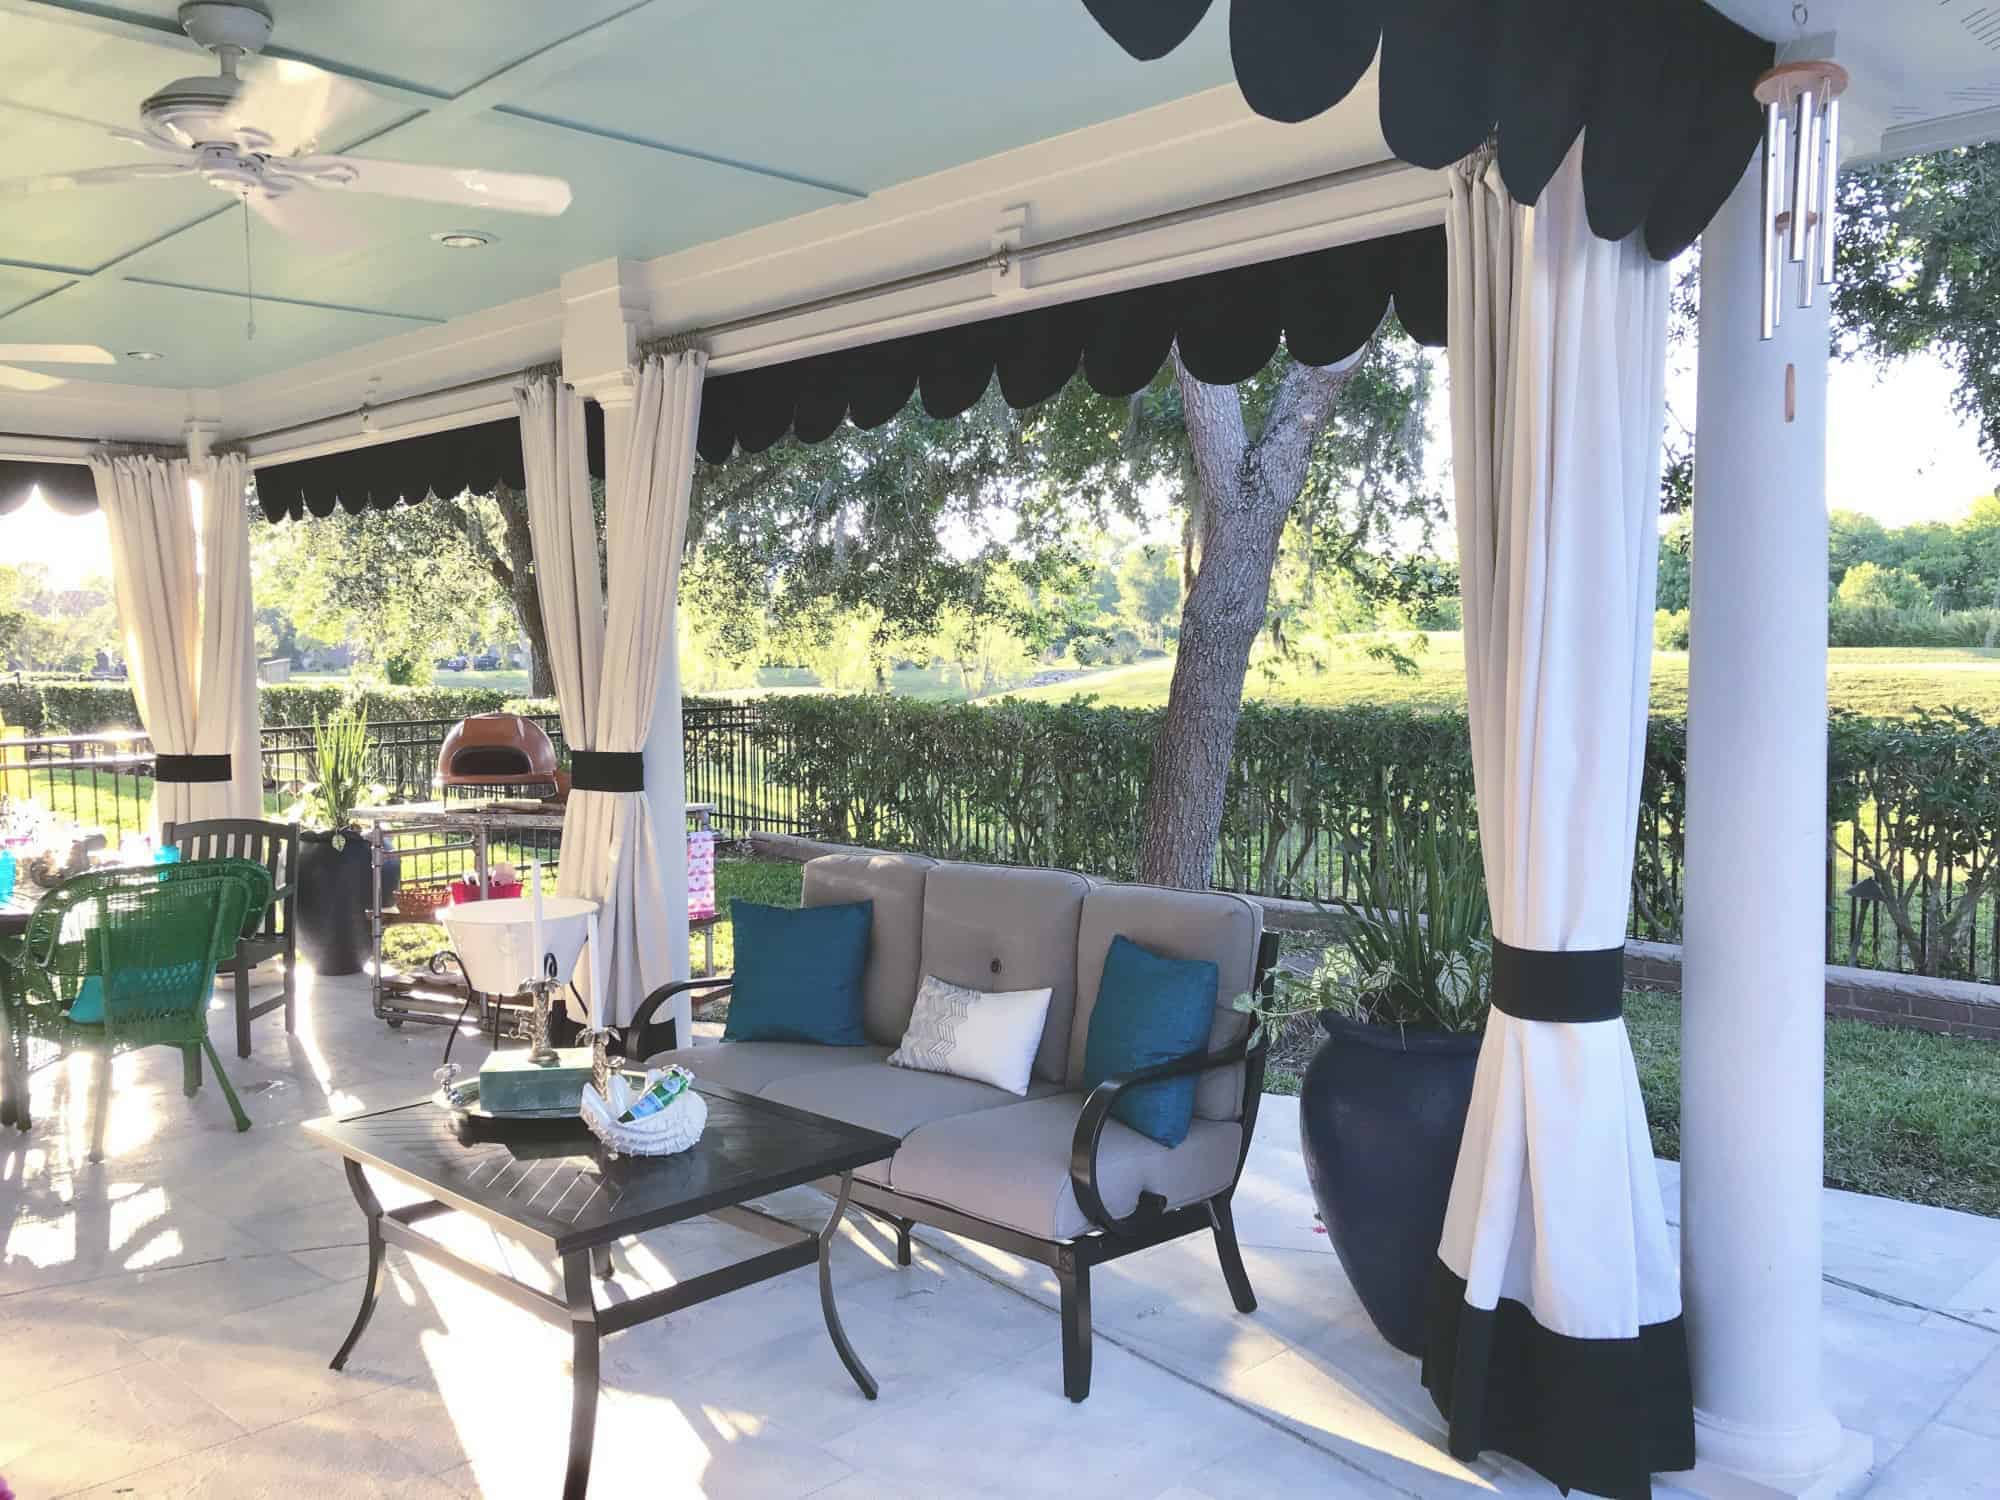
I love it when the cool spring breezes gently blow the outdoor curtains and the melodic sounds of the chimes chirp softly. Iced lemonade and a good book or magazine just make the picture complete. As good as that sounds, the costs of creating such a dream can climb pretty high, so I am super excited to share with you this DIY outdoor curtain rod project!

Supplies:
- Finish nailer (optional)
- 1″x4″ wood plank ( fewer knots, the better)
- Wood screws
- Jigsaw
- Hacksaw
- Paddle bit
- 1” 2-hole EMT straps (center support for the length of the pipe)
- 1″ EMT set-screw coupling (if you need to extend the length of the pipe beyond 10 feet)
- 1″ EMT pipe in 10-foot lengths conduit poles
How to make Outdoor Curtain Rods
Step 1: Measure your area
Measure the area you would like to add outdoor curtain rods.
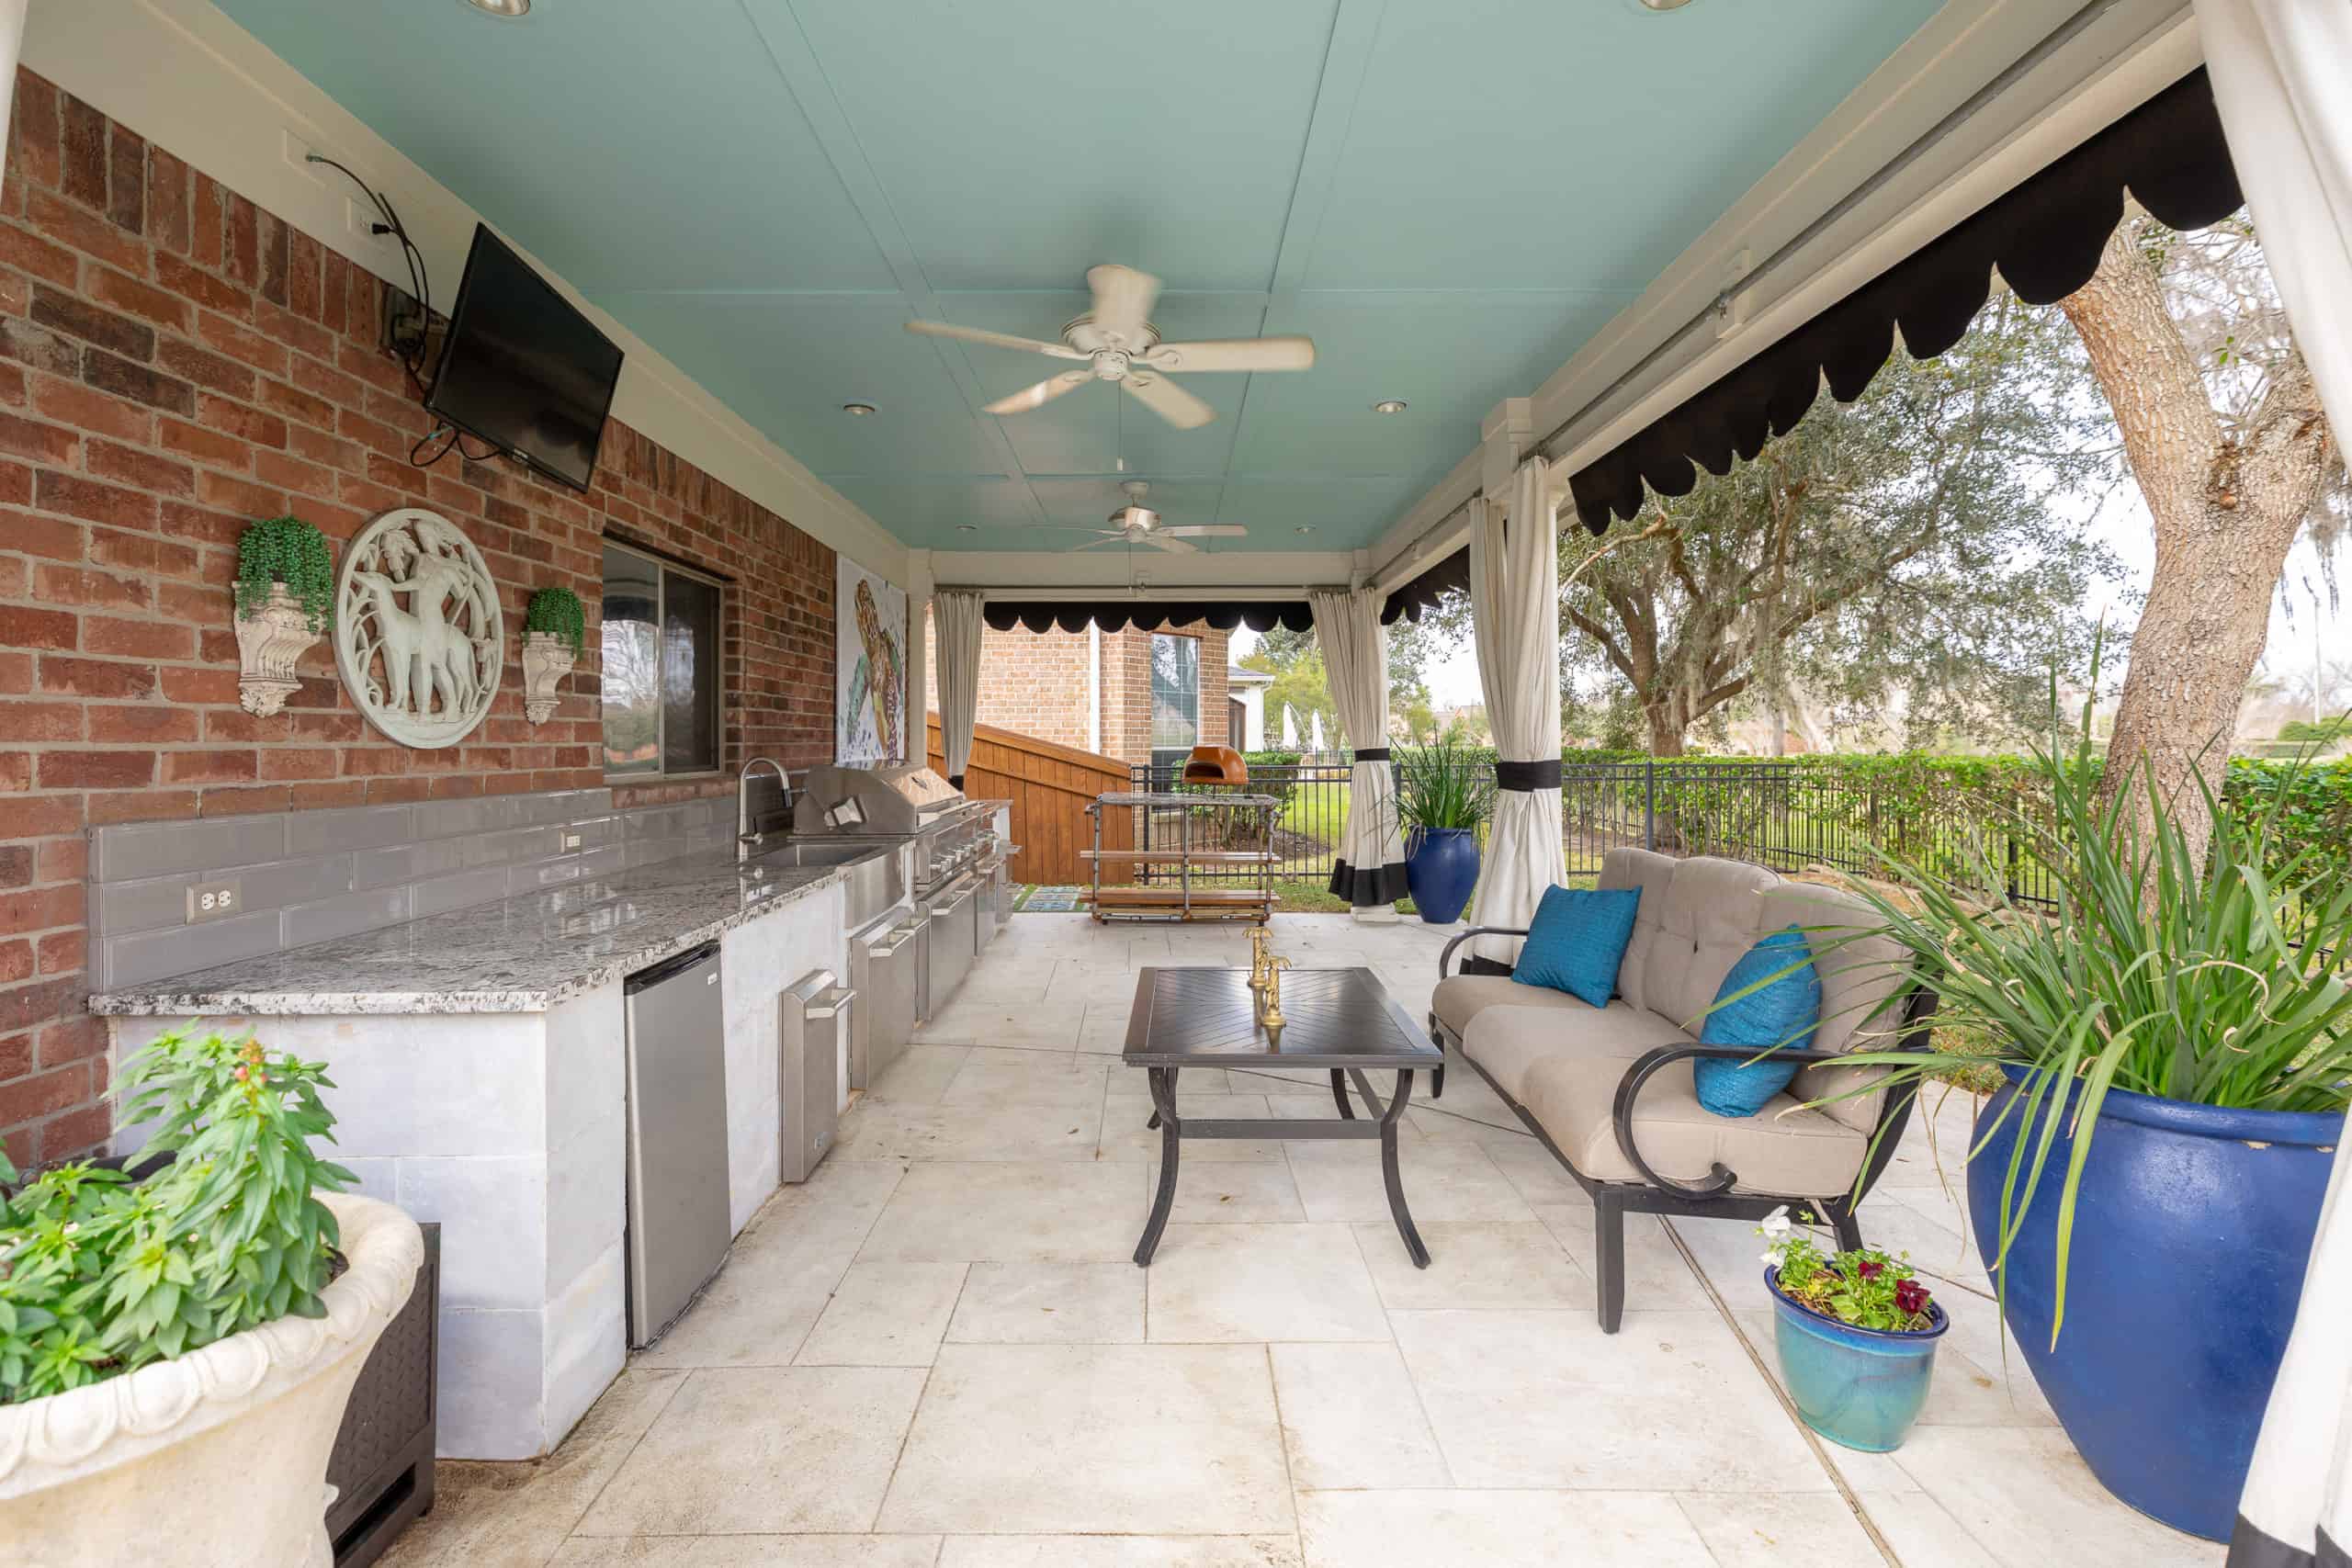
I wanted to give our outdoor kitchen/ living area a bit of character and have the opportunity to create quick shade when needed. Our space measured 15′ x 30′. So we needed 8 poles to create a balanced look. We wanted the connector couplings to be centered where the support bracket will be.
Step 2: Build the outdoor curtain rod supports
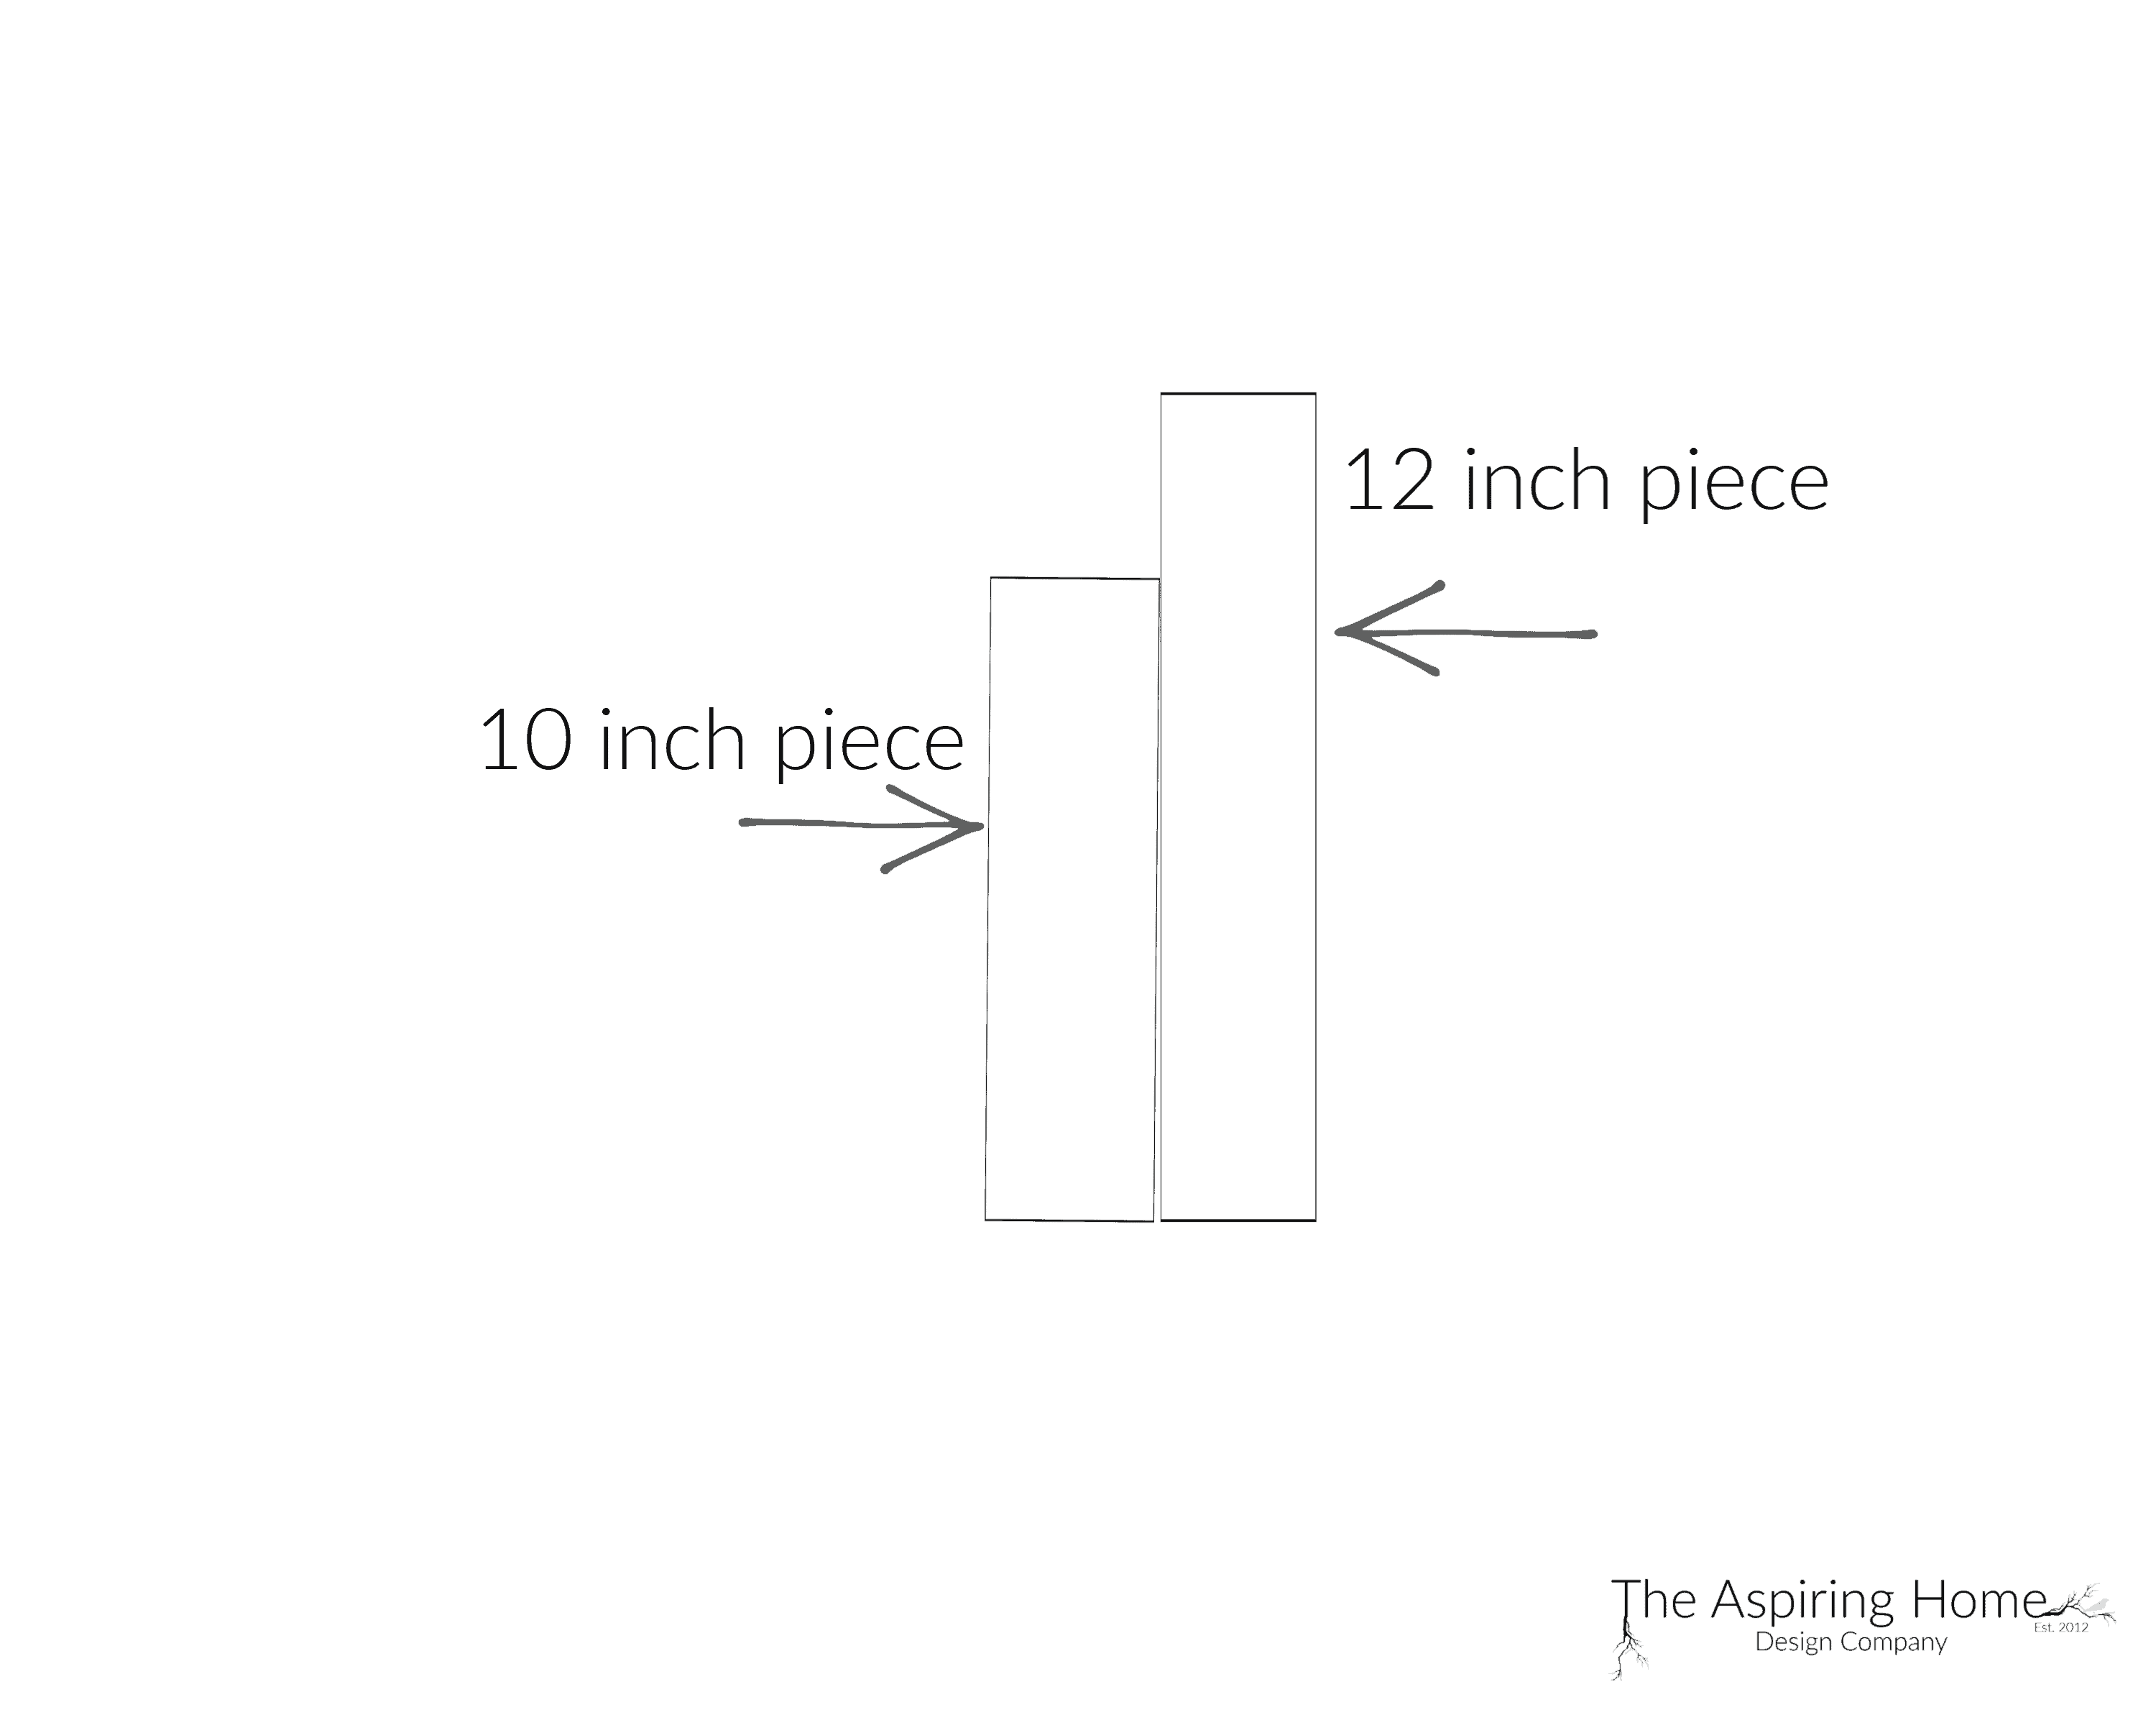
Next, using 1″x4″ wood plank, cut two lengths. The first length will be 12 inches. The second length will be 10 inches. We will be “sandwiching” the pieces together eventually to support the outdoor rod.
So for each rod, we will have three of these supports.
- 1. support with a “u” cut for the pipe to slide in.
- 2. support with a hole to secure one end of the pipe.
- 3. middle support with a solid front for the EMT strap to be secured to.
- Find the center of a 10-inch piece. Use your paddle bit to create a 1-inch hole. Next, using a ruler draw a straight line on each side to create a “U”. With a jigsaw, cut the “U” out. Finally, attach the 10-inch piece to the 12-inch piece.

2. Find the center of a 10-inch piece. Use your paddle bit to create a 1-inch hole. Next, attach the 10-inch piece to the 12-inch piece.
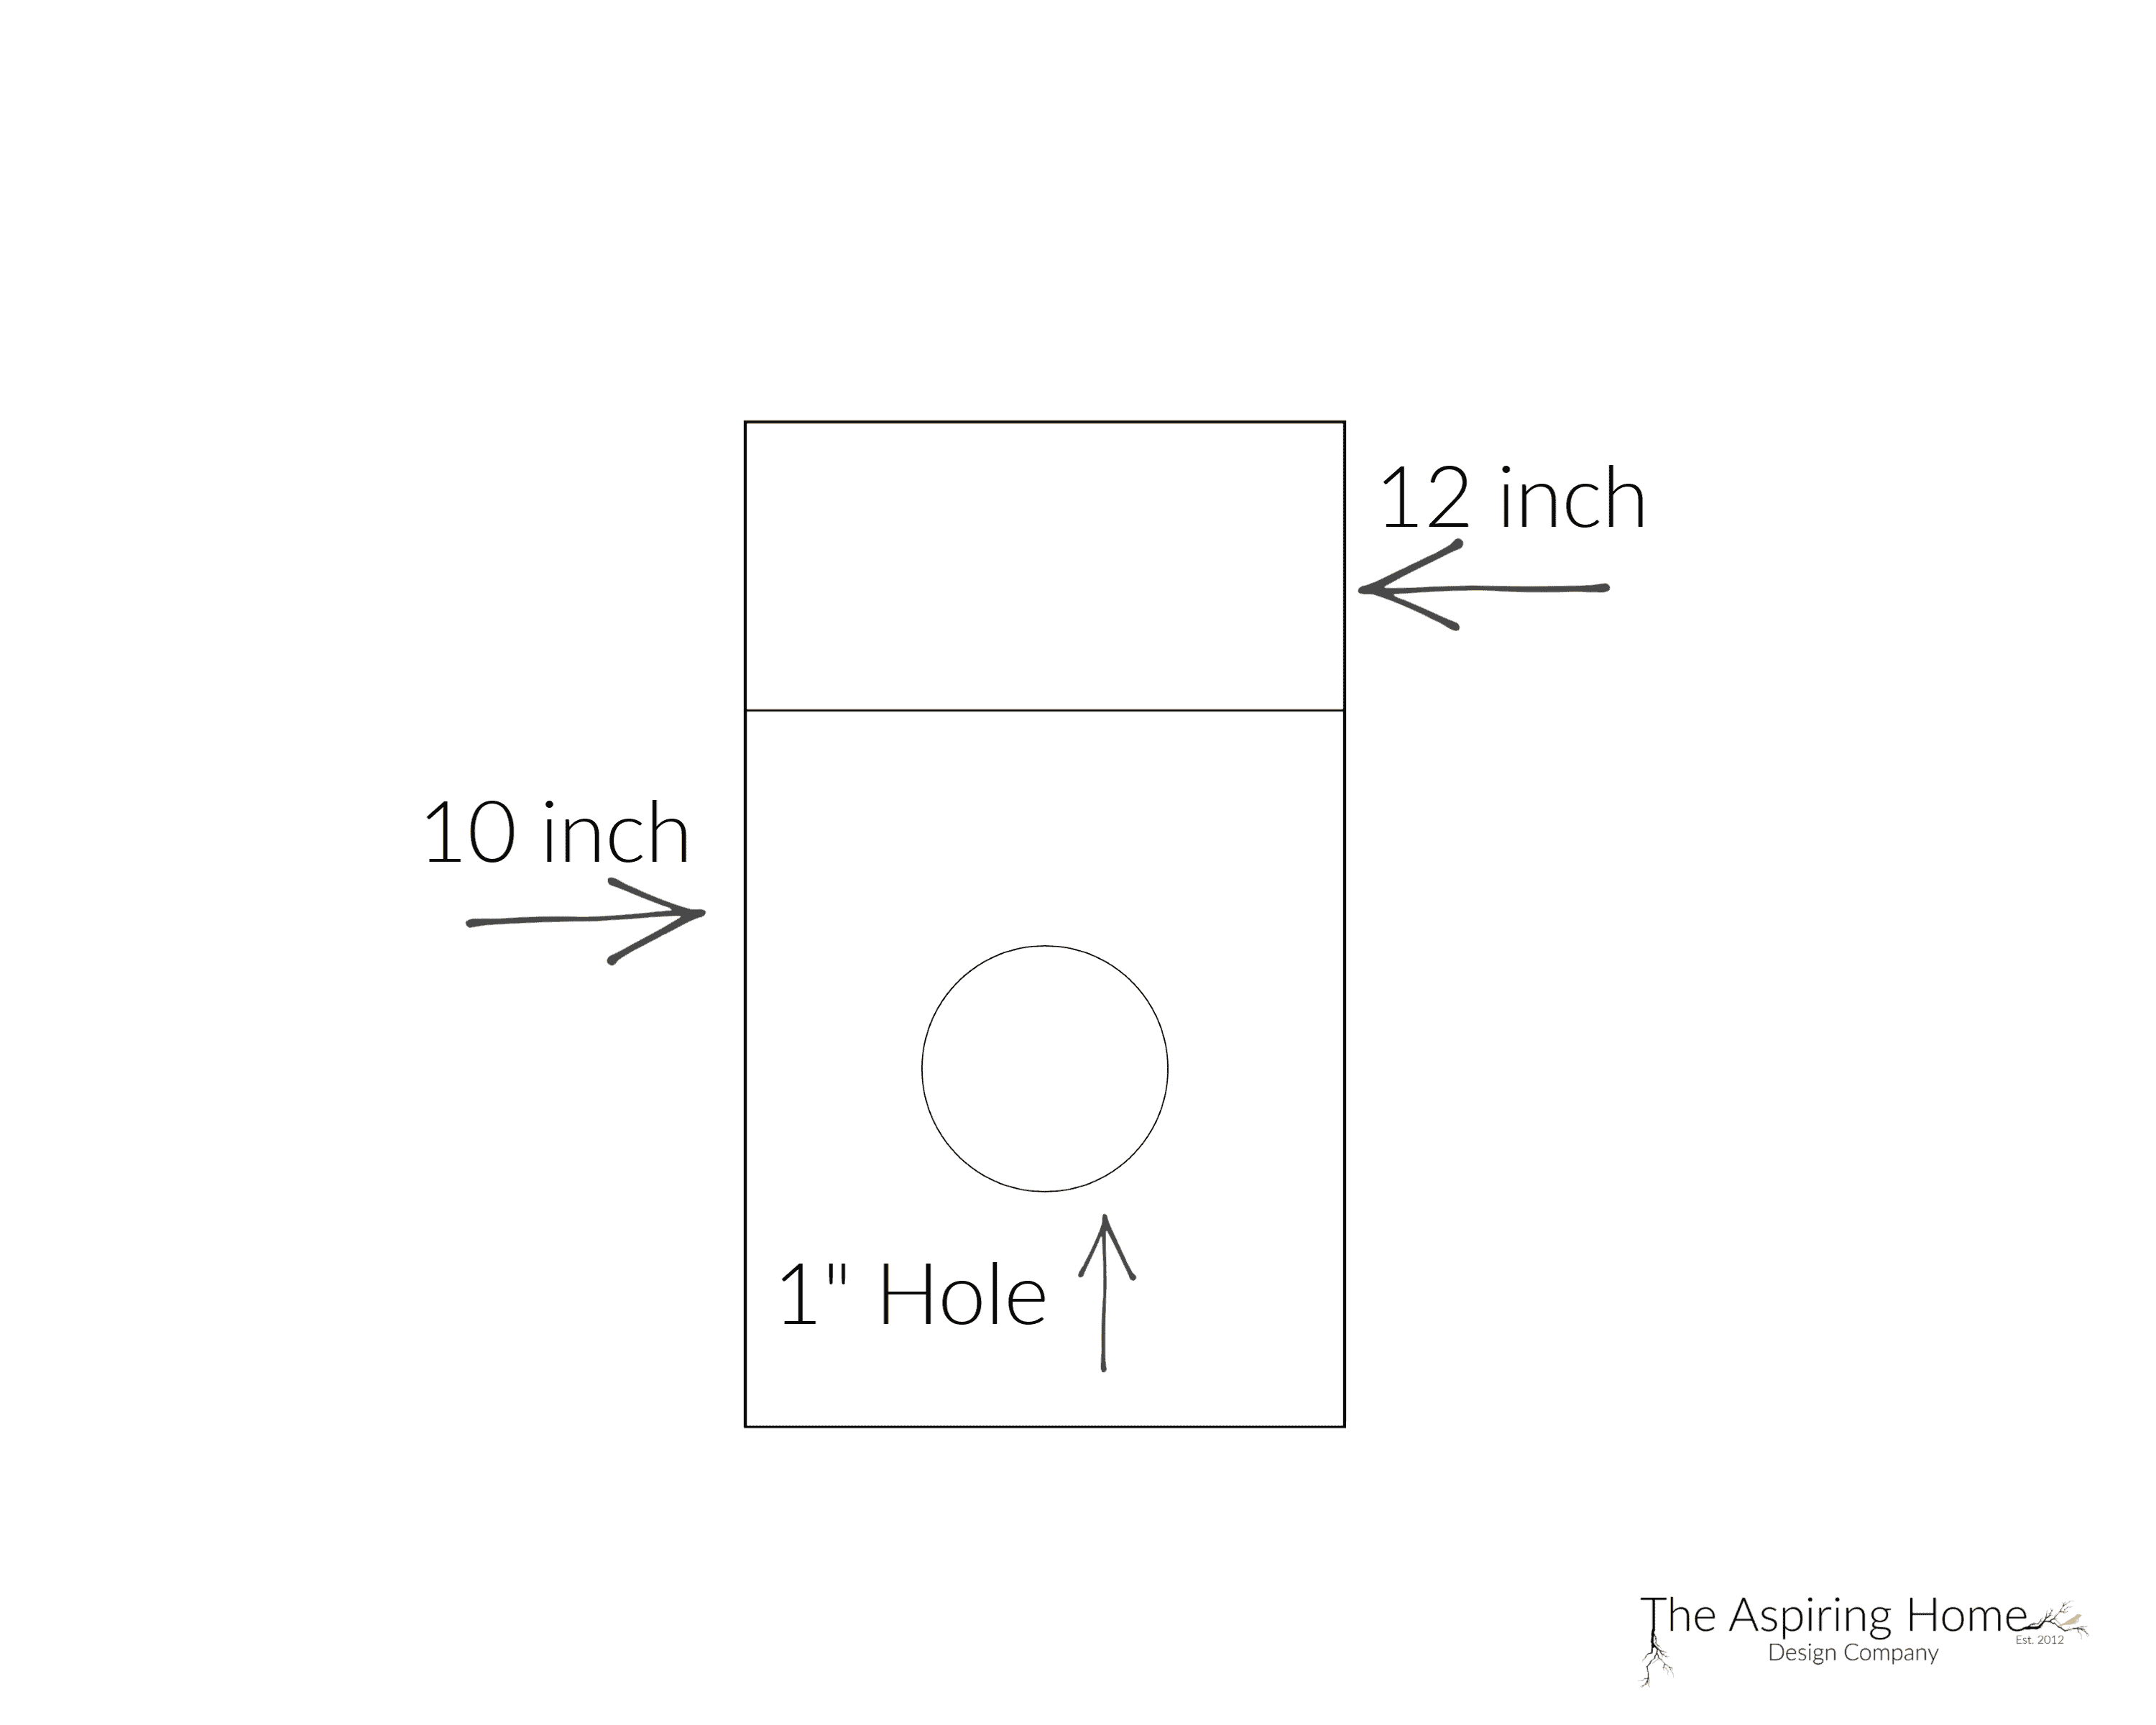
3. Attach the 10-inch piece to the 12-inch piece.
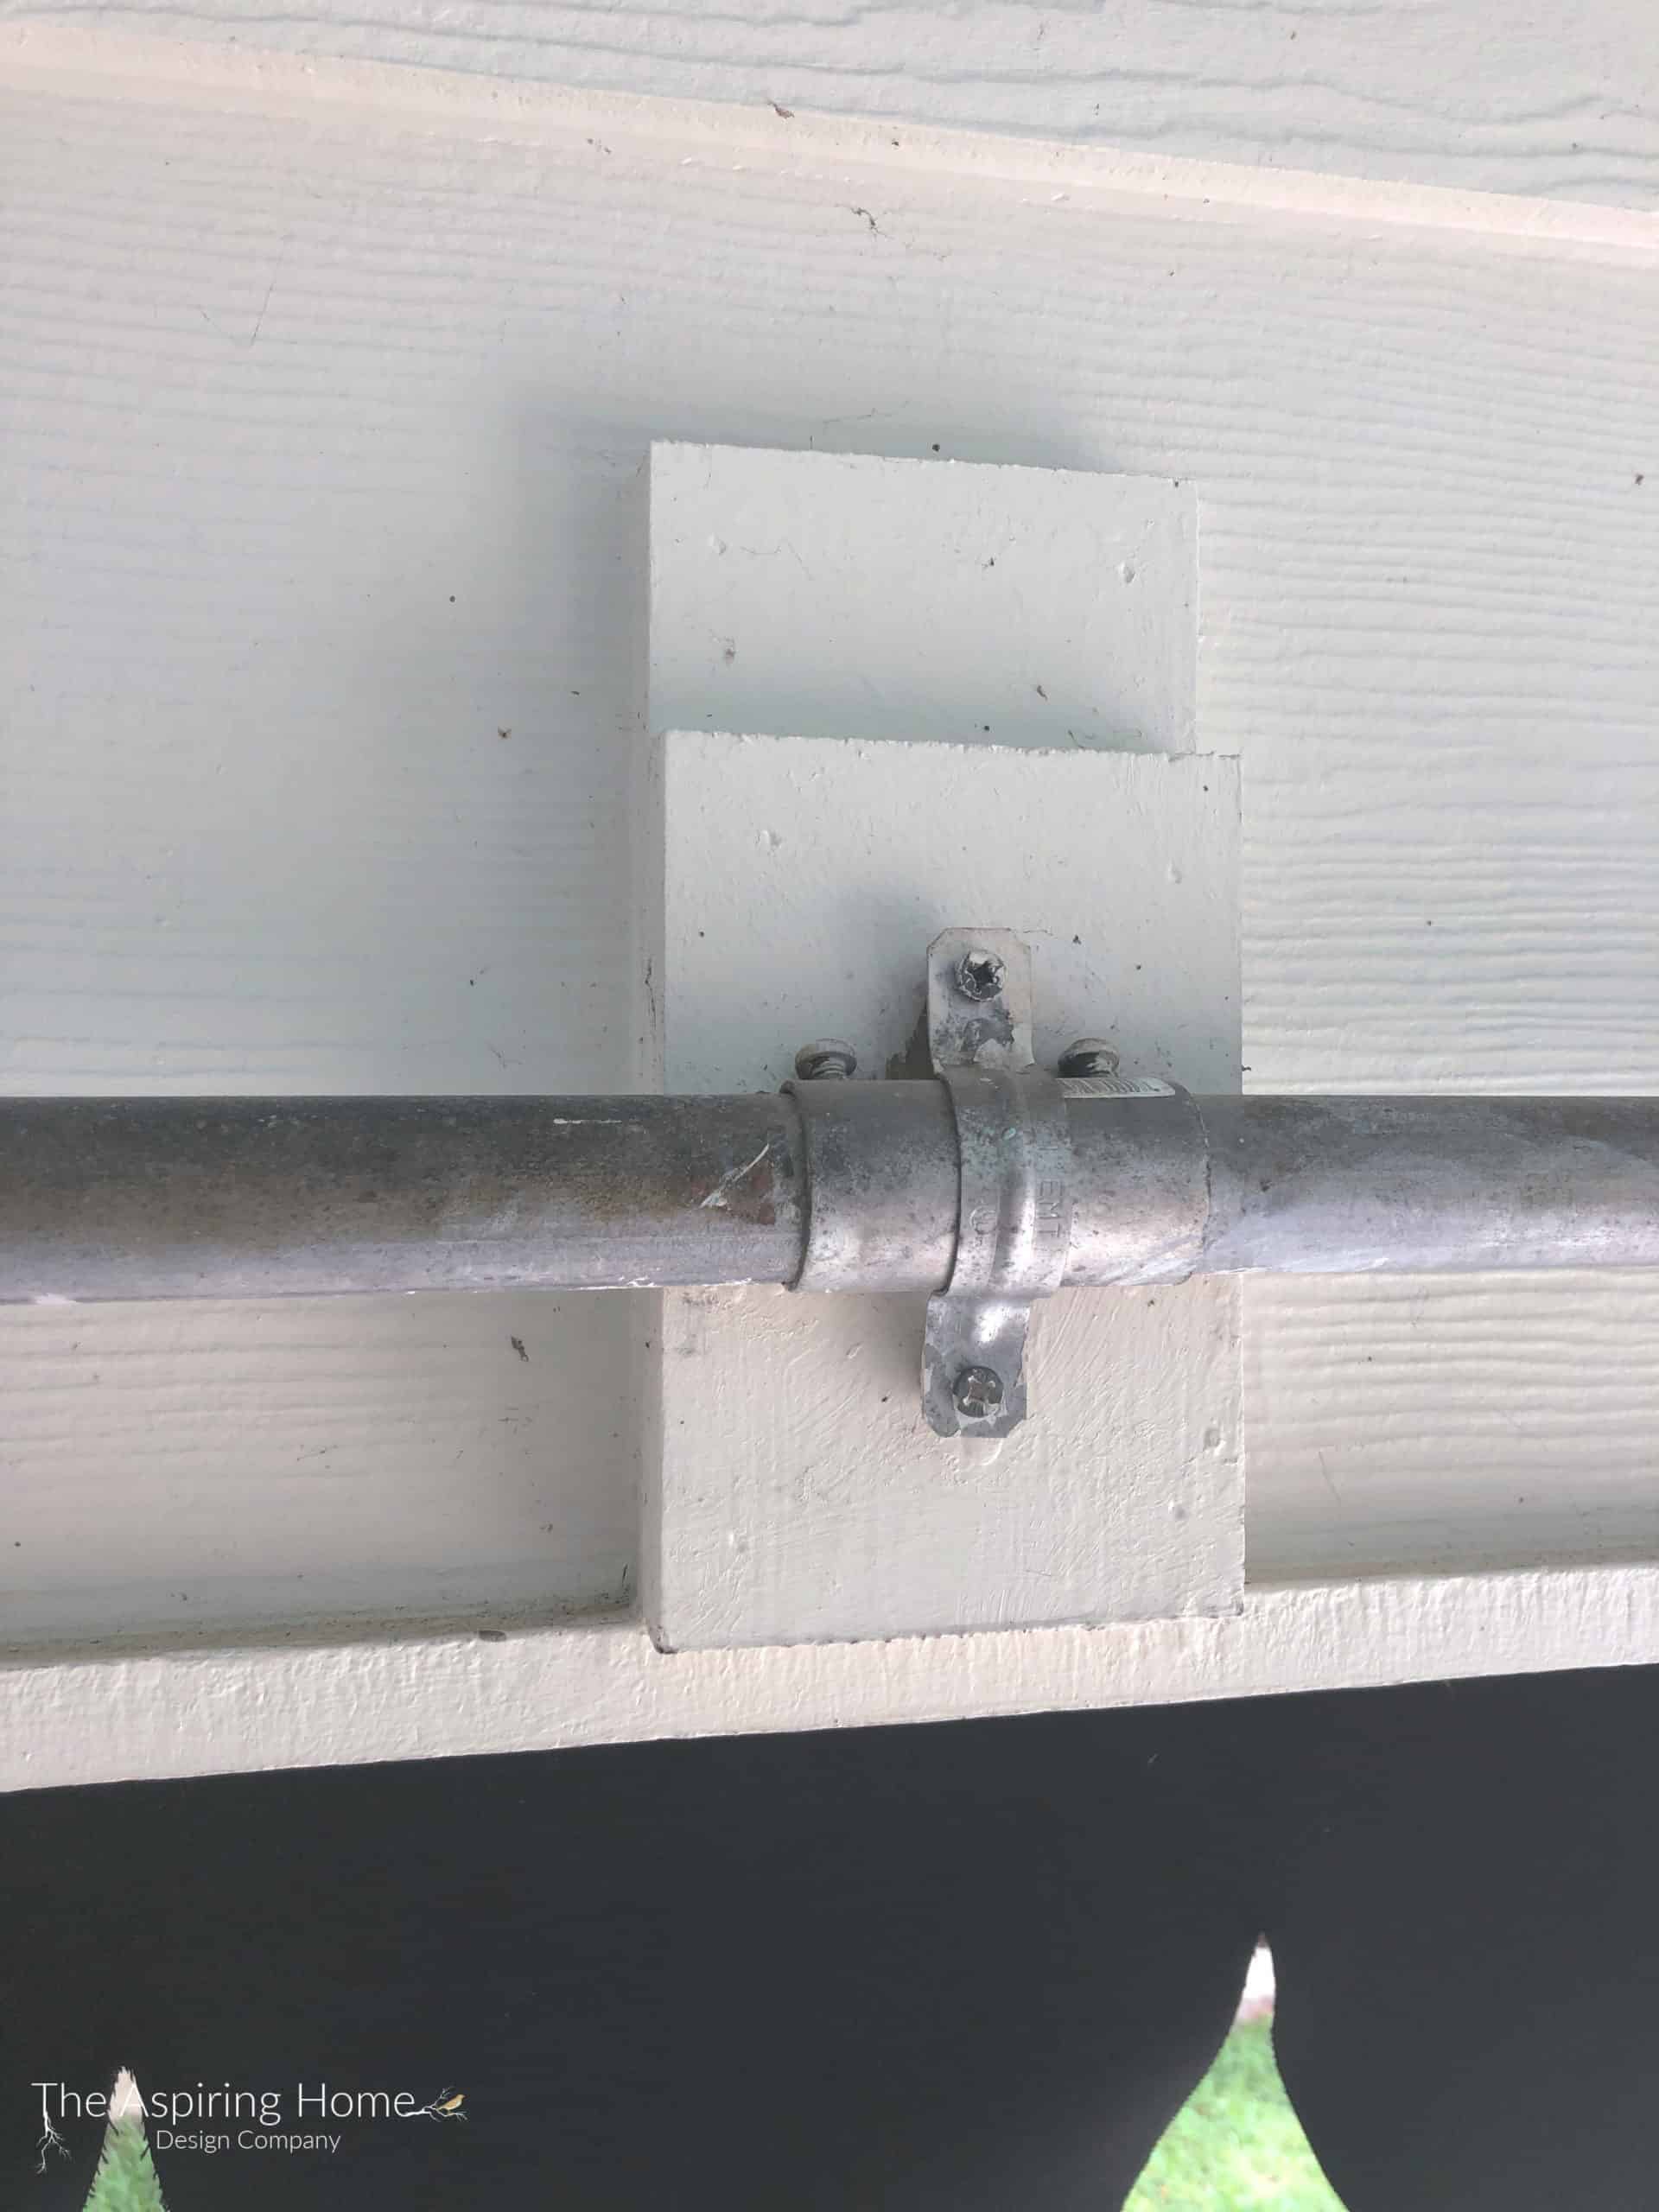
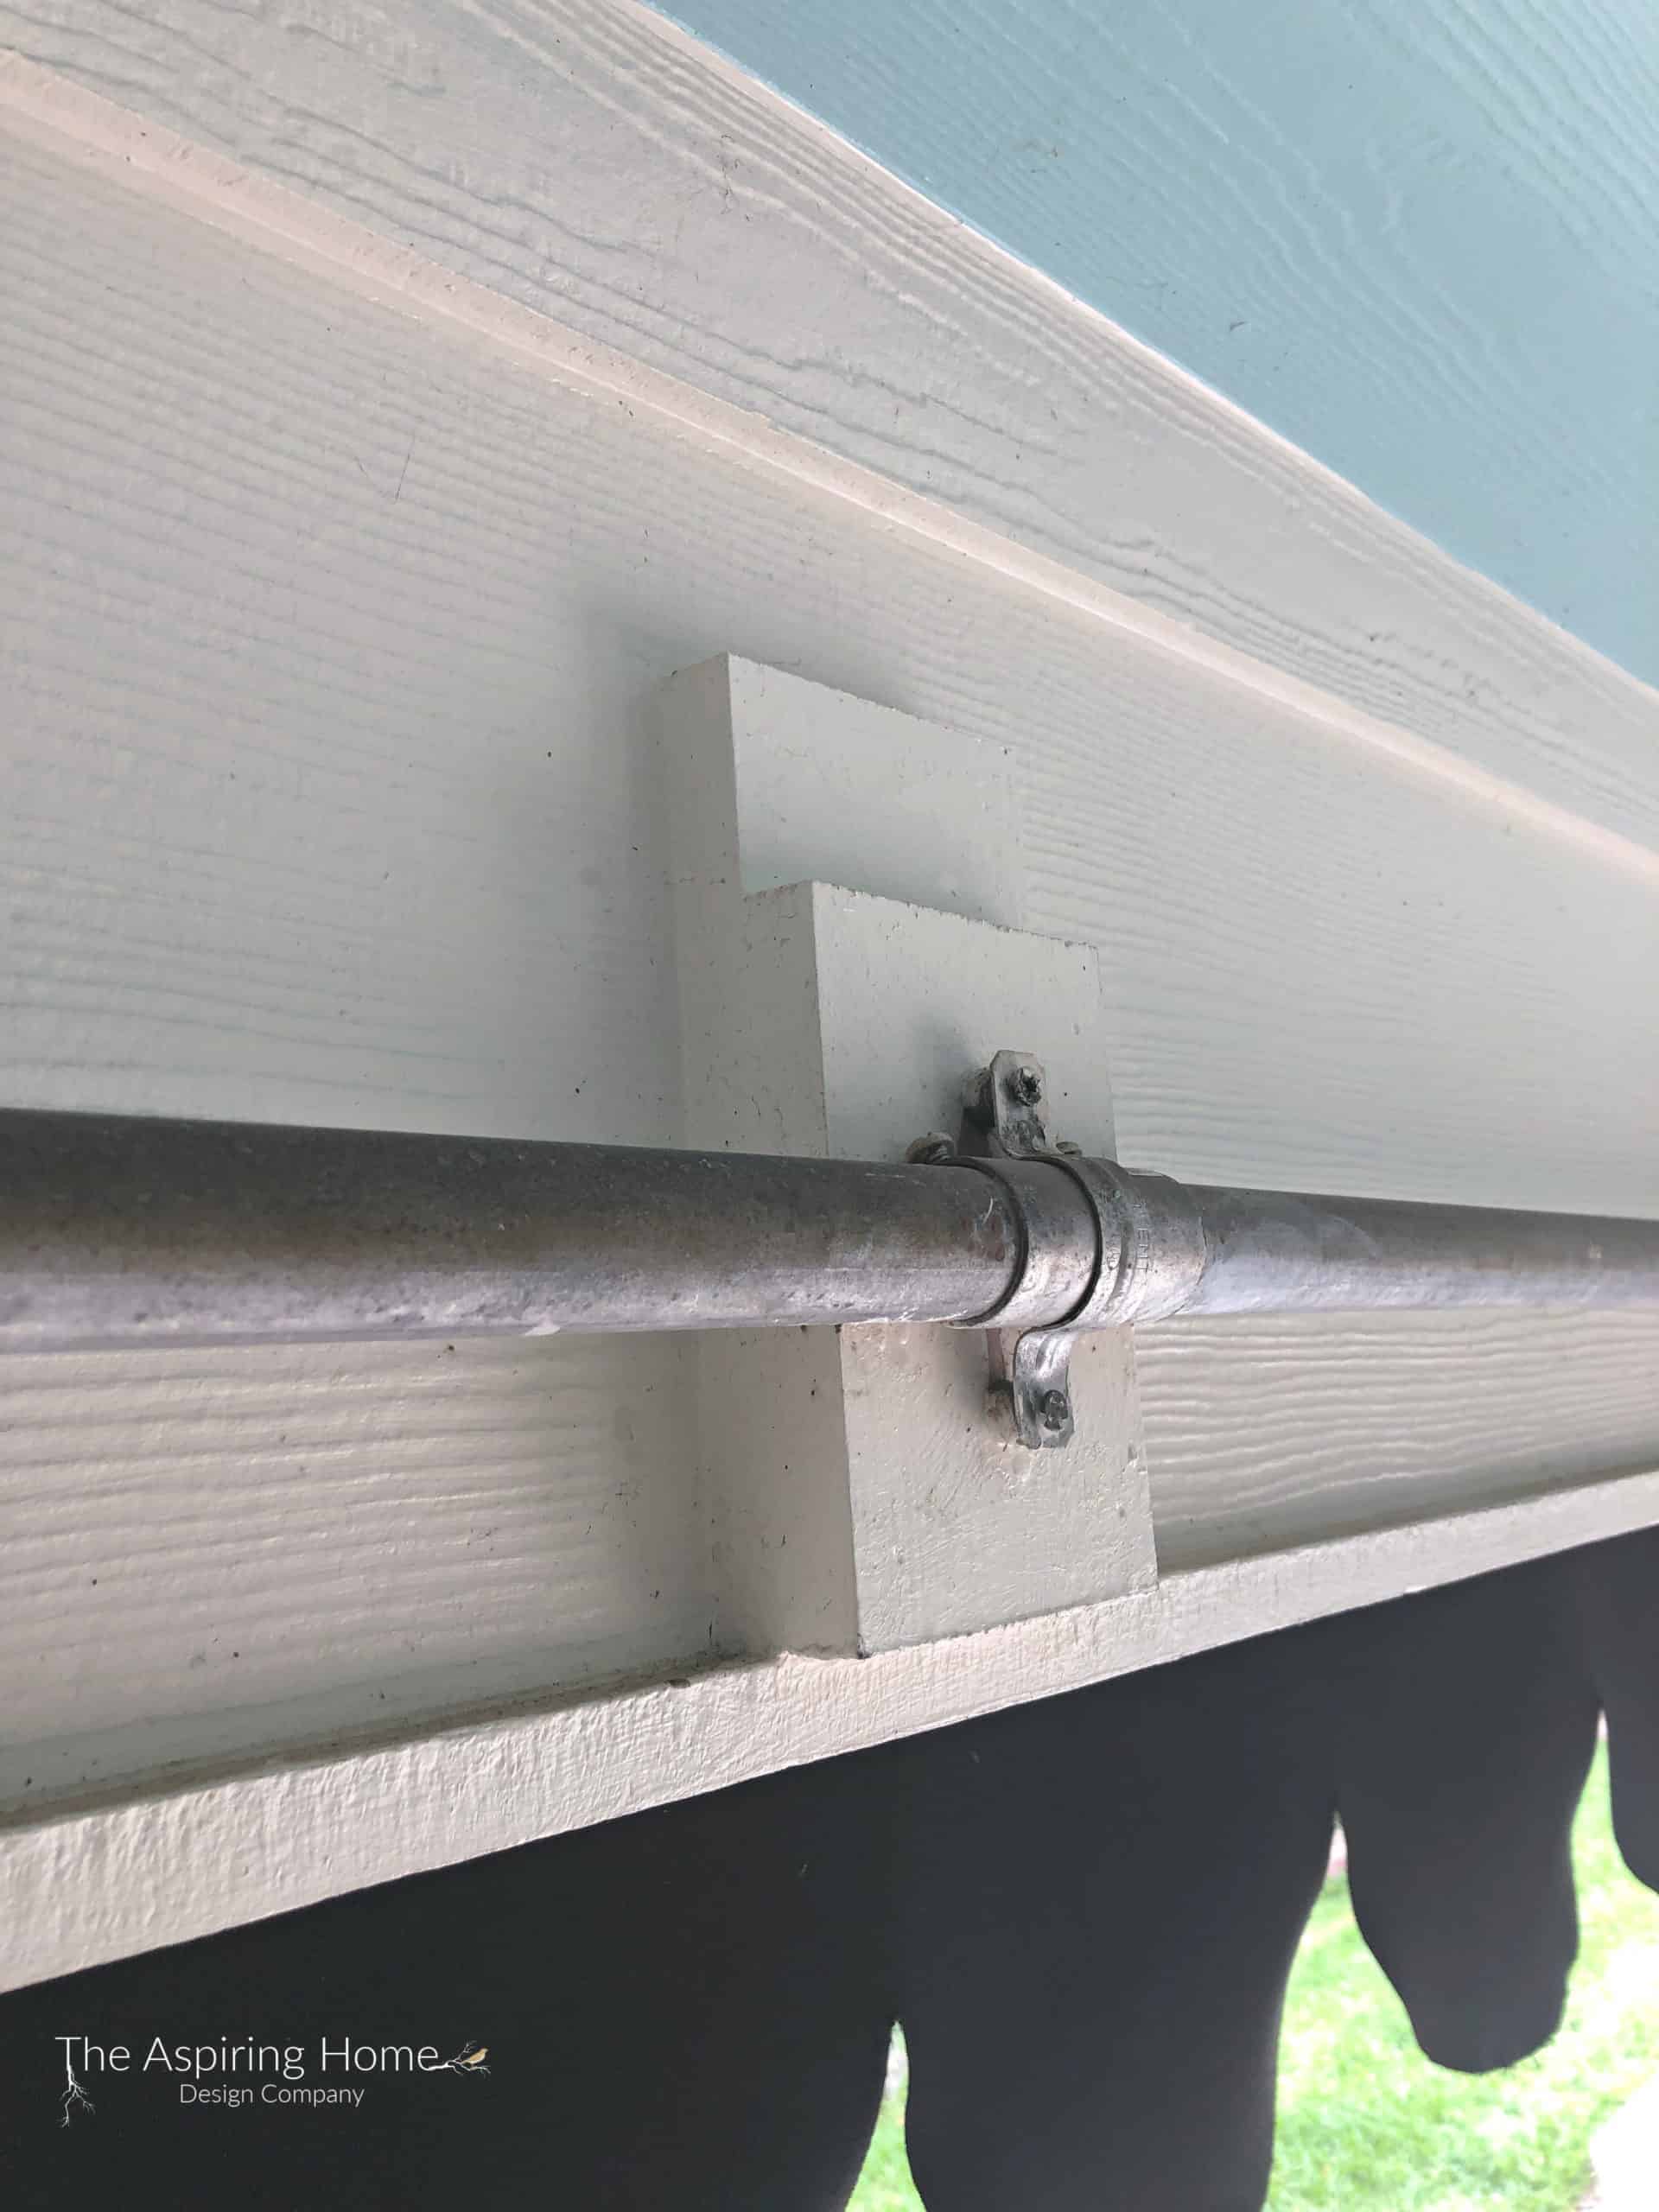
Step 3: Attach the supports
Now, Attach the supports to your structure with wood screws.
Step 4: Make the outdoor curtain rod
Measure and cut the pipe to the appropriate length. If your outdoor room is large like ours, split the difference in order to assure the coupling connector will end up in the middle of the final curtain rod length.
Example: 15 ft. length is needed. Cut two pipes to a 7′ 6″ length and add coupling to attach the two pieces.
Step 5: Attach the outdoor curtain rods
Finally, gently push the pipe into the support with a hole. Slide the other end into the “u” shape support. For the center support – you will need the EMT straps.
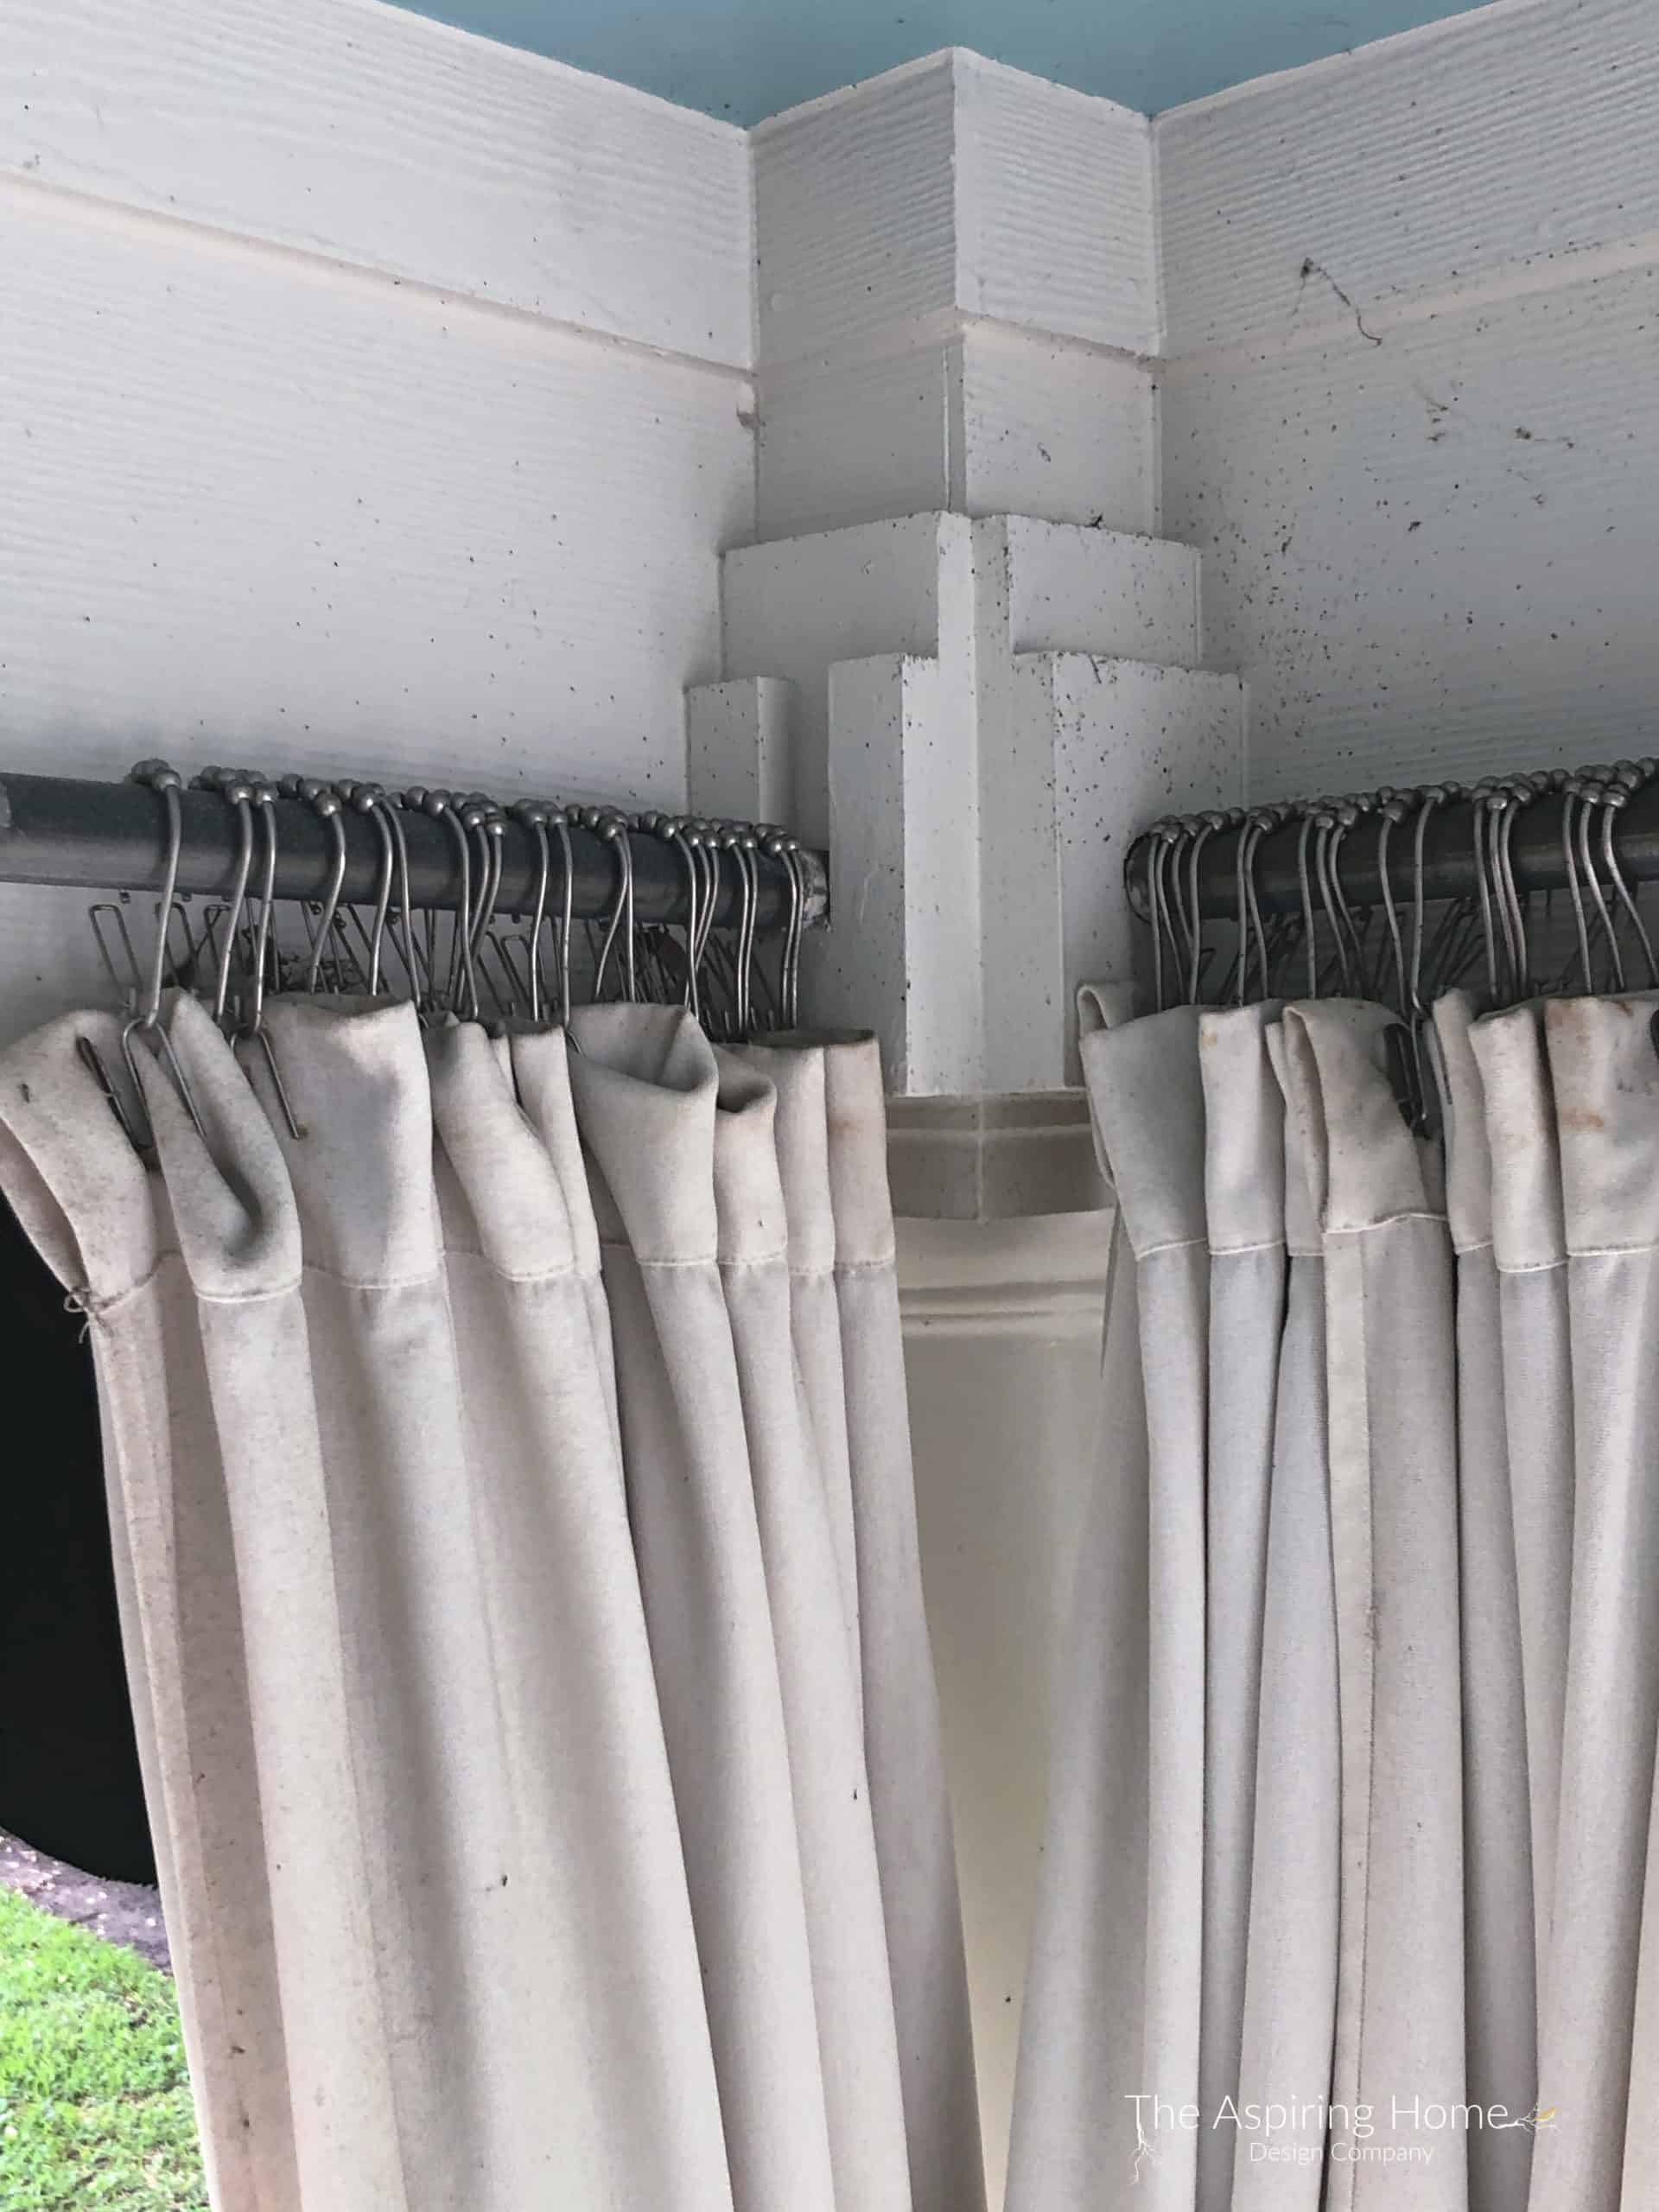
*To keep the strap from securing the pipe too tight – use a couple of washers stacks as seen in the picture below.
This next picture shows the corner and a thousand little gnats. My apologies – but it is a real-life photo, ha! To hang the curtains, I used shower curtain rings.
The outdoor curtains were on serious clearance many years ago from Pottery Barn online and I added the Sunbrella fabric to lengthen them.
- What I wish I would have done and would love for you to do – I should have sprayed the curtain hooks (came with the outdoor curtains) with a sealer to keep them from rusting.
This entire DIY curtain rod project was extremely reasonable – especially when you consider these have had a 10-year span!
We LOVE those kinds of projects, don’t we?
Till Later, Friends!


Joy Maier is the founder and principal designer of The Aspiring Home Interiors, an award-winning studio serving the greater Dallas area and beyond. Blending gracious living with elevated design expertise, Joy creates interiors that feel deeply personal, beautifully refined, and effortlessly livable — from full-home renovations to boutique vacation rentals. Her professional affiliations include ASID (Associate), ART, the Interior Design Society (Professional), NKBA, VRD Collective, and she is a founding member of Designers for Dogs. Since 2012, she has shared design tips and heartfelt stories on The Aspiring Home Blog. Her philosophy is simple: “Design should feel like a deep breath. When we get it right, your home greets you with that exhale every single day.”
Hello, your porch looks great! What caught my eye on Pinterest was the black scallop fabric around the edges of the porch. Where did you get those, how did you make them, are they fabric? So many questions! 😆 I love all things scalloped! Want to add some to my farmhouse porches