Halloween Witch’s Hat Topiary DIY
Witch’s Hat Topiary DIY, create a fun front porch with this idea. All you need are a few items found at your local craft store.
This is one of those rainy Saturday projects that only take a few hours to complete. Follow these easy steps to make your own Halloween witch’s hat topiary DIY.

Supplies:
- Witch’s hat
- Wide wired ribbon
- Large flower
- Small flower
- Grasses/greenery
- Hot glue
- Hot glue gun
I listed a few of these items in my Amazon storefront for you here. Please note that these are affiliate links and I will make a small commission but at no cost to you.
Step 1- Create the flower adornment
Use a piece of thin cardboard for the backing. I used the end of a ribbon spool. It was cheap, it was the right size. It was there.

Create a bow by making a loop and securing it with hot glue. Gently pinch the middle and use a craft/floral wire to create the bow.

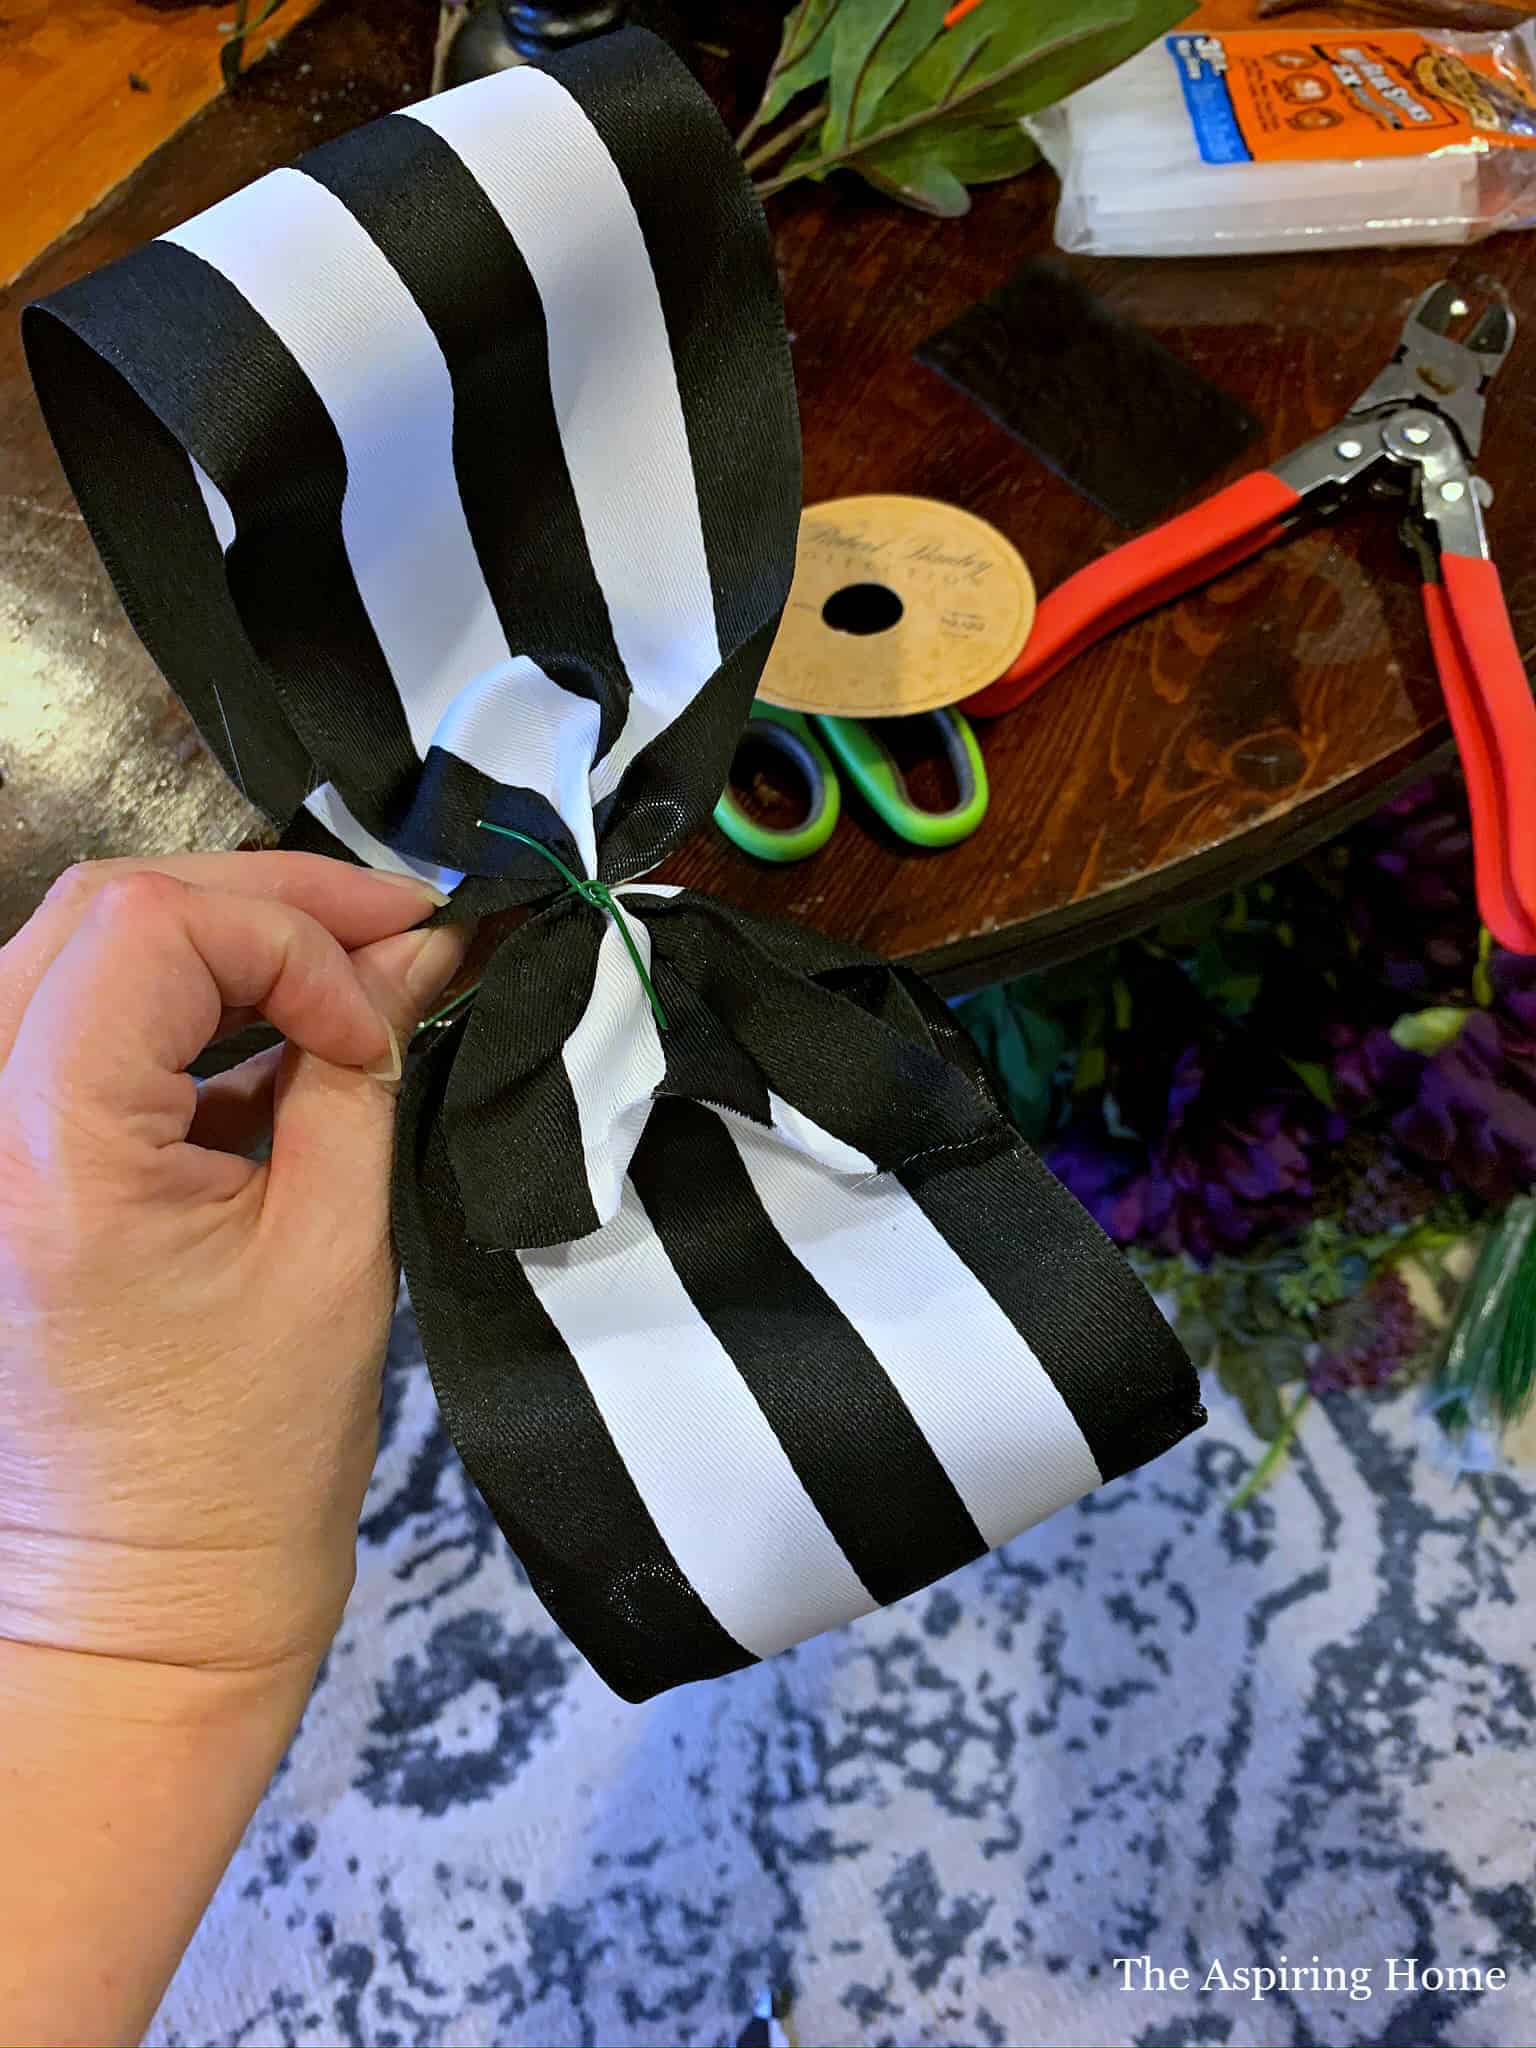
Hot glue grass to the backside of the cardboard backing. Glue the bow to the front of the cardboard backing.
Glue leaves to the front to fill out the flower adornment.

Finally, glue the large flower in the middle of the bow. Add the little flower right below to the side. Like this –

Step 2- Band the Witch’s hat
The wired ribbon will be too wide to easily wrap around. Fold the ribbon in half and hot glue – just enough to wrap around the hat.

Hot glue the floral adornment to the middle.
Step 3 – Add ties to secure
Add ribbon ties, with you, guessed it… hot glue, on the hat to make it easier to secure to the topiary.

Tie your cute witch’s hat to your favorite topiary.

For additional fun, pick up cute letters at the craft store and paint. I painted a layer of flat black acrylic paint and then added Rub n Buff copper and gold for a little more oomph.
To add a little more creepy to the topiaries, I draped the garland I found at the craft store to the front. Kinda has that “been out in the swamp a little too long” look.
I love a Happy Halloween front porch
and
hey, if you are in need of a quick costume – grab the hat!
‘Till Later Friends,