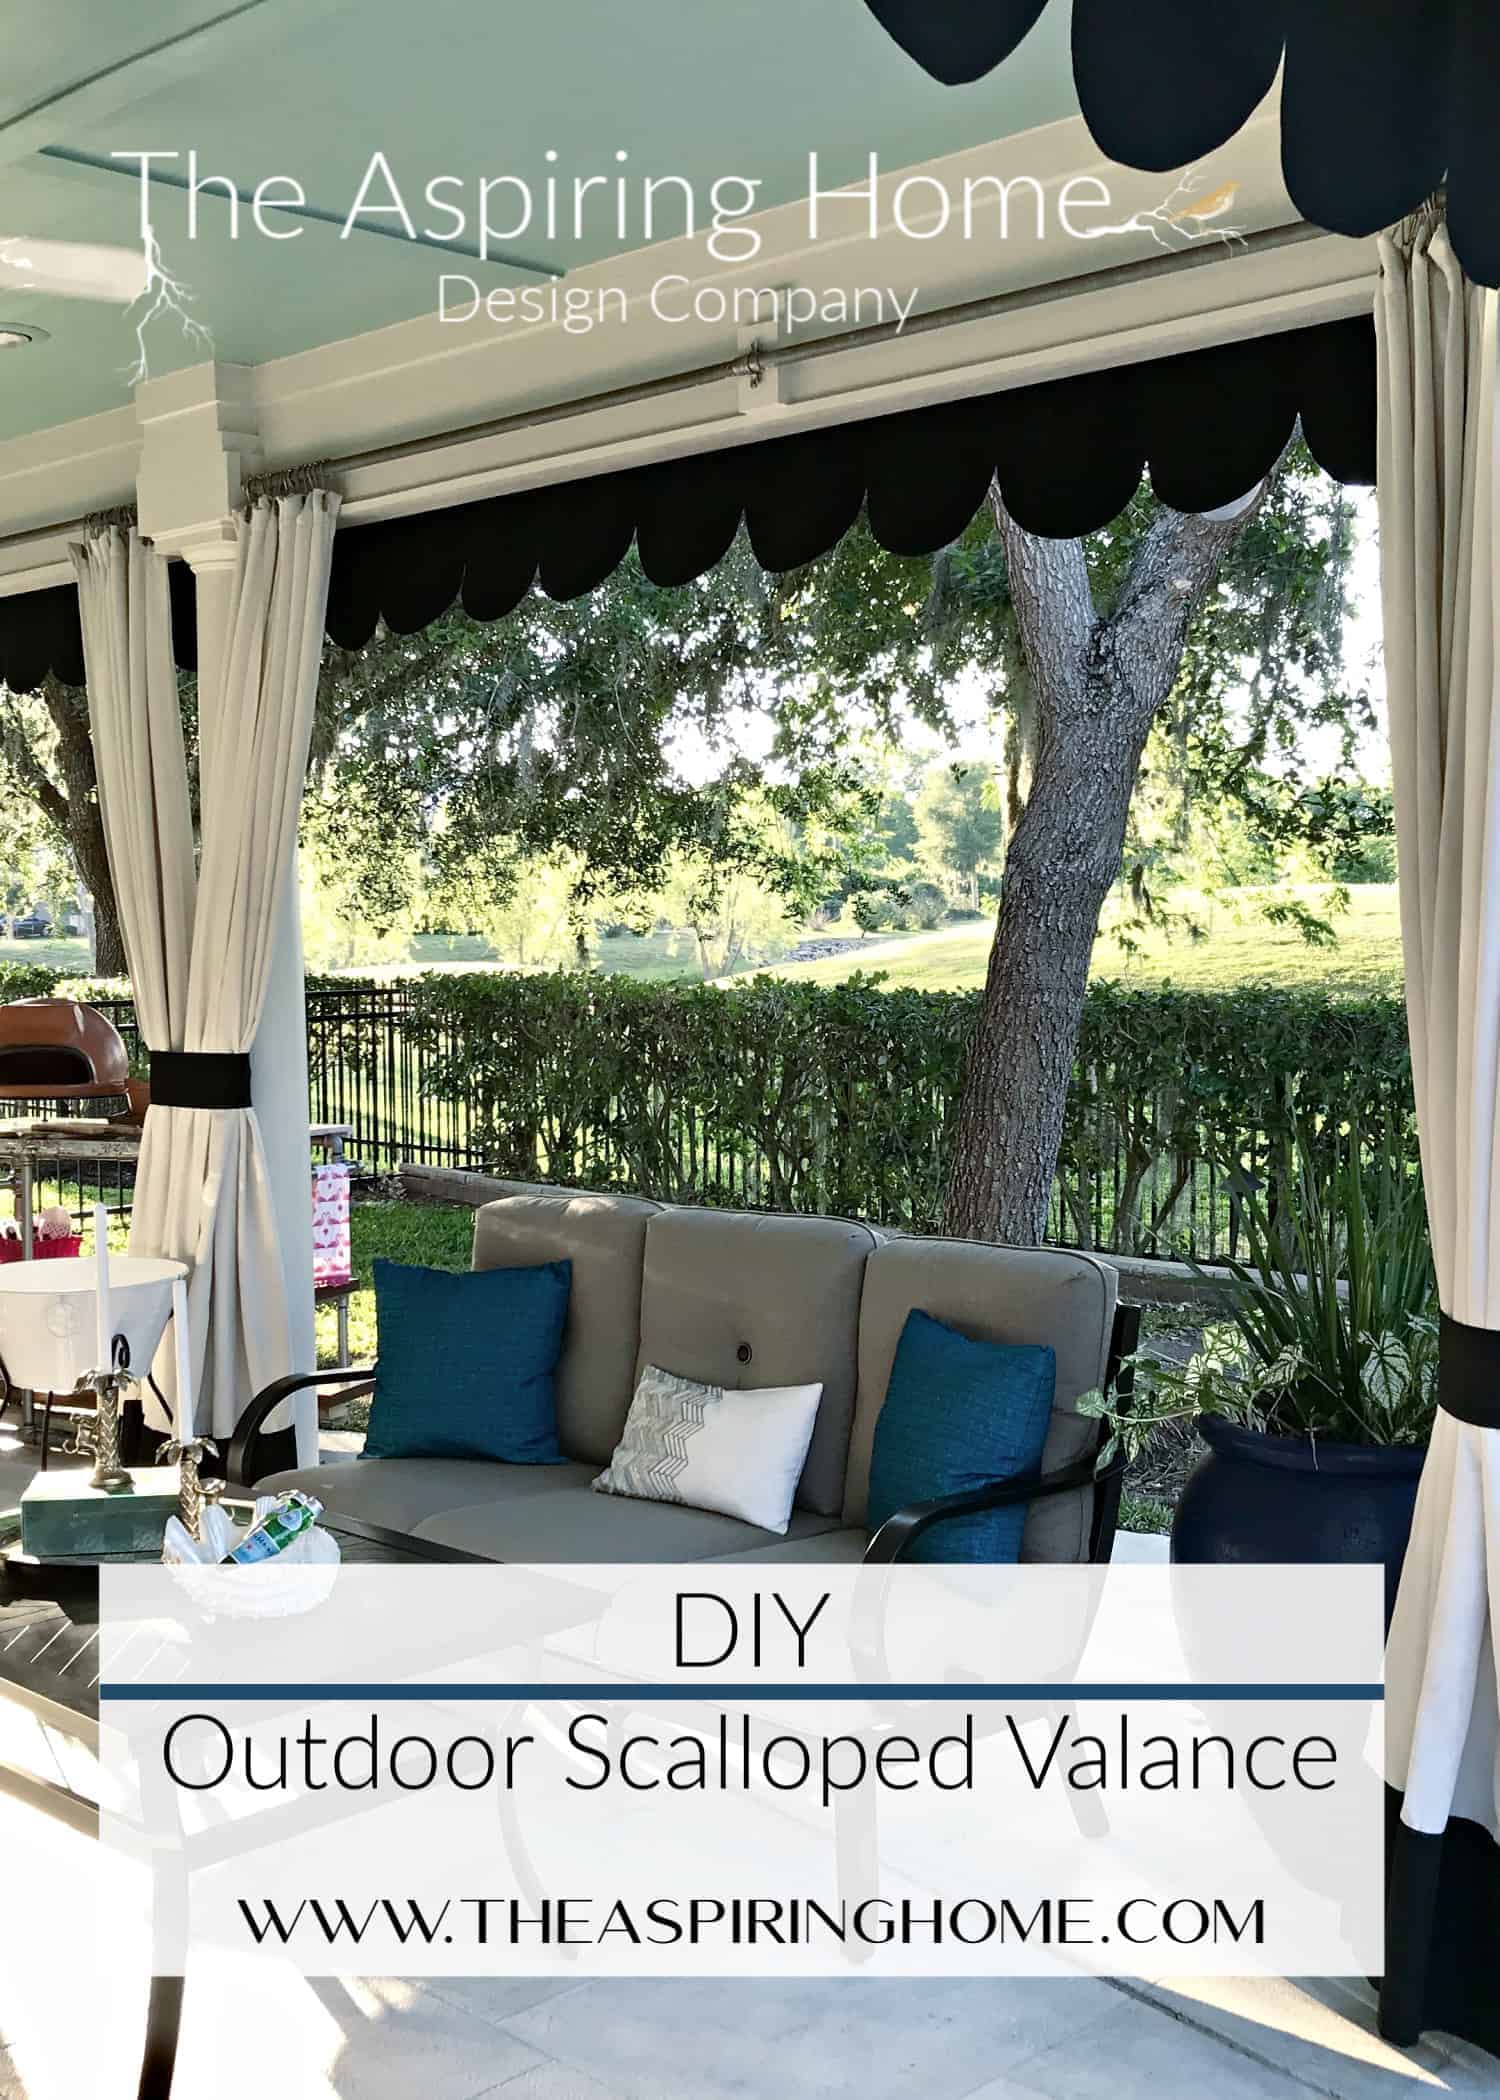
DIY Outdoor Scalloped Valance
Add a little whimsy with this easy project. A DIY outdoor scalloped valance will only take a weekend and will give your outdoor space a little extra “oomph”!
We are on the cusp of pool weather, long weekends of grilling, and family time. When I redesigned our outdoor living space, I wanted it to feel fun and inviting. My concept took its cues from old movies and great posh hotels of the 1940s and 1950s. I studied old hotel photographs from Miami to Los Angeles and picked up on a few elements. One of those elements happened to be the cute detail on the poolside umbrellas. I loved the scalloped feature and decided to recreate it and you can too if you would like. Let me show you how with this easy DIY outdoor scalloped valance tutorial!
Read the Outdoor Pool and Living Spaces Reveal Post here
Supplies:
- Outdoor fabric (I chose Sunbrella brand)
- Chalk pencil
- Scissors
- Fray check
- Optional: Trim
- Cardstock or heavy grade scrapbook paper
- A bowl (for tracing)
Step 1:
Measure the area you would like the valance to hang. Measure the width and how wide you would like your valance. My valance length was determined by the space between the pillars of the outdoor kitchen(add a 1/2 inch on each side and the top for hem allowance). I chose my valance length to be 18-inch.
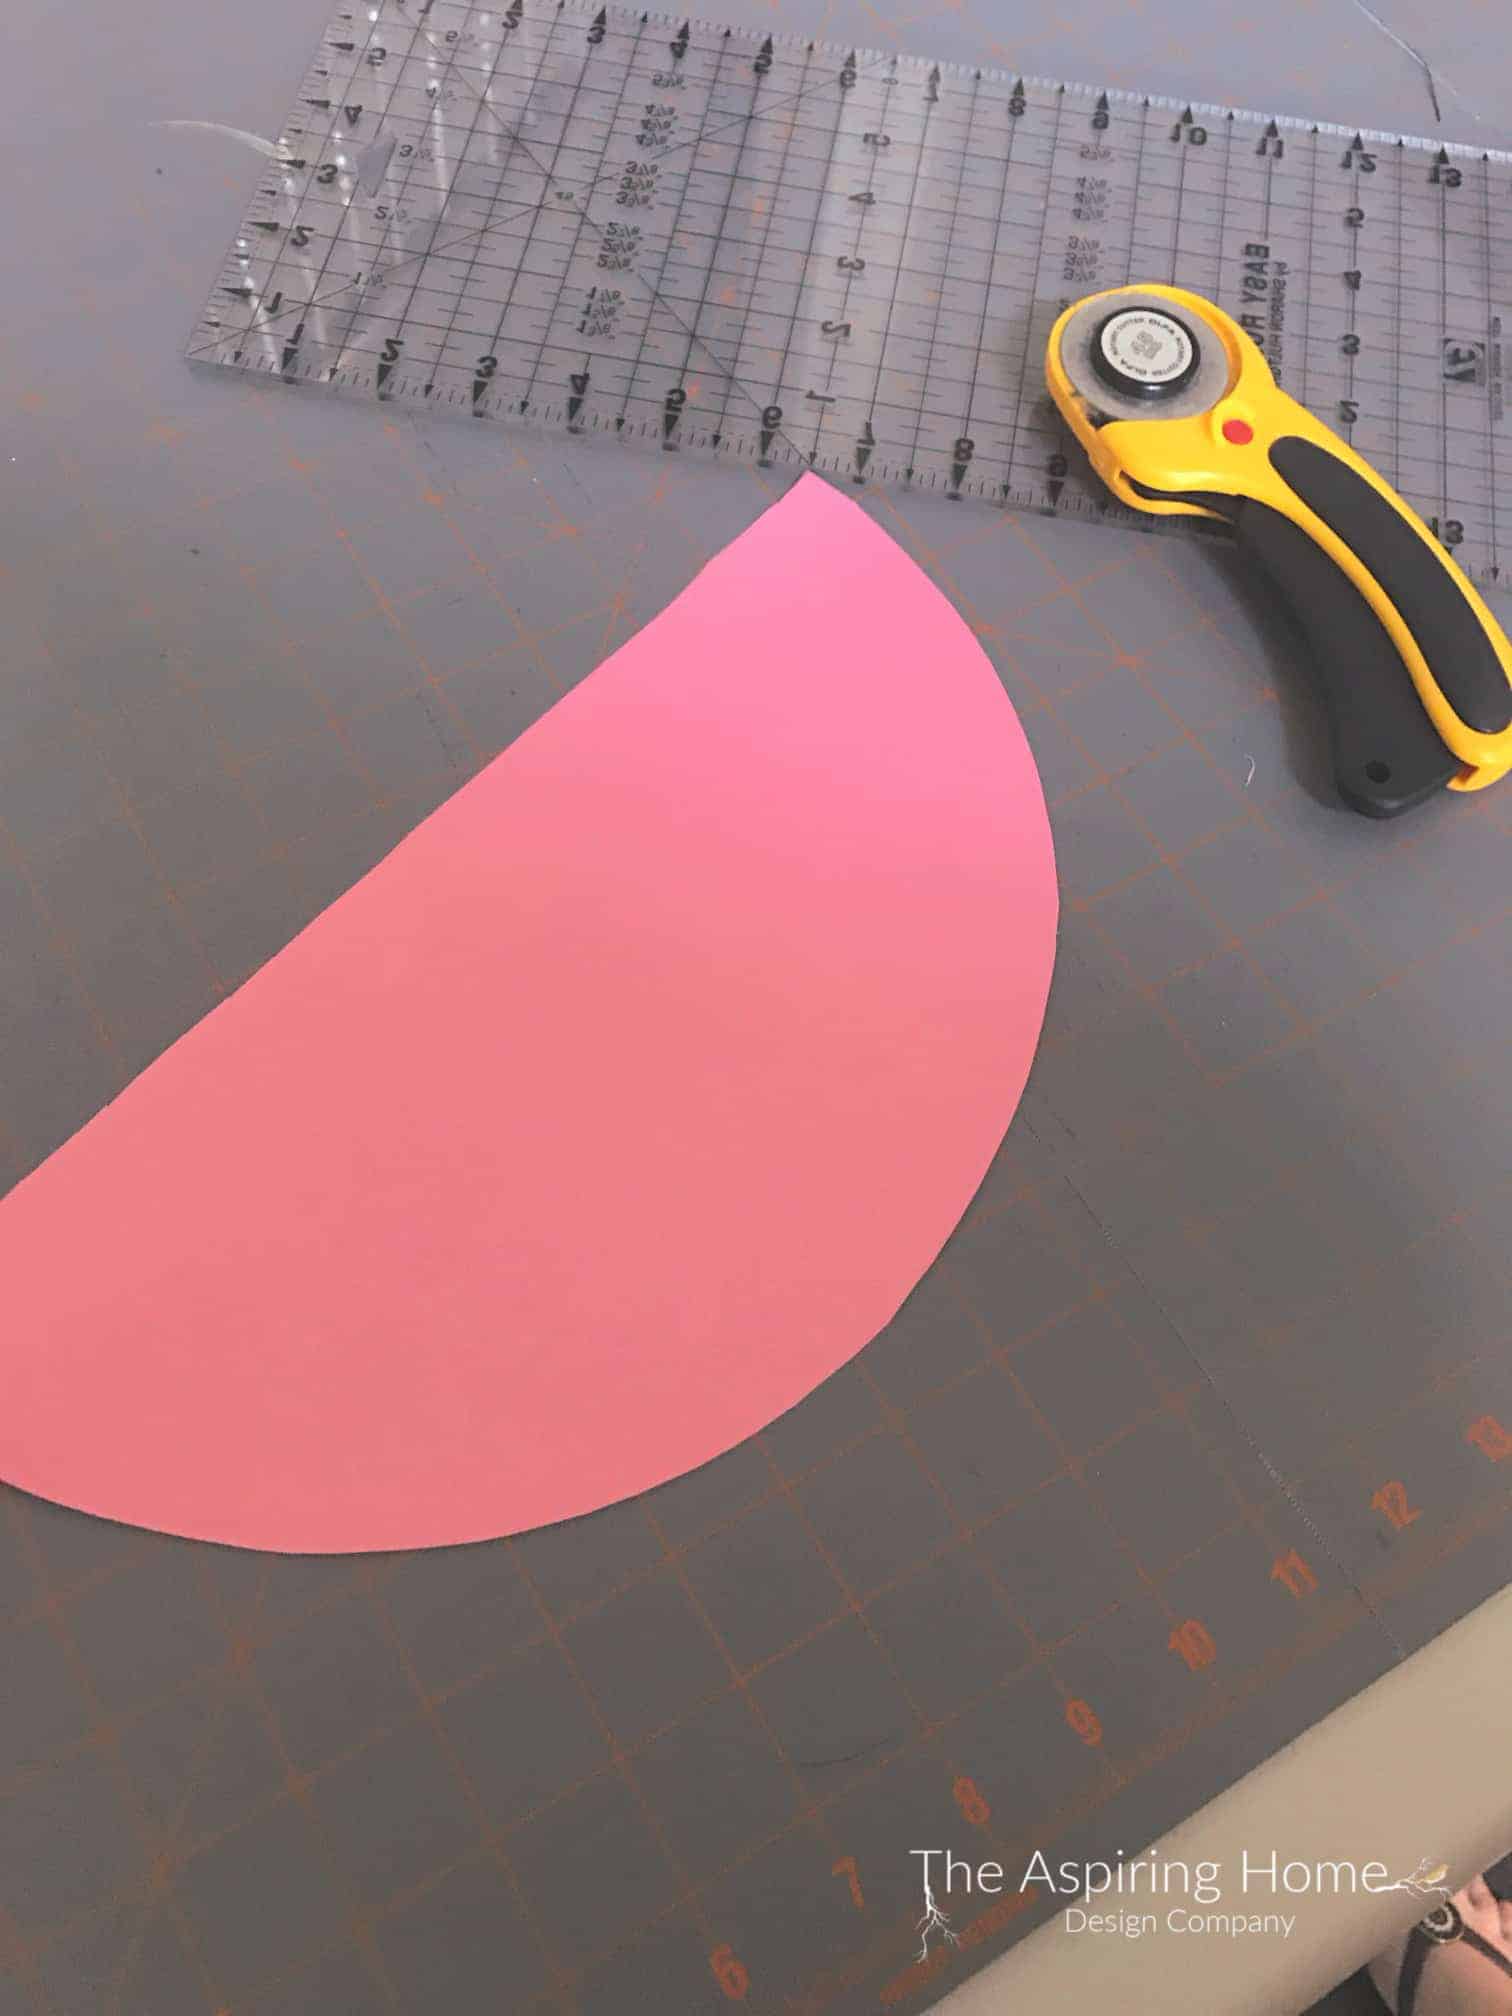
Step 2:
Draw your circle. I chose to do a 12-inch circle so scrapbook paper worked perfectly. I know this isn’t scientific and you can go that route but I was in a hurry and grabbed a bowl that had a 12-inch opening and traced it (upside down). Next, I folded the circle in half and created a crease line, then I just cut along the crease line. Voila, I had a semi-circle perfect for tracing scallops!
Step 3:
Trace your scallop onto the valance using a tracing pencil. Find the center of your valance and mark it with a pin. Lay your scallop template where the bottom of the scallop lines up with the bottom of the valance. Trace. Move to either the left or the right and line up the template again but this time make sure the scallop not only line up with the bottom but is touching the scallop you just marked. It’s basically the same principle when you are stenciling. Continue drawing out your scallops.
Click here for 10 more ways to celebrate Summer outdoors!
Step 4:
When all your scallops have been drawn out, Trace the drawn line with fray check. Allow fray check to dry then cut the scallops. The fray check works well but if you would like a more finished edge you may add trim, just make sure to spray it with a waterproof spray since it will be for outdoor use.

Step 5:
Hem the top and sides of your valance.
Step 6:
Apply the outdoor grade velcro and sew it to the top. Attach the other side to the area you wish to hang your valance. A brad nailer or stapler will secure the velcro.
Step 7:
Attach your valance!

Learn how to make outdoor curtain rods.
Til Later Friends,

Joy Maier is the founder and principal designer of The Aspiring Home Interiors, an award-winning studio serving the greater Dallas area and beyond. Blending gracious living with elevated design expertise, Joy creates interiors that feel deeply personal, beautifully refined, and effortlessly livable — from full-home renovations to boutique vacation rentals. Her professional affiliations include ASID (Associate), ART, the Interior Design Society (Professional), NKBA, VRD Collective, and she is a founding member of Designers for Dogs. Since 2012, she has shared design tips and heartfelt stories on The Aspiring Home Blog. Her philosophy is simple: “Design should feel like a deep breath. When we get it right, your home greets you with that exhale every single day.”
Just commented on you curtain rod post and asked about the scallops… when looking on Pinterest a bit more I found your tutorial on how you made the scallop edging on the porch. Thank you! Can’t wait to add some scallops to my farmhouse porches!