DIY Bed Frame Update Project
Sometimes, all furniture needs is a little reimagining. This DIY bed frame update project gave an old bachelor-era bed and fresh update.
This idea came about while I was putting the design board together for my son’s bedroom. I was desperately trying to use what furniture we had on hand and this bed was still in too good of shape not to use. So here’s how we gave this tired piece of furniture a facelift with a DIY Bed frame update.
Let me show you my inspiration picture for the DIY bed frame update project:

We started by sanding the old 20 plus-year-old finish off by using a hand sander.

Once sanded we bleached the wood by painting bleach gel then rinsed thoroughly.


Next, we applied my favorite all-purpose stain color, Minwax Early American.

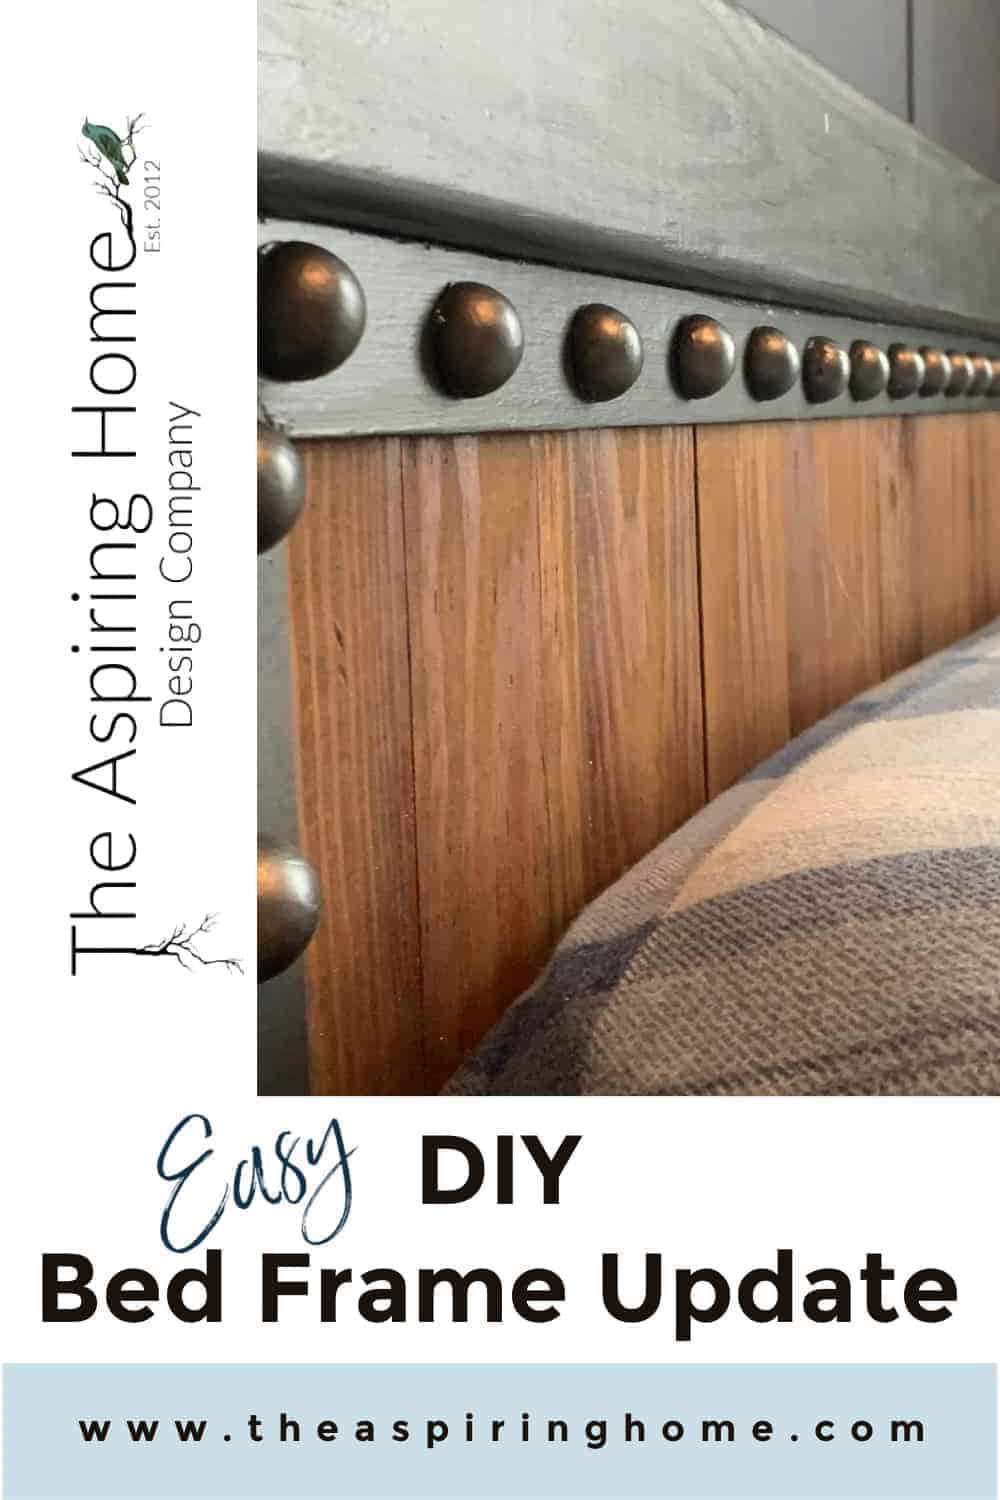
Finally, we took gloss black acrylic craft paint and painted the border, first. Matte metallic charcoal acrylic paint from DecoArt and painted the final coat.

To add the riveted detail from the inspiration, we took some of the same 1/4 inch paintable plywood and ripped it down. To attach, we used a brad nailer.
First – We did a dry-fit of the boards before we painted them.


Now, for the fine details. I added 1/2 inch wood split balls painted in the metallic charcoal matte paint with my trusty glue gun and Gorilla glue brand hot glue sticks.


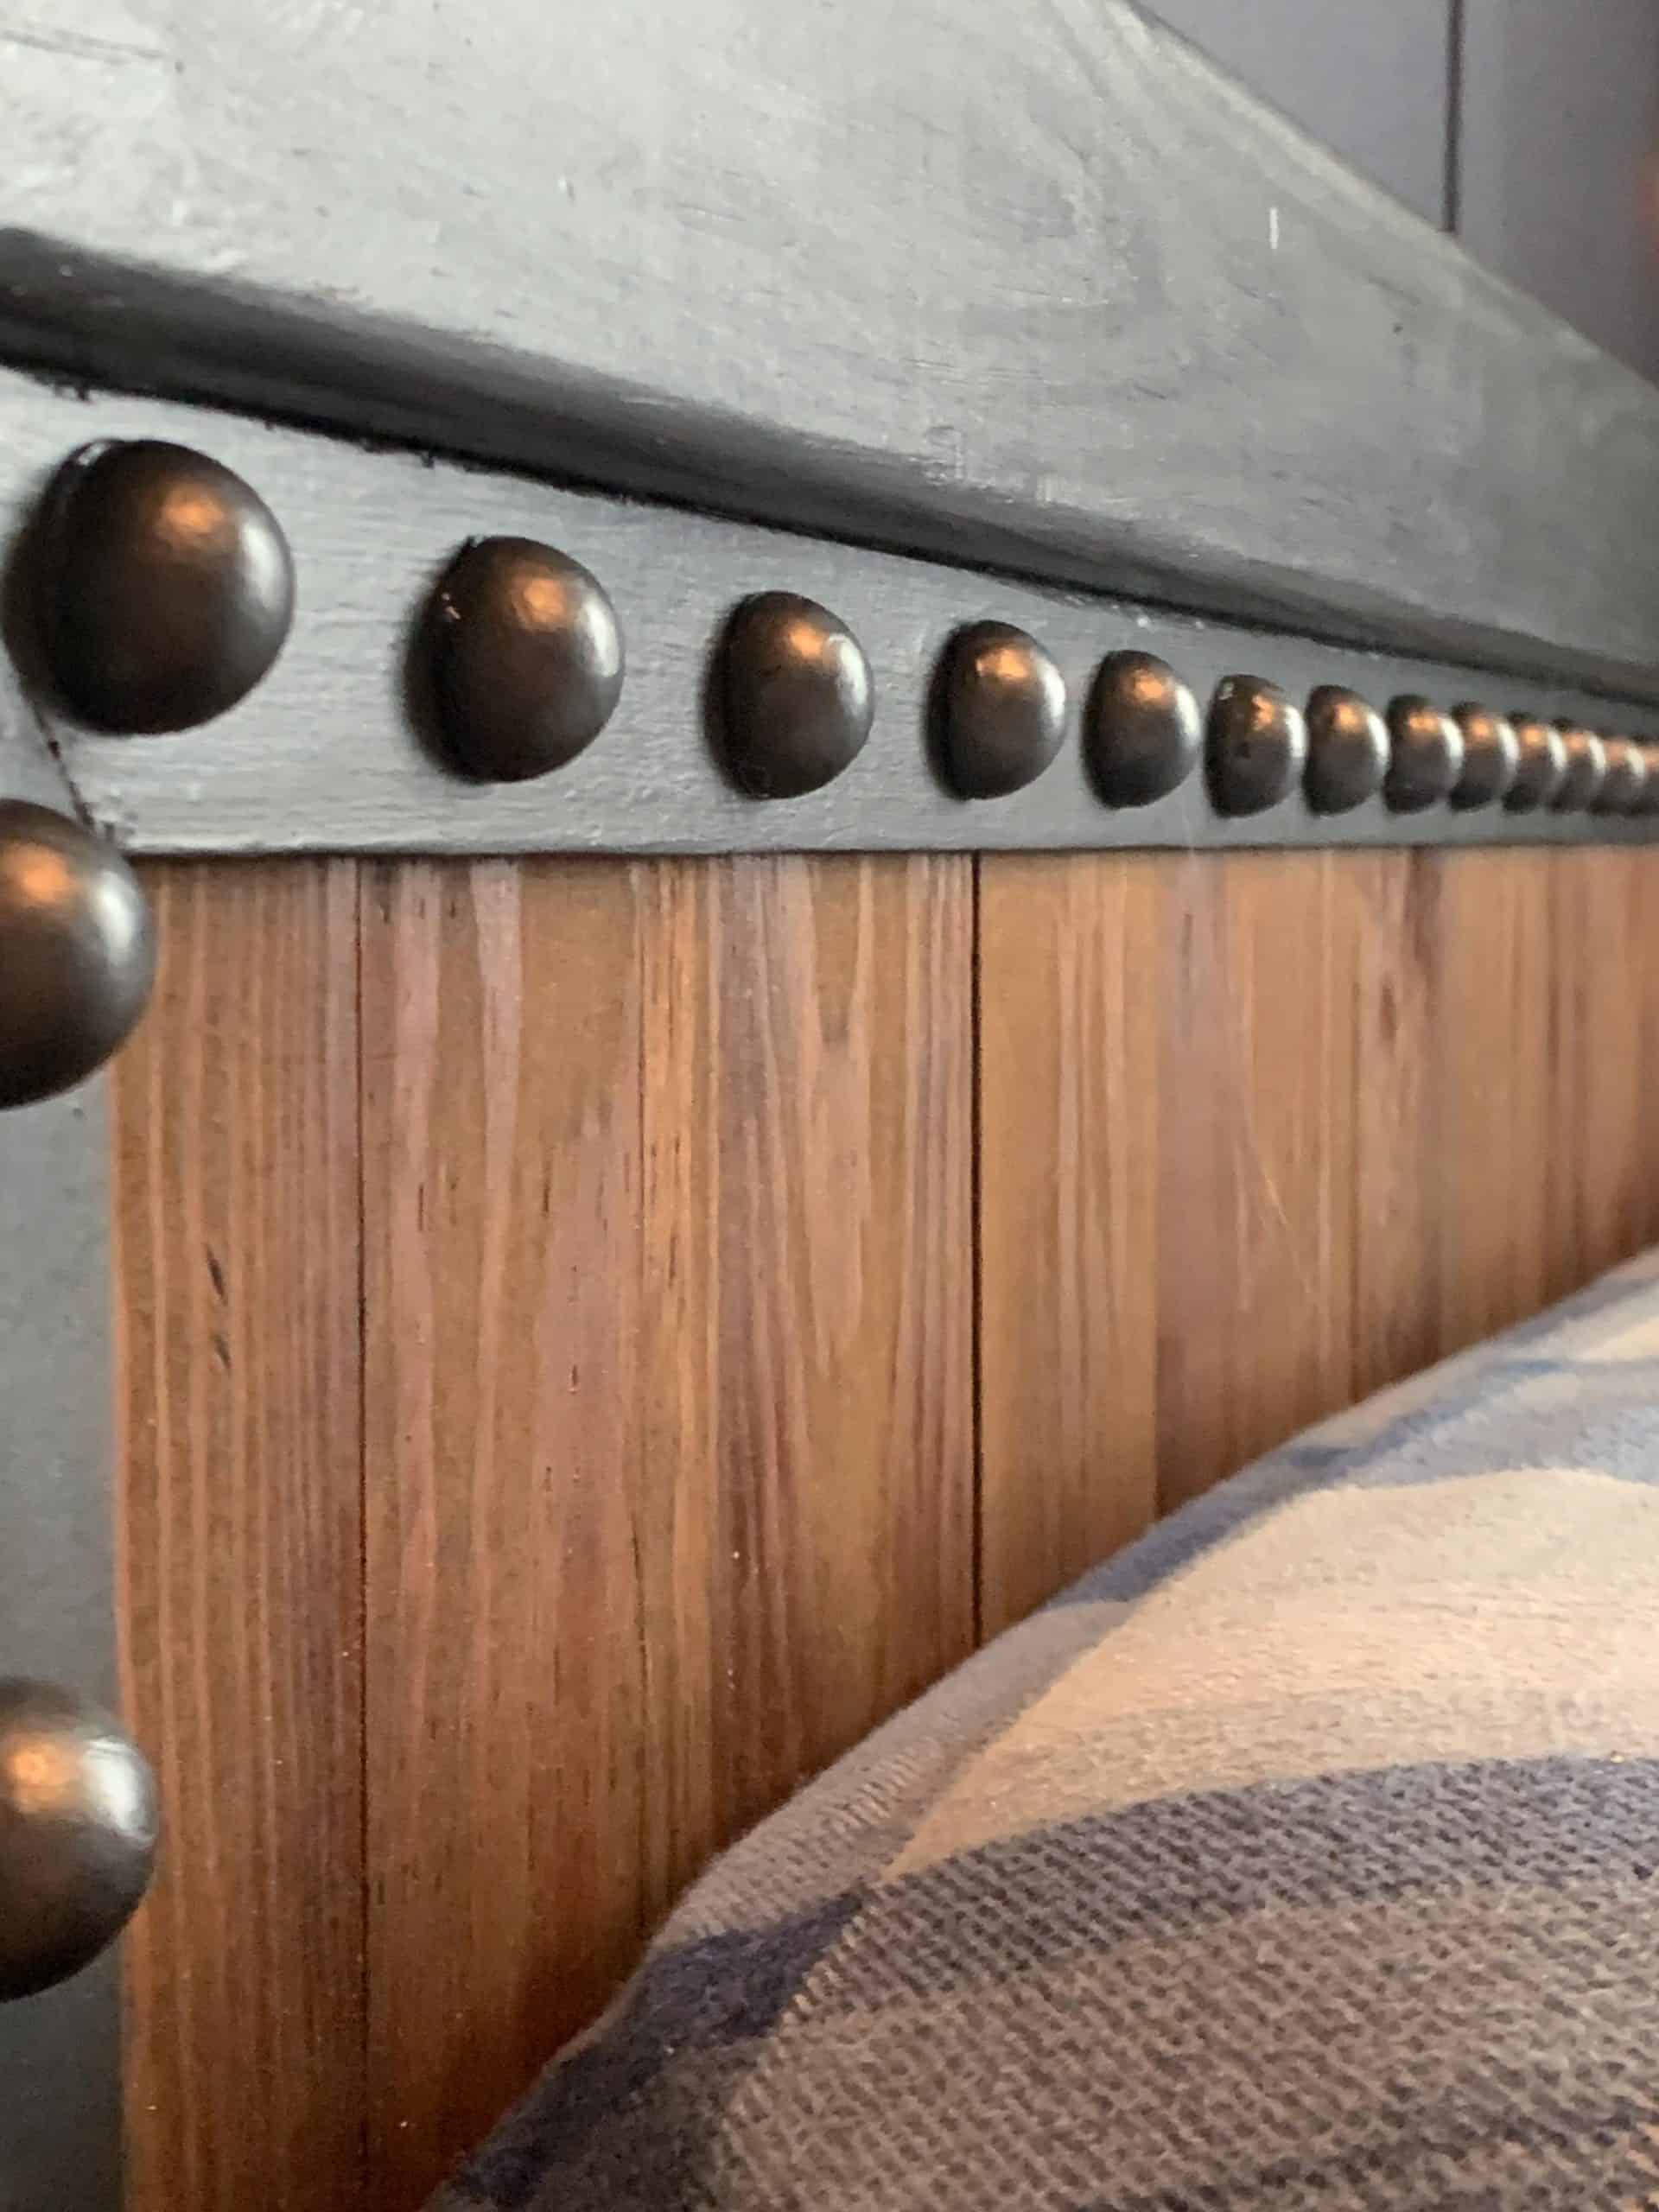
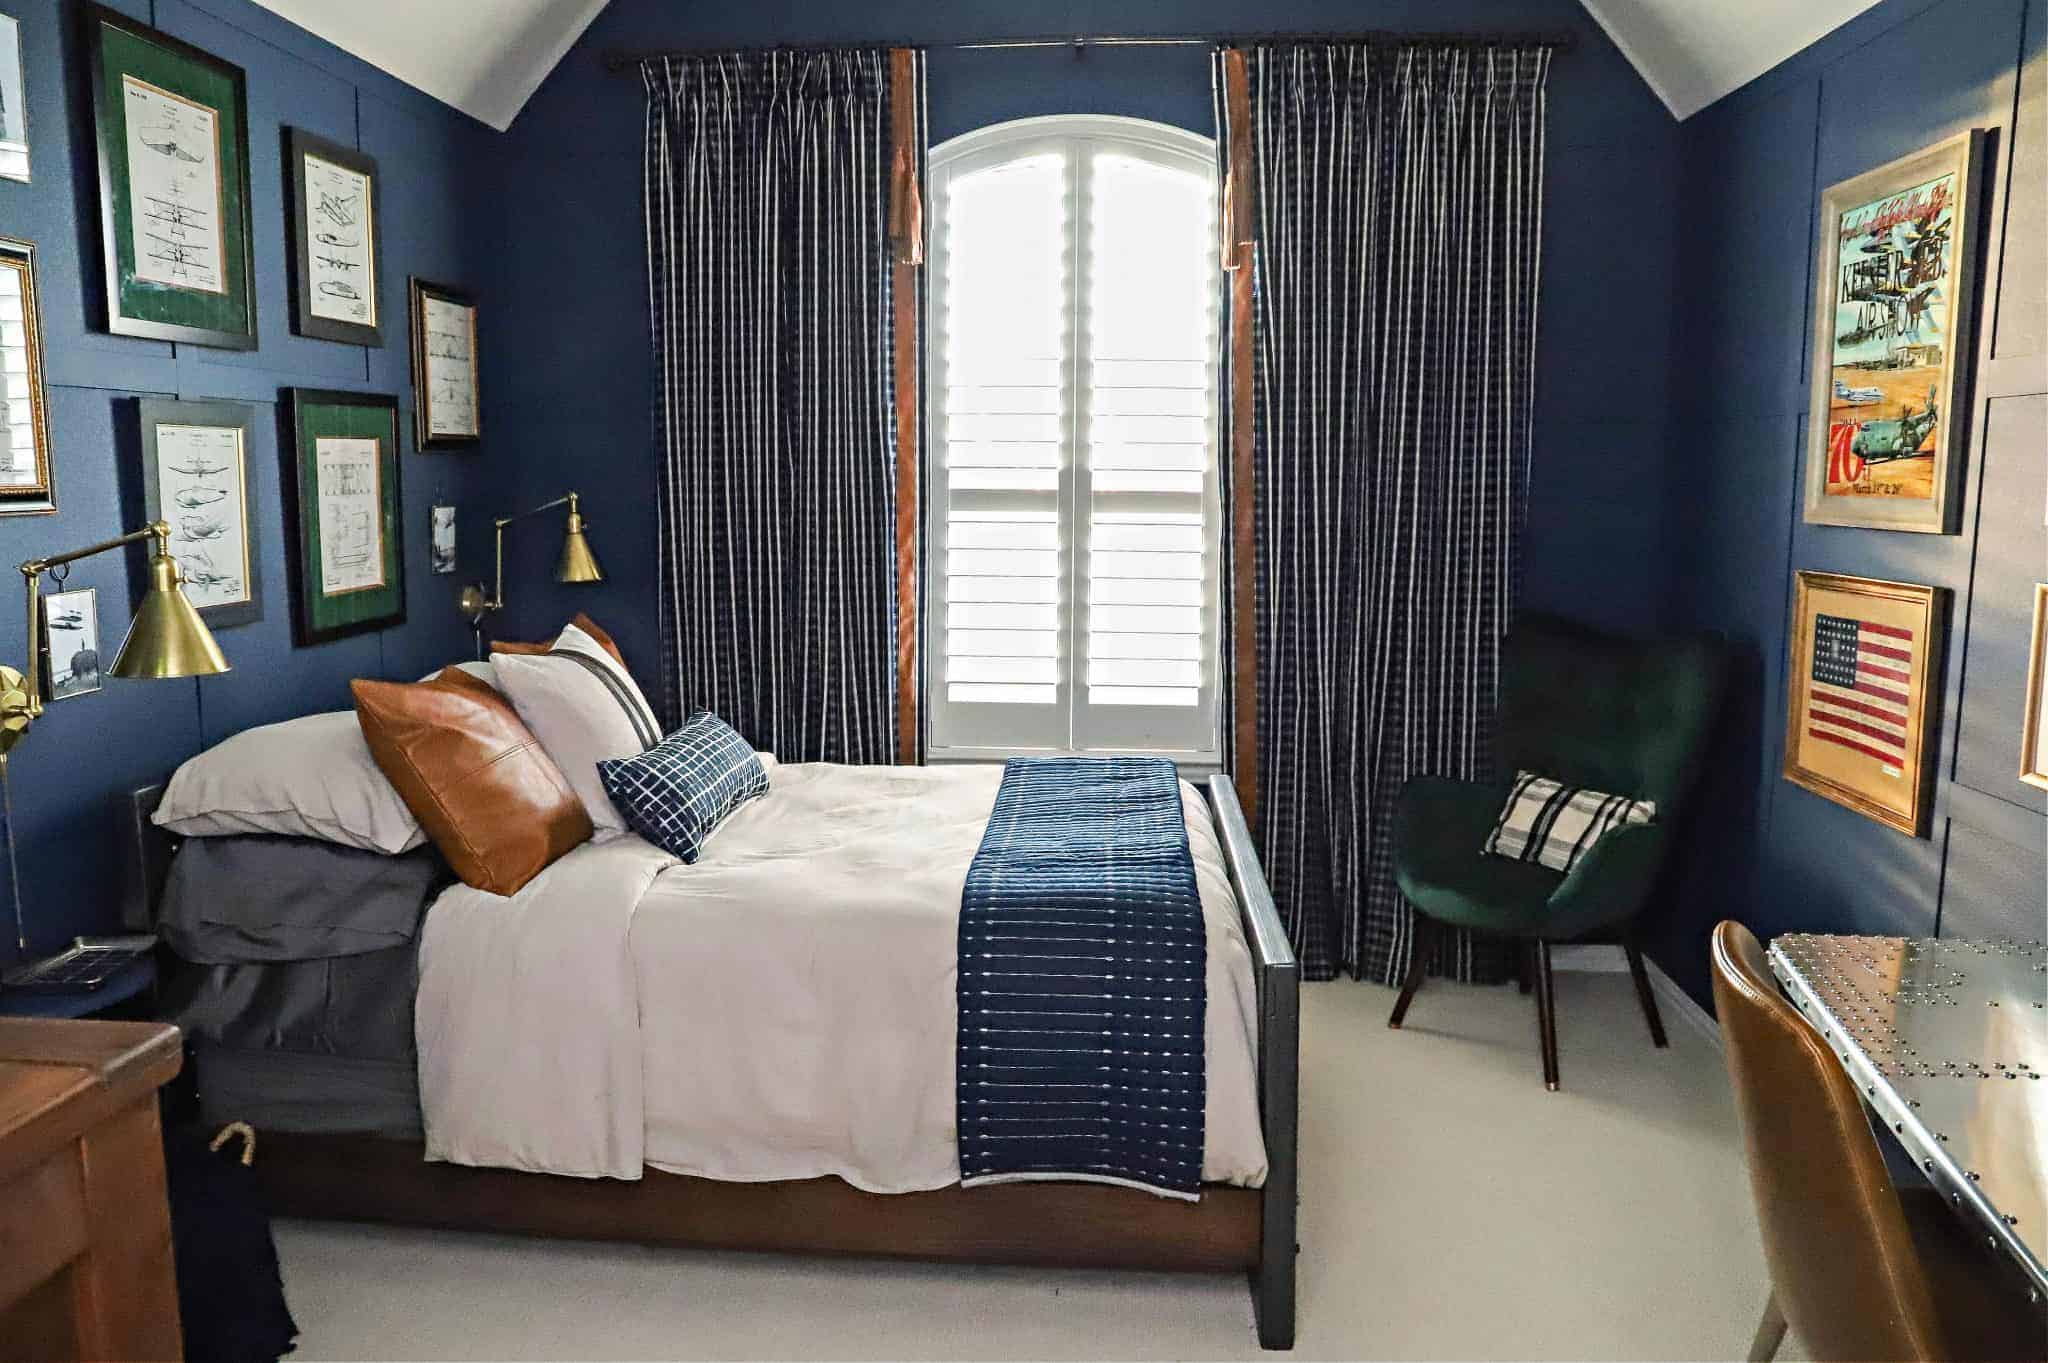
The bed is officially updated! I love being able to take something that was on the edge of “being fine” and make it into something perfect for the room.
Isn’t that what creating a home is all about? Taking the “eh” items and making them into something perfect for our abodes.
Keep Creating Home, my friends,


Shop this room –
*These are affiliate links and I may receive a small commission if you purchase through the links. Thank you for supporting The Aspiring Home.

Joy Maier is the founder and principal designer of The Aspiring Home Interiors, an award-winning studio serving the greater Dallas area and beyond. Blending gracious living with elevated design expertise, Joy creates interiors that feel deeply personal, beautifully refined, and effortlessly livable — from full-home renovations to boutique vacation rentals. Her professional affiliations include ASID (Associate), ART, the Interior Design Society (Professional), NKBA, VRD Collective, and she is a founding member of Designers for Dogs. Since 2012, she has shared design tips and heartfelt stories on The Aspiring Home Blog. Her philosophy is simple: “Design should feel like a deep breath. When we get it right, your home greets you with that exhale every single day.”