Updating Vintage Furniture WK 3 $100 Challenge
Updating vintage furniture is a great way to save money and preserve the past. Carefully bringing new life to an old cabinet will add storage with style to this billiard room update.
It’s week 3 of the $100 Room Challenge created by Erin of Lemons, Lavender, & Laundry. 1 more week left before the big reveal! It’s always so hard to believe how quickly time goes but it does! This week is all about updating vintage furniture or my attempt at bringing a little life back into an old cabinet.
Catch Up Here:
Week 1 // Week 2 // You are here // Week 4
Last week, I showed you the before of this update.
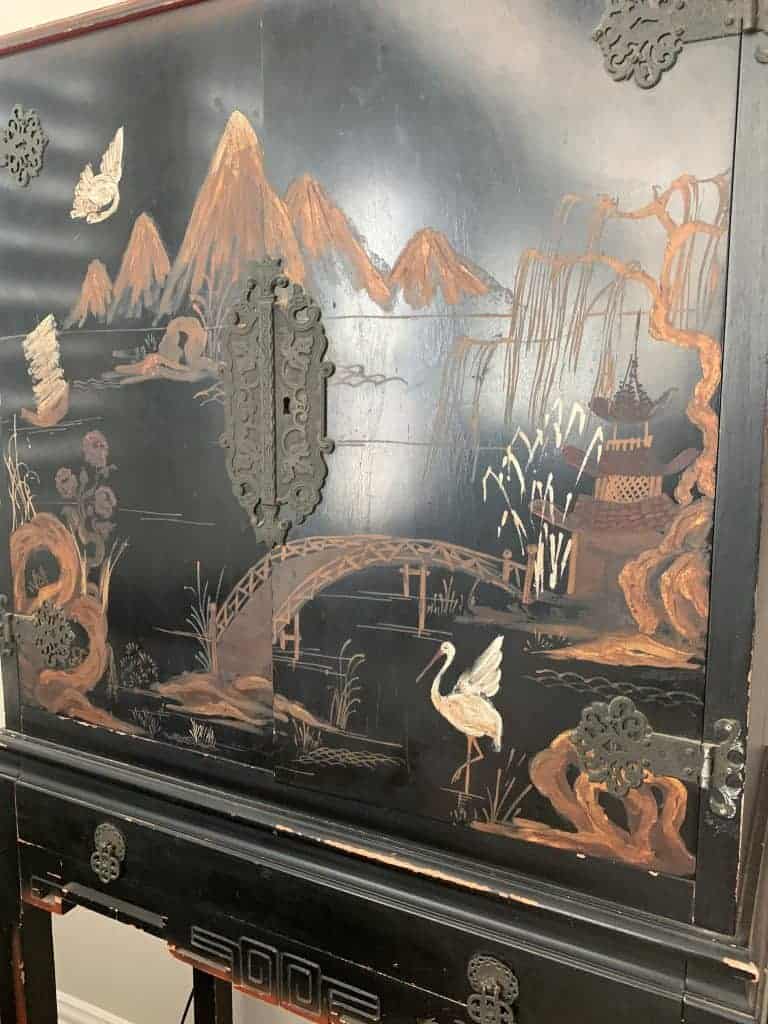
It’s such a neat cabinet and has great storage it’s just a little worn and not in a good way. Nothing a little paint can’t solve. I am leaving the red interior alone.
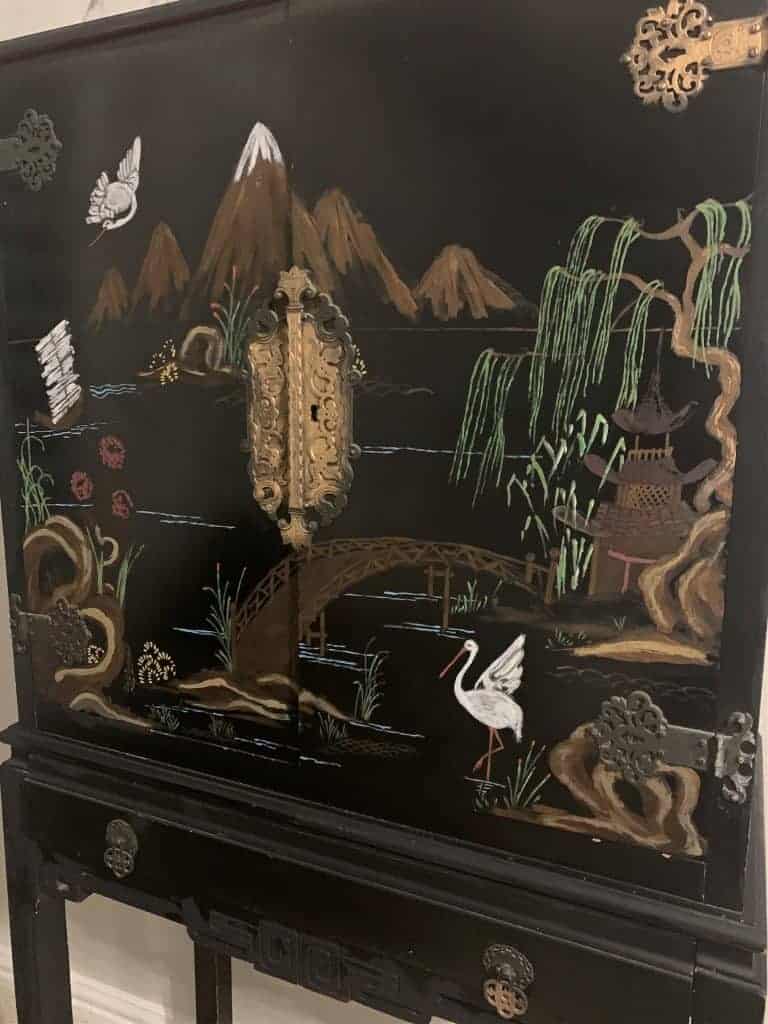
The majority of this makeover will be in adding a little color to the legs, touchup of the black painted areas, and adding a glimmer of gold to the entire piece.
Ready for a little peek? It’s pretty snazzy!
I’m so happy how it turned out and I can’t wait for the big reveal to show you it in its entirety. Happy color but stays true to the character – at least I think so. I used gloss black paint to freshen the areas. Antique gold rub n buff with a wash of black paint to age it a bit more. I wanted to brighten the cranes and restore their beaks – seemed like the right thing to do. 😉
This cabinet had seen better days – it’s hard to tell (or maybe it isn’t) how faded and damaged it really was. If this had been a true antique – I would have sought someone out who was in the know before touching it.
A steady hand, a little acrylic paint, and a tiny paintbrush made updating vintage furniture a breeze.
The little cabinet is just one part of this makeover so let’s look at our list, shall we?
Clear the clutter (duh, right?)Install draperies (can’t wait to show you what I found!)Reupholster the chaise lounge ( I have had the fabric for years, now is the time)- Add the plush
Rearrange furniture a bit- Bring a little good drama to the ceiling (this will be AMAZING and on a dime!)
- Remedy the bare walls
Update vintage furniture
The chaise is looking sleek now and I am going to save its debut for the reveal post!
The drapes?
Well, the drapes are a different story. I thought I was all set with the pocket hidden tab style but once they were up – they just didn’t make me happy. So, I sat with a seam ripper and took out the hidden tabs then added pinch pleat tape. Thankfully this didn’t affect my budget because I tend to buy too much of the stuff when it is on sale. For the rings, I am digging through old stuff and looking for enough rings – they may not perfectly match so I will paint them gold and mix them for that oh so coveted “custom” look. HAHA.
Let’s check on the budget while we are at it –
Curtain panels – $50
Cabinet paint – $0
Chaise lounge fabric – $0
This weekend we will be installing the ceiling treatment and this will be where a good chunk of the remaining budget will go.
I’m gonna call this post finished so you can go see what my friends have been up to!
Til Later My Friends,





The cabinet turned out beautifully! I details of the picture just pop right out now. I love how pretty it is 🙂 Great job!!
Wow, those little touched really made a difference to that cabinet. Can’t wait to see it all together for the reveal!
Oh my, what a difference a little paint makes! It looks so much brighter- and I love the addition of the green to the trees and such. Nice job Joy! Can’t wait to see your room complete
That’s a great update on the cabinet! Can’t wait to see the whole room together!
That cabinet is SO COOL! I love that you were able to preserve the design, but give it a little life with some added paint. It looks beautiful!
What a gorgeous piece!!!