Super Easy DIY Project – Embroidery Hoop Art
Large art pieces can get pricey, this modern art beauty can be made for a real bargain, embroidery hoops are the key. A little hot glue, floral wire, and gold leaf make for a spectacular embroidery hoop art project.
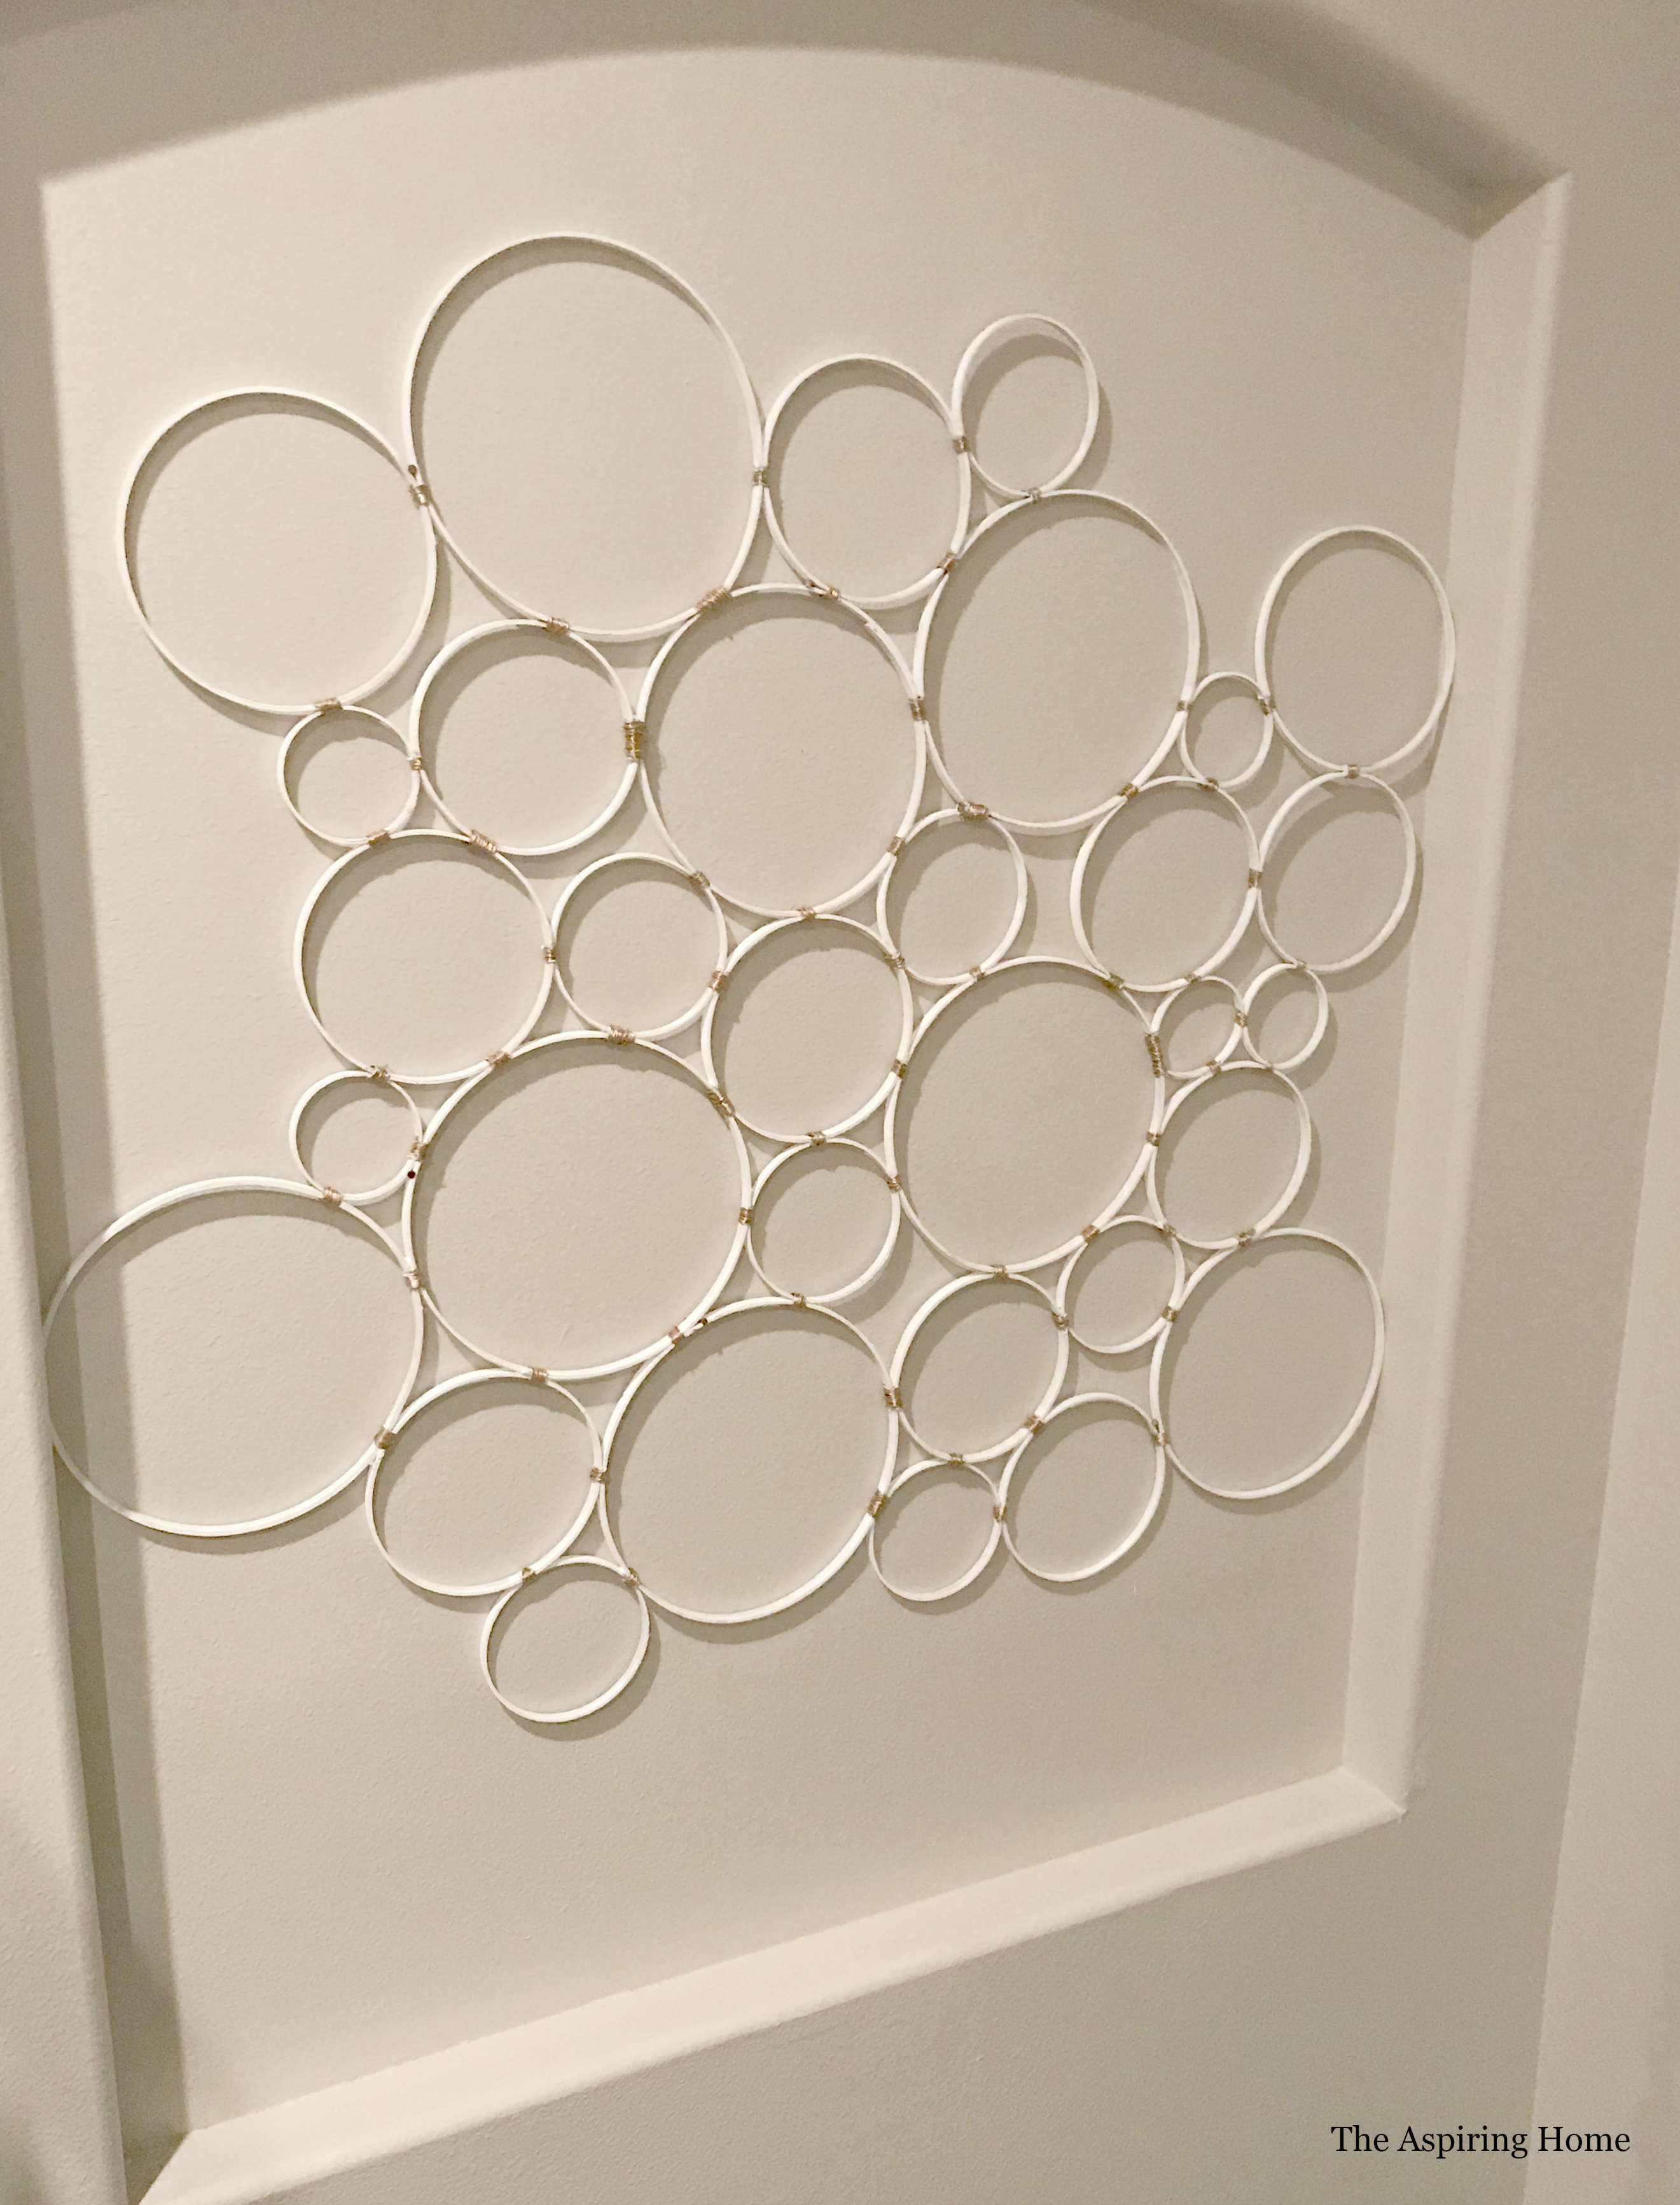
Last fall, I decided to update our foyer area for the One Room Challenge. The foyer was a tad tricky due to 20-foot ceiling height, a set of stairs, narrow hallway, and really large shallow art niches. The whole project came together beautifully and six months later, the room still looks gorgeous. One of my favorite projects involved filling the art niche. How do you get a large art piece on a really small budget? Well, you create embroidery hoop art!
Embroidery hoops are becoming the craft darling as of late. Everything from wreaths to art to actually using the hoops for embroidery (go figure, right?) is popping up on Pinterest. The hoops are a reasonably priced option when you are wanting to create, I have even seen folks use the hoops as a stencil for adding polka dots to a wall!
Let’s get started on this art project!

Materials:
- Embroidery Hoops – a variety of sizes
- 22 gauge Floral wire
- Hot glue gun
- Hot glue gun sticks
- Gold leaf paint
You can find all these items at your local craft store.
Step 1
Measure your space and make note of it. You will measure your art piece from time to time just to keep your sanity.
Step 2
Take apart your embroidery hoops, use the solid hoops first. I ended up cutting off the metal connector part of the other hoop half and hot glued the ends together. Gently bend the wood back into shape before gluing.
Step 3
Start with the largest hoop and hot glue a mix of other hoop sizes on the top, bottom, left, and right. Then begin to add more hoops to each of those hoops. Use a mix of large, medium, and small hoops to create a free-flowing piece of art. There isn’t a wrong way and there isn’t a “right way” to do this – just try to avoid huge negative spaces between the hoops.

Step 4
Paint the hoop art in your favorite color. I chose to paint mine white. Make sure to paint both sides and interior. Allow drying time.
Step 5
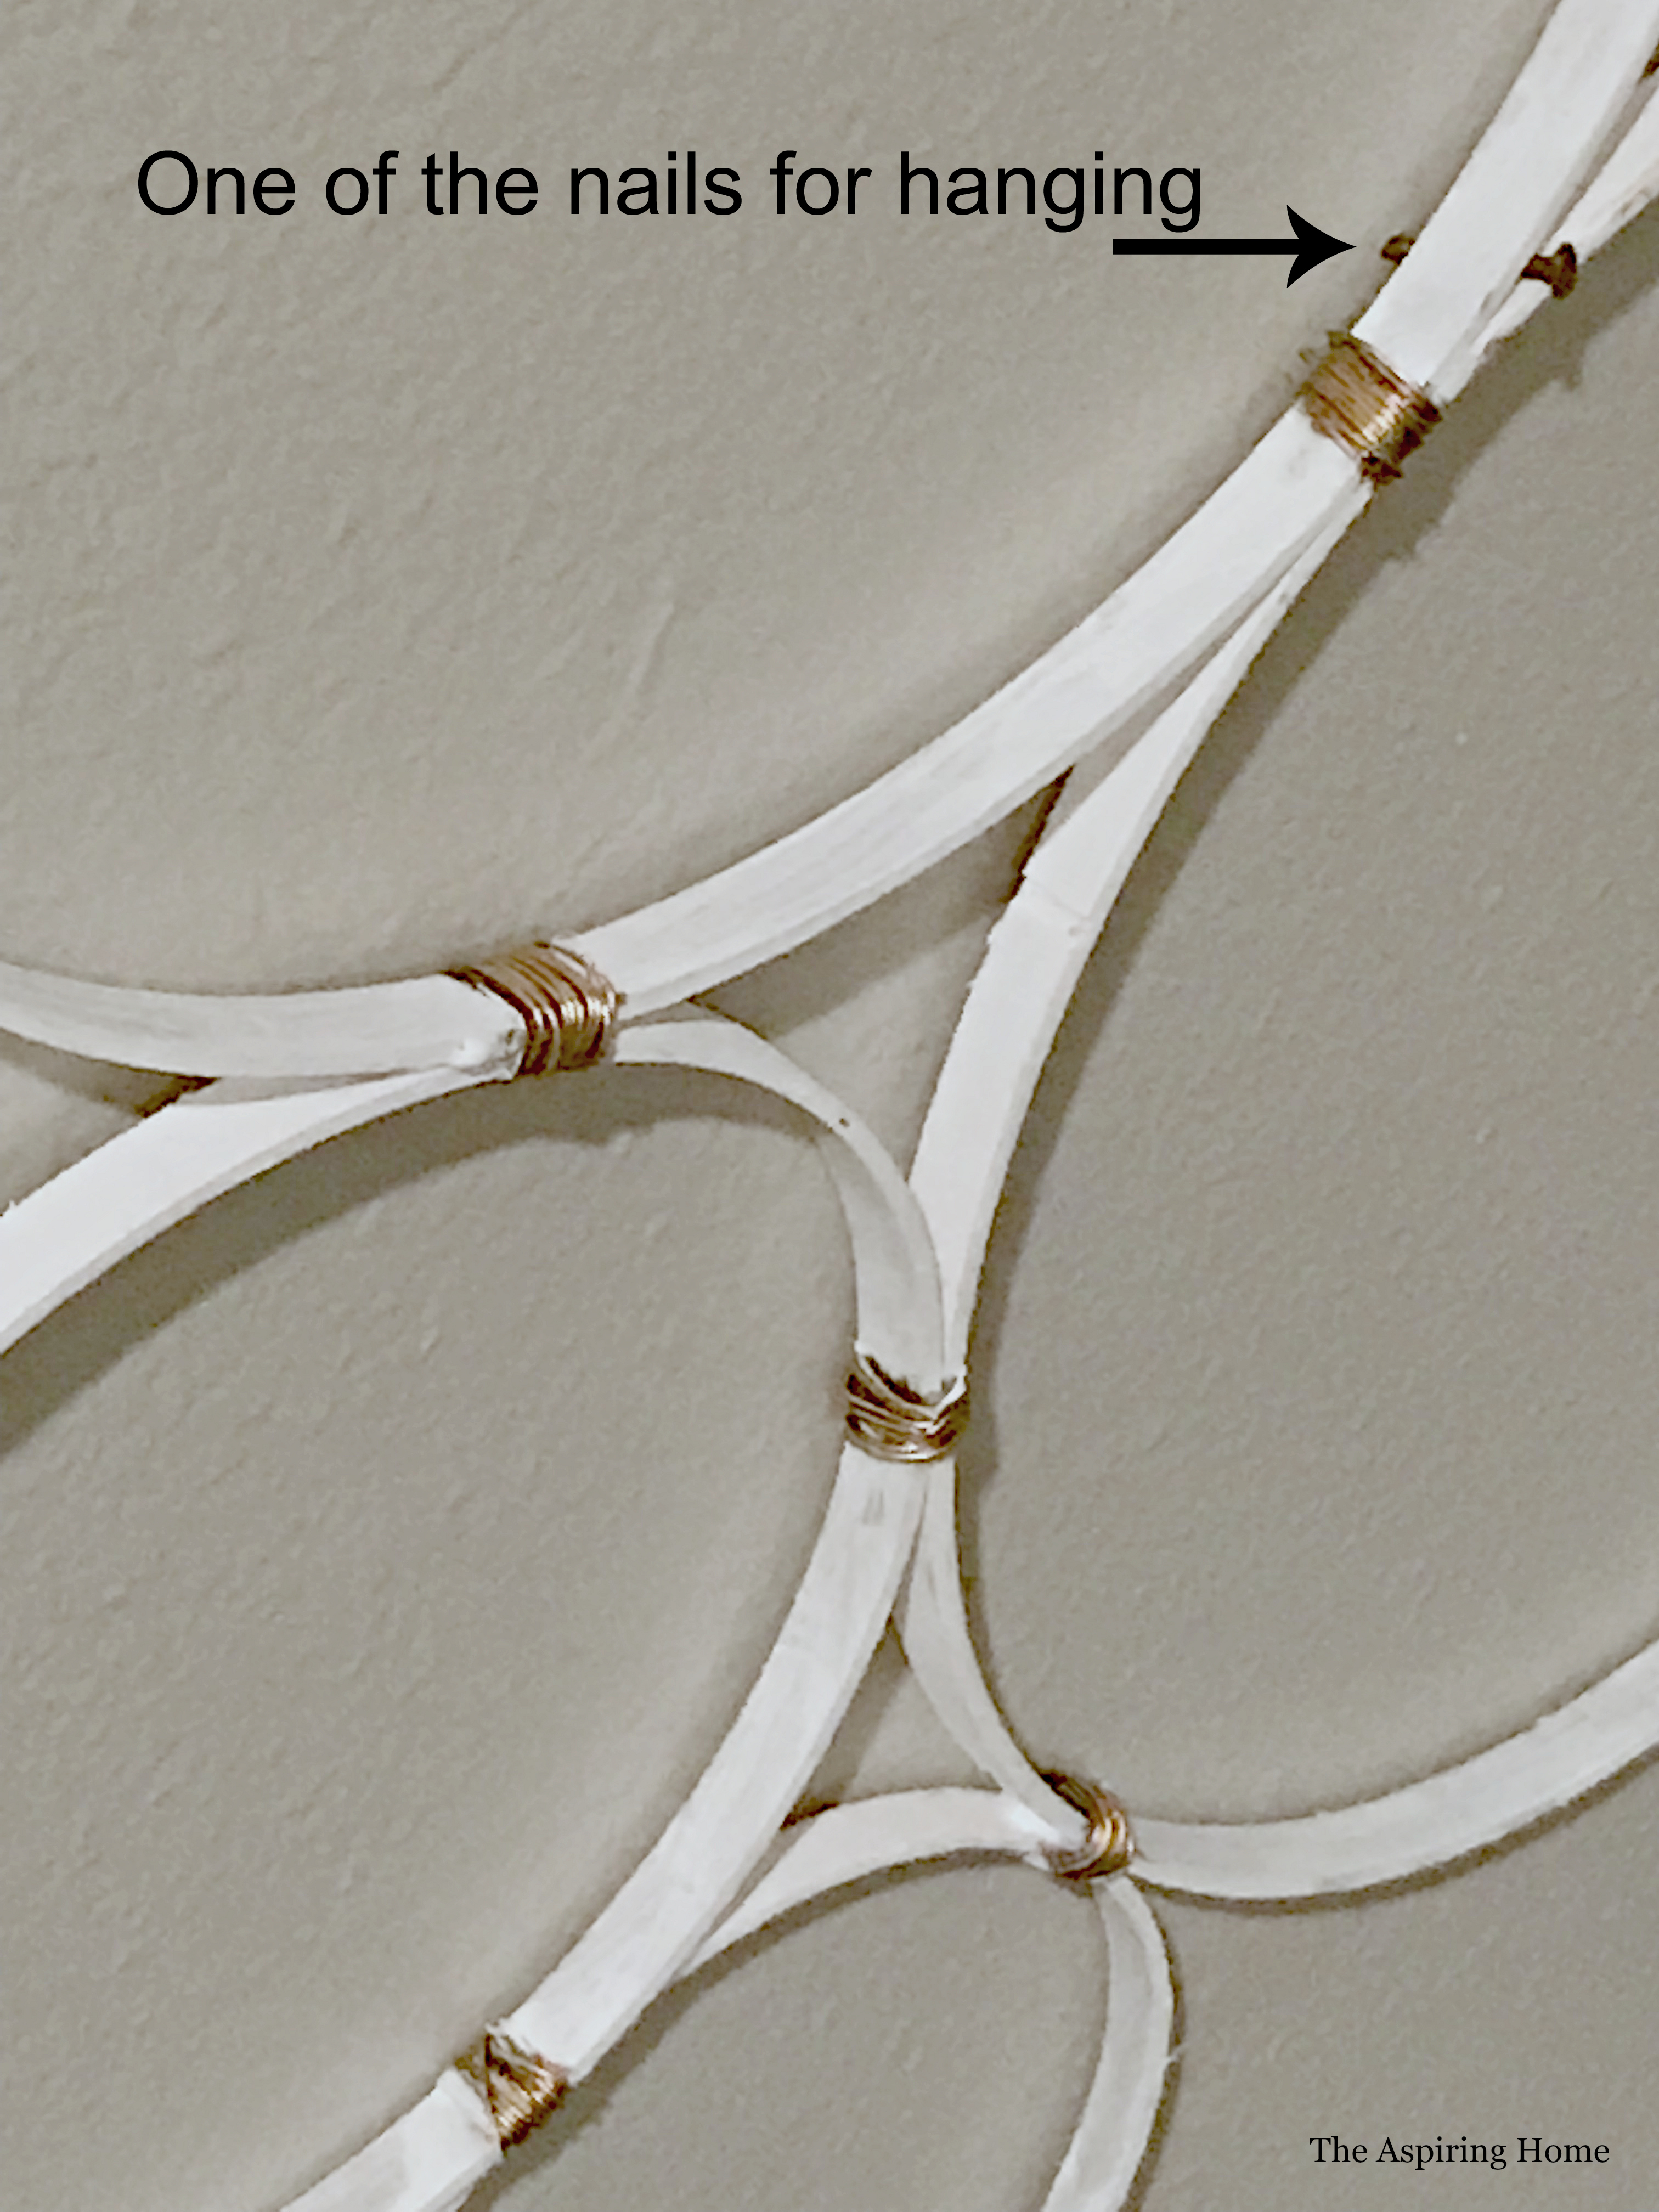
Once the embroidery hoop art is dry, begin wrapping the floral wire around the areas where you hot glued the hoops together. Tuck the wire ends into the wrapped area so they are not seen.

I tried a heavier gauge wire and it was harder to wrap and keep taut. Use fine-grit sandpaper to smooth out the rough areas.
Step 6
Paint the green floral wire with Gold leaf paint.

Step 7
Hang your artwork. Thankfully this artwork is very lightweight and requires simple nails to hold it in place. We hung the piece using nails at the top corners, middle and lower corners.
Wanna know how much the whole project cost? $20! I had all the supplies on hand except the embroidery hoops (which I got on sale)
Imagine how fun this project would look mixed with framed family pictures or a fun focal point in a nursery? The possibilities are endless!
Till later,

**Affiliate Link Disclosure: Please note that some of the links above are affiliate links, and at no additional cost to you, I will earn a commission if you decide to make a purchase after clicking through the link. Please understand that I have experienced all of these companies, and I recommend them because they are helpful and useful, not because of the small commissions I make if you decide to buy something through my links. Please do not spend any money on these products unless you feel you need them or that they will help you achieve your goals.
Joy Maier is the founder and principal designer of The Aspiring Home Interiors, an award-winning studio serving the greater Dallas area and beyond. Blending gracious living with elevated design expertise, Joy creates interiors that feel deeply personal, beautifully refined, and effortlessly livable — from full-home renovations to boutique vacation rentals. Her professional affiliations include ASID (Associate), ART, the Interior Design Society (Professional), NKBA, VRD Collective, and she is a founding member of Designers for Dogs. Since 2012, she has shared design tips and heartfelt stories on The Aspiring Home Blog. Her philosophy is simple: “Design should feel like a deep breath. When we get it right, your home greets you with that exhale every single day.”