How To Upholster A Bench Over The Weekend
Let’s make a quick comfy seating option with this upholstered bench DIY. This easy project requires a few supplies and a little patience.
Creating this project wasn’t originally in the plans for the office but once the built-ins were in place, a bench seemed like a perfect addition. I could have easily bought a beautiful bench to tuck under the narrow computer niche but making a custom one was more intriguing and thus this upholstered bench DIY emerged.

Now, with any project on this site – I want to be forthcoming and tell you honestly that I am not a professional. I am just a soul that loves beautiful things but can not always swing the price point so I decide to figure it out and then share the ideas with you. My utmost happiness comes from sharing what I learn and hopefully giving you the confidence to try new things that make your house into a home.
Ready to get started on this upholstered bench DIY?
Supplies:
- Hairpin legs
- The fabric of your choice
- Staple gun/staples
- Sewing machine
- Thread
- 1 in x12 in x however long you want your bench
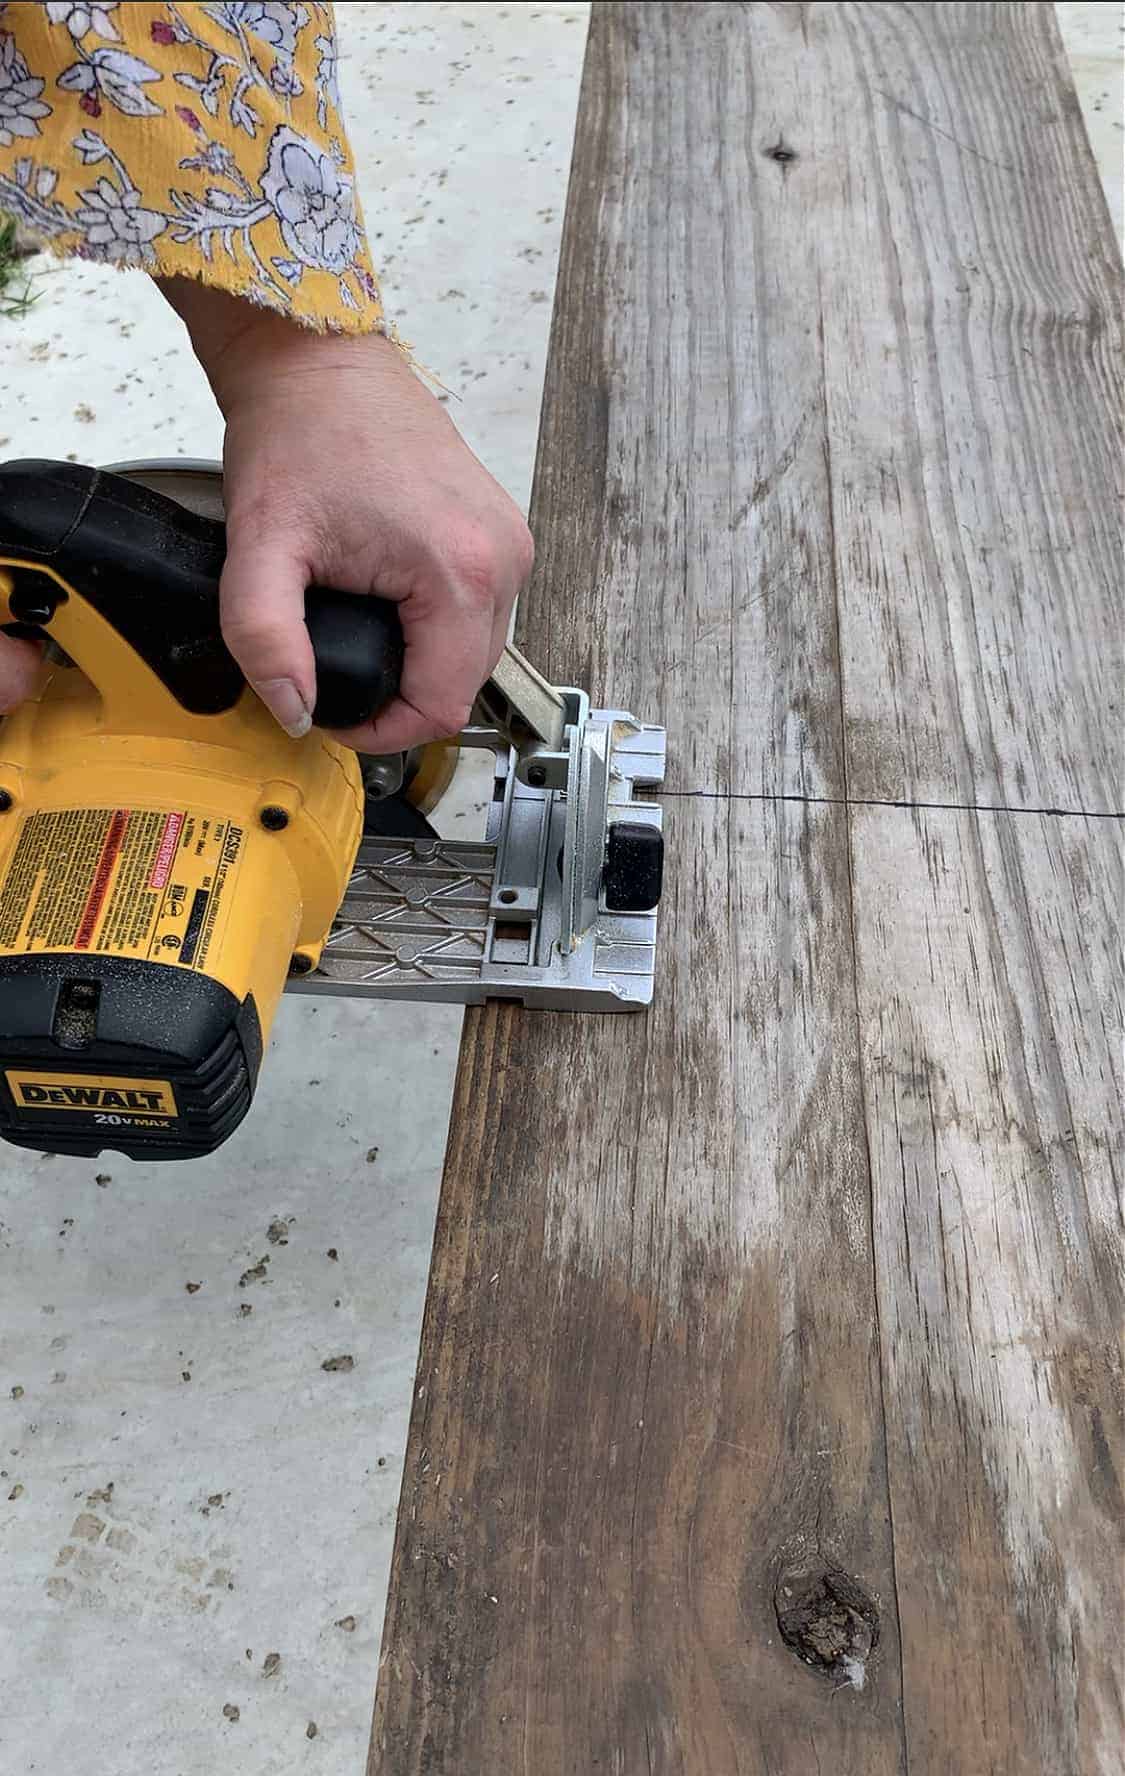
Step 1 – Build the bench
I started out with the bench that once graced our previous home’s foyer. You can see it here. The length of the bench is too long for this home’s layout so – I cut it in half and made two benches.
I simply measured the length I needed and used a sharpie marker to make for an easy cut.


Cut your board.
Add the legs. If your bench is on the longer side – add another set of legs to the center.

Step 2 – Add the foam
I found my foam at my local fabric store. I bought a piece that was twice the size of my bench but not as long – it was a budget decision.
I measured and drew a sharpie line right down the middle of the foam and on the sides. Using an electric carving knife – carefully cut the foam.
Using the electric knife will create a cleaner smoother cut. In full disclosure – I did not use an electric knife for this project simply because I could not find my knife (it’s packed away somewhere).
I want you to take note of how ragged my edge looks – not ideal my friends. I put a few staples in to keep the foam in place on the bench.
Check out another easy project I did for the bedroom by making over a purchased bench!

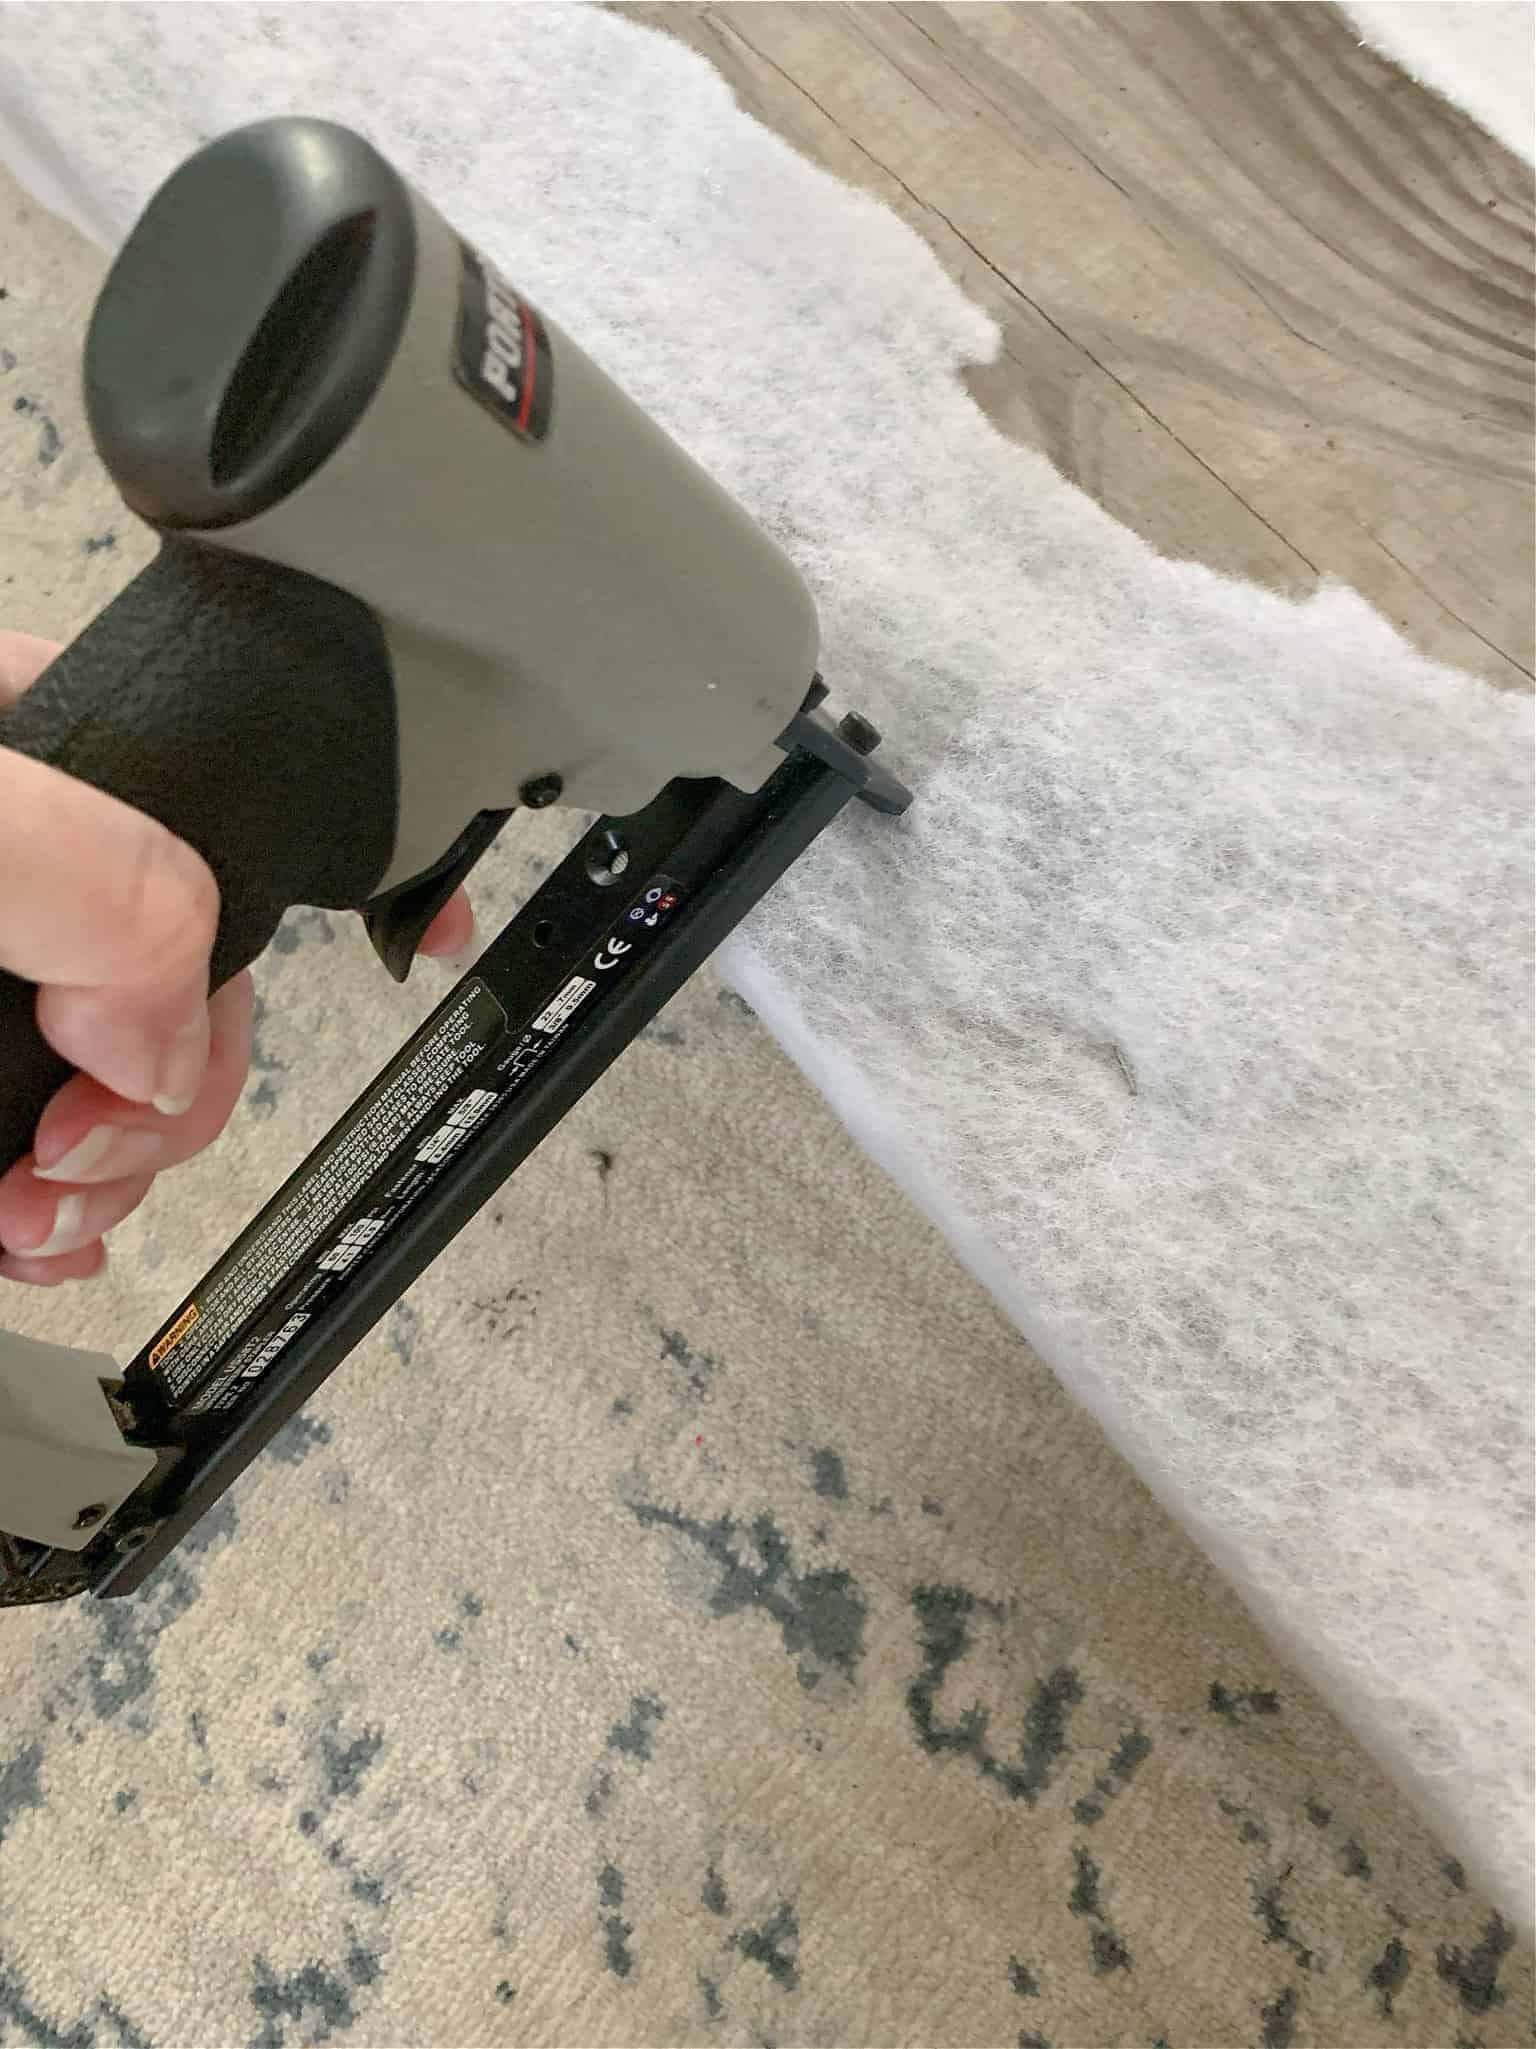
Step 3 – Wrap foam with batting
I made up for my jagged edges here but layering the batting. I solved the issue overall but again – doing it right the first time is much better. Staple the batting underneath.
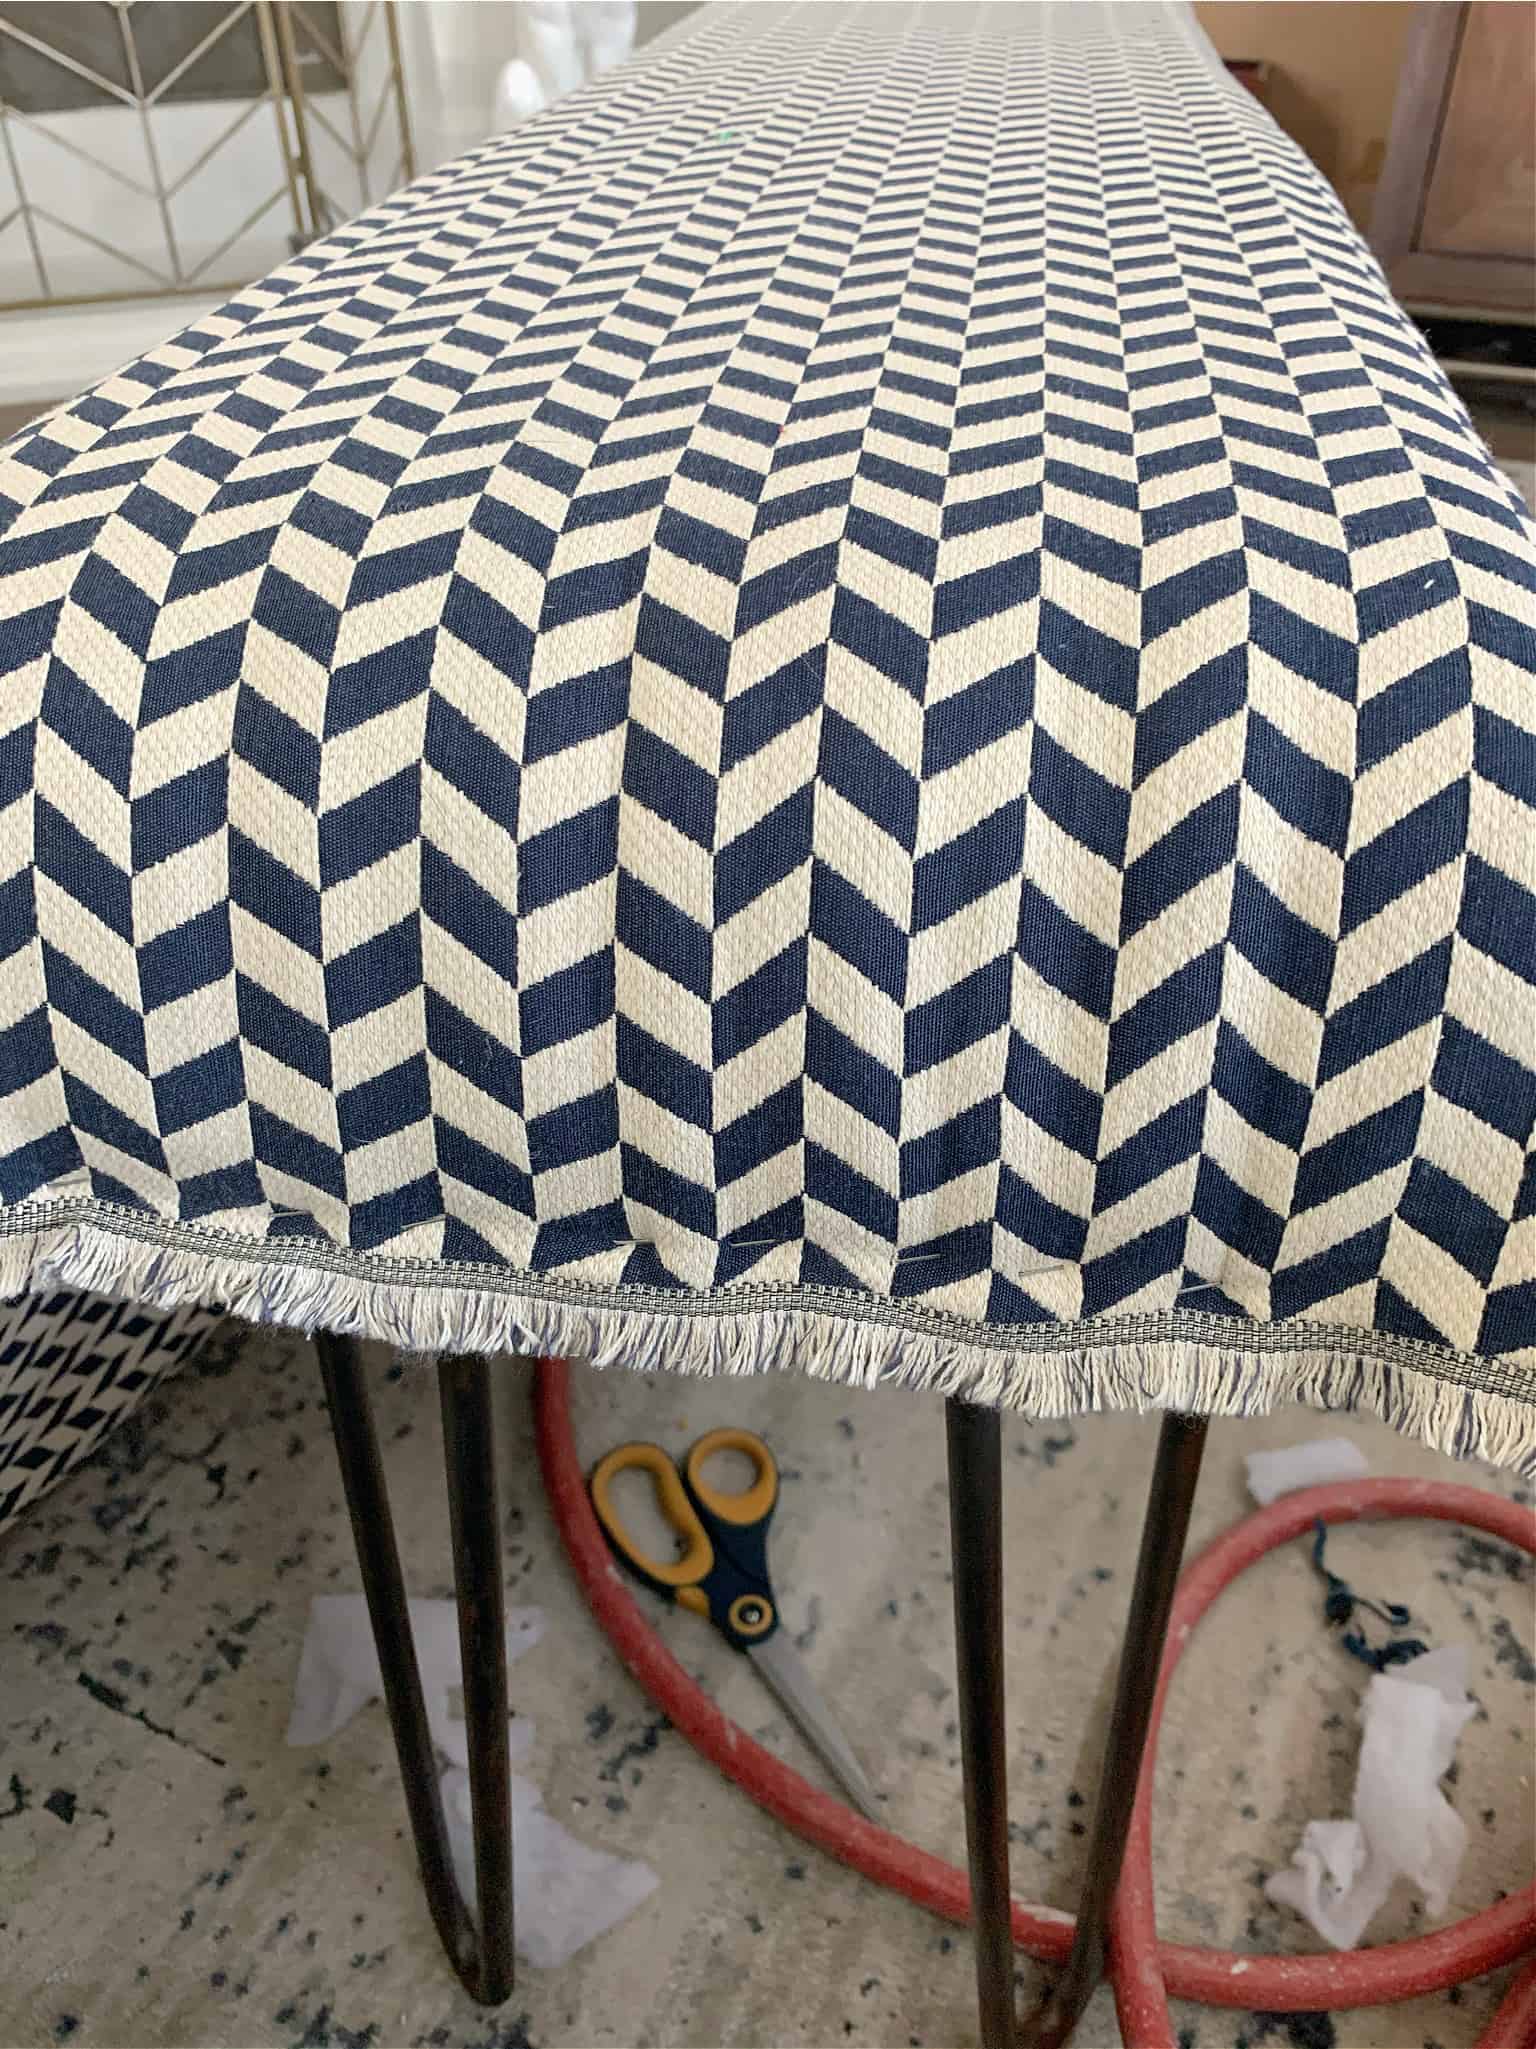
Step 4 – Add the fabric
My fabric is really thick so I just wrapped and stapled it. IF your fabric isn’t super thick, add a cotton fabric layer (old sheet) first.
If you want the hairpin legs to show – just wrap and staple the fabric underneath and call it. If you want to add a skirt – read on.

Step 5 – Add the skirt
I measured the width, length, and height of my bench then added 1/2 inch for seams. For the height, I added 2 inches for a nice hem.
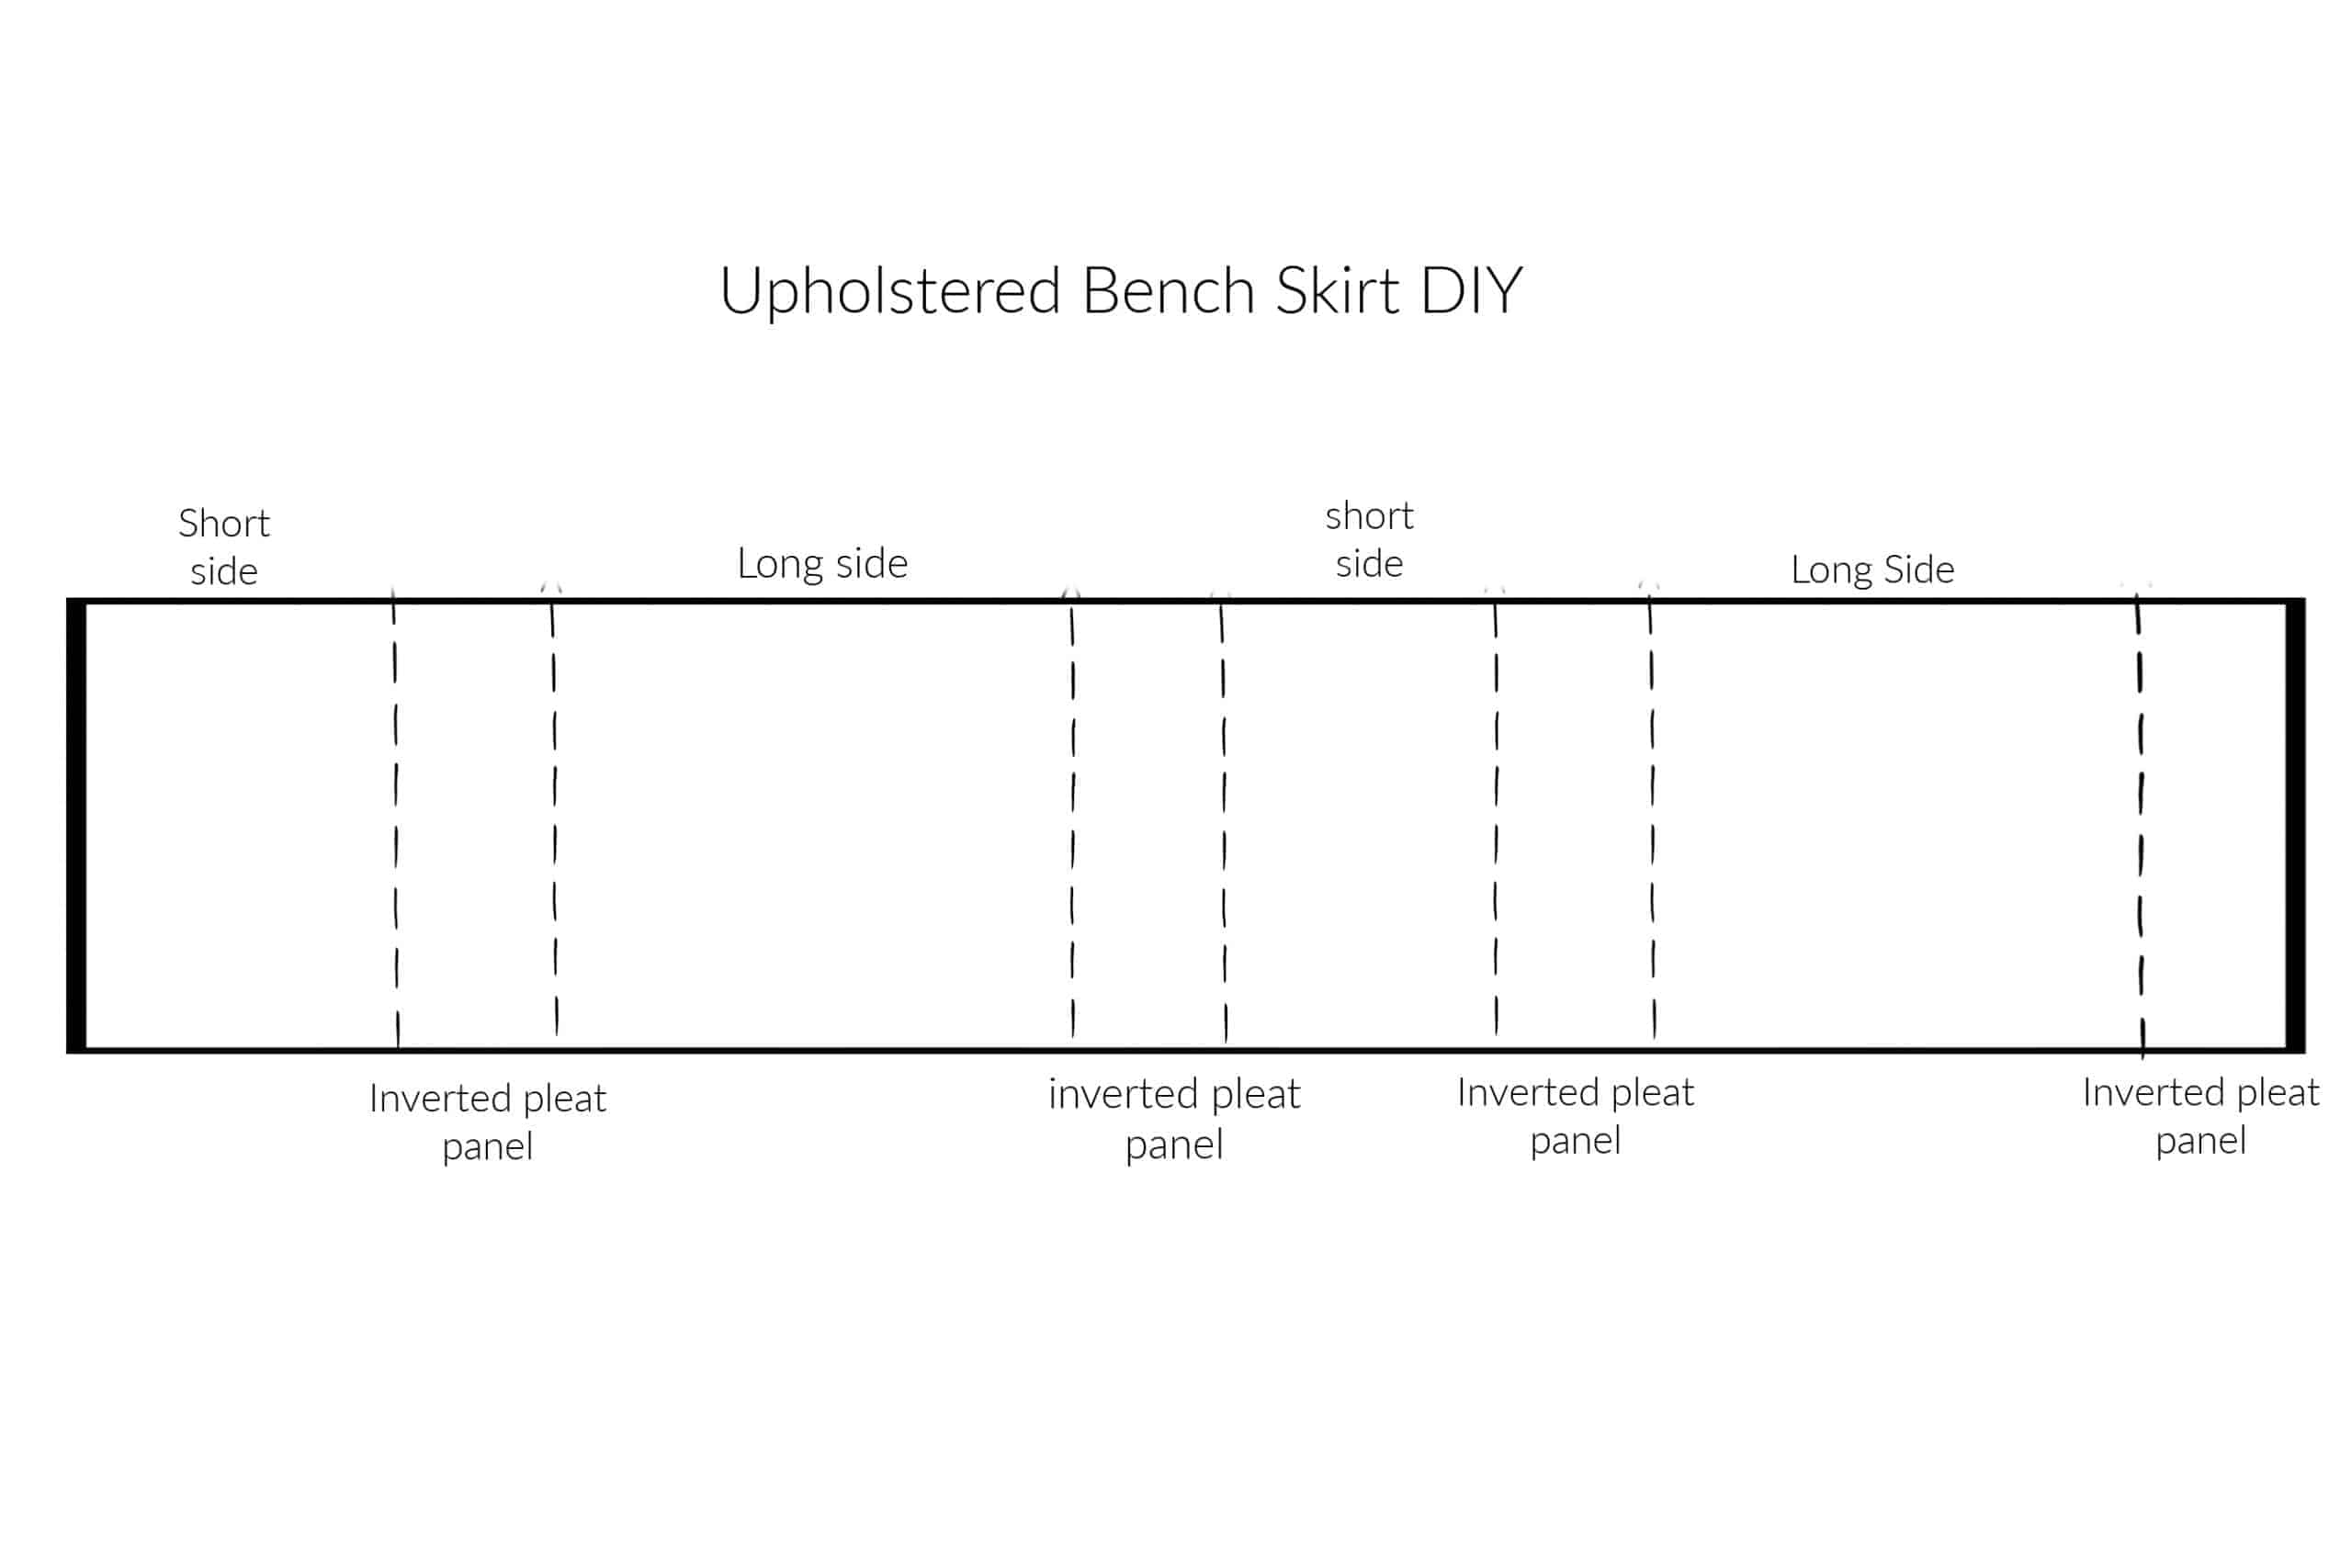
To create the inverted pleat, I cut 6-inch widths (plus 1/2 inch for seams so 7-inch widths). I chose a complementary fabric for my inverted pleats.
I sewed on each side of the main fabric the inverted pleat fabric until I had one long piece of fabric. Refer to the diagram below.

Creating the pleats –
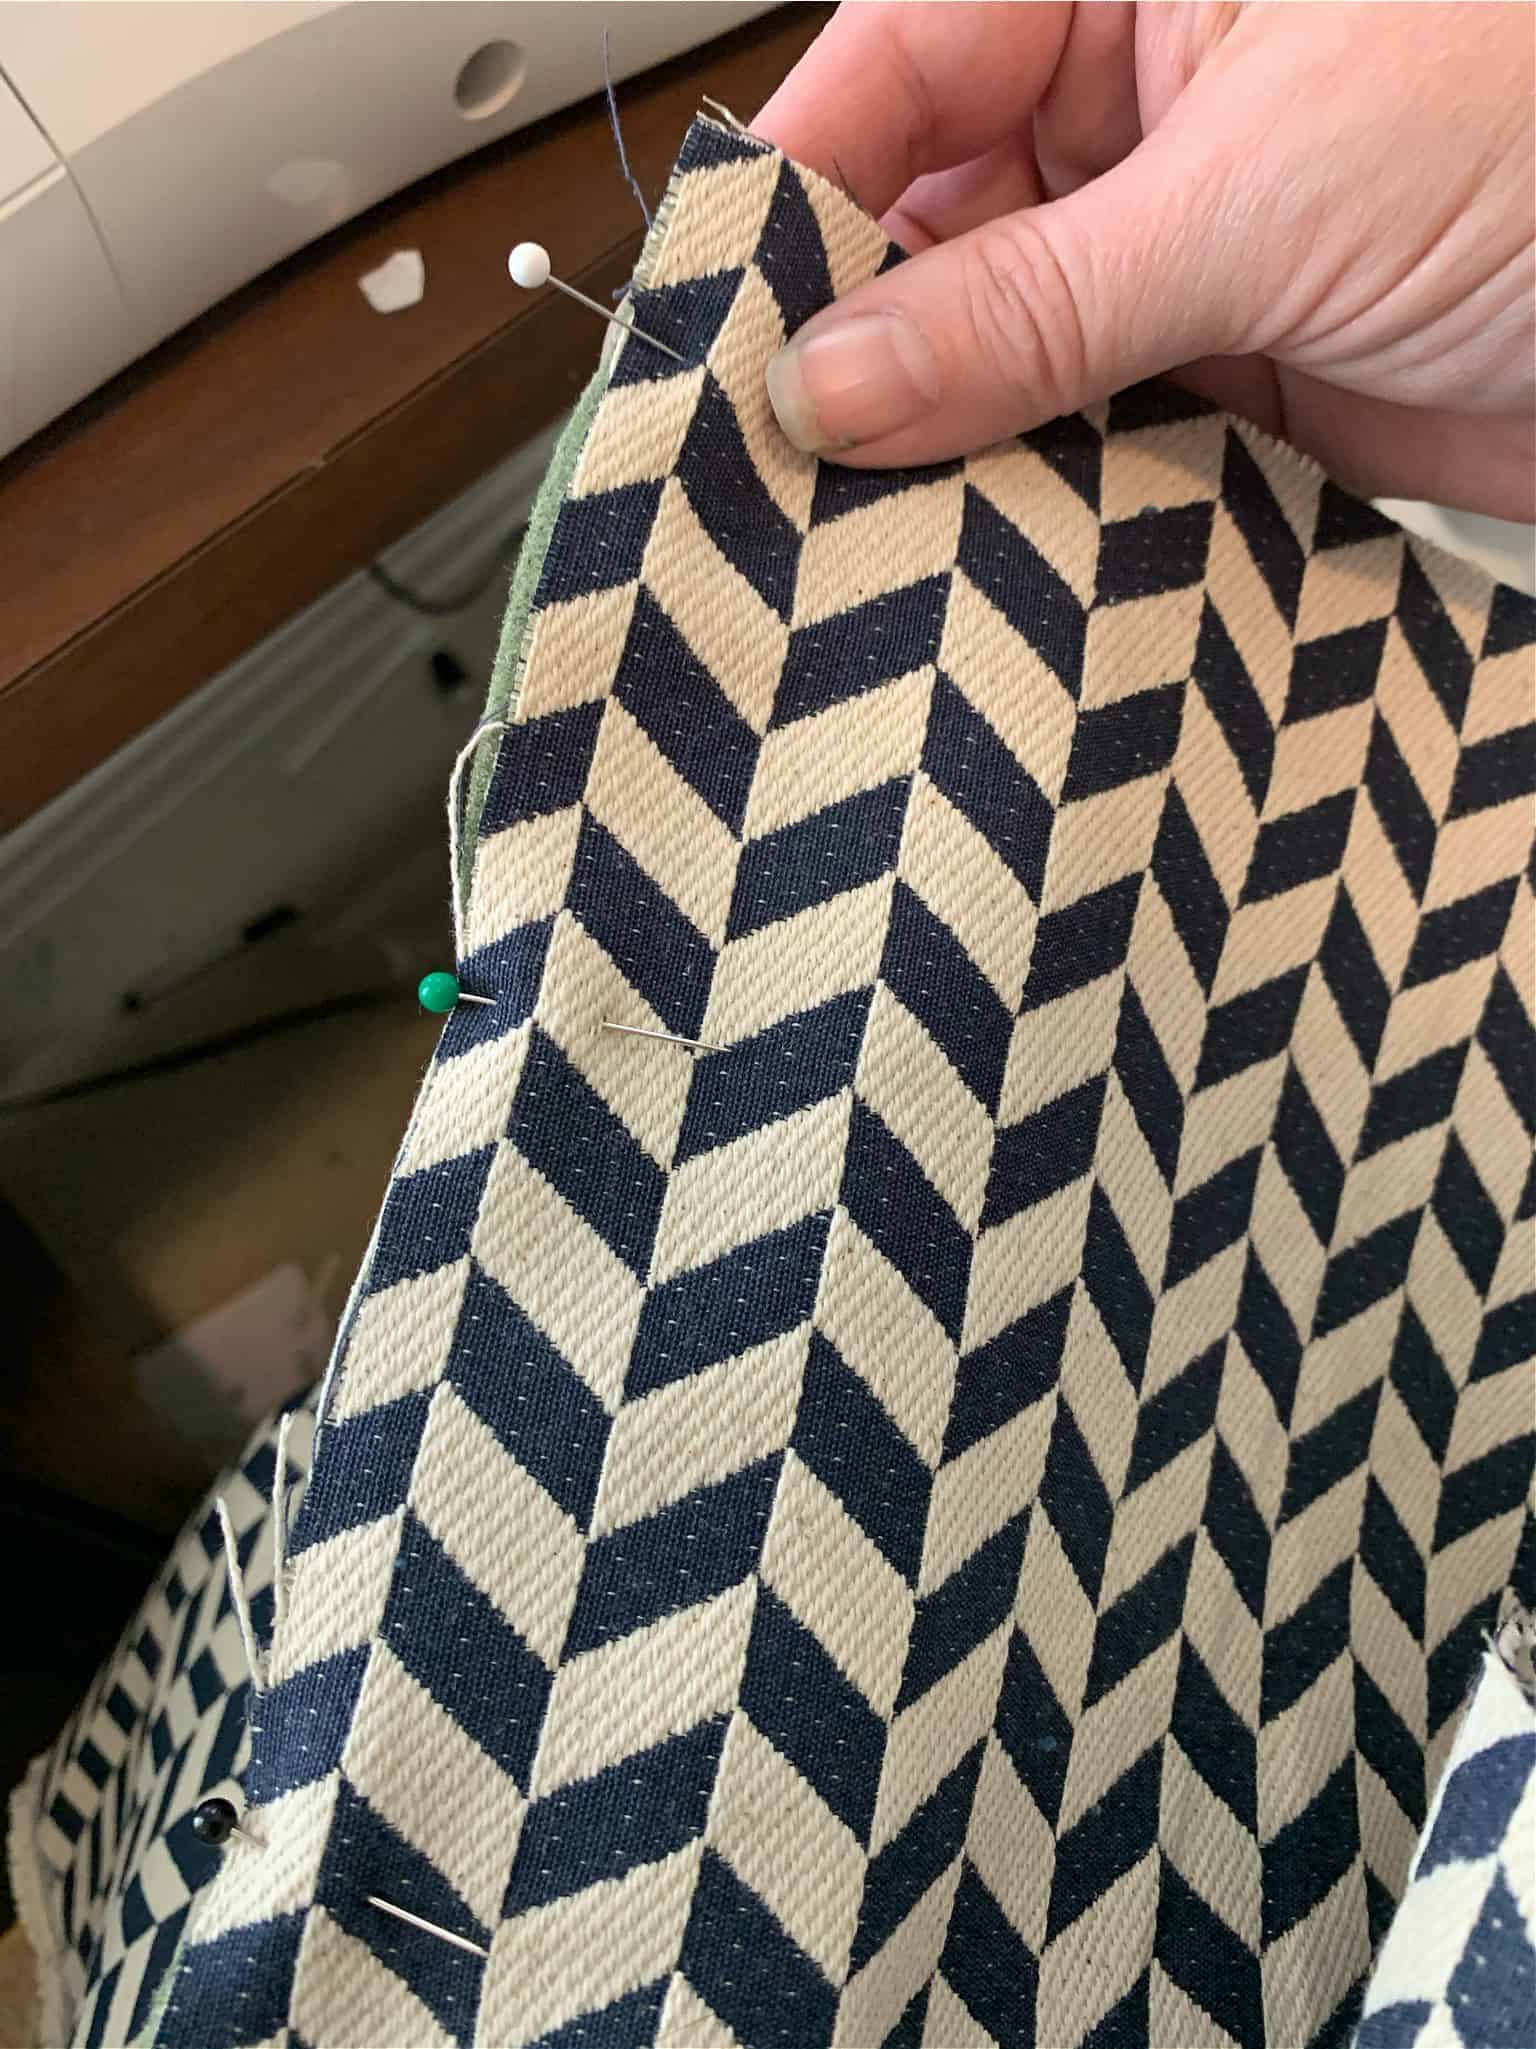
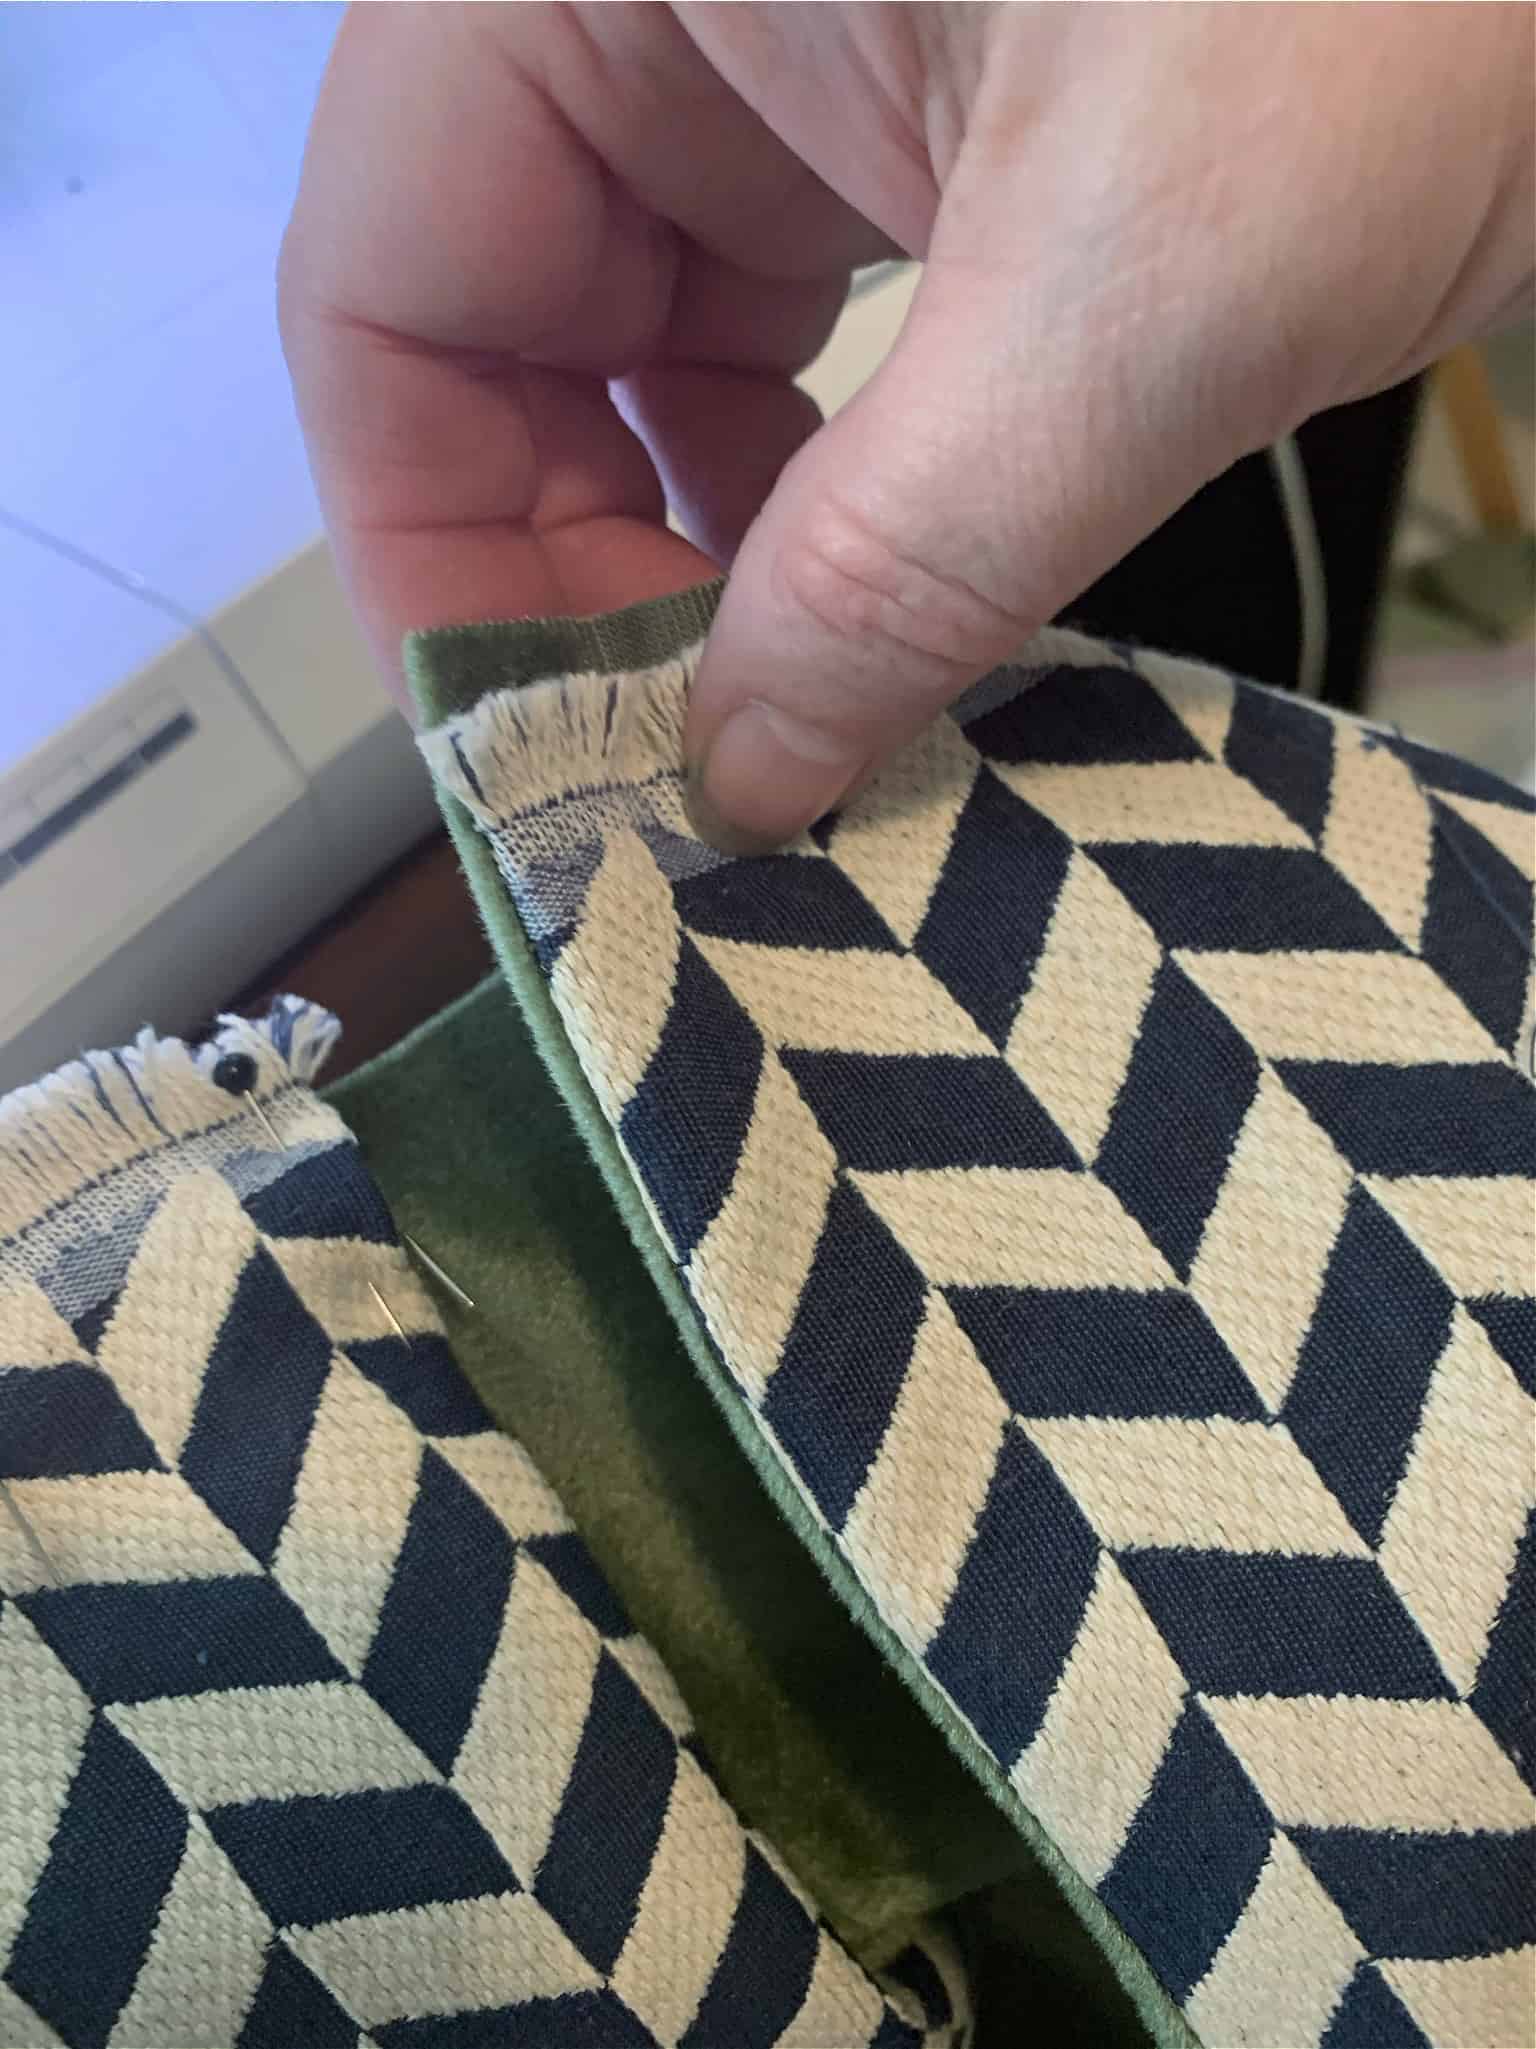
Iron the seams flat then iron on the fold. Doing this will help with creating the pleat. Find the center of the inverted pleat panel (the green fabric in my case).
Mark it with a pin. Take the folded ironed sides and line up with the marked middle of the inverted pleat panel material. Pin and then sew at the top.
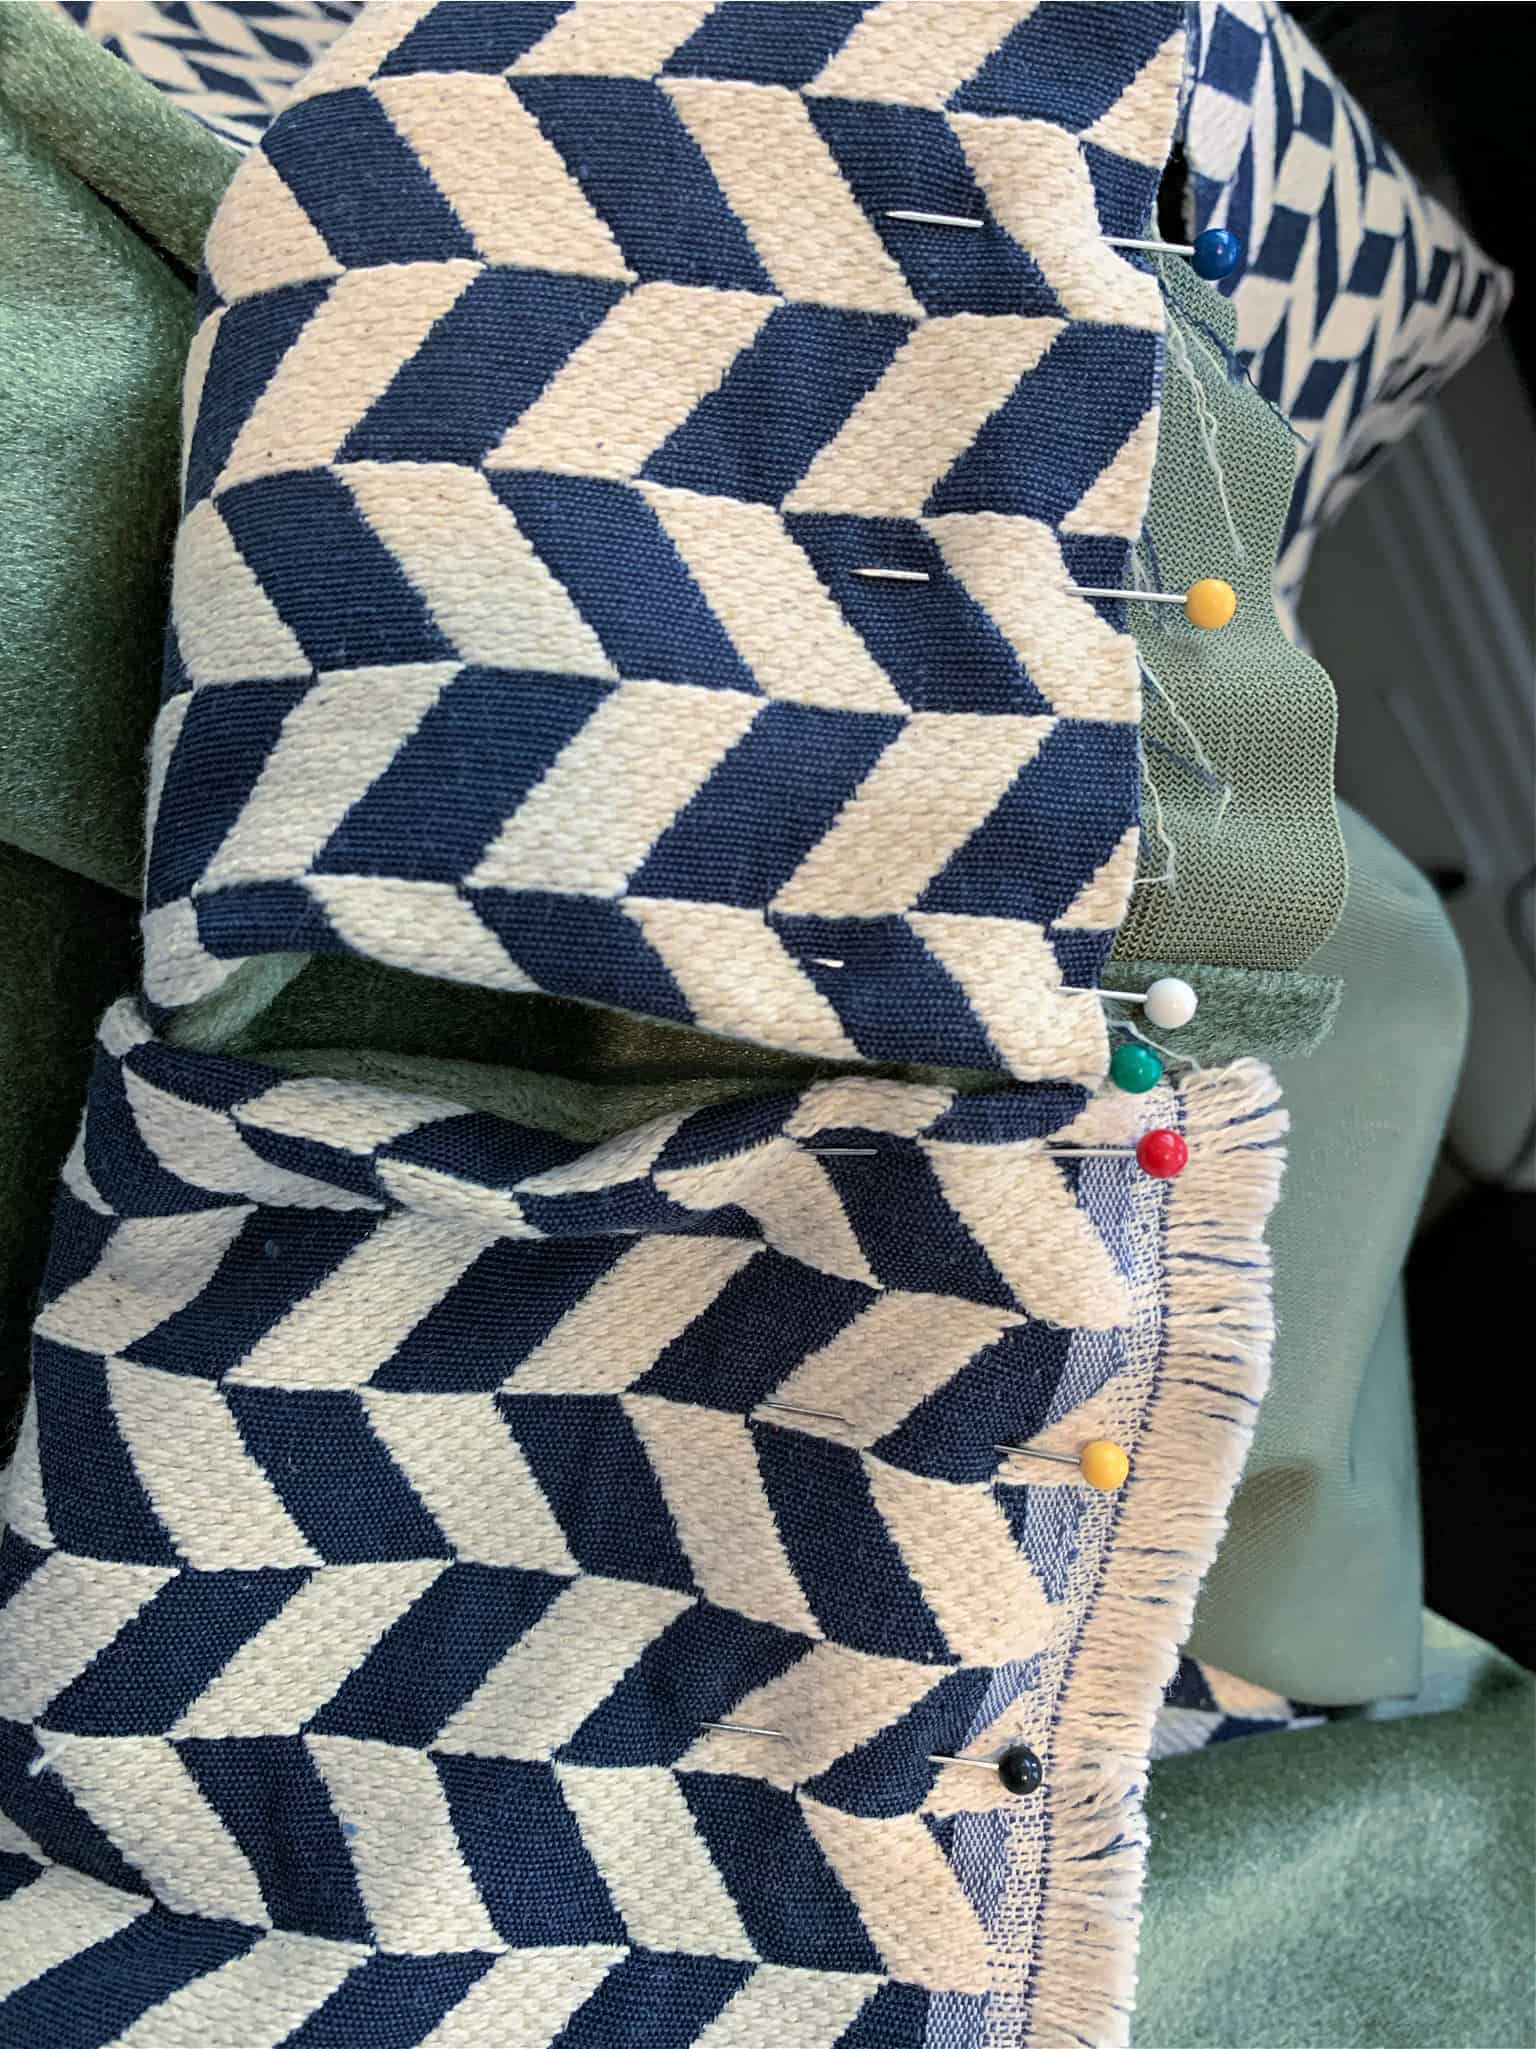
Staple skirt to the bench-
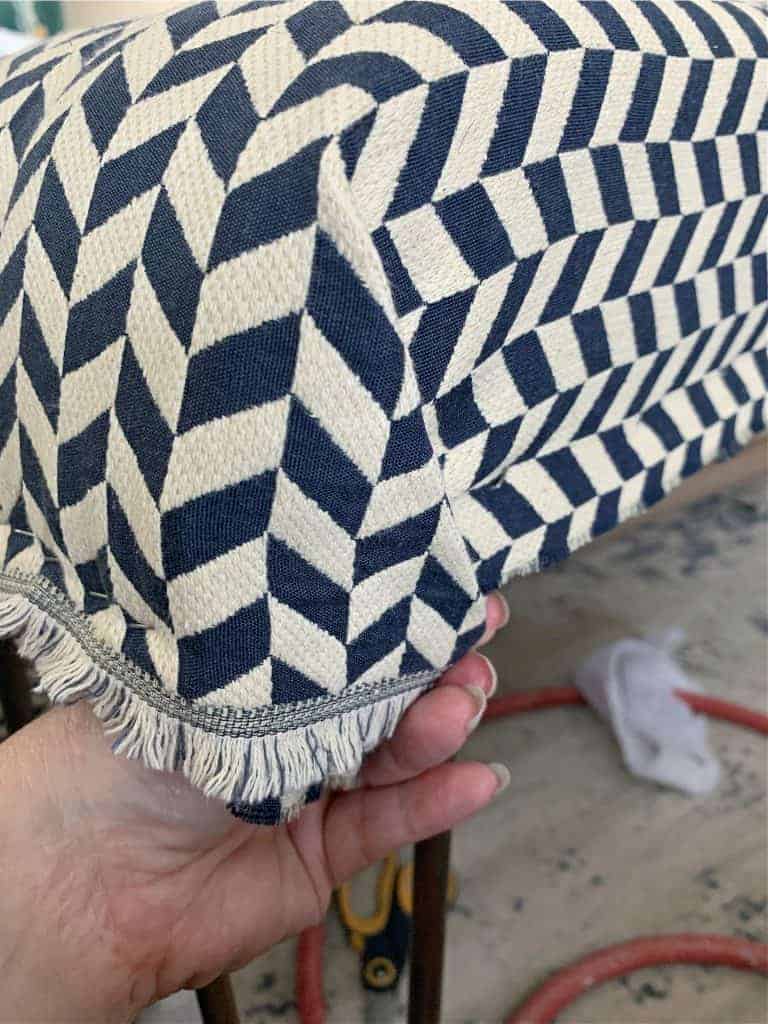
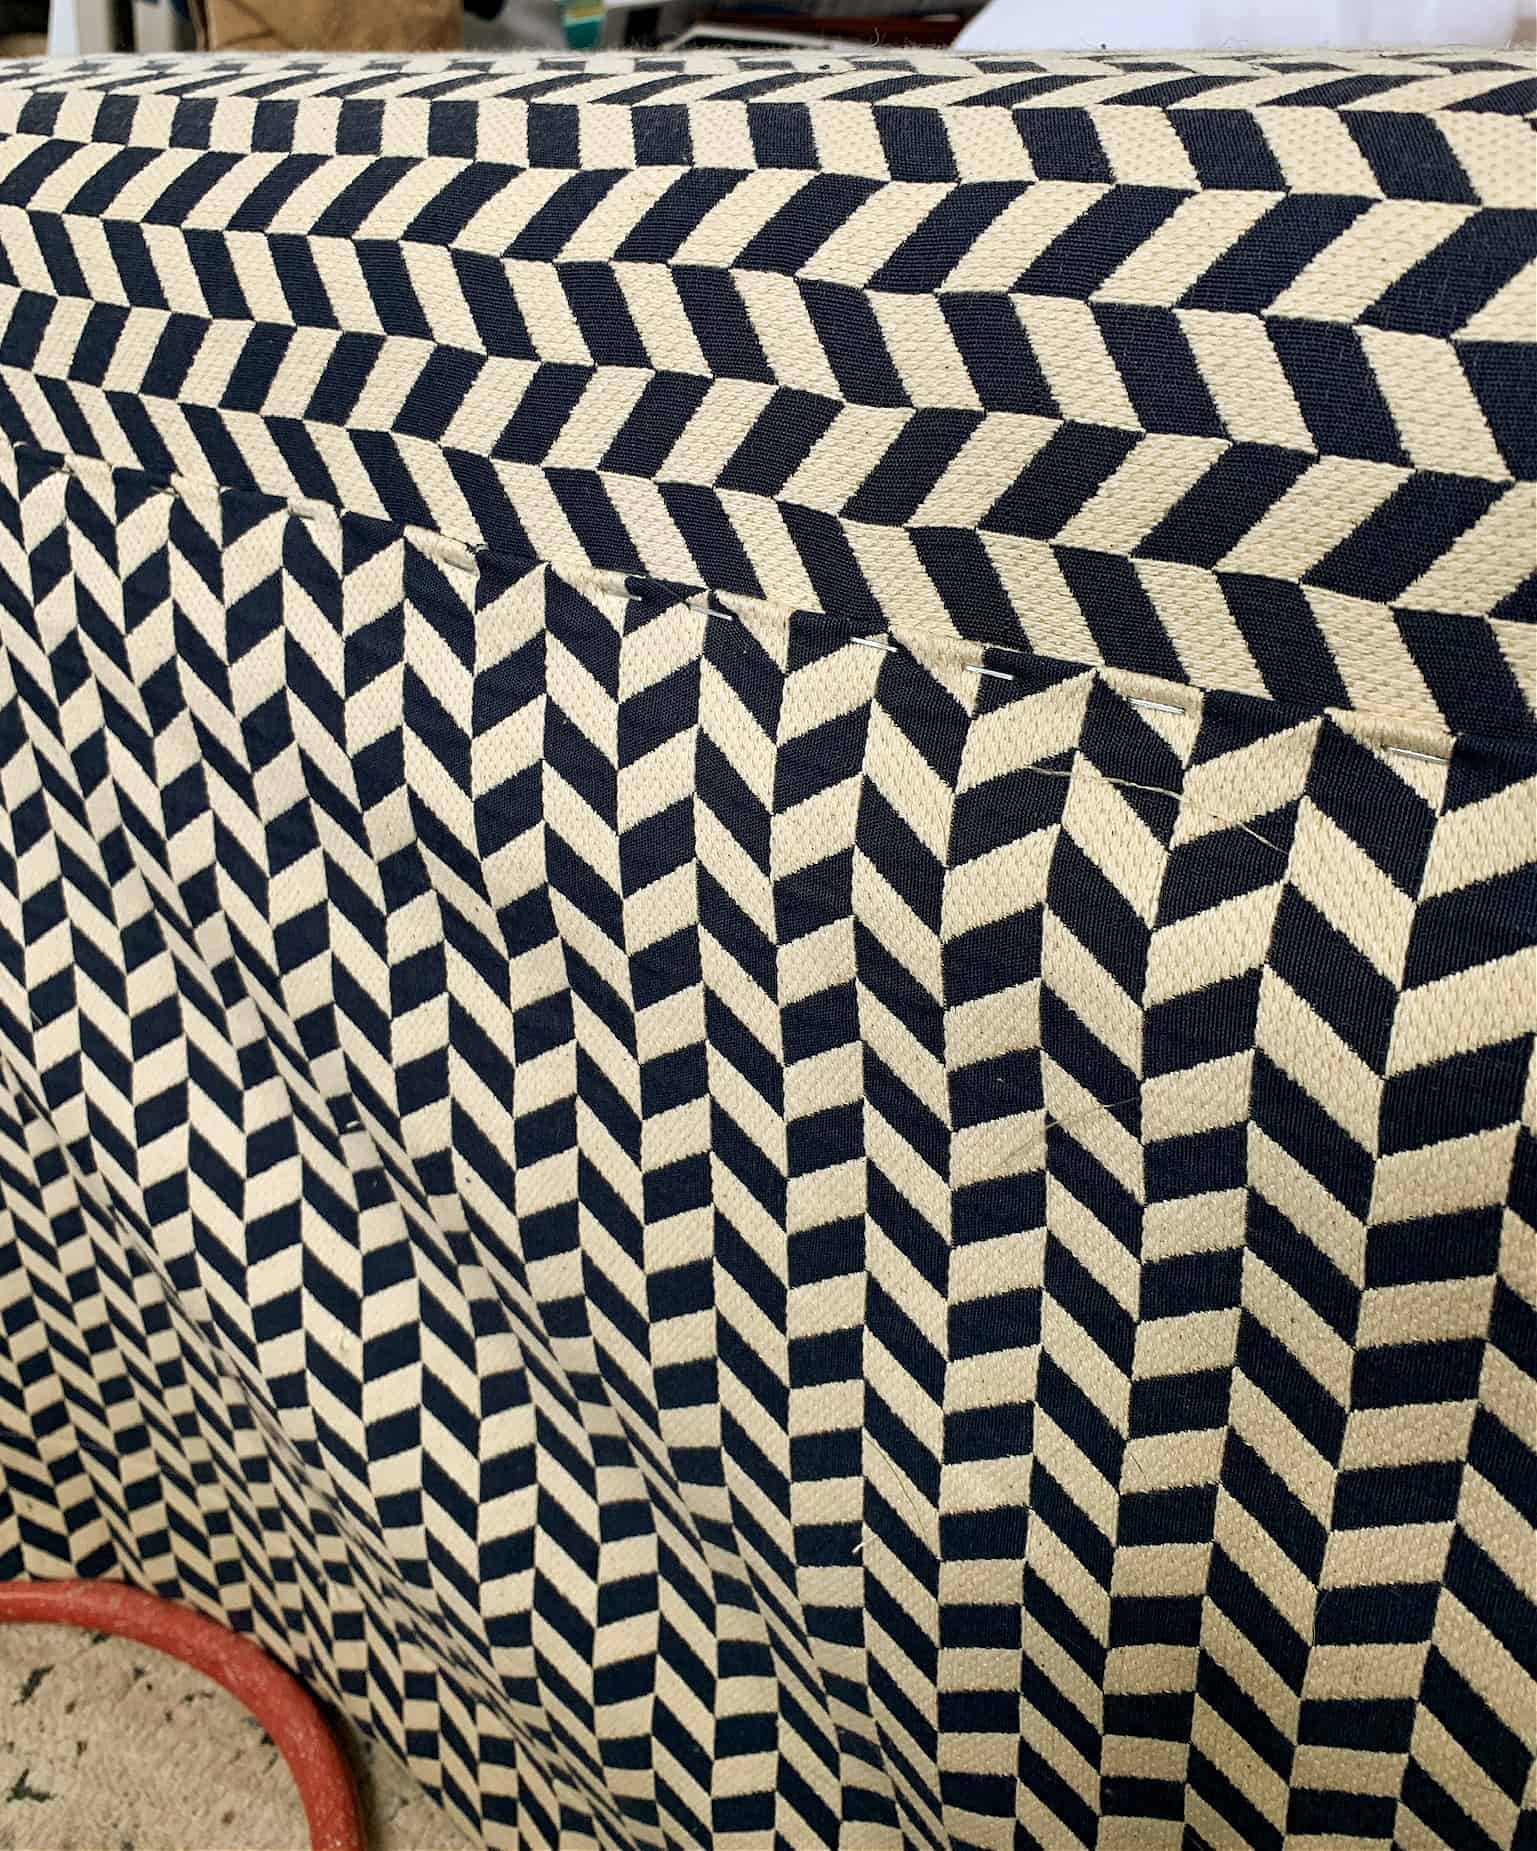
Double-check that your skirt fits nicely on the bench by gently pinning it in place. This will save heartbreak and headache later. Flip the skirt over and staple to secure. Flip back over.
The skirt will naturally flare out and if that is the look your want – great! I wanted a more tailored look so I chose to curb the flare this time by stapling on top.
Now, I knew I was going to add a strip of green fabric to band my bench so I didn’t worry about the staples. If you are not banding your skirt – use nailhead trim.

*a little steaming helped immensely
*To keep my pleats clean at the skirt bottom – I just did a little tack stitch.

That’s it, my friends!

This was my first go at upholstering a bench – I have another area that needs one and you know what they say… “Practice makes Perfect” and if you are looking for a way to reupholster a chair, I’ve got you!
Until later friends, keep creating home!


Joy Maier is the founder and principal designer of The Aspiring Home Interiors, an award-winning studio serving the greater Dallas area and beyond. Blending gracious living with elevated design expertise, Joy creates interiors that feel deeply personal, beautifully refined, and effortlessly livable — from full-home renovations to boutique vacation rentals. Her professional affiliations include ASID (Associate), ART, the Interior Design Society (Professional), NKBA, VRD Collective, and she is a founding member of Designers for Dogs. Since 2012, she has shared design tips and heartfelt stories on The Aspiring Home Blog. Her philosophy is simple: “Design should feel like a deep breath. When we get it right, your home greets you with that exhale every single day.”