O Christmas Tree, O Christmas Tree, you are made of clothespins!
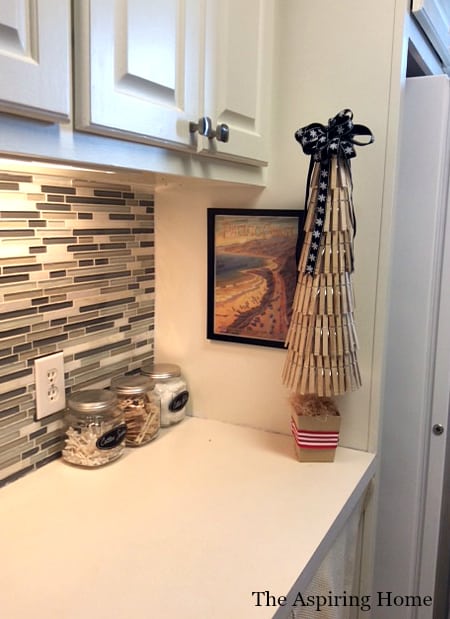
Need a fun yet simple Christmas decor addition? My little clothespin Christmas tree is the answer! Imagine a whole “forest” of these cuties.
Season’s Greetings Friends!
Today is a FUN day I am linking up with Hometalk.com and Countryliving.com for a terrific blog hop called Home for Christmas.

I am sure you, like me, have been busy decking the halls with festive adornment! I am hoping to have a Christmas Home Tour ready for you soon but until then let me introduce you to a lovely little project sure to brighten up the laundry room!
I don’t know about you but my laundry room pulls triple duty. It is not only the laundry room but a mudroom and the casual side entrance to our home. A few years ago we began updating the room – hoping to create a functional mudroom/laundry room and not scare friends off when they approach the side door.
I have to be honest and tell you it isn’t perfect all the time, I mean I have kids and laundry and dirt… BUT it doesn’t take long at all to whip it into shape now thanks to all the extra cabinets we had installed and all the pretty organization.
Now I am excited! For the first time… the room will have a little Christmas cheer! This project came together quickly. Simplicity at its best.
Let’s Get Started:
Supplies- 

- Styrofoam Cone
- Clothespins (I bought two sizes and went with the larger ones)
- Wooden Dowel
- Styrofoam hot glue
- Low temp glue gun
- Container for your tree (I used a pencil holder from Target)
- Styrofoam for container
- Filler for container
- Ribbon
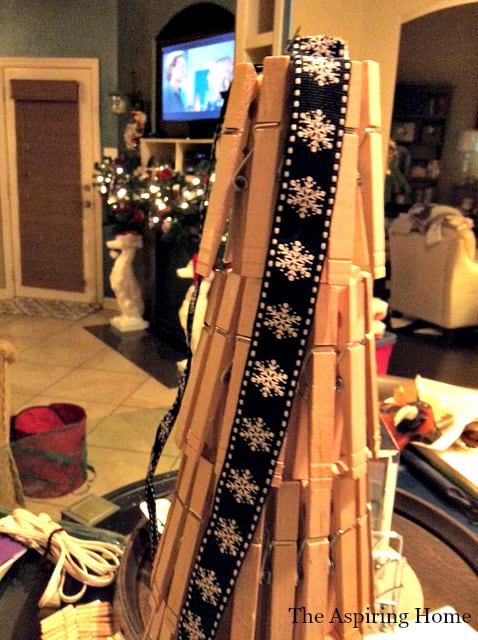
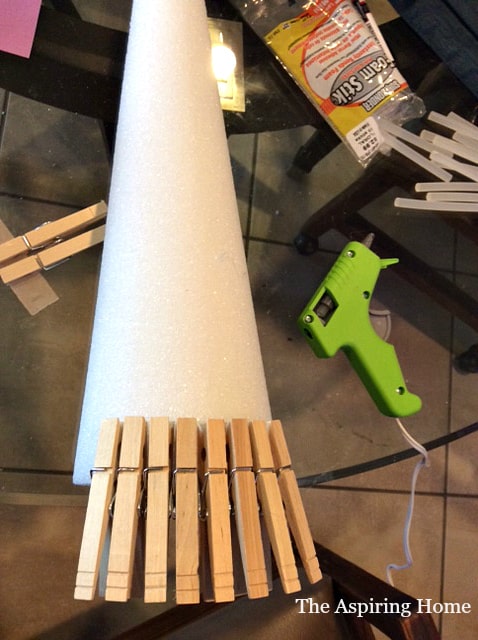 Glue the clothespins to the styrofoam cone. I only glue the top section to the cone, allowing the pins to flare. I also chose to begin my first row by allowing an “overhang”. I like being able to “see through” the bottom once it was put together.
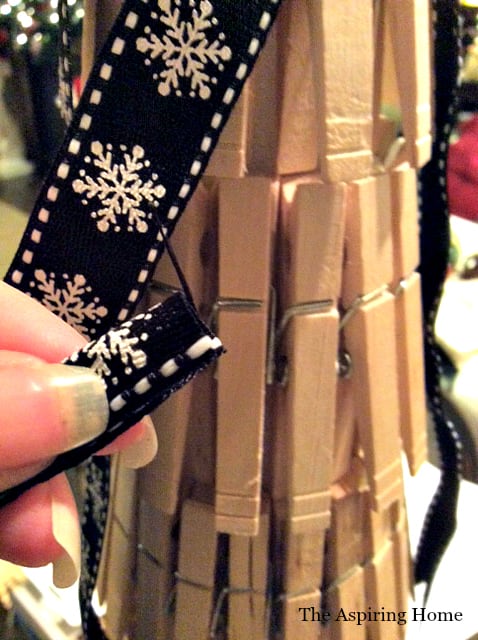
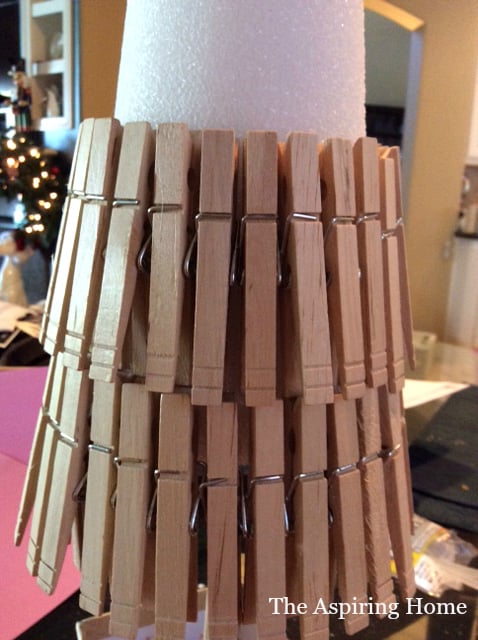 Continue gluing clothespins. Stagger the clothespins as you work your way around. I found it easier to keep the clothespins straight once the cone was on the dowel rod and secured in the container. *make sure you squeeze the wire spring so it sits in the groove created on the pin. This will help you with lining up the pins. If you have a space that it too small for a clothespin or too big to let it go without (It happened to me) pull a part a clothespin and glue just one side. Wiggle it into the spot, it may stick out slightly but once the tree is completed- you barely notice it.
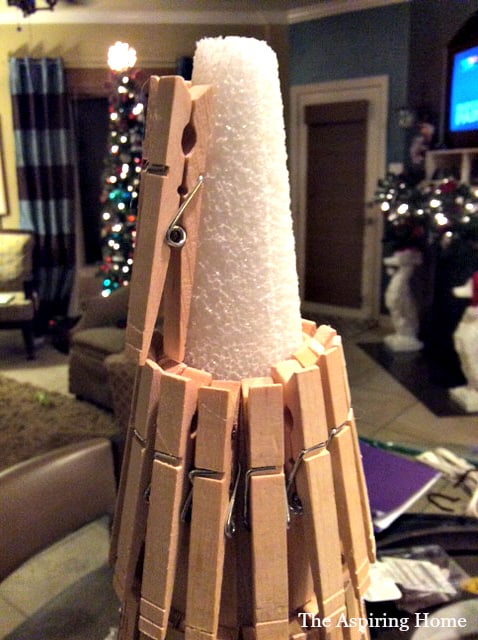
Allow a bit of room at the top of the cone for the ribbon tails and loops.
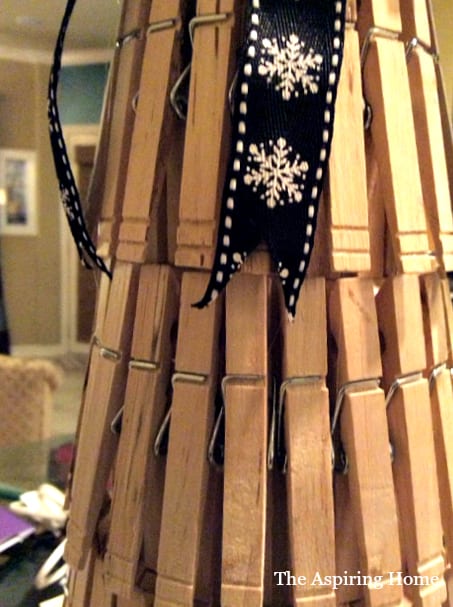
 Glue your ribbon to the top of the cone and cut it to the length you desire. I added ribbon tails all the way around the tree. Yes, I do get caught up watching the Hallmark Christmas movies (that’s what is on the ol’tube), I just love all their sappy wonderful happy endings. Oh, and pardon the mess in the background- lots of decor going up around here!
 You can leave the tails as is or you can fold in half and cut on an angle to create a fishtail end. Forgive my lack of polish. 🙂
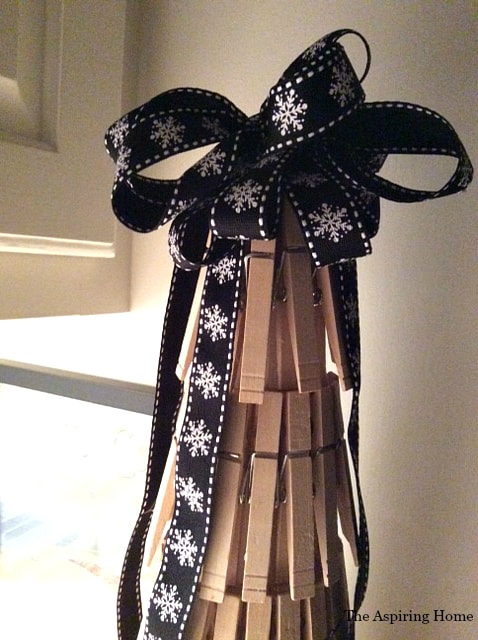 Make a loopy bow for the top and secure with floral wire

Here’s the pinterest version
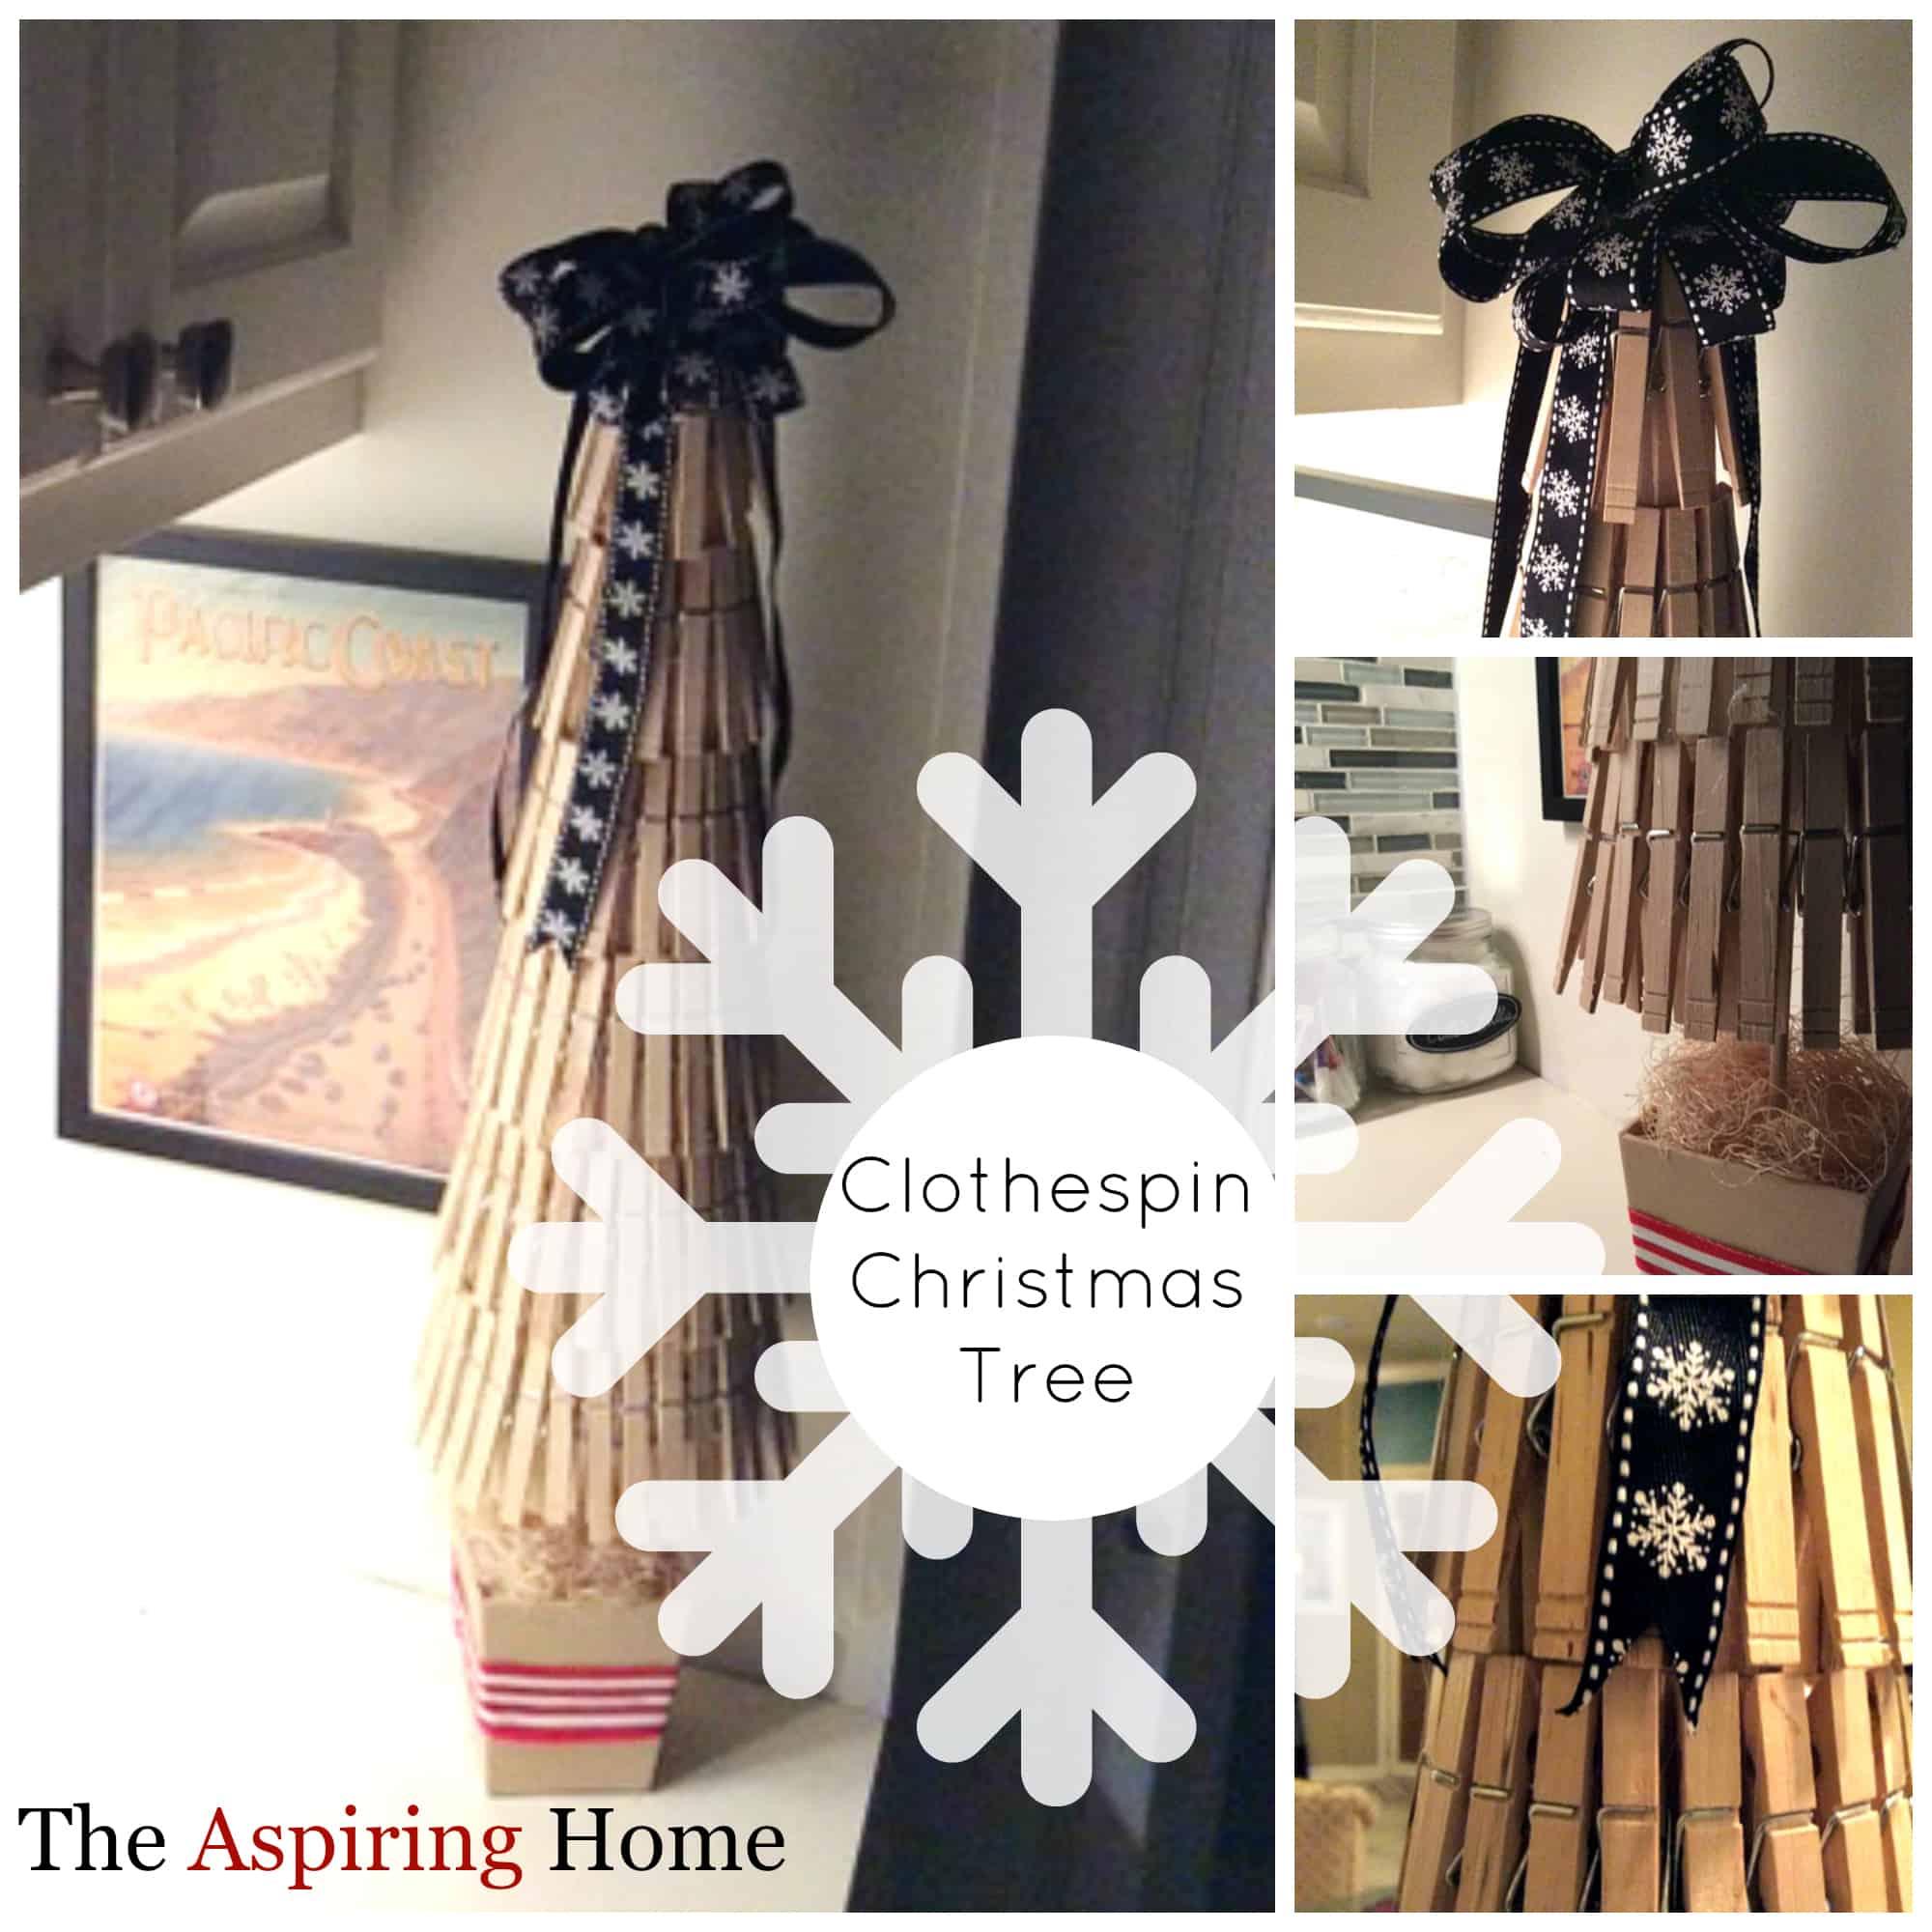
I added a little ribbon around the container for grins. I had so much fun creating this little project. I am now on the hunt for a great old coffee can or detergent canister as a container, how darling would that be?
Hope you make one or three or hey, give ’em as gifts if you would like. Everyone should have one right?!?
And… for more Christmas Inspiration, check out the Blog Hop. Let me warn ya, you are going to LOVE it! Grab a cup of cocoa and enjoy it! I am excited to click away at all the Christmas merriment! #HomeForChristmas
Till Later,

Joy Maier is the founder and principal designer of The Aspiring Home Interiors, an award-winning studio serving the greater Dallas area and beyond. Blending gracious living with elevated design expertise, Joy creates interiors that feel deeply personal, beautifully refined, and effortlessly livable — from full-home renovations to boutique vacation rentals. Her professional affiliations include ASID (Associate), ART, the Interior Design Society (Professional), NKBA, VRD Collective, and she is a founding member of Designers for Dogs. Since 2012, she has shared design tips and heartfelt stories on The Aspiring Home Blog. Her philosophy is simple: “Design should feel like a deep breath. When we get it right, your home greets you with that exhale every single day.”
This is adorable – love the ribbon topper. pinning. Cathy
Thank you Cathy!
So darling! I love it!
Thank you!
Excellent idea! I am a total lover of all things clothespins! You could even stain it or paint it too 🙂
Yes! Paint or stain would be so fun! Great thought, thanks Susan!
This is definitely something to pin for later. So very cute.
Thanks Donna! It was such a fun project!
Love your tree. So cute!
Tami @ Curb Alert!
Thank you Tami!
Very cute idea – pinned to share!
Thanks a million Marie!
Really cute and clever idea! Love the woodsy touch!
Thanks Donna! Oh and love your blog btw!
This is so cute and I love the natural wood with black ribbon. The touch of red is pretty too. Very clever!
Thank you Patti!
What a great project. I love how easy and lovely this turned out. Enjoyed looking around your lovely blog.
Thank you for the kind words Vanessa!
Very cute! You could use a cardboard cone too, it would blend in well with the clothespins.
Yep! You sure could Becky! 🙂
This is just darling!! I love it! Off to pin!!
Thanks Kim!
Your blog is lovely and what a sweet project!
Thank you so much Susan!
Great project Joy! And I love the title of your post. It made me chuckle, hehe! We need to have a chat soon, I am thinking about putting together some sort of blog hop for Spring Decor, and I would love to collaborate with you on it. Let’s chat and plan something!
Thank you Nicki! Yes! I would love to collaborate with you! Let’s visit soon! 🙂