DIY Striped Tapered Candles
Need a quick way to update old taper candles? Why not paint them? Today I show you just how easy it is to remake with this DIY striped tapered candles tutorial.
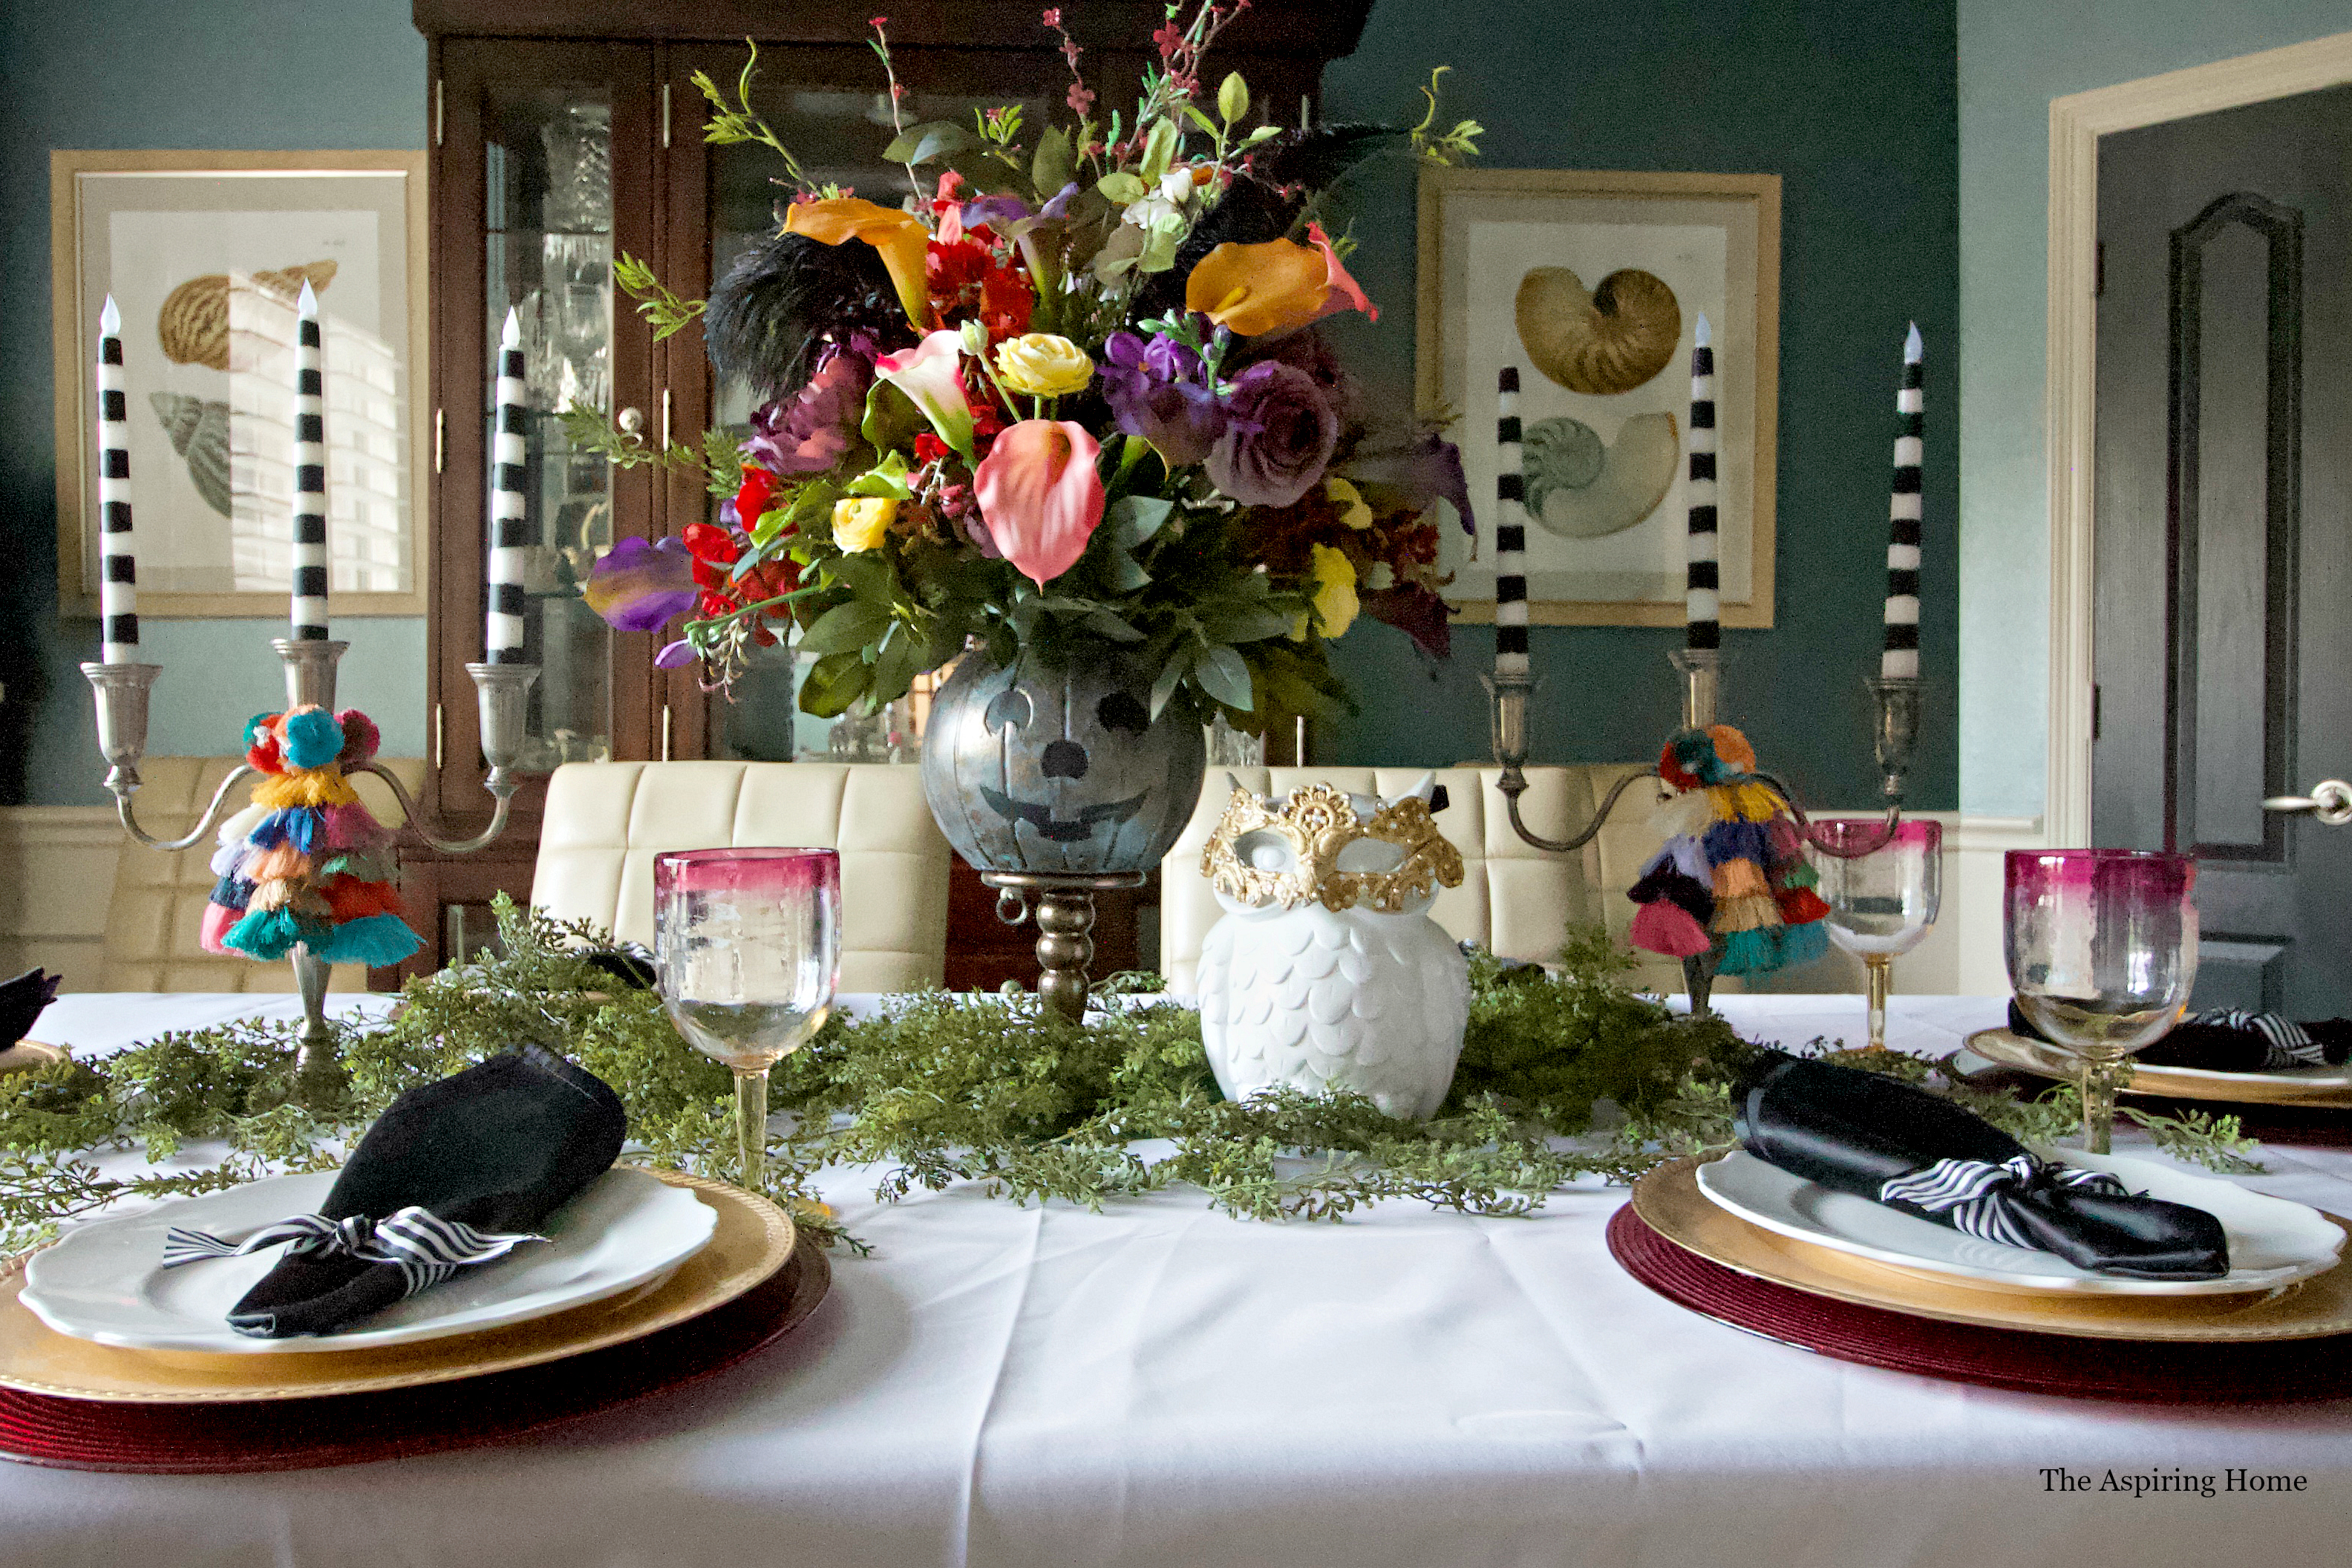
I love to reuse the things I have. When it comes to decorating for the holidays, the previous statement holds true. Just recently I reorganized and decluttered my entertaining closet. I almost threw away these old candles – until a lightbulb went off. Why not paint them? Within a few minutes, I had a simple DIY striped tapered candle tutorial and fun candles for my Happy Halloween centerpiece.

Supplies:
Black flat paint
Square tip paintbrush
**Affiliate Link Disclosure: Please note that some of the links above are affiliate links, and at no additional cost to you, I will earn a commission if you decide to make a purchase after clicking through the link. Please understand that I have experienced all of these companies, and I recommend them because they are helpful and useful, not because of the small commissions I make if you decide to buy something through my links. Please do not spend any money on these products unless you feel you need them or that they will help you achieve your goals.
Ok, this is so ridiculously easy that I don’t even need to add steps.
Pour a little black paint in a disposable bowl. Dip your paint brush in and drag the paintbrush around the taper. Eyeball the spacing by using the width of the square tip brush in between the stripes. That’s it. Sit them carefully in candle holders to dry.

I up’d the cuteness factor by adding this tassel to my old silver candelabras.
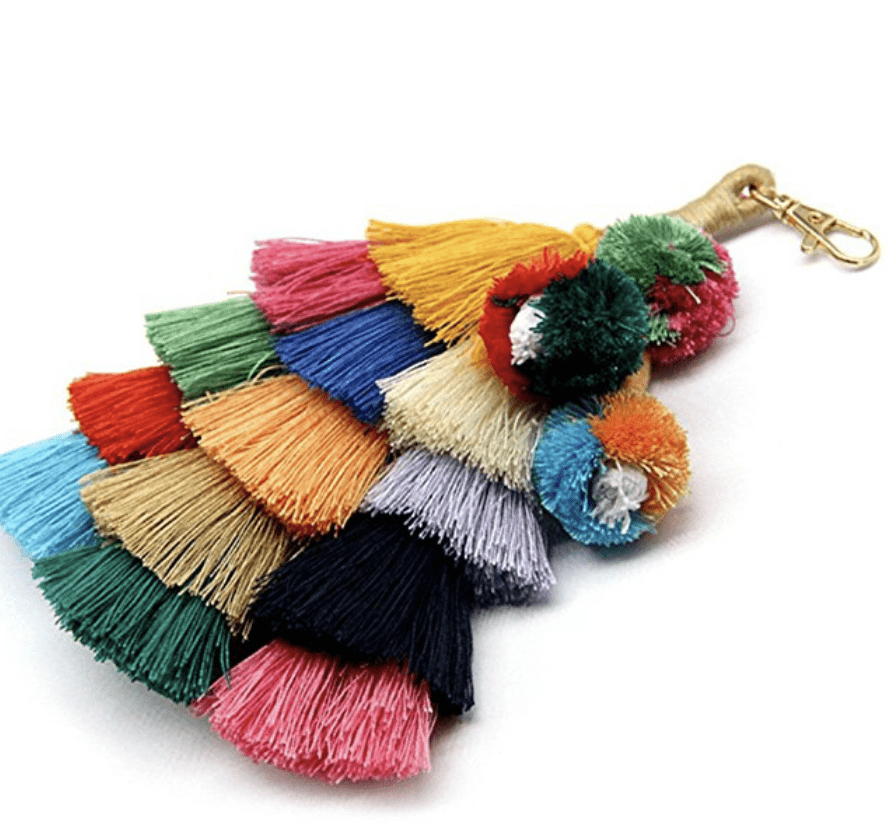
Tassel Source Click Here
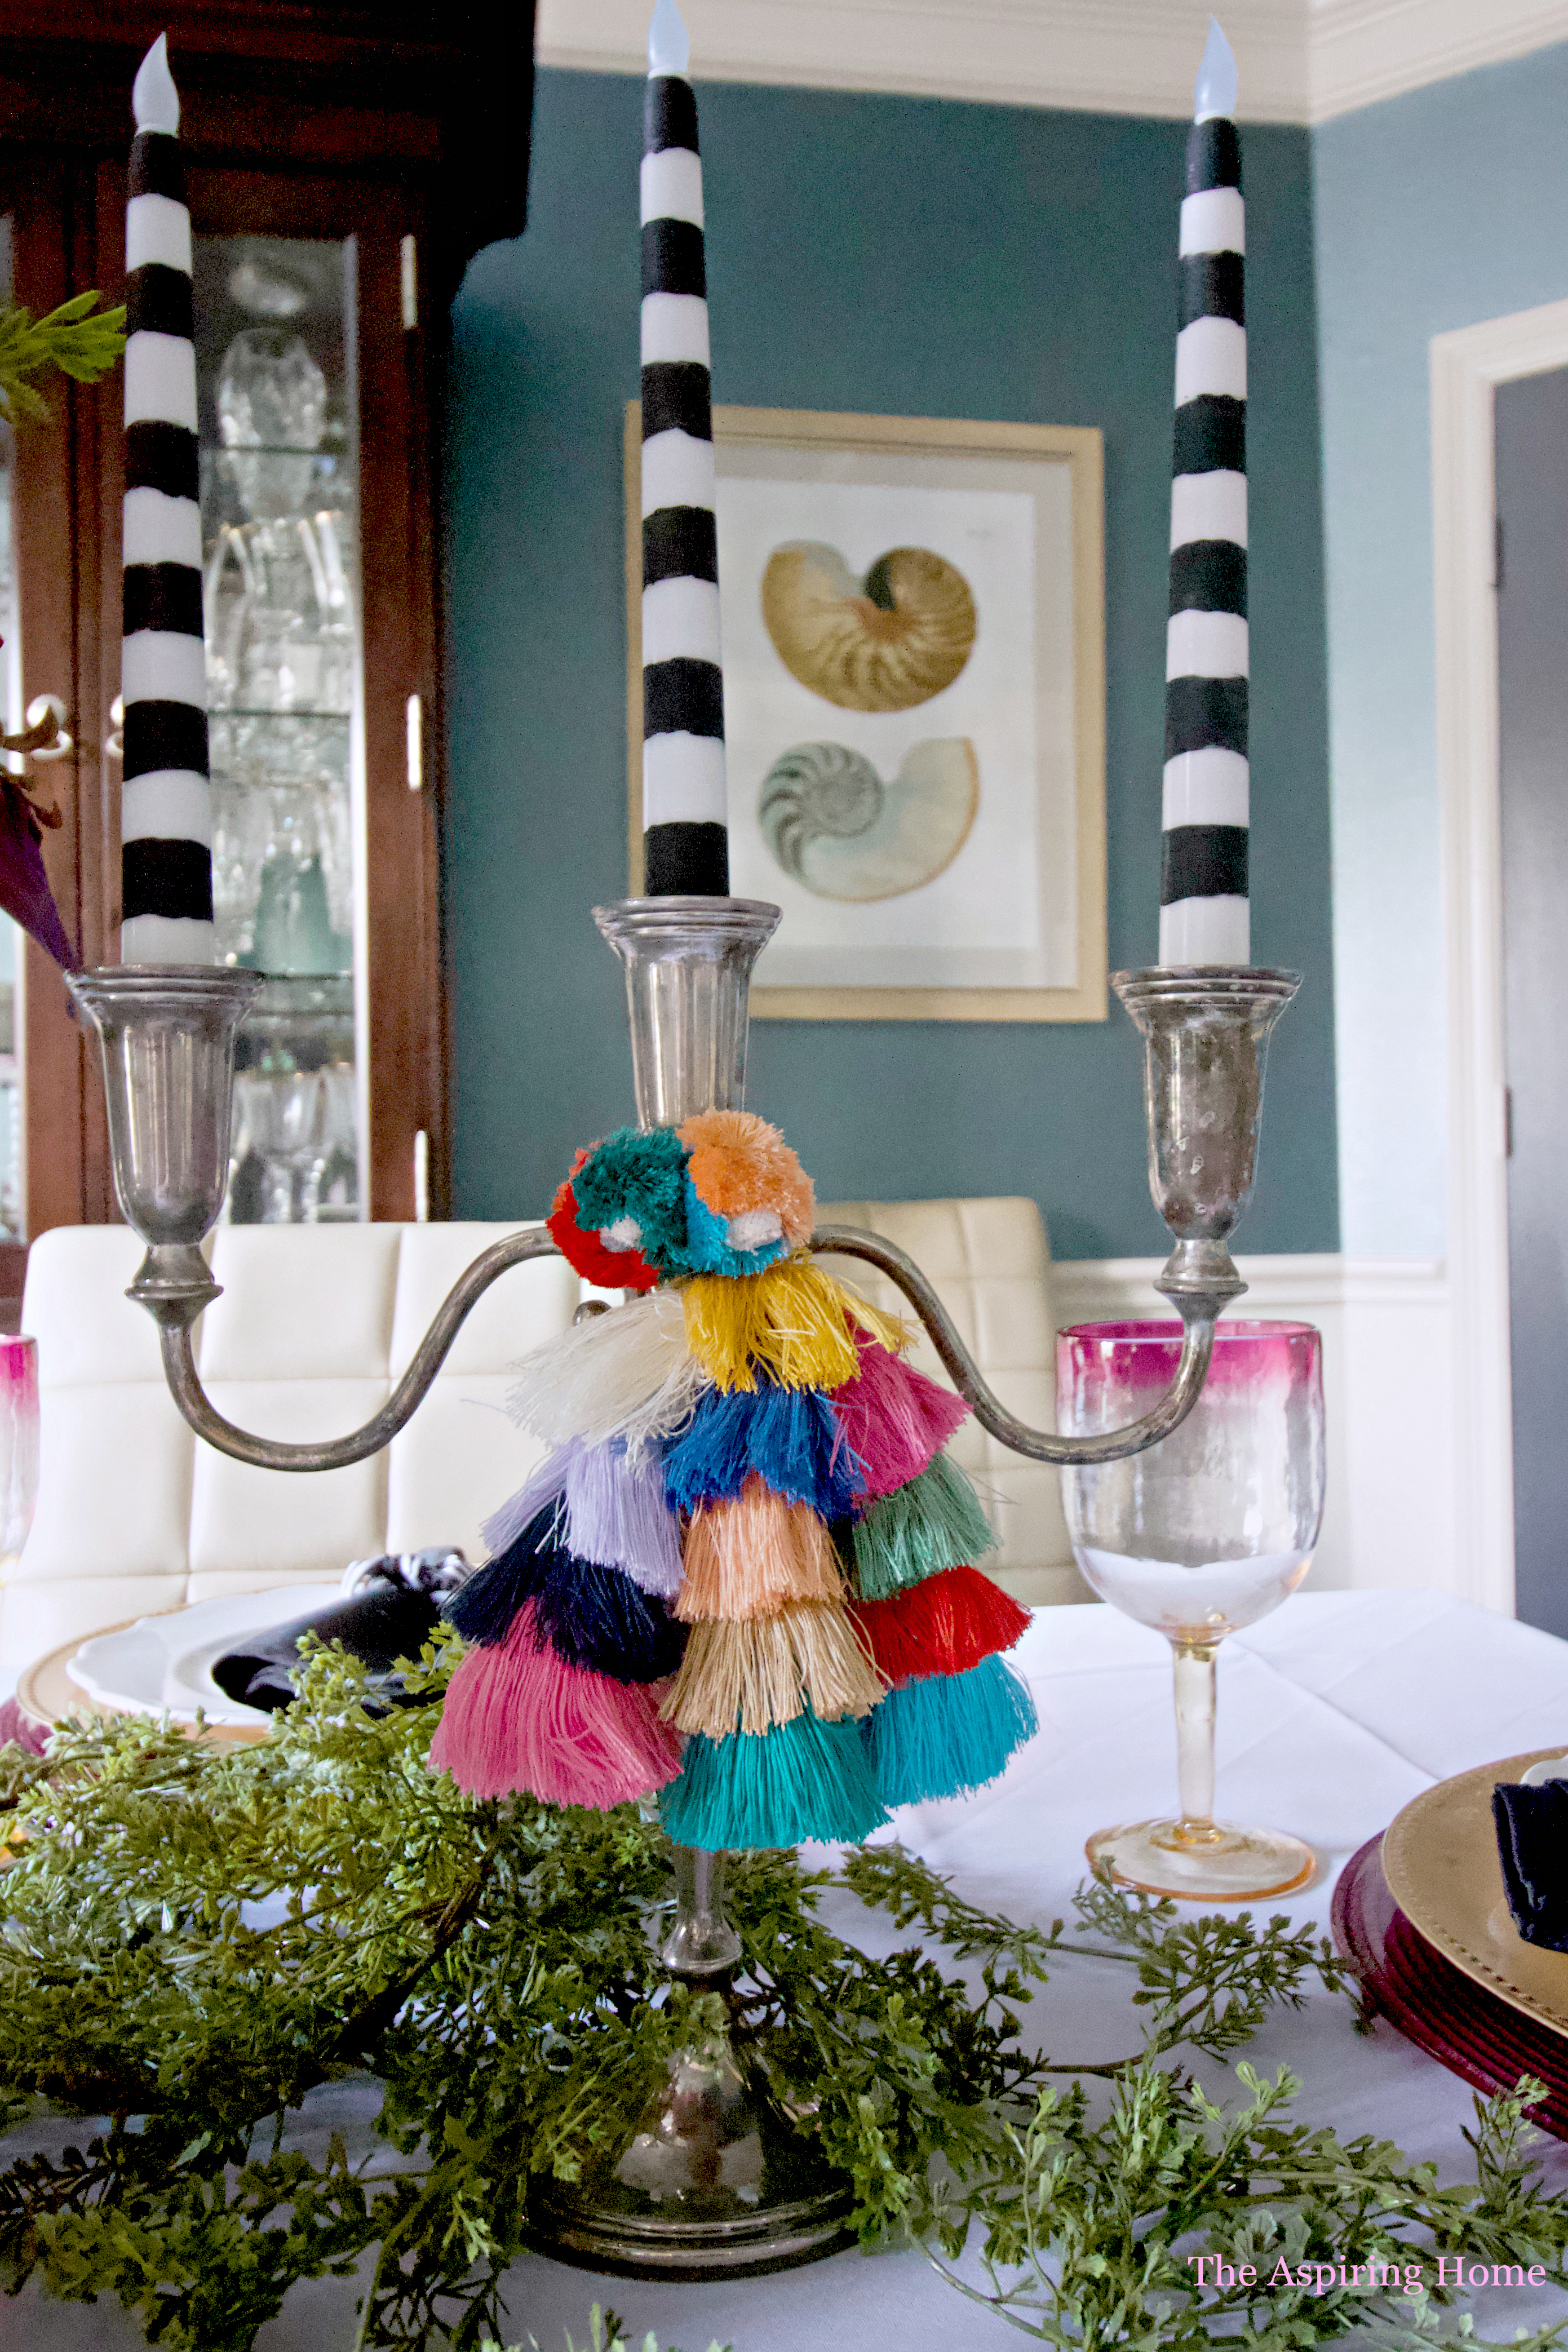
Here they are incorporated in my darling centerpiece! You can read all about it here.
Happy painting friends!
Till later,

A few of my favorite things:
Joy Maier is the founder and principal designer of The Aspiring Home Interiors, an award-winning studio serving the greater Dallas area and beyond. Blending gracious living with elevated design expertise, Joy creates interiors that feel deeply personal, beautifully refined, and effortlessly livable — from full-home renovations to boutique vacation rentals. Her professional affiliations include ASID (Associate), ART, the Interior Design Society (Professional), NKBA, VRD Collective, and she is a founding member of Designers for Dogs. Since 2012, she has shared design tips and heartfelt stories on The Aspiring Home Blog. Her philosophy is simple: “Design should feel like a deep breath. When we get it right, your home greets you with that exhale every single day.”