How To Add Wood Veneer Banding To A Drawer
Wood banding is the perfect finishing product for your plywood projects. I used it to elevated my bathroom vanity pull-out drawers. See how to add wood veneer edge banding to a drawer today.
I have such an easy gratifying DIY for you. Have you heard of wood edge banding tape? You can buy it at your local hardware store and it turns basic plywood projects into finished “craftsman feeling” projects. Let’s look at how to add wood banding to sanded plywood. If you can use an iron – you can do this!

Supplies:
- Wood veneer edge banding tape
- Wood veneer edge trimmer
- Scissors
- Iron
- Parchment paper
- Fine grit sandpaper
This is such a rewarding and easy step to take to finish out raw edges. I have been wanting to try this for a long time and when we tackled the girls shared bathroom -I got my opportunity!
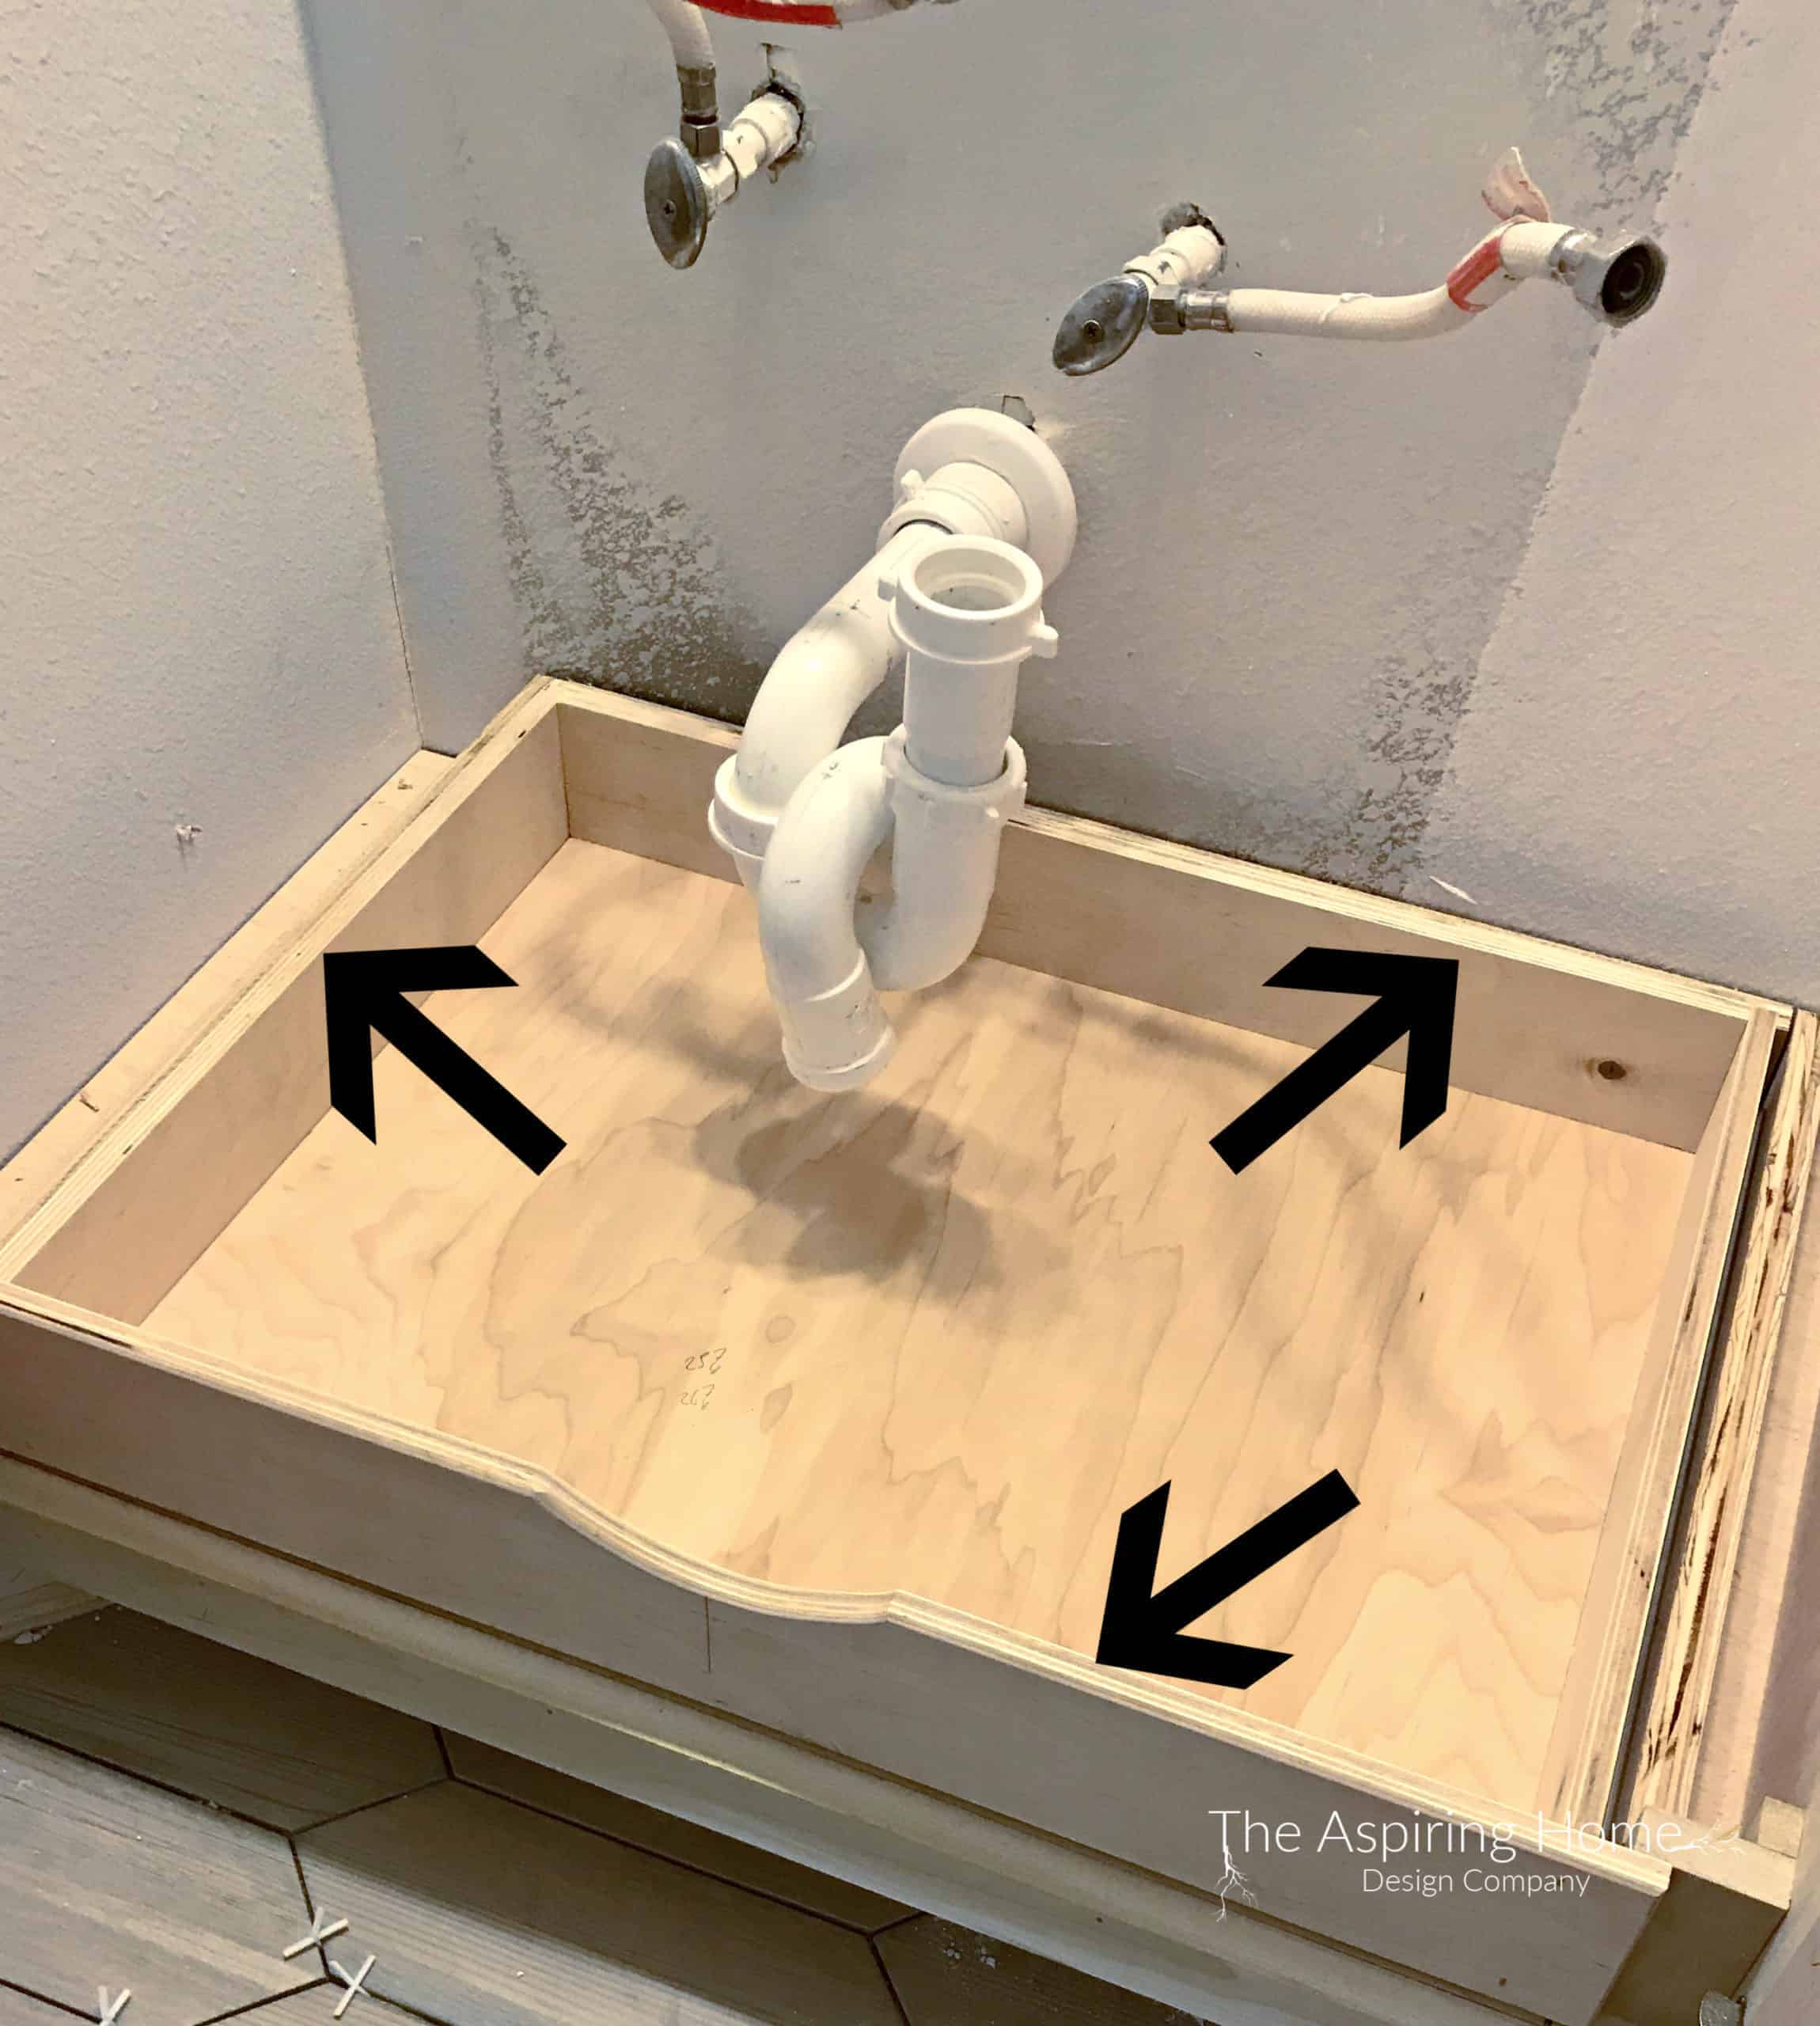
I designed this cabinetry, I wanted to solve a few issues. One was trying to easily reach the back of the vanity lower cabinets. Easy fix with slide-out drawers. I had a very talented carpenter friend bring my drawing to life while keeping the costs in check. Which brings me to the use of sanded plywood for the vanity and drawers.
To elevate the unfinished raw edges of the unsanded plywood, a little wood veneer edge banding was all that was needed.
Grab your iron and parchment paper. Cut a strip of parchment paper to use as a buffer between the iron and the wood veneer edge tape. Follow the instructions on the wood veneer tape packaging, Take your time.
When you get to the end of the tape, use a pair of scissors or they make a tool to “chop” the end but scissors work fine. Just don’t use the fabric sheers, or you will get in so much trouble.
I never understood the frustration of using the fabric scissors for anything that wasn’t fabric until I started seriously sewing. The frustration is real and warranted my friends. Ha!

Allow the product to cool before trimming.
Use even gentle pressure while using the trimmer. This will come in handy especially if you have curves to deal with.
In fact, patience is required with the curves – speaking from experience – I got too comfortable with how simple the sides went and had a rude awakening when I tackled the front of the drawer.
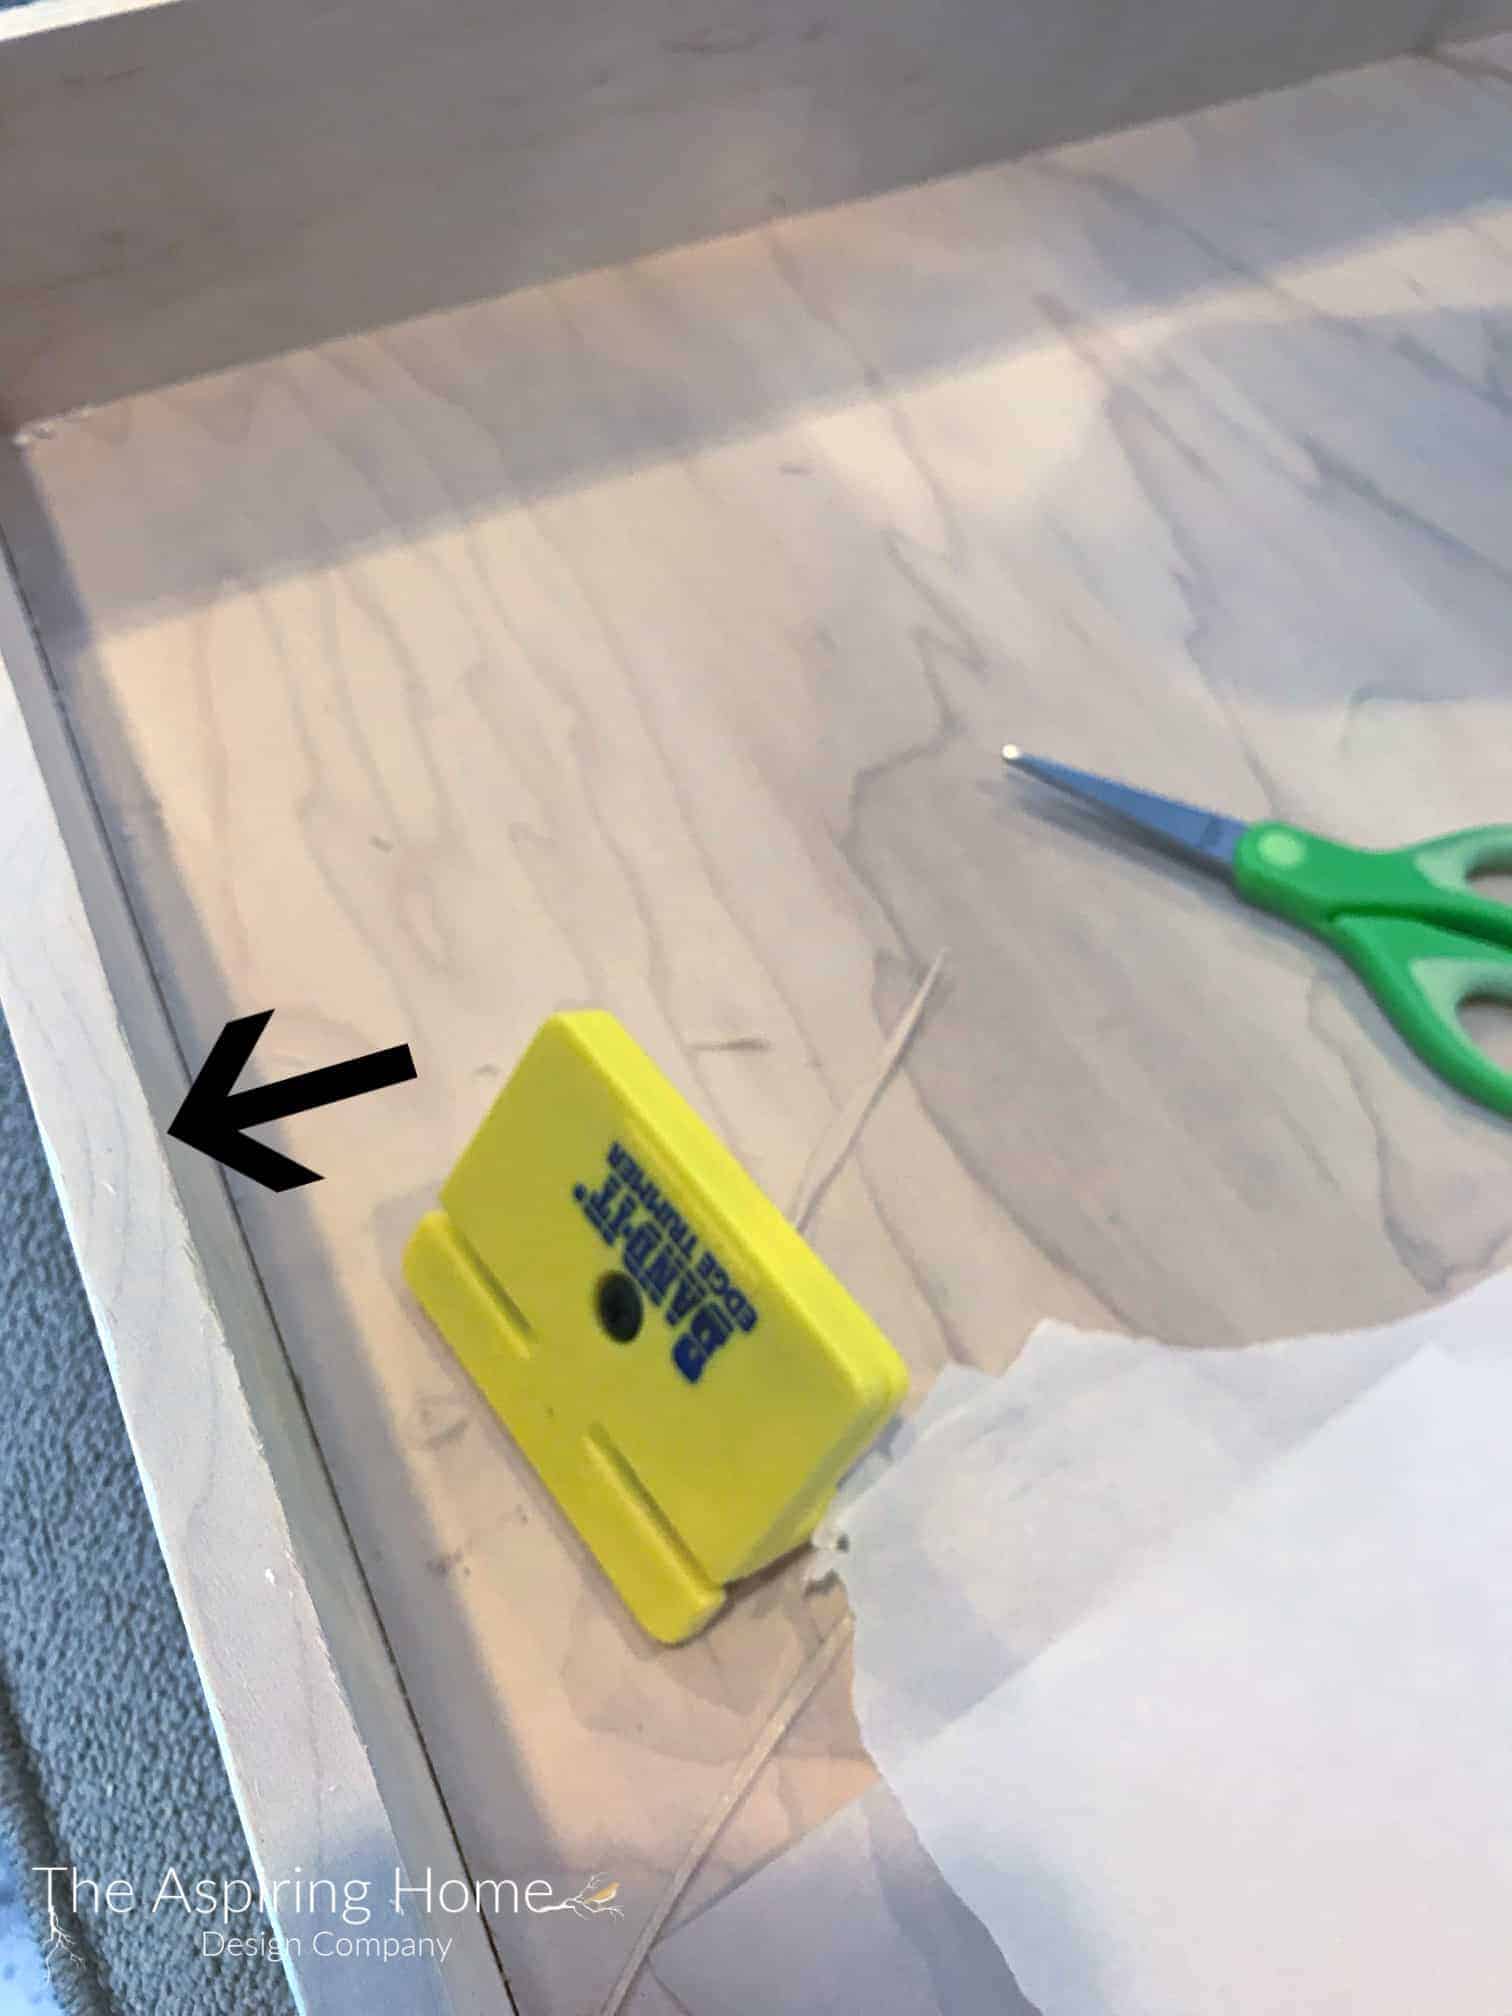
Just to let you know how easy this stuff is to cut, look at that little green pair of elementary school scissors…the ONLY ones I could find at the time. HAHA.
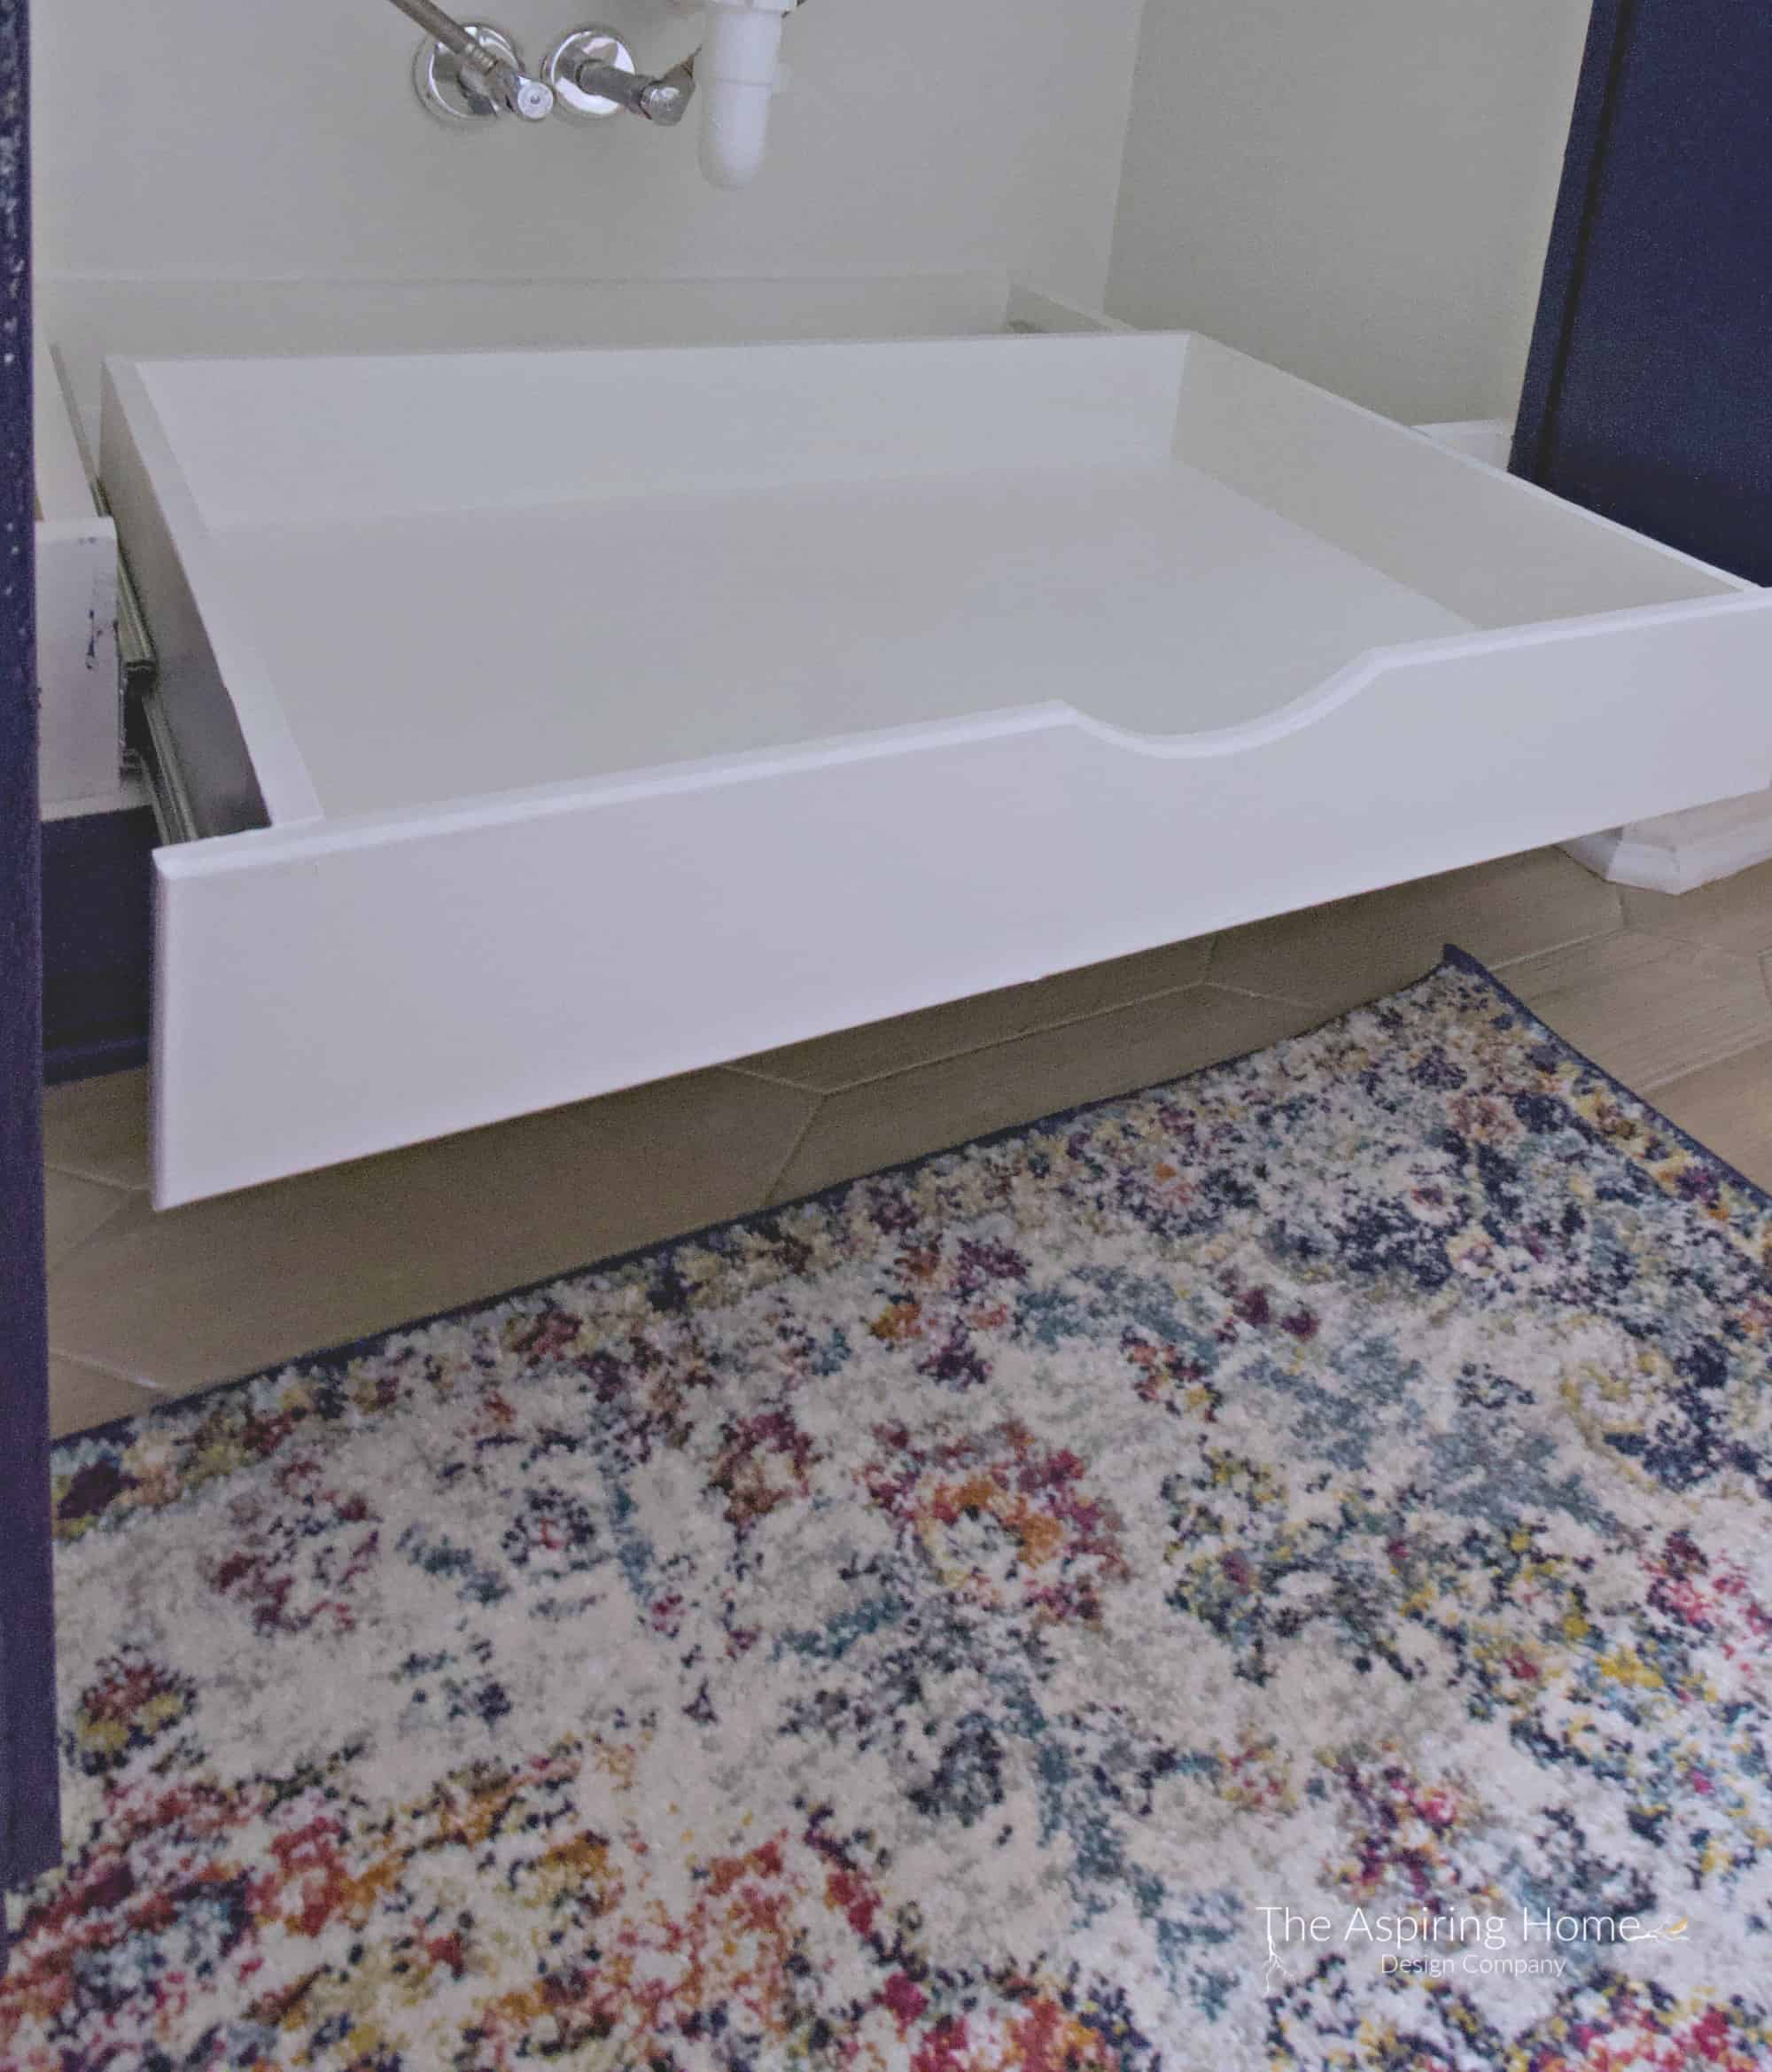
Once you have trimmed all the excess wood edge veneer tape, do a little light sanding on the edges with a fine-grit sandpaper.
Be sure to use a tack cloth or a damp rag over everything before staining or painting.
Take a look at the finished product – makes such a difference, right?
Check out this video from Wood Magazine HERE for more details.
Till Later, friends